How to Fix Outlook Error 0x80040119 on Windows?
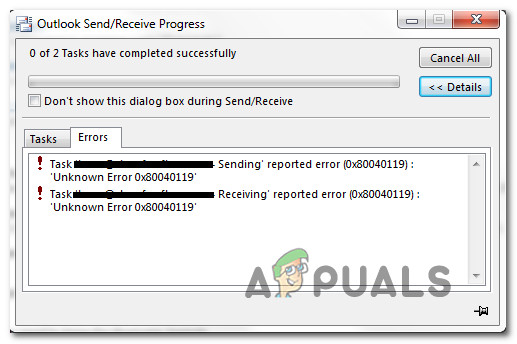
Several Windows users are getting the 0x80040119 error code whenever they try to set up an account in Outlook or after the sending of an email fails. In most reported cases, the issue occurs with IMAP email accounts and affected users report that this error stops them from sending or receiving any email from that particular email address. The issue is not exclusive to a certain Windows version since it’s confirmed to occur on Windows 10, Windows 8.1 and Windows 7.
What’s causing the Outlook Error 0x80040119?
We investigated this particular issue by looking at various user reports and by analyzing several different repair strategies that were recommended by other users that have previously managed to fix the issue. As it turns out, several different scenarios are known to cause this particular error message. Here’s a list with potential culprits that might be responsible for triggering the 0x80040119 error code:
- Corrupted .PST file – The most common cause that will trigger this particular error code is an inconsistency with the Outlook (.PST) file. It the file is corrupted, your connected email will be prevented from communicating with the email server. In situations like this one, the most effective fix is to fix the corrupted file with the Inbox Repair Tool.
- Corrupted Office Installation – Another potential cause that might be causing this issue is a corrupted or an incomplete Office installation. Several affected users that found themselves in a similar situation have reported that they managed to resolve the issue by repairing the Office installation using the Programs and Features menu.
- Glitched email account – If you’re using a 3rd party email provider like Yahoo or Gmail, chances are an inconsistency rendered the email stuck in limbo mode, where it can send or receive emails. In this case, you can resolve the issue by repairing the account via the Account Settings menu in Outlook.
- 3rd party AV interference – If you’re not using Windows Defender (Windows Security), this issue might be caused by an overprotective AV suite that’s stopping the communications between your email client and the email server. In this case, the only fix is to get rid of the 3rd party suite by uninstalling it along with its remnant files.
If you’re currently dealing with this error code and you’re looking for a viable fix that will take care of it, this article will provide you with several different troubleshooting guides. Down below, you’ll find a collection of recommended fixes that other users in a similar situation have successfully used to get to fix the 0x80040119 error.
If you want to remain as efficient as possible, we advise you to follow the instructions below in the same order as we arranged them in (by severity and efficiency). Eventually, you should stumble upon a fix that will take care of the issue regardless of the culprit that’s causing the problem.
Let’s begin!
Method 1: Using the Inbox Repair Tool
As it turns out, the most common cause that will end up triggering the 0x80040119 error is an inconsistency with your Outlook (.PST) file. If this file is touched by corruption, your email might be prevented from communicating with the email server.
Several affected users have been able to resolve the issue by fixing the .PST file using the Inbox Repair Tool and restarting their computer. After doing this, they were able to send and receive emails without seeing the dreadful error code.
This tool is included with all Outlook versions, but the location will be different depending on the version that you have installed. For the sake of keeping things simple, we’re going to show you a way of using the Inbox Repair Tool to repair the .PST file that works universally (regardless of your Outlook version).
Note: This fix is only applicable to Microsoft Outlook 2013 and later. If you have an older Outlook version, the steps below will NOT work for you. In this case, move down directly to Method 2.
Here’s a quick guide on repairing the Outlook (.PST) file using the Inbox Repair Tool:
- Make sure that Outlook and any associated apps are completely closed.
- Visit this link (here) to download the Inbox Repair tool and wait until the download is complete.
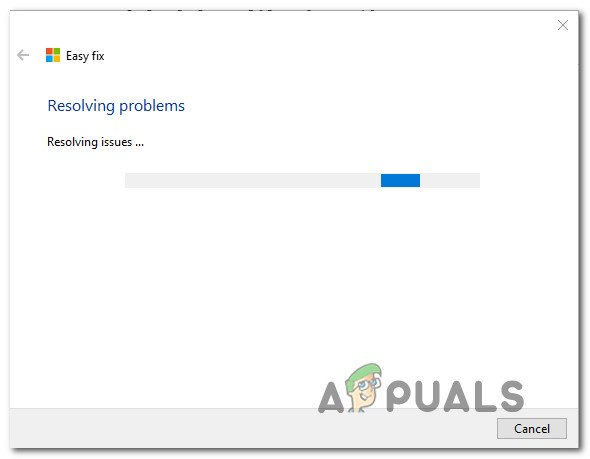
- Double-click on the utility launcher. Once you arrive at the first screen, click on the Advanced hyperlink, then check the box associated with Apply repairs automatically. Then, click Next to move over to the next screen.
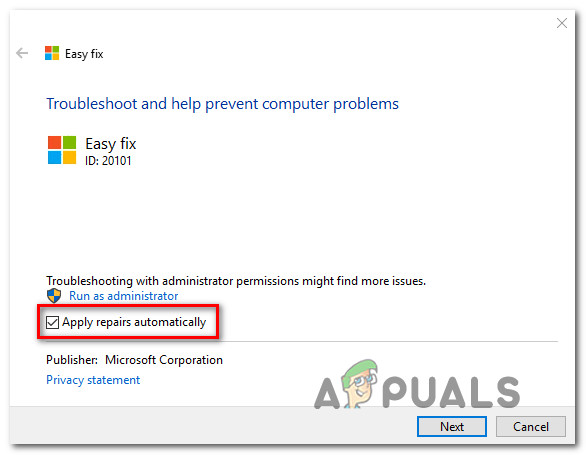
Applying repairs automatically - Wait until the scan finishes to determine the issues with your Outlook .PST file. If any inconsistencies are found, it will automatically recommend viable repair strategies.
Resolving the issues with your .PST file - Once you get to the Microsoft Outlook Inbox Repair window, click on Browse, then navigate to the location where the .PST file is stored.
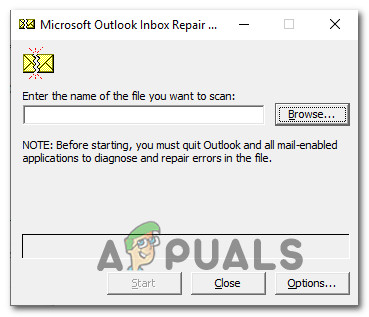
Selecting the .PST file using the Browse menu Note: If you don’t know the location of yours. PST file, keep in mind that the default location is C:\Users\ \AppData\Local\MicrosoftOutlook. Unless you saved it into a custom location, you should be able to find it there.
- After the process is complete, start Outlook once again and see if the issue is now resolved.
If you’re still seeing the 0x80040119 error when you’re trying to perform an action with your connected email, move down to the next method below.
Method 2: Repairing the entire Office installation
If you’ve confirmed that the issue is not being caused by a corrupted .PST file, chances are you’re dealing with some kind of file corruption in your Office installation that is limiting the functionality of the Outlook app.
Several Windows users that found themselves in a similar scenario have managed to get the issue resolved by repairing the entire Office installation using the built-in functionality. If you recently noticed signs that your Office installation might have been altered (a quarantined item or some startup error related to Office) you should ensure that your Office installation is not corrupted by repairing it via the Programs and Features window.
Here’s a quick guide on repairing the Office installation to resolve the Outlook Error 0x80040119:
- Press Windows key + R to open up a Run dialog box. Next, type “appwiz.cpl” inside the text box and press Enter to open up the Programs and Features.

Type appwiz.cpl and Press Enter To Open Installed Programs Page - Once you’re inside the Programs and Features screen, scroll down through the list of applications to locate your Office installation. Once you see it, right-click on it and choose Change from the newly appeared context menu.
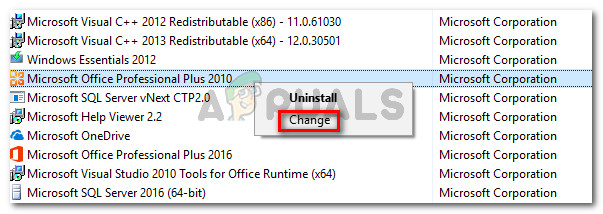
Accessing the repair menu of the Microsoft Office installation Note: If you’re prompted by the UAC (User Account Control) after you click on Change, click Yes to grant administrative privileges.
- When you manage to get inside the repair menu, click on Quick Repair and then click on Continue.
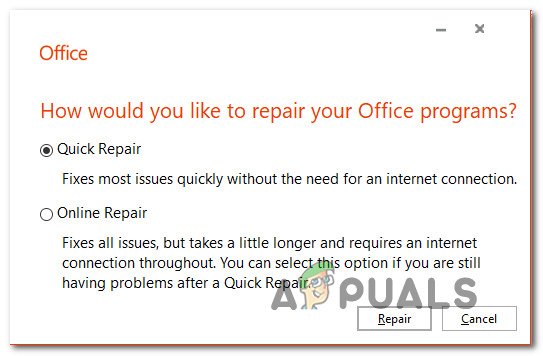
Repairing the Office installation Note: Keep in mind that depending on your Office installation, this menu might appear differently on your screen.
- Once the process is complete, restart your computer and see if the issue is resolved at the next system startup.
If you’ve repaired your office installation and you’re still encountering the 0x80040119, move down to the next method below.
Method 3: Repairing the account via Account Settings
If you’re using a 3rd party email client with Outlook (like Yahoo or Gmail), you may be encountering the 0x80040119 error due to an inconsistency that rendered the email stuck in a limbo state – whenever this happens, you can’t send or receive emails from the 3rd party email client.
Other users that faced this situation before have reported that they were able to fix the problem entirely by repairing the affected account using the Account Settings menu.
If this scenario is applicable and you’re using a 3rd party email client, follow the instructions below to see if you can repair it using the Account Settings menu of Outlook:
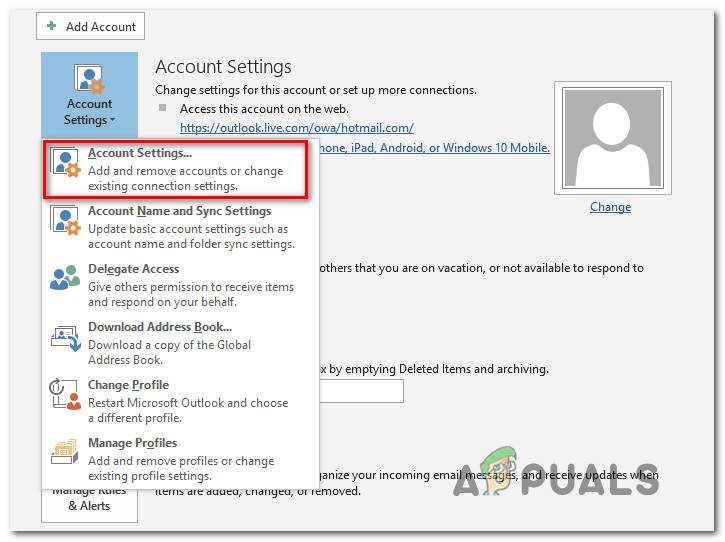
- Open Outlook and click on File from the ribbon bar at the top.
- Then, move over to the right-hand menu and click on Account Settings > Account Settings.
Accessing the Account Settings menu of Outlook - Once you’re inside the Account Settings menu, select the Email tab first. Then, select the email that’s causing the error and click on the Repair button.
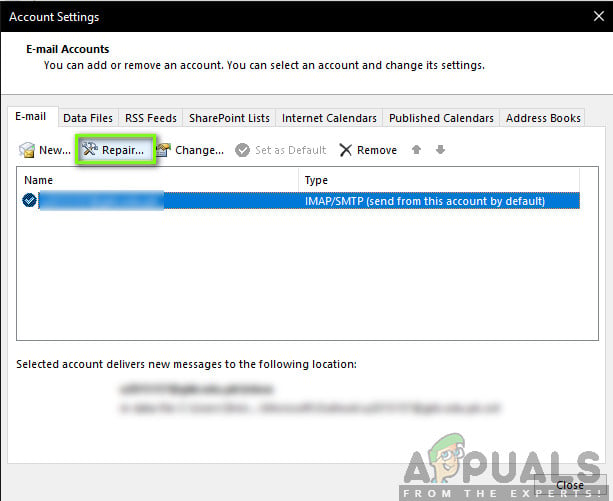
Repairing the Email Account - Follow the on-screen instructions to complete the repairing process, then restart your computer and see if the issue is resolved at the next system startup.
If you’re still encountering the 0x80040119 error, move down to the next method below.
Method 4: Eliminating the 3rd Party AV interference (if applicable)
As it turns out, there are some cases in which the issue ended up being caused by an overprotective 3rd party suite. In those cases, it was confirmed that Outlook was prevented from communicating with the email server by a security suite.
Several 3rd party suites are known for causing this particular issue on Windows 10, Windows 8.1 and Windows 7- McAfee and Kaspersky are among the most blamed 3rd party security suites.
If this scenario is applicable, you should be able to resolve the 0x80040119 error by uninstalling the 3rd party security suite and removing any remnant file that might interfere with your email client. If you confirm that a 3rd party AV suite was causing the problem, you can look for a more lenient one or revert to the built-in protection suite (Windows Defender).
Here’s a quick guide on uninstalling the security suite without leaving behind any leftover files that will continue to produce this error:
- Press Windows key + R to open up a Run dialog box. Next, once you’re inside the Run box, type “appwiz.cpl” inside the text box and press Enter to open up the Programs and Features menu.

Type appwiz.cpl and Press Enter to Open Installed Programs List - Once you’re inside the Programs and Features menu, scroll down through the list of installed application and find the security suite that you suspect it’s producing the issue. Once you see it, right-click on it and choose Uninstall from the context menu to start the uninstall process.
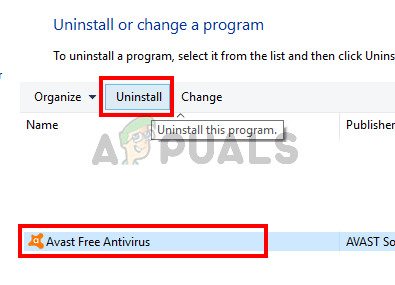
Select Avast and Click Uninstall - After the installation is complete, restart your computer. Once the next startup sequence is complete, follow this article (here) to remove any remnant files that might still produce the interference.
- Repeat the action that was previously producing the 0x80040119 error and see if the issue is now resolved.