How to Fix NVIDIA Overlay not Working Problem on Windows?
The NVIDIA overlay might not work, stopping users from accessing in-game features even when using the correct shortcut keys. This issue is mainly due to a problem with GeForce Experience, which stops the overlay from launching properly.
The main cause is outdated or corrupted graphics drivers, but conflicts with other software, wrong app settings, or missing system components can also play a role.
Now that you know the causes, let’s discuss the solutions.
1. Update Your NVIDIA Drivers
Regularly updating your NVIDIA drivers is essential for fixing bugs and ensuring the overlay works smoothly. Driver updates include patches that resolve overlay issues and optimize performance, helping maintain GeForce Experience functionality on your computer.
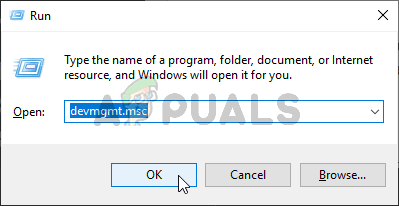
- Press Windows Key + R to open the Run dialog box. Type “devmgmt.msc” and click OK to open the Device Manager. Alternatively, search for Device Manager in the Start menu and select the first result.
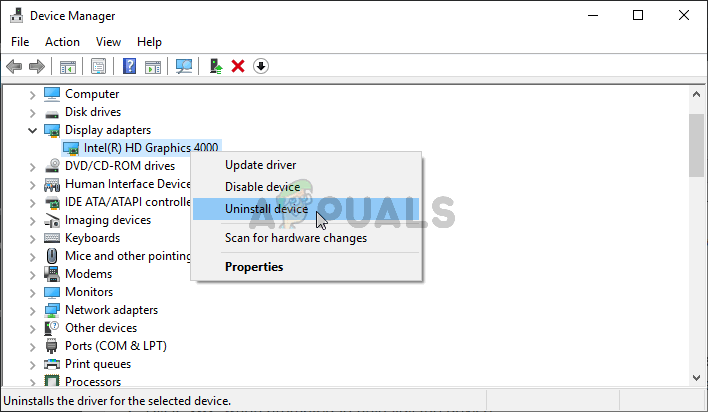
- Expand the Display Adapters section by clicking the arrow next to it. Right-click on your NVIDIA graphics processor and select Uninstall device from the context menu.
- Confirm any prompts that ask you to confirm your choice.
- Open a web browser and go to the website for driver updates. Enter your operating system and setup details, then click Search. Download the latest driver from the list.
- Open the downloaded driver file in the Downloads folder, follow the on-screen instructions to install it, restart your computer, and check if NVIDIA Overlay now works.
2. Enable Experimental Features
Turning on NVIDIA’s experimental features can access updates and improvements not yet in the regular release, often fixing bugs like overlay problems. This setting allows extra beta features that can enhance compatibility and performance, solving issues that might stop the overlay from working correctly.
- Open the GeForce Experience client. If you have a shortcut on your Desktop, double-click it. Otherwise, search for it in the Start menu or use the Search function and select the first result.
- Go to the Preferences tab at the top of the window, then navigate to the General section and find the About section.
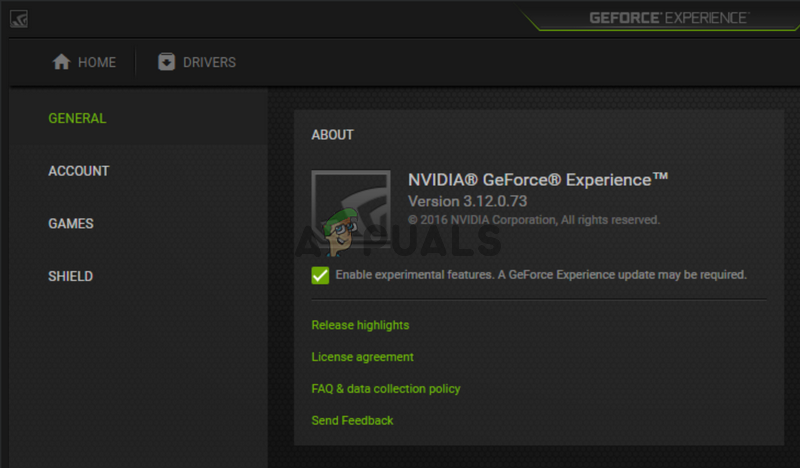
- Check the box next to Enable experimental features. A small download will start, updating GeForce Experience. Check if NVIDIA Overlay is now working!
3. Boot Once Without Third-Party Services
Starting Windows without third-party services can identify if other software interferes with NVIDIA’s overlay. Ensure NVIDIA services are enabled, and if the overlay works, re-enable any services you turned off.
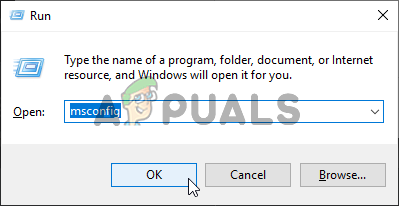
- Press Windows Key + R to open the Run dialog box. Type “msconfig” in the text box and click OK to open the System Configuration window.
- Go to the Services tab. Check the box for Hide all Microsoft services in the bottom-right corner.
- Click Disable all. If any NVIDIA services are disabled, re-enable them by checking their boxes in the list.
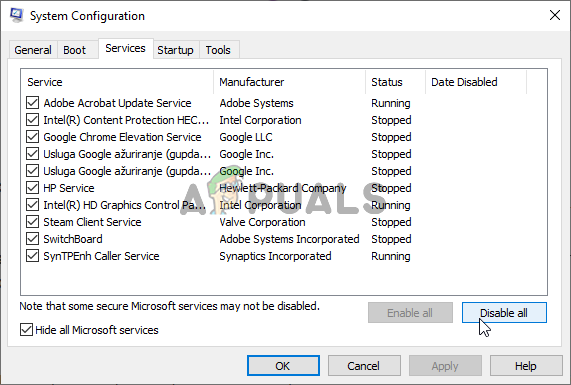
- Click OK and restart your computer. Open GeForce Experience and see if NVIDIA Overlay works. Regardless of the outcome, repeat steps 1 and 2, then click the Enable all button.
4. Repair Your Visual C++ Redistributable Package
Refreshing the Visual C++ Redistributable package can resolve overlay issues by ensuring necessary libraries are intact. Corrupted or outdated redistributables can cause compatibility problems, so reinstalling or repairing them helps the overlay function properly.
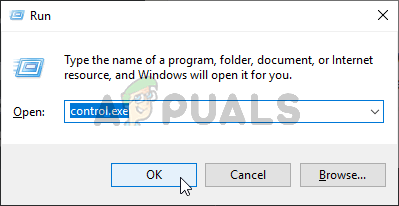
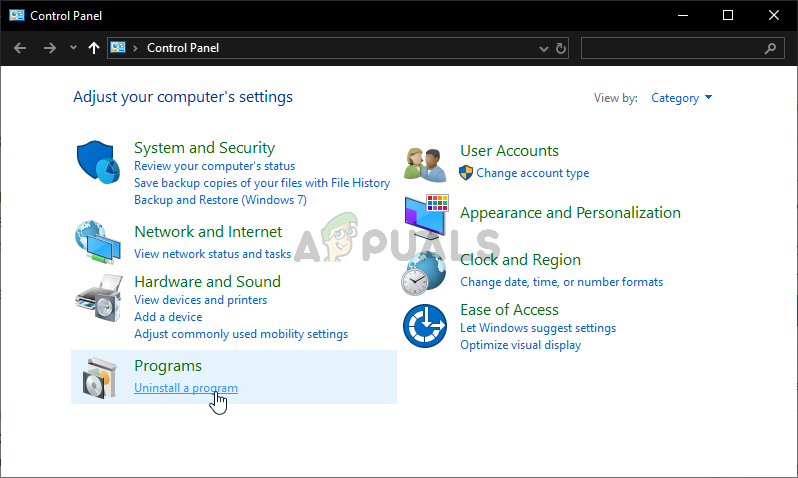
- Open the Control Panel using the Run dialog. Press Windows Key + R and type “control.exe” in the text box. Click OK afterward. You can also search for Control Panel in the Start menu.
- Set the View by option to Category in the Control Panel. Click Uninstall a program under the Programs section to see a list of installed programs.
- Find the Microsoft Visual C++ Redistributable entry. For multiple entries, repeat the process for all, skipping older versions (2008 or older). Left-click its entry and select Change from the bar at the top.
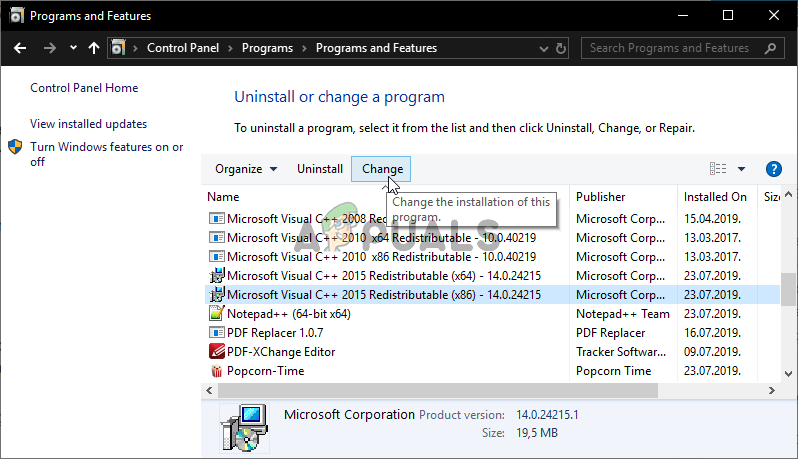
- In the Setup window, click the Repair button and wait for the process to complete. Check if NVIDIA Overlay now works on your computer!
5. Install a Media Feature Pack (for Windows 10 N users)
Windows 10 N editions lack certain media features by default, which can cause NVIDIA overlay issues. Installing the Media Feature Pack restores these missing components, ensuring the overlay functions correctly by providing the necessary media capabilities for GeForce Experience. Make sure to first update your graphics card drivers for this solution to be effective.
- Open a browser and visit this Microsoft Support link for the Media Feature Pack. Scroll to the Media Feature Pack list and find your Windows version.
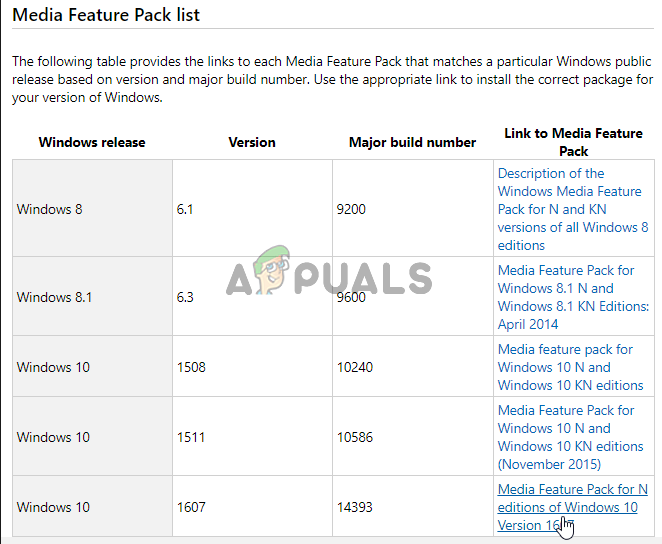
- Click the link under the Link to Media Feature Pack column. Scroll to the bottom of the new page to find the Download the Media Feature Pack update package now section.
- Select your language and click the red Download button to download the file.
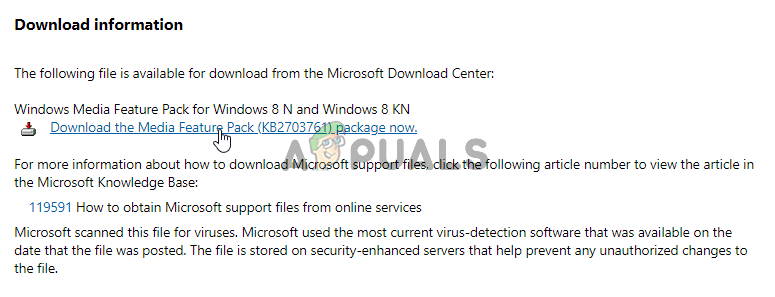
- Run the downloaded file and follow the instructions to install the Media Feature Pack. Reopen GeForce Experience and a game to see if NVIDIA Overlay is working properly.
6. Reinstall GeForce Experience
A fresh installation of GeForce Experience can resolve overlay issues by removing corrupted files or wrong settings that block the overlay. This ensures a clean setup, helping the software work properly with updated components and reliable access to NVIDIA’s in-game features.
- Open the Control Panel by searching for it in the Start menu or typing “control.exe” in the Run dialog box (use Windows Key + R).

- For Windows 10, use the Settings app by pressing Windows Key + I or clicking the cog in the bottom right of the Start menu.
- In Control Panel, set View by to Category and select Uninstall a program under Programs. In Settings, select Apps to see installed apps.
- Select GeForce Experience and click Uninstall. Follow the on-screen instructions to remove it.
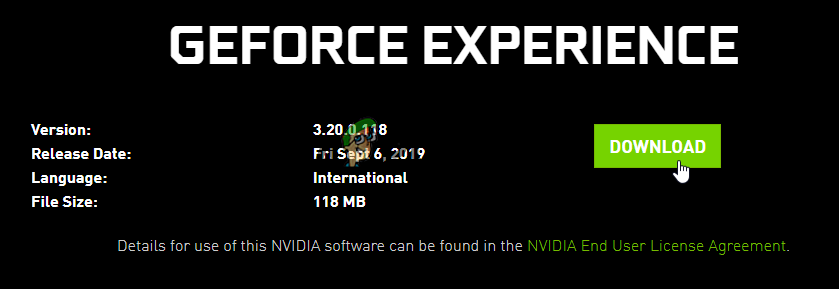
- Visit this link, click Download, open the downloaded file, and follow the instructions to install the latest version.
- Check if the NVIDIA Overlay is working now.
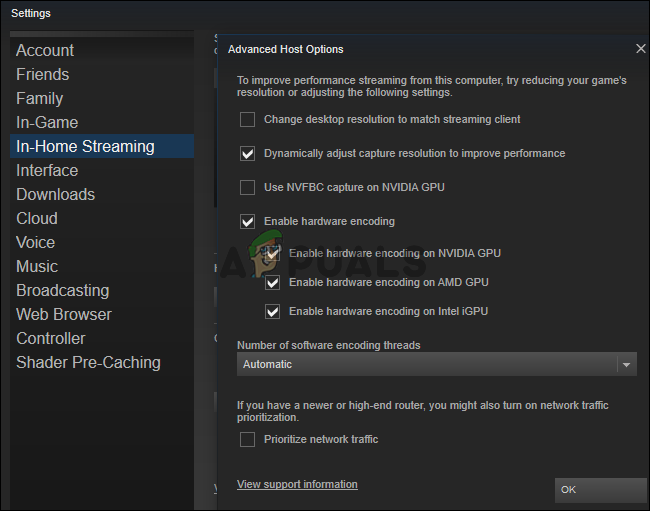
7. Disable NVFBC Capture on NVIDIA GPU in Steam
Sometimes, disabling NVFBC Capture on the NVIDIA GPU in Steam helps resolve overlay issues by reducing conflicts with NVIDIA’s capture services. NVFBC is mainly for streaming but can interfere with the GeForce overlay if multiple capture tools are active.
- Run Steam by double-clicking its icon on your Desktop, or search for it in the Start menu or using Search/Cortana.
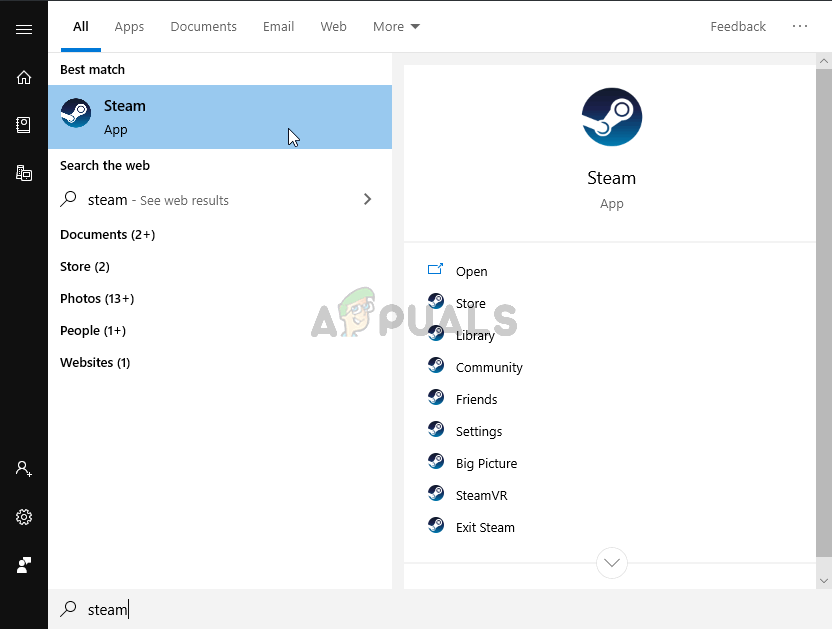
- Click the Steam menu at the top right, then select Settings.
- Go to the In-Home Streaming tab, uncheck Use NVFBC capture on NVIDIA GPU under Advanced Host Options, then click the Steam menu again and select Exit to close Steam.
- Reopen GeForce Experience and it should work properly now.
8. Manage Spotify Settings
Adjusting Spotify settings can fix conflicts with NVIDIA’s overlay. Disabling hardware acceleration and changing background permissions reduce interference, allowing the overlay to work smoothly.
- Open Spotify from your Desktop icon or search for it in the Start menu.
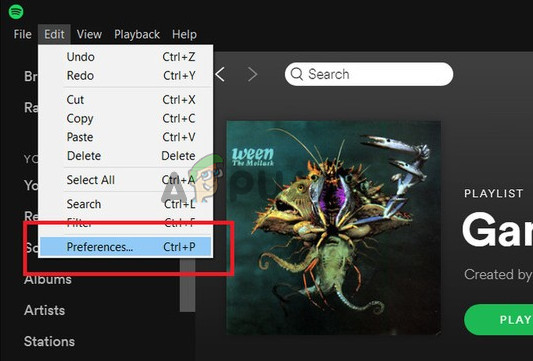
- Go to the Edit menu and select Preferences, or press Ctrl + P.
- In Settings, find Show desktop overlay when using media keys under Display Options and turn it Off.
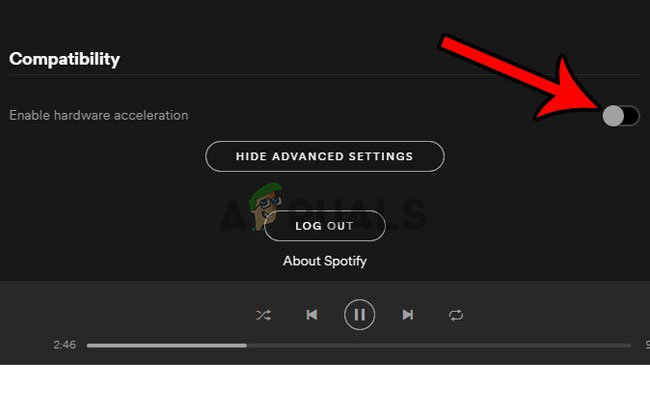
- Click Show Advanced Settings, scroll to Compatibility, and turn Enable hardware acceleration Off.
- Reopen GeForce Experience and check if the NVIDIA Overlay works properly.
9. Run GeForce Experience as an Administrator
Giving GeForce Experience administrative access can fix issues that stop the overlay from working. Running it as an administrator lets the software fully use system resources, removing permission problems that might block overlay features.
- Right-click the GeForce Experience shortcut on the Desktop (or find the main executable in the installation folder at
C:\Program Files (x86)\NVIDIA Corporation\NVIDIA GeForce Experience
 ) and select Properties.
 - Go to the Compatibility tab, check Run this program as an administrator, then click OK.
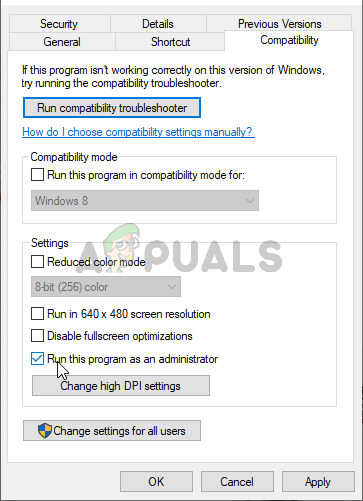
- Reopen GeForce Experience and check if the NVIDIA Overlay works.


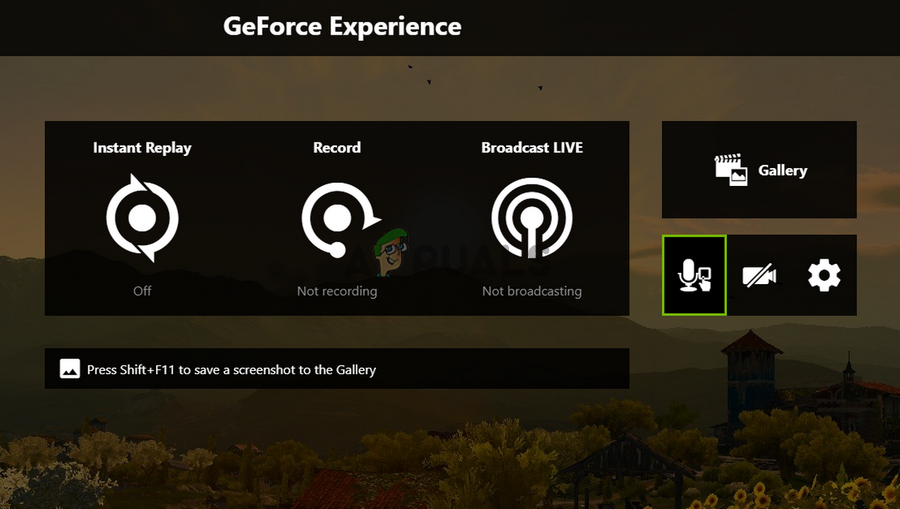
I felt so silly when I realized I didn’t have desktop capture enabled. It doesn’t give you a pop-up message to enable it if you try to make recordings, but it does when you press the default alt+f1 for a screenshot.