How to Fix .NET Framework 3.5 Installation Error 0x800F0922
Error code 0x800F0922 means that the request for the installation of the .net framework failed, has been denied or did not complete. It might be a case of not activating the feature from the control panel, or interruption in the installation, resulting in incomplete installation.
This error comes up when you attempt to install the Microsoft .NET Framework 3.5 on a computer that is running Windows 8, Windows 8.1, Windows 10, Windows Server 2012 R2 or Windows Server 2012. What happens is that you are expected to make a fresh install and not to upgrade. Fresh installation is better than the upgrade as Windows upgrade can result in some complications which can lead to this error. This error code, however, is not specific to .NET Framework only. The 0x800F0922 error message equally occurs when you perform Windows 10 upgrade with the error displayed below:
0x800F0922 CBS_E_INSTALLERS_FAILED: Processing advanced installers and generic commands failed.
Windows OS users have been able to overcome this problem majorly via two methods- by turning windows features on or off, and by utilizing the DISM command.
Method 1: Turn Windows features on or off
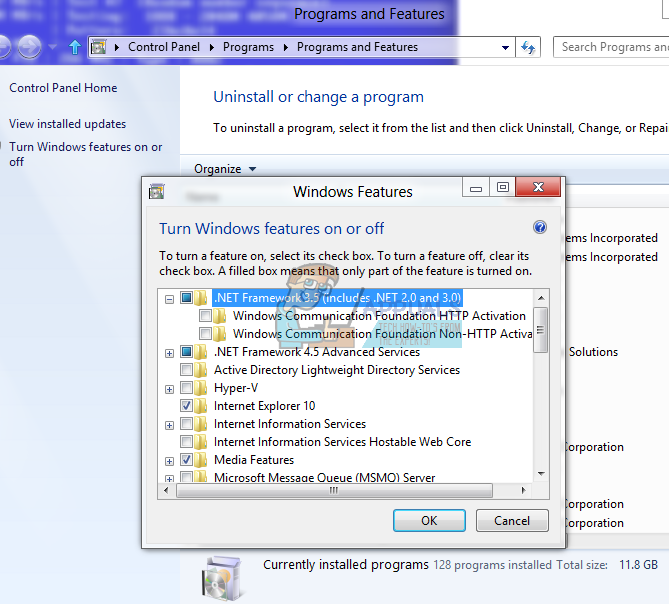
Hold the Windows Key and Press R. Type appwiz.cpl and Click OK. From the left pane, choose “Turn Windows Features on or off”

NOTE: If you had upgraded to Windows 8 from a lower version (i.e., from Win7 and/or Win8 Release Preview), and have difficulties in activating the .NET Framework 3.5.1, you may have a “hooked” install of Win8 – in that case, consider running a Refresh or a Reset of the computer.
Method 2: Reinstall .NET Framework
Before installing .NET Framework 3.5 you need to remove newer version of .NET Framework 4.6. You need to do next steps:
- Press Windows logo + X
- Click Programs and Features
- On the left side you need to click Turn Windows features on or off
- Deselect .NET Framework 4.6 Advanced Services and click OK. After Windows complete the requested changes you need to click After you click Close, window you opened at step 3 will close.
- Again, on the left side you need to click Turn Windows features on or off
- Select .NET Framework 3.5 (includes .NET 2.0 and 3.0) and click OK
- Choose Download files from Windows Update to finish installing features. Files will be downloaded and installed.
- After Windows complete the requested changes click After you click Close, window you opened at step 5 will close.
- Again, on the left side you need to click Turn Windows features on or off
- Select .NET Framework 4.6 Advanced Services and click After Windows complete the requested changes you need to click Close.
- Close Programs and Features
Method 3: Using DISM command
Deployment Image Servicing and Management (DISM.exe) enables you to add features that are offline on the computer. To fix the 0x800F0922 error using DSIM command, we need to input lines of code, or simply issue commands. From the start menu, search for cmd, right click and choose Run as administrator. Once it opens, type the command specifically with no alteration as shown below:
dism.exe /online /enable-feature /featurename:NetFX3 /Source:d:\sources\sxs /LimitAccess
Replace “D:” with the appropriate drive containing the Windows ISO (Setup) that you wish to install from. This will ensure that another error does not result, showing the unidentified source or source files missing. Copying and pasting will require that you remove any extra spaces in the command. This step is equally very important. The .NET files can be found in the install.wim of the media, therefore, for the command above to work you will need to ensure that you have made reference to the letter representing the appropriate drive. One thing to keep in mind when using the DISM command, is to always check the logs for errors. You can find the DISM log file at C:\WINDOWS\Logs\DISM\dism.log.
If you have a case of corrupt DSIM , you will have to clean up by running the command:
Dism /Online /Cleanup-Image /RestoreHealth
If you have Windows 7/8/10, 64 bit and 32 bit respectively, the following steps are recommended in order to install .Net framework successfully.
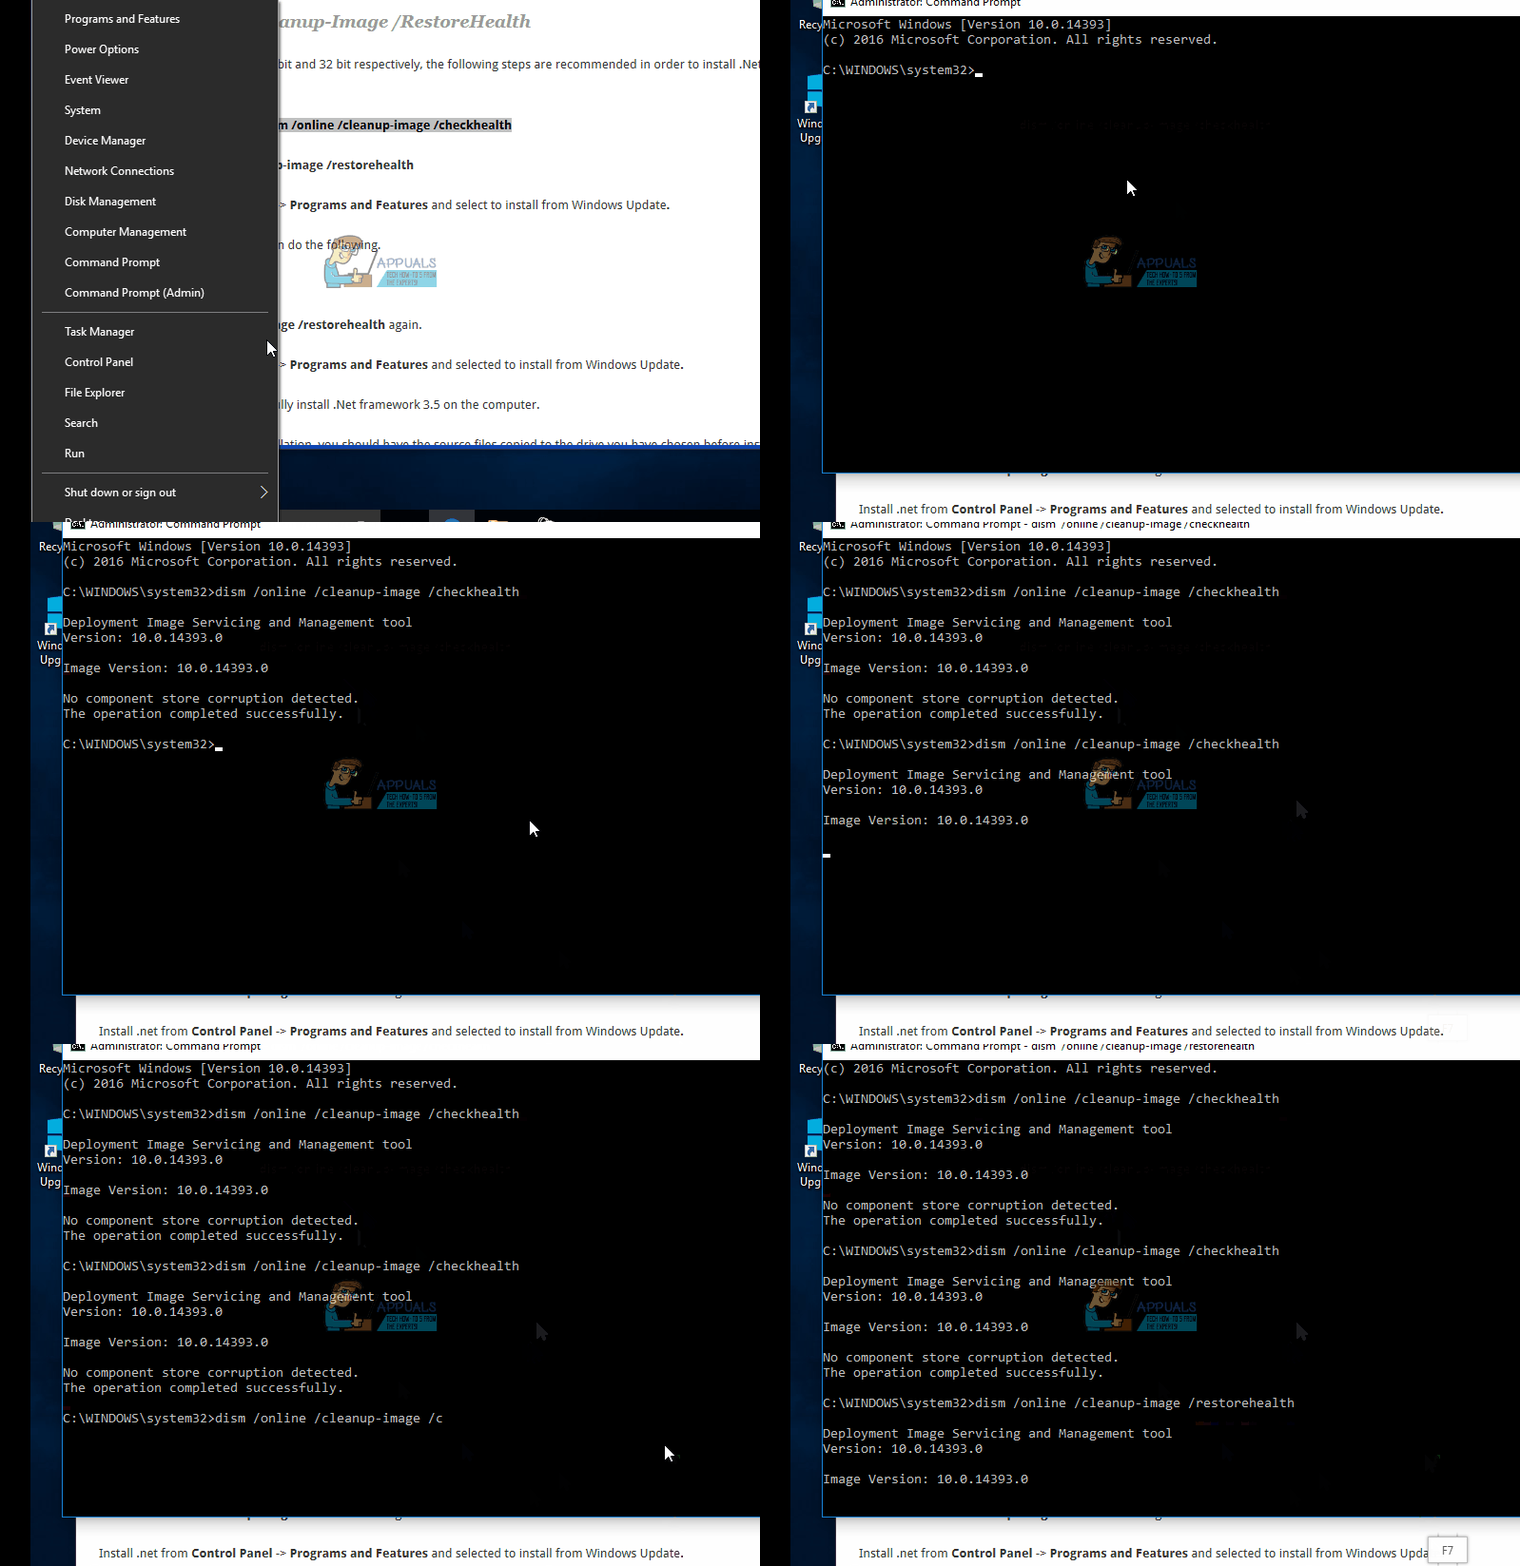
The first command to run is dism /online /cleanup-image /checkhealth
Then run dism /online /cleanup-image /restorehealth

Install .net from Control Panel -> Programs and Features and select to install from Windows Update.
If this does not work for you then do the following.
Reboot the VM or native PC.
Run dism /online /cleanup-image /restorehealth again.
Install .net from Control Panel -> Programs and Features and selected to install from Windows Update.
Following this step will successfully install .Net framework 3.5 on the computer.
For the .net framework 3.5 installation, you should have the source files copied to the drive you have chosen before installing, otherwise it is advisable to download the full installation package directly.