How to Fix Gears of War 4 Crashing on PC?
Gears of War is a military science fiction game developed by the renowned developer, Epic Games. It is published by Microsoft Studios itself on PC and Xbox alike. The game gained a lot of traction when it was released for its incredible graphics and gameplay.

Despite being published by Microsoft itself, we came across numerous instances where the game crashed without any prior issues. There were several variations to this issue ranging from updating the graphics card or experiencing the problem whenever the game launched in normal scenarios. In this article, we will go through all the different reasons as to why this might occur to you and what the workarounds are to fix them.
What causes Gears of War 4 to Crash on PC?
After receiving several users reports and looking at the frequency of the issue, we started investigating why the issue was occurring. After doing our checks and combining them with the user reports, we listed narrowed down some of the reasons. Some of them are listed down below:
- Async: Async provides enhanced performance to the game by providing asynchronous functionality to work with JavaScript. This is known to increase the performance but also known to cause problems with the game.
- Gamebar and DVR: Microsoft games often have a game bar which allows the users to record the gameplay using an overlay. This is a pretty nifty feature but sometimes conflicts with the game with which it is used.
- Recent Windows Updates: Microsoft releases frequent updates to all its computers. These updates have bug fixes and new features. However, there are instances where these updates instead of making the experience better, ruin it by conflicting with the game.
- Outdated Windows: Whenever the crashing in Gears of War starts to be common, Microsoft releases an update to fix the problem. Hence, you must keep your OS up to date as well.
- Windows Store: Since Gears of War 4 is released by Microsoft Store, it is connected with the game and its engines are used when running it. If your Store is not working properly, you will experience random game crashes.
- Graphics drivers: There are several variations where graphics drivers can mess with Gears of War. Either a new update breaks the game or the current driver’s version doesn’t work. Here, we can attempt a number of different possibilities to fix the problem.
Before we start with the solution, make sure that you are logged in as an administrator. Also, you should have a decent internet connection as we will be downloading a couple of stuff. Also, have your credentials on hand in case you need to input them.
Solution 1: Disabling Game Bar
The game bar was introduced as a feature of the Xbox application on Windows to allow users to record and take screenshots using it when playing any game. What made it so popular was ease of use and that the user didn’t have to install any other third-party software to do the job.
However, there have been many instances in the past where the game bar doesn’t sit well with some of the games. Gears of War 4 seems to be one of them as well. We will make use of the Game Bar settings in the Xbox application and try to disable it from there.
- Press Windows + S, type “Xbox” in the dialogue box and open the application.
- Once in the Xbox application, click on the Settings present at the bottom-left side of the screen.
- Once in the settings, click on Game DVR from the navigation list. Uncheck the following option
Record game clips and screenshots using Game DVR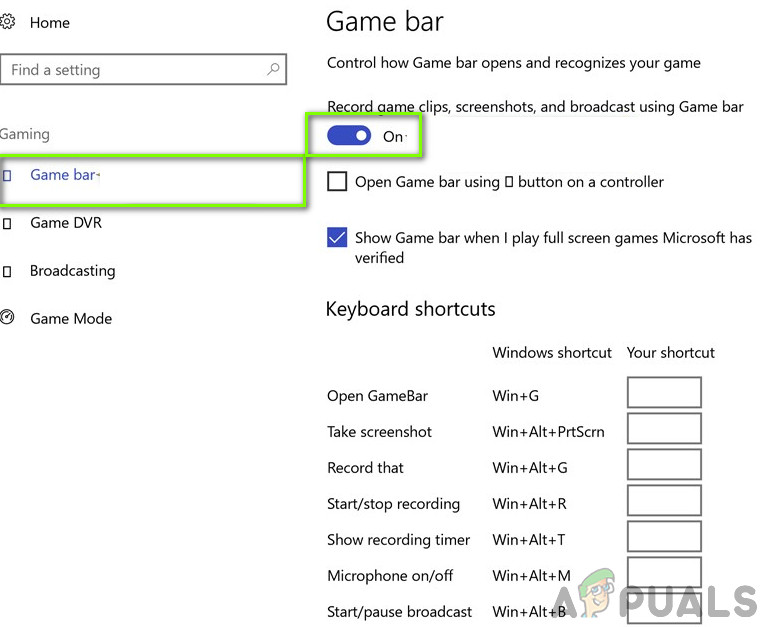
Disabling Game Bar - Save changes and exit. Restart your computer and see if this did the trick in solving the crashing issue.
- Restart your computer for the changes to take place and check if the problem at hand got solved.
Note: If you have a newer version of Windows, you can search for Xbox Game Bar after pressing Windows + S and open the application directly.
Solution 2: Disabling Async
The second thing which we will try if the above solution doesn’t work is disabling Async Computer completely from your game or graphics drivers. This utility allows async processing for numerous modules running in the game. Even though this is considered a nifty feature, there are instances where it doesn’t enhance the experience and instead conflicts with the game and causes it to crash. Here are the directions from where you can disable the Async in Gears of War 4.
- Launch Gears of War 4. Now, click on Options.
- Once in Options, select Advanced Video.
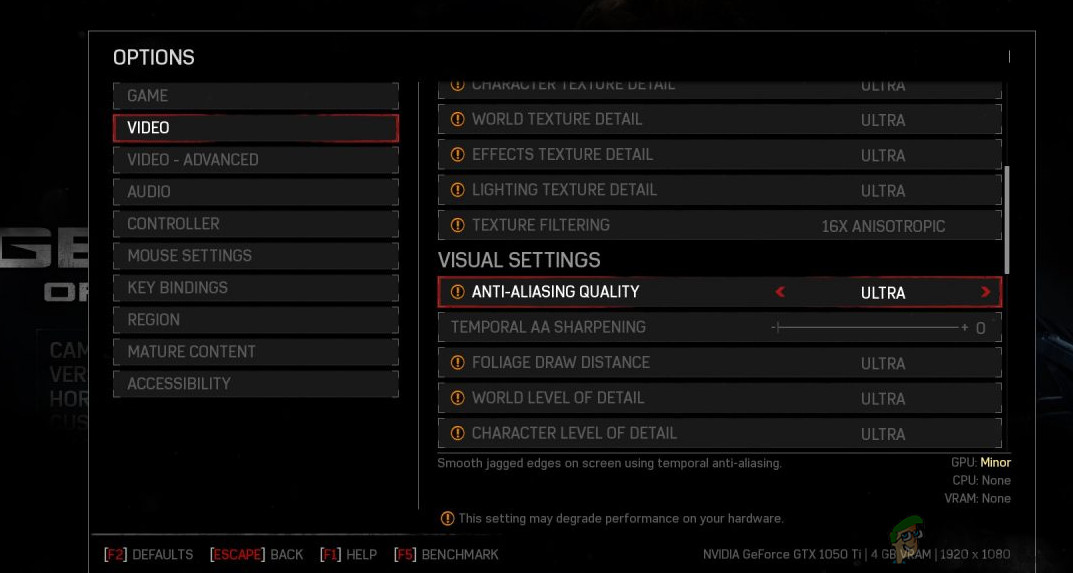
Disabling Async – Gears of War - Now, Turn off Async from the options by toggling the option.
You can also disable the feature from your graphics card if it is available there. After changing, restart your computer and check if the issue has been resolved.
Solution 3: Resetting Windows Store
If both the above methods don’t work and fix the Gears of War 4 crashing, we can try resetting Windows Store and see if this does the trick. Since Gears of War 4 is released by Microsoft, it is still tied to Store somehow. If Windows Store isn’t working properly, some of its modules might not be able to interact with Gears of War especially if you are playing online.
Here, we will attempt at resetting the Windows Store cache and see if this does the trick.
- Press Windows + S, type “command prompt” in the dialogue box, right-click on the application and select Run as administrator.
- Now type the following command in the window and press Enter.
wsreset.exe
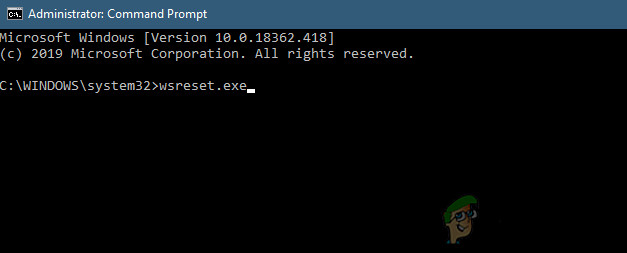
- This process might take some time. Make sure that you let it complete before restarting your computer.
- After the restart, try to launch the game and check if the issue is resolved.
Solution 4: Installing DirectX
DirectX is an API developed by Microsoft which is extensively used in 3D games and high-density graphics. Gears of War 4 also makes use of DirectX in its operations. Normally, Windows nowadays comes bundled with DirectX. But there are still numerous cases where the API is not installed or if it is, it is incomplete or got corrupt due to being moved manually between drives.
DirectX is also known to contribute to the sound of the game so you might experience crashes whenever you go inside a sound and graphics-intensive scene in the game. In this solution, we will navigate to Microsoft’s official website and download the latest version of DirectX into our computer.
- Launch your Browser. Now, navigate to Microsoft’s DirectX Website and download the installer from there to an accessible location.
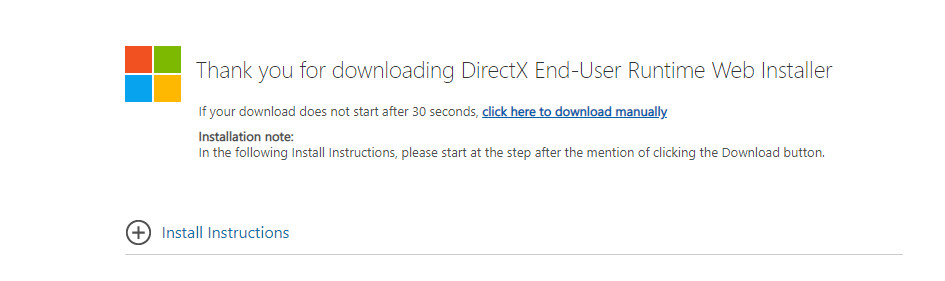
Installing DirectX - Now, launch the executable and install DirectX on your computer as an administrator.
- Restart your computer after the installation is done and check if the sound is back on Skyrim.
Solution 5: Uninstalling Latest Windows Update
Microsoft frequently releases Windows updates to its computers which includes new features and addressing of bugs However, it is frequently noted that there are several Windows updates that conflict with the existing games played through Microsoft store. The newer update either clashes with the game or doesn’t let some of its modules run properly.
Here, we can try uninstalling the latest Windows Updates on the computer. We always have a list of updates installed with all the details. Just as a precaution, make sure that you backup all of your data before following the solution listed.
- Press Windows + S, type “settings” in the dialogue box and open the application.
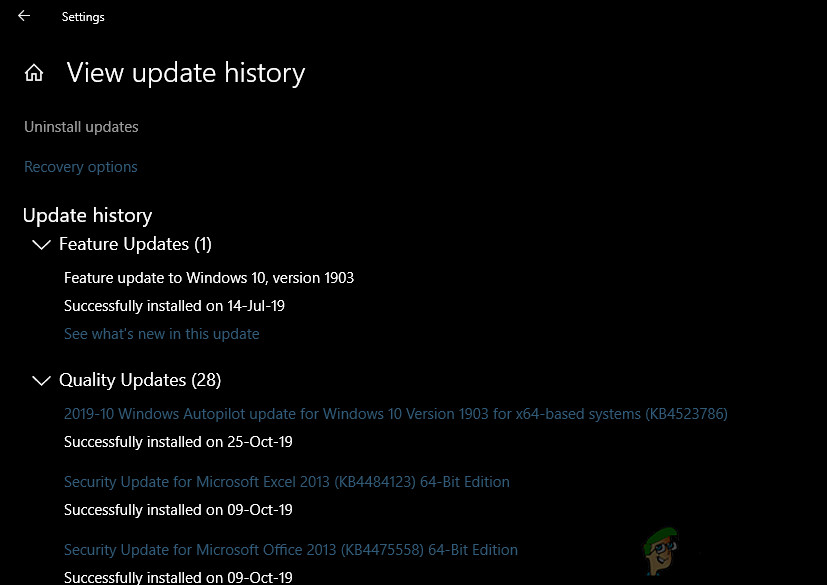
- Click on Update and Security once you are in the settings. Here beneath the heading of Update status, click “View update history”.
- Click “Uninstall updates” present at the very top of the screen.
- A new window will be brought in front of you consisting of all the updates installed on your computer. Right-click on the one which was recently installed and click “Uninstall”.
Uninstalling Windows Updates - After uninstalling the update, power cycle your computer and check if the problem at hand got solved.
Note: If you have a newer version of Windows, click on View Update History and then uninstall the updates.
Solution 6: Checking for Windows Updates
If none of the above methods work and you are still unable to solve the crashing issue, we will check if there are any updates available to your OS or the game in the Windows Store. Even though we did the opposite in the previous solution, there are instances where Microsoft engineers pushed an update to the OS or the game to fix the crashing issue.
Here is the method on how to update Windows to the latest version.
- Press Windows + S, type “update” in the dialogue box and launch the Settings app.
- Now, click on the button of Check for Updates.
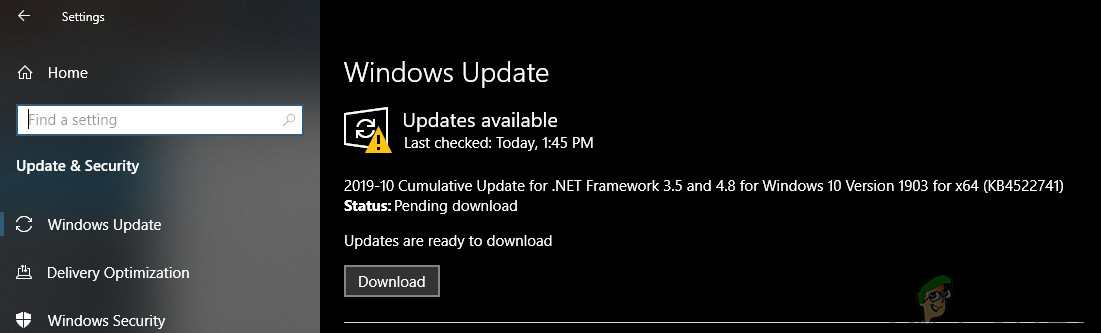
Checking for Windows Updates - After the updates are installed, restart your computer and launch the game. Check if the issue is resolved.
Now that we have installed the latest updates for Windows, we will move on and install the updates for Gears of War 4. Here, we have assumed that you have downloaded the game from Microsoft Store.
- Press Windows + S, type “store” in the dialogue box and open the entry of Microsoft Store from the results.
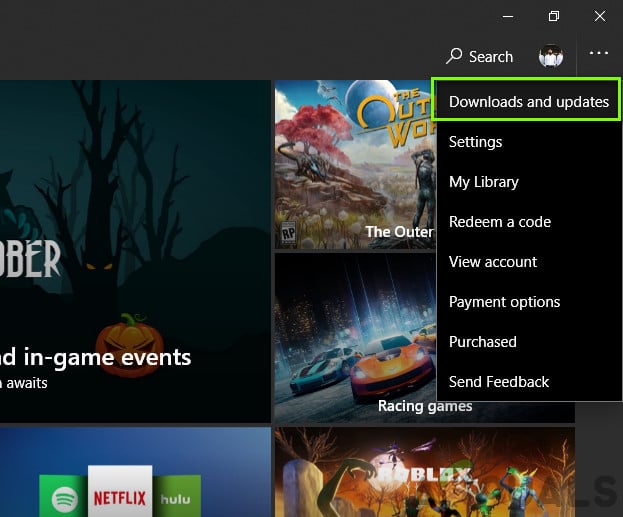
- Once the store is opened, click on the three dots present at the top-right side of the window near your profile image and click Downloads and Updates.
- Now, click on the button of Get updates so all the updates begin to download automatically on your computer. If there is an update for Gears of War 4, it will be downloaded.
Updating Windows Store - Once Gears of War 4 is updated, restart your computer and launch the game. Check if the sound issue is solved.
Solution 7: Updating Graphics Drivers
Last but not least, your graphics drivers might also be causing crashes of Gears of War 4 on your computer. Graphics drivers are the main components that relay the graphics information to your hardware from the software entities like the game or the OS. If the very graphics drivers are somehow outdated or corrupt, you will have difficulty in playing the game.
In this solution, we will download a tool named DDU and then uninstall the current graphics drivers in Safe Mode. First, download and install DDU on your computer before proceeding.
- After installing Display Driver Uninstaller (DDU), launch your computer in safe mode. You can check our article on how to boot your computer into safe mode.
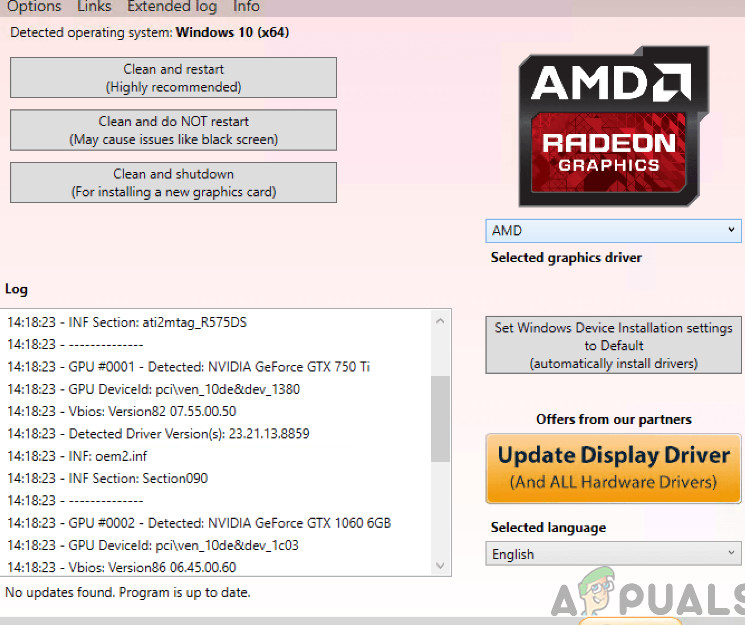
- Click Clean and restart once DDU is launched on your computer. This action will automatically remove the current graphics drivers from your computer.
Clean and restart – DDU - Now after the uninstallation, boot your computer normally without safe mode. Once in Safe mode, type devmgmt.msc after pressing Windows + R. The device manager will now open. Right-click on any whitespace and click Scan for hardware changes. The default drivers will be installed through this option.
- In the majority of the cases, the default drivers will not work for you so you can either install the latest drivers through Windows update or navigate to your manufacturer’s website and download the latest ones.
Locate the graphics drivers, right-click on them and click on Update Driver. - After you have installed the drivers, restart your computer and check if the problem is solved.


