How to Fix ‘Firewall is Blocking Quickbooks’ Error?
Quickbooks is an accounting software that has been developed and distributed by Intuit. Applications developed by the company are aimed towards small and medium-sized businesses and provide on-site accounting applications aswell. However, a lot of users have been getting the “Firewall is blocking Quickbooks” error while trying to use the applications.

What Causes the “Firewall is Blocking QuickBooks” Error?
After receiving numerous reports from multiple users, we decided to investigate the issue and devised a solution to fix it completely. Also, we looked into the reasons due to which it is triggered and listed them as follows.
- Closed Ports: This error is triggered when the ports which the application uses to access the internet aren’t forwarded by the computer. The specific ports that are being used by the application must be forwarded by the user for it to work properly. Unlike many other applications, QuickBooks doesn’t use a wide range of ports, instead, it uses a specific port depending upon the version of the application that you are using.
- Blocked in Firewall: In some cases, the application itself might have been blocked by the Windows’ Firewall. It is also possible, that a third party antivirus might have blocked the application permanently.
Now that you have a basic understanding of the nature of the problem, we will move on towards the solutions. Make sure to implement these in the specific order in which they are presented to avoid conflict.
Solution 1: Configuring Firewall Ports
Firewall ports need to be configured to allow the application to access the internet. You can automatically configure these ports by downloading and running this application. If for some reason you don’t want to do it automatically, follow the steps below.
- Open the “QuickBooks Database Server Manager” and click on the “Port Monitor” tab.

Clicking on the “Port Monitor” option. - Note the “Port Number” listed for your application.
- Press “Windows” + “I” to open settings and click on “Update & Security”.
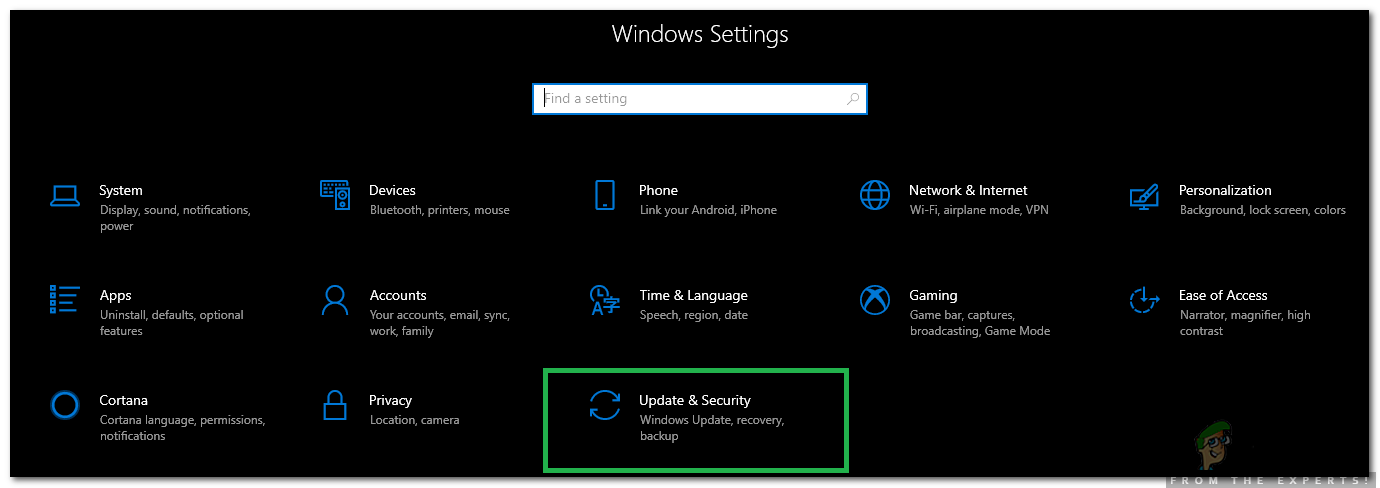
Selecting the Update & Security Option - Select the “Windows Security” tab from the left pane and click on “Firewall and Network Security” option.
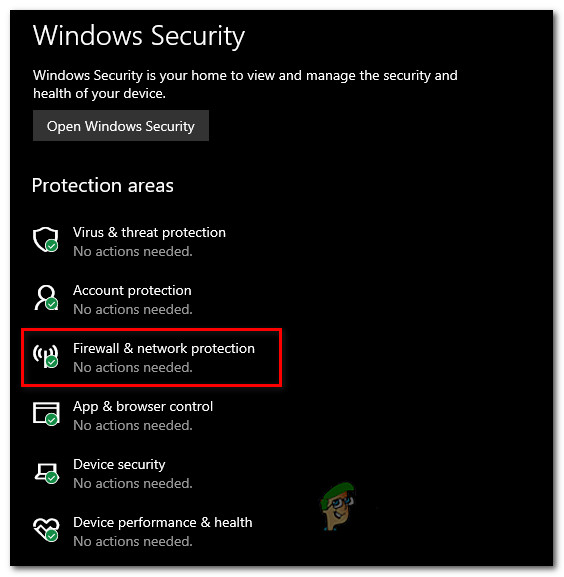
Accessing the Firewall & network protection settings - Select the “Advanced Settings” button from the list.
- A new window will open up, Click on the “Inbound Rules” option and select “New Rule“.

Clicking on “Inbound Rule” and select “New Rule” - Select “Port” and click on “Next”.
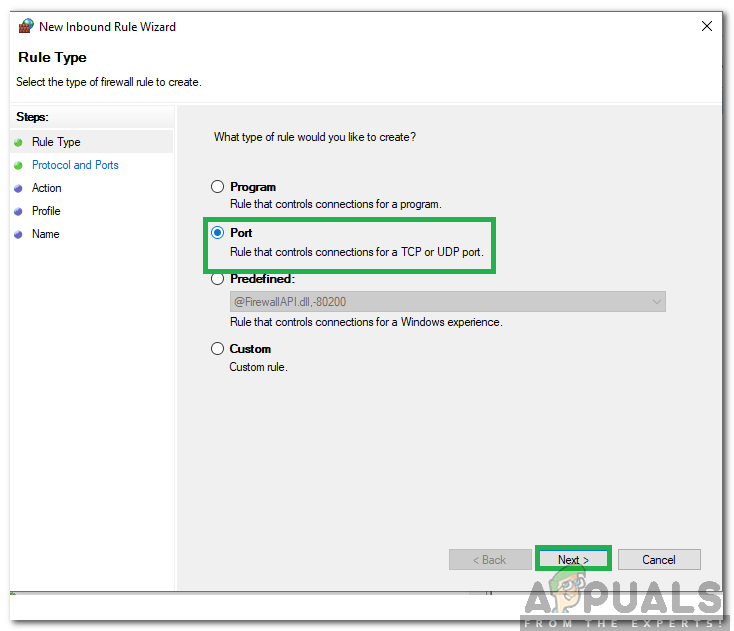
Selecting Port and clicking on Next - Click on “TCP” and select “Specified Local Ports” option.
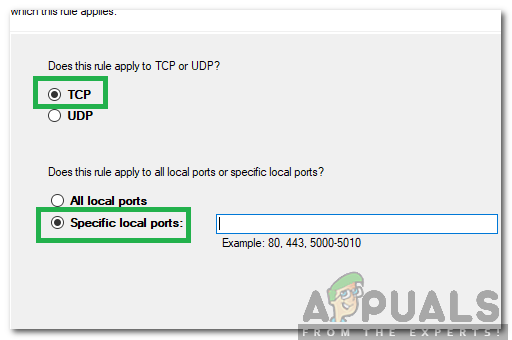
Clicking on “TCP” and checking the “Specified Local Ports” option - Different Port Numbers are depending upon the version that you are using.
For QuickBooks Server Manager 2019 Enter: 8019, “The port number that we noted in step 2”.
For QuickBooks Server Manager 2018 Enter: 8019, 56728, 55378-55382
For QuickBooks Server Manager 2017 Enter: 8019, 56727, 55373-55377
For QuickBooks Server Manager 2016 Enter: 8019, 56726, 55368-55372 - Click on “Next” and select “Allow the Connection“.
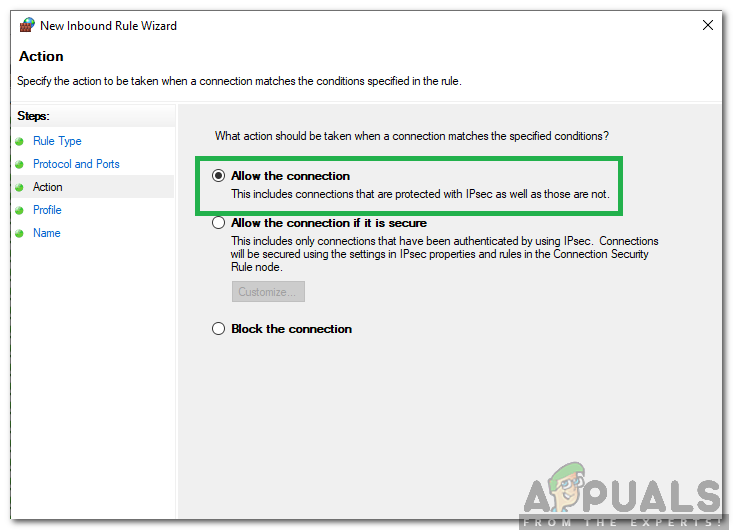
Selecting the “Allow the connection” option - Select “Next” and make sure all three options are checked.
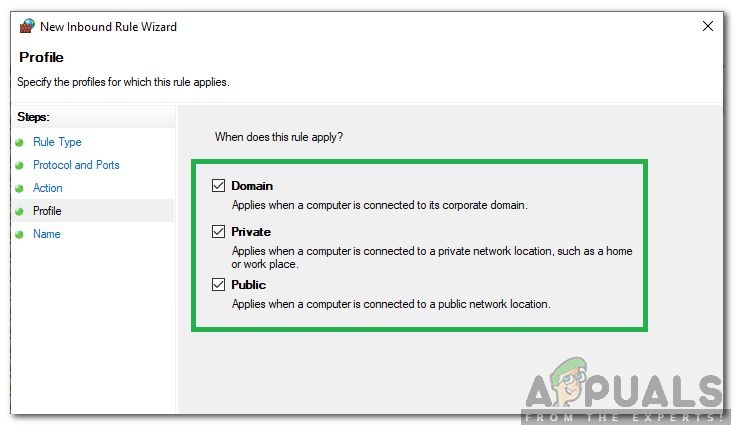
Checking All options - Again, click on “Next” and write a “Name” for the new rule.
- Select “Next” after writing a name and click on “Finish“.
- Repeat the above process for “Outbound Rule” and check to see if the issue persists.
Solution 2: Adding Firewall Exception
It is important the QuickBooks program also has an exception in the Firewall because sometimes, the Windows’ Firewall can block the application entirely in spite of the ports being open. Therefore, in this step, we will be adding the QuickBooks program as an exception to the Firewall. For that:
- Press “Windows” + “I” to open settings and click on “Update & Security“.

Selecting the Update & Security Option - Select the “Windows Security” tab from the left pane and click on “Firewall and Network Security” option.
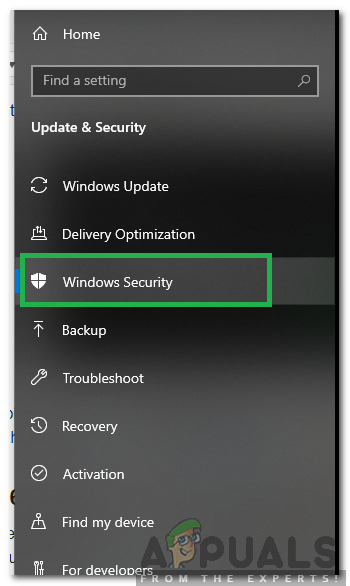
Selecting Windows Security from the left pane - Select the “Advanced Settings” button from the list.
- A new window will open up, Click on the “Inbound Rules” option and select “New Rule“.

Clicking on “Inbound Rule” and select “New Rule” - Click on “Program” and select “Next“.
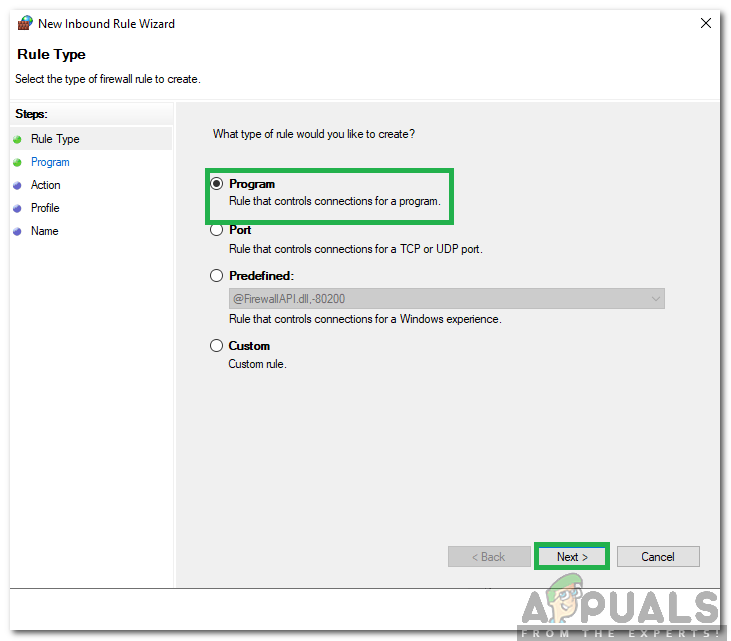
Checking Program and clicking on Next - Check the “This program Path” option and click on “Browse“.
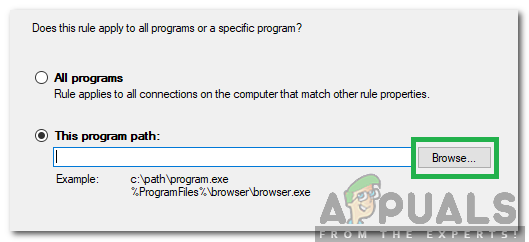
Clicking on “Browse” - Select the path where the QuickBooks Program has been installed.
- Click on “Next” after selecting the path and check the “Allow the Connection” option.

Selecting the “Allow the connection” option - Check all “Three” options and click on “Next“.

Checking All options - Type a name for the rule and click on “Finish“.
- Repeat the same process for the “Outbound Rule” and check to see if the issue persists.


