5 Solutions to Fix ‘Failed to retrieve Directory Listing’ on FileZilla
FileZilla is free software, it has two versions i.e. FileZilla Client and FileZilla Server. The Client has cross-platform support but the Server only supports Windows. This application is used to transfer files between computers on a network. However, quite recently, a lot of reports have been coming in where users experience the “Failed to Retrieve Directory Listing” error while trying to connect to the server.

What Causes the “Failed to Retrieve Directory Listing” Error on FileZilla?
After receiving numerous reports from multiple users, we decided to investigate the issue and devised a set of solutions that eradicated it for most of our users. Also, we looked into the reasons due to which this issue is triggered and listed some of the most common ones below.
- Windows Firewall: In most cases, the FileZilla server worked locally but not remotely. Whenever a connection attempt was made locally this error was triggered. This error is triggered because FileZilla’s connection was being blocked by the Windows Firewall. Even though the exception for a particular port might be added in the Firewall, it still uses a “Passive Mode” to send and receive files. This is done on random TCP ports. Therefore, these ports are blocked by the Firewall and this error is triggered.
- Encryption: There are several types of connection encryptions that you can use while trying to connect to the server. Although some are more secure than the others they can often cause issues even with the legitimate connections by preventing the connection from being established.
Now that you have a basic understanding of the nature of the problem, we will move on towards the solutions. Make sure to implement these in the specific manner in which they are presented to avoid conflicts.
1. Create a Firewall Rule
If the Firewall is blocking FileZilla from making contact with the internet, it will not work properly and the error will be triggered. Therefore, in this step, we will be first limiting the ports for FileZilla and then adding exceptions for them in the Firewall. To do that:
- Launch the “FileZilla Server” on the “Server” computer.
- Click on the “Edit” option and select “Settings” from the list.
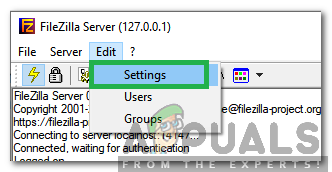
Clicking on “Edit” and select “Settings” - Click on the “Passive Mode Settings” option from the left pane and check the “Use Custom Port Range” option.
- Enter “2100” in the first box and the second box.
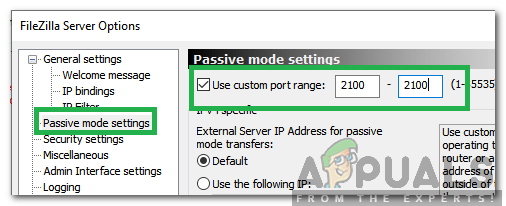
Entering 2100 in both the boxes - Click on “OK” to save your settings.
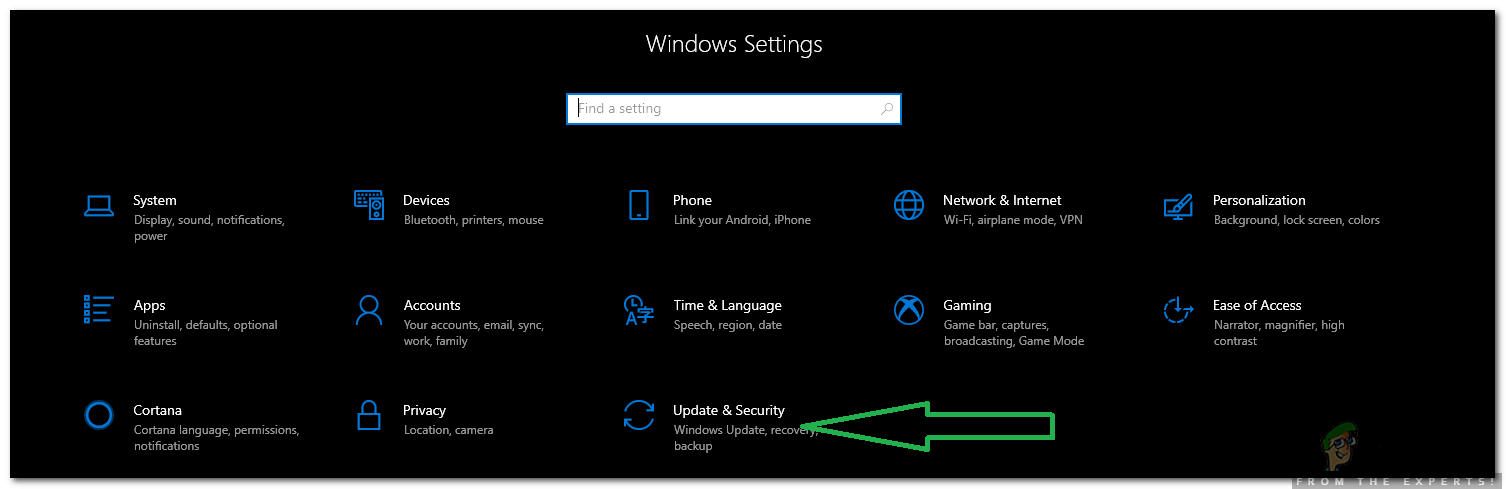
- Press the “Windows” + “I” buttons simultaneously to open settings.
- Click on “Update & Security” and select “Windows Security” in the left pane.
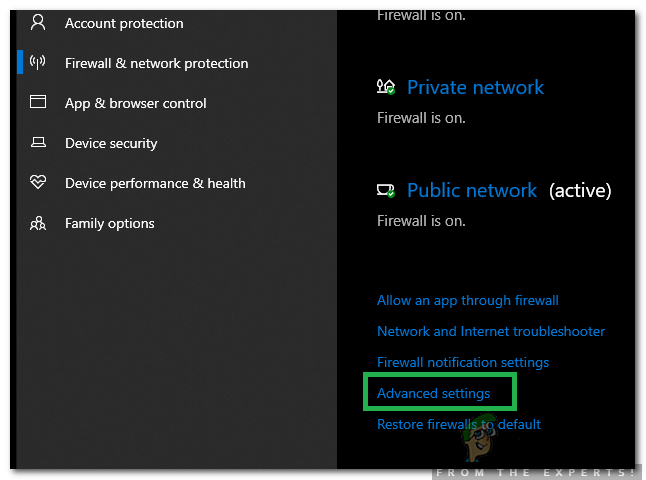
Selecting “Update and Security” - Click on the “Firewall & Network Protection” option and select the “Advanced Settings” button.
Clicking on “Advanced Settings” - Left–click on the “Inbound Rule” option and then right–click on it again.
- Select “New Rule” from the list.

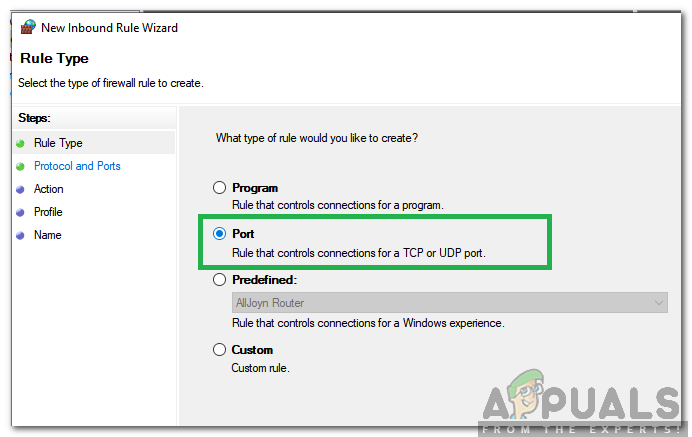
Selecting “New Rule” - Under the heading “What Type of Rule you want to create“, check the “Port” option and click on “Next”.
Checking the “Port” option - Check the “TCP” option and check the “Specific Local Ports” option.

Checking “TCP” and the “Specific Local Ports” option - Write in “21,2100” in the space and click on “Next”.
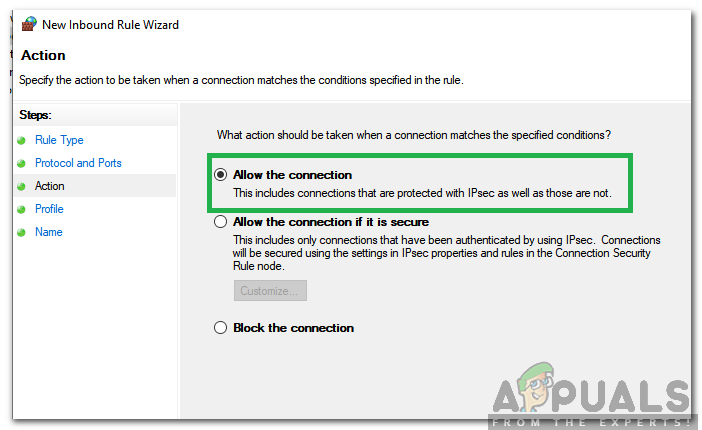
Note: In place for 21 write the port that you selected while creating the server - Check the “Allow Connection” option and click on “Next“.
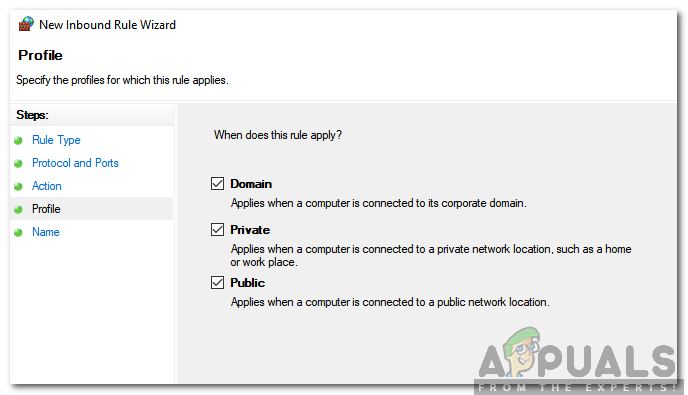
Clicking on “Allow Connection” - In the next screen, check “Private“, “Domain” and the “public” option.
Checking the Private, Domain and Public options - Click on “Next” and enter the name which you want for this rule.

Entering the name for the rule - Click on “Finish” to add this rule.
- Repeat this same process for “Outgoing Rules” to add the same rule for it as well.
- When these rules have been added, check to see if the issue persists.
2. Change Encryption
It is possible that the Encryption configurations might be causing the issue. Therefore, in this step, we will be changing the encryption for the connection. For that:
- Open “FileZilla Client” on the “Client” computer.
- Click on “File” and select “Site Manager“.

Clicking on File and selecting “Site Manager” - If the server you want to connect to isn’t already in there select “New Site“.
- Add the hostname, username, and password for the connection.
- Click on the “Logon Type” dropdown and select “Normal“.
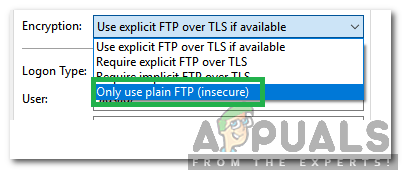
- Click on the “Encryption” dropdown and select “Only use Plain FTP“.
Changing Encryption Settings - Make the connection and check to see if the issue persists.
3. Change FTP Configurations
In some cases, the FTP settings might not be configured properly due to which the error is being triggered. Therefore, in this step, we will be changing certain FTP configurations. In order to do that:
- Open “FileZilla Client” on the “Client” Computer.
- Click on “Edit” and select “Settings“.

Clicking on “Edit” and select “Settings” - Click on “FTP” under “Connections” and check the “Active” option.
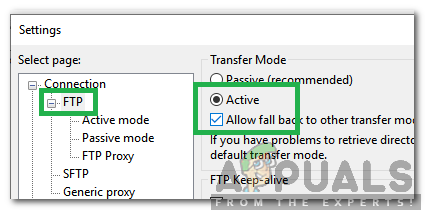
Clicking on FTP and checking “Active” - Check “Allow Fallback to other transfer modes on Failure“.
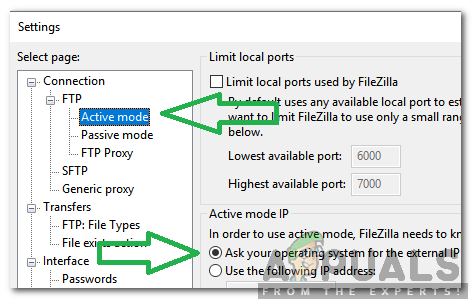
- Click on “Active Mode” under the “FTP” heading and check the “Ask your operating system for External IP Address” option.
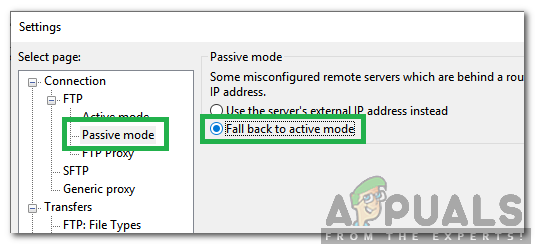
Clicking on “Active Mode” and checking the “Ask your operating system for External IP Address” option - Click on the “Passive Mode” option and check the “Fall Back to Active Mode” option.
Clicking on “Passive Mode” and checking the “Fall Back to Active Mode” option - Click on “OK” to save your settings and check to see if the issue persists.
4. Alter the Host Name
Sometimes, while making a connection to a specific host altering the hostname to initiate a certain protocol might fix the error. Therefore, in this step, we will be altering the hostname. For that:
- Open “FileZilla Client” on the “Client” computer.
- Click on the “Hostname” option.
- Enter the following before the actual hostname of the server
sftp://

Adding “sftp://” before the hostname - Enter the rest of the details and check to see if the issue persists.
5. Change Transfer Mode
Filezilla offers two specific transfer modes to transfer files across the network. It has Passive Mode or Active Mode; Passive Mode allows the server to determine which port is used for data connection, while Active Mode allows the server to assign the same IP address as the FTP client making the request. Follow the steps to change the transfer mode:-
- Click on File from the top and select Site Manager

Go to Site Manager - Select your site and navigate to Transfer Settings from the right pane
- Change Transfer Mode from Passive to Active

Changing Transfer Mode - Once done and check if the issue persists.


None of those solutions are working!