How to Fix ‘Failed to Load the JNI Shared Library’ Error?
Eclipse is an open-source project that employs a Java plugin system, enabling programmers coding in various languages to collaborate smoothly. It is also compatible with many platforms. The error mentioned in the article’s title occur when users attempt to launch Eclipse on their Windows PC.

Basically, Eclipse simply closes after this error occurs. This problem often occurs immediately after users install and attempt to run Eclipse. Numerous methods have been devised to resolve this issue, and we have compiled them in this article for your convenience.
What Causes this Error?
The issue is usually due to one or two common problems encountered by many users who have reported this error online. Nonetheless, various solutions are available to fix the problem. Here is a list of the most frequent causes:
- Mismatched Eclipse and Java Runtime versions – To prevent this error, make sure both Eclipse and Java Runtime Environment (JRE) are either 64-bit or 32-bit versions.
- Concurrent installation of 32-bit and 64-bit Java versions – Eclipse might mistakenly access the incorrect version. Correct this by editing the Path environment variable to point Eclipse to the appropriate Java version.
- Java installation folder unknown to Eclipse – Clarify the location by adding the necessary details to the eclipse.ini file.
1. Edit the ‘eclipse.ini’ File
This issue may occur if Eclipse’s installation cannot correctly identify the path to the Java executable. By editing the `eclipse.ini` file, you directly specify the path to the Java executable that Eclipse should use. This action eliminates the uncertainty Eclipse may face in finding Java on its own, which is the root cause of the JNI shared library error.
- Open the File Explorer by opening any folder and clicking This PC from the left navigation panel, or by searching for this in the Start menu.
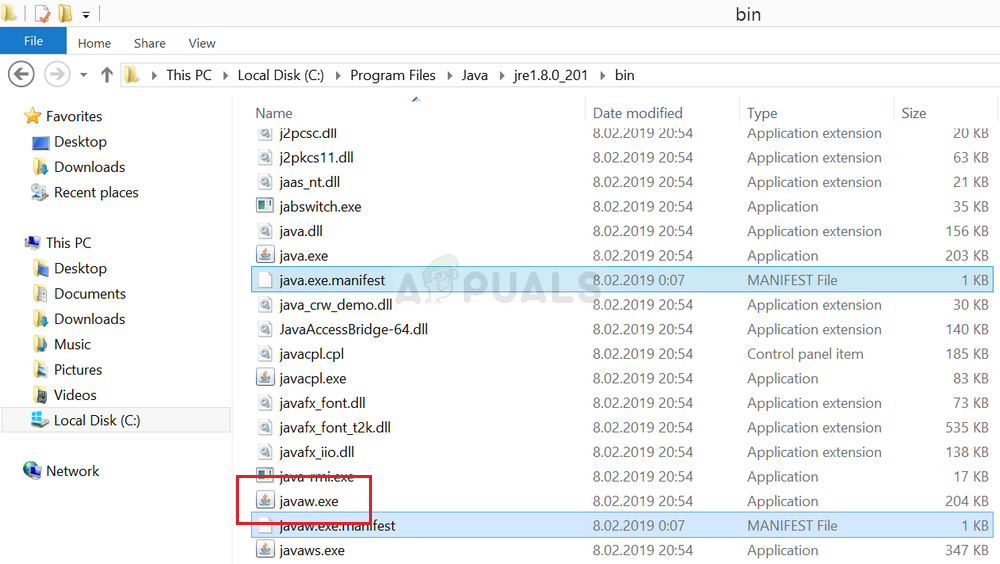
- Double-click your Local Disk to navigate to the Java Development Kit’s installation directory. Proceed to the folder named jdkx.x.xx > bin and find the javaw.exe file. Click the address bar to copy its full path to the clipboard. Replace x.x.xx with the version number of Java you have installed.
- Locate the Eclipse installation folder. This can also be found by right-clicking the Eclipse shortcut and selecting the Open file location option from the context menu.
- Right-click the ‘eclipse.ini’ file and choose to open it with Notepad. Paste the following lines at the beginning of the file, substituting our placeholder with the Java path discovered earlier:
-vm

C:\path\to\64bit\java\bin\javaw.exe
- Attempt to run the program once more and verify if the error still occurs.
2. Make Sure Eclipse and Java Versions Match
If you’re using the 64-bit version of Eclipse, you must also install the 64-bit version of the Java Runtime Environment. The same principle applies to the 32-bit versions. Follow the instructions given below to uninstall one version and install the other as needed.
Uninstalling Java on Windows 10
- Click on the Start menu button located at the bottom-left corner of your screen. Then select Settings, indicated by the gear icon above the power button in the Start menu.
- Locate the Apps section within the Settings app. Search for Java in the list of installed applications, select it, and click on the Uninstall button.
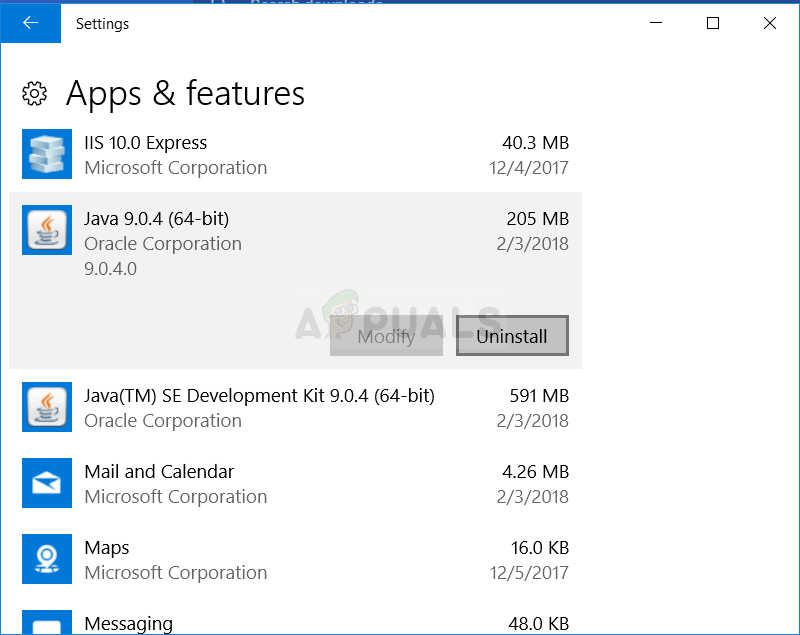
- Follow the on-screen prompts to complete the uninstallation process.
Uninstalling Java on Previous Versions of Windows
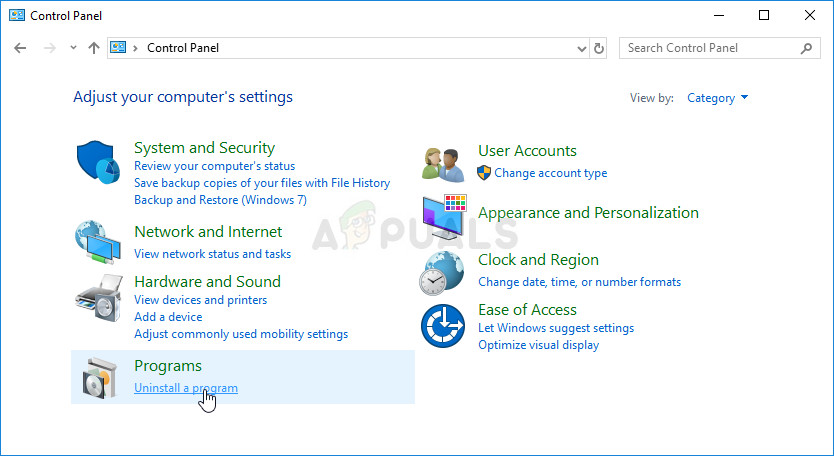
- Click on the Start menu button located at the bottom-left corner of your screen.
- Navigate to Control Panel from the Start menu and toggle the ‘View by’ setting to Category. Then select Uninstall a Program under the Programs section.
- Click on Java in the list of installed programs, hit the Uninstall button, and follow the wizard to complete the process.
Installing Java
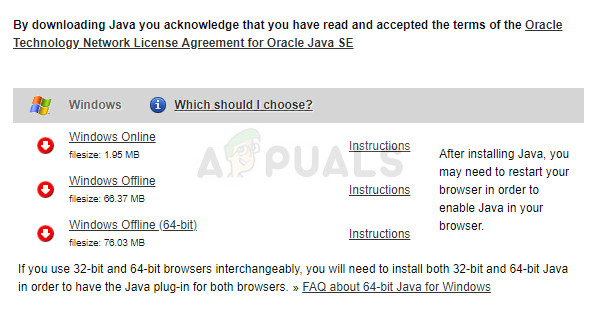
There are two methods for installing Java: using an online installer which downloads a small launcher file to retrieve the entire program or downloading the entire package for offline installation. For the offline method, follow these steps:
- Visit the Manual download page and select Windows Offline. Make sure you differentiate between Windows Offline, the 32-bit version, and Windows Offline (64-bit), the 64-bit version.
- The File Download dialog box will prompt you whether to run or save the download file. Click Save to download it onto your system.
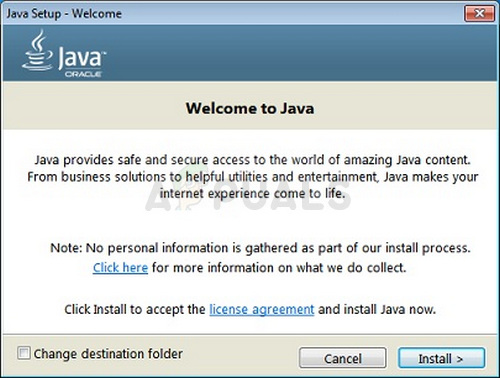
- Close all running applications, including your browser, and double-click the downloaded file to initiate the installation. Click Install, accept the license terms, and proceed with the installation.
- The installer may offer to install additional products from partnered companies. Make sure that the desired programs are selected, and click the Next button to continue with the installation.
- Brief dialogs will confirm the final steps of the installation process; click Close on the last dialog to finalize the installation.
- Check whether the persists after aligning the versions of Eclipse and Java Runtime.
3. Remove the Path Variable for Java
Having both 32-bit and 64-bit versions of Java installed on your computer might confuse Eclipse when determining which version to use. For instance, if a 64-bit version of Eclipse attempts to access the 32-bit Java version, an error will occur. This issue can be resolved without uninstalling either Java version by simply removing the Path variable of the mismatched version.
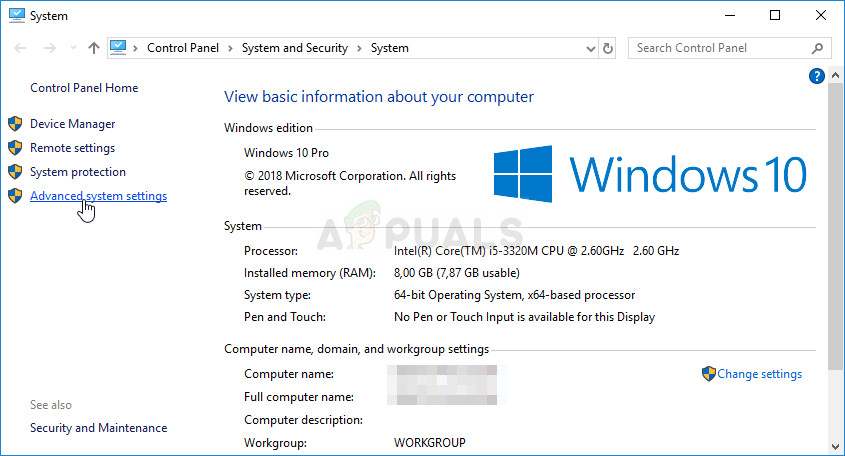
- Right-click on This PC, and select Properties. Then, locate and click on the Advanced system settings button on the right side of the window, and go to the Advanced tab.
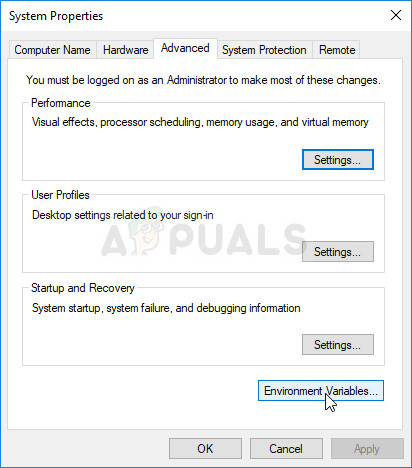
- Click the Environment Variables button at the bottom-right corner of the Advanced tab to access a list of all user variables within the User Variables section.
- Select the Path variable in the System Variables or User Variables section and click Edit. Locate the Java folder’s path, highlight it, and then select Delete from the sidebar menu. This should be the Java installation path that does not match your Eclipse version.
- After making these changes, try opening Eclipse to check if it runs correctly.


