How to Fix ‘Failed to Bind to Port’ Error on Minecraft?
Minecraft is a sandbox construction game that has been developed by Mojang AB. It has been existent and popular ever since its release and has recently acquired a renewal in its popularity. Players can also create their servers and host games for their friends. However, quite recently, a lot of people have been facing the “Failed to Bind Port” Error while running their servers.
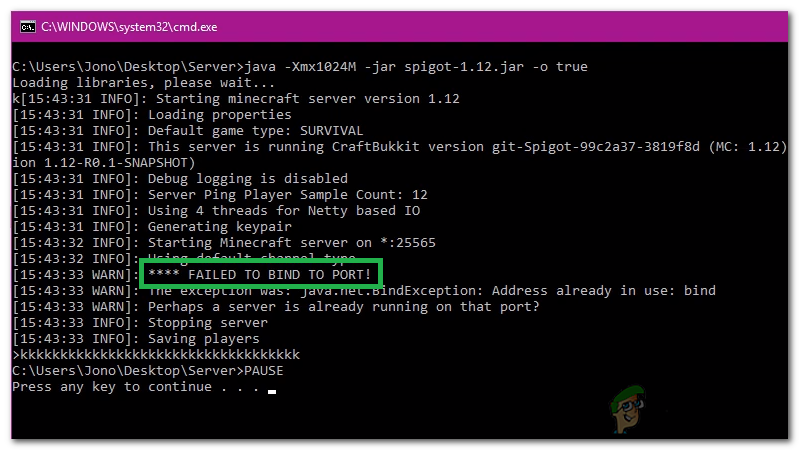
What Causes the “Failed to Bind to Port” Error on Minecraft?
After receiving numerous reports from multiple users, we decided to investigate the issue and devised a set of solutions to fix it completely. Also, we looked into the reasons due to which it is triggered and listed them as follows.
- IP Issue: In some cases, if you have set a specific IP Address for the server to use, this error can be triggered. The IP Address and the port number might already be in use by another server hosted by somebody else due to which this issue might be triggered.
- Java Binary: If there is an instance of Java running in the background, this issue can be triggered. It seems to be a glitch where sometimes Java runs in the background and the error is triggered while running the server.
Now that you have a basic understanding of the nature of the problem, we will move on towards the solutions. Make sure to implement these in the specific order in which they are provided to avoid conflict.
Solution 1: Terminating Java
This issue was triggered in some cases due to an instance of Java running in the background. Therefore, in this step, we will be using the Task Manager to identify and eliminate any instance of Java running in the background. For that:
- Press “Windows” + “R” to open the Run prompt.
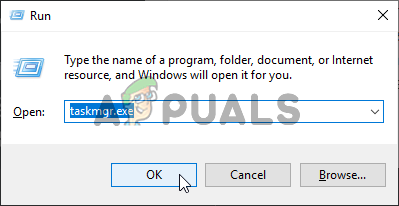
Running the Task Manager - Type in “taskmgr” and press “Enter” to open the Task Manager.
- Click on the “Processes” tab and look for any instance of Java running in the background.
- If there is one, click on it and select the “End Task” Button to eliminate it.
- Make sure that there isn’t even a single application named “Java (TM) Platform SE Binary” running in the background.
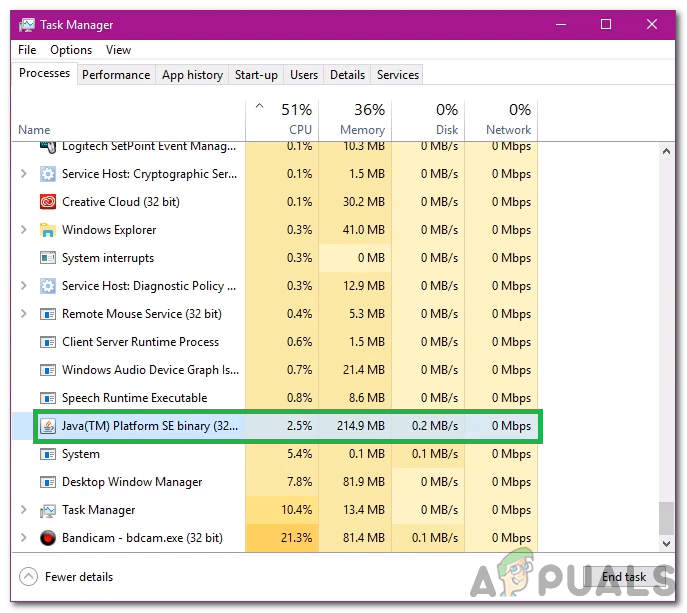
Selecting Java (TM) Platform SE Binary and clicking on the “End Task” button - Start the server and check to see if the issue persists.
Solution 2: Changing the IP Configuration
In some cases, the combination of the IP Address and the port number that is being used by the computer to create the server might already be in use by another server. Therefore, in this step, we will be configuring the server in such a way that it will automatically identify a valid IP Address. For that:
- We will need a text editor to edit the server files.
- Navigate to this address and download the appropriate version of Notepad++.
- Once downloaded, install it by following the onscreen prompts.
- Once installed, open the “Server” Folder for Minecraft and right-click on the “Server.properties” file.
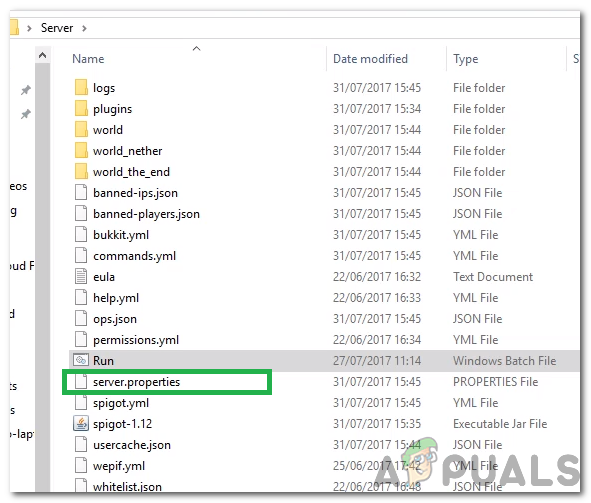
Server.properties file inside the server folder for Minecraft - Select the “Edit with Notepad++” option.
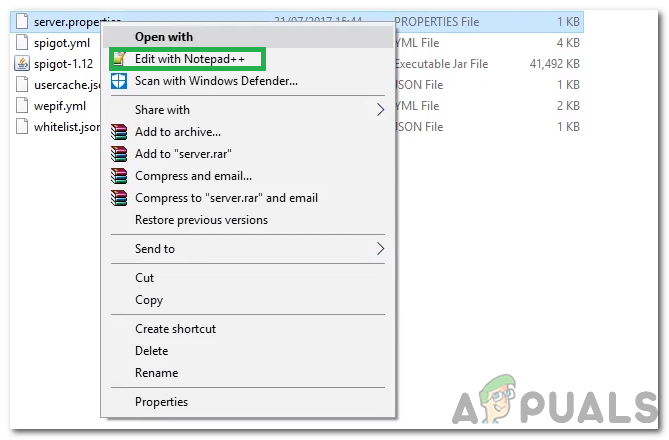
Clicking on the “Edit with Notepad++” option - Find the “Server-ip=” option.
- There might be an IP Address written in front of this option.
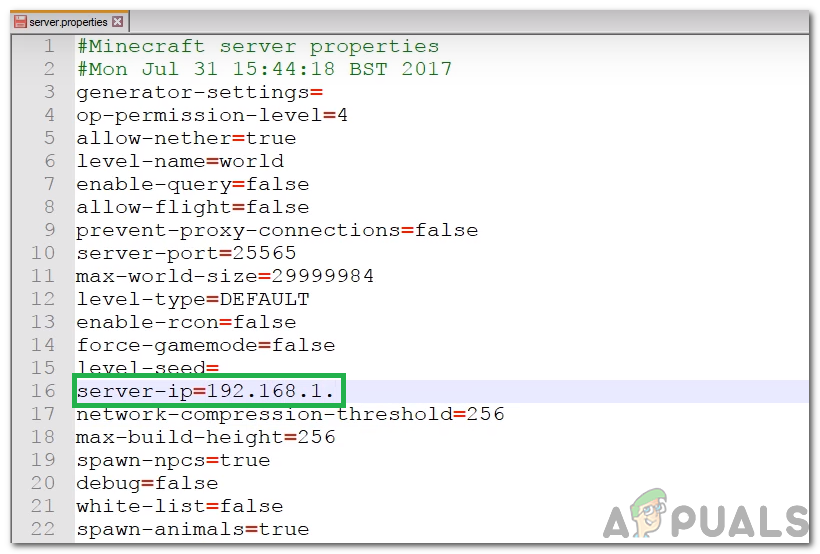
There is an IP Address written in front of the option - Erase the IP Address in front of the option and save your changes.
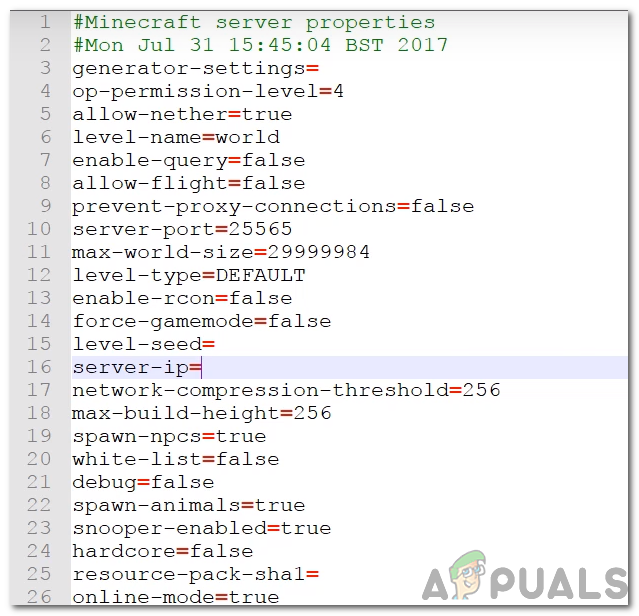
Erasing the address - Run the server and check to see if the issue persists.
Note: If your server has been hosted by a hosting service, it is best to contact them and get this issue sorted from their end. Also, if the above methods don’t solve your issue contact your ISP and ask them to change your IP Address and try again.


