How to fix error 0xc000021a in Windows 8 and 10
Windows 8/10 had a number of issues at the time when it was first released. After a while, when Microsoft started pushing updates, some errors were solved, but there were plenty of them that weren’t. One of those errors is associated with the hex code 0xc000021a.
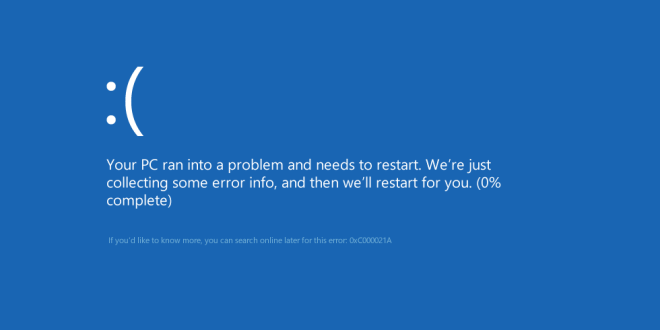
It states that Your PC ran into a problem and needs to restart. This error appears inside a blue screen of death. So, it may have some serious issues damaging the internal structure of Windows OS. This error also persists even after restarting the PC. Performing a system restore also doesn’t work. So, you would definitely want to know the reason behind this critical error message.
Reasons Behind the Error 0Xc000021A:
This issue arises when Windows is updated. So, after the update, it doesn’t boot to Windows and displays this blue screen of death along with the error. There are two files that are the major cause of this error. These files are listed below.
- winlogon.exe: As the name of the file represents, this file is responsible for the login and logout operations inside Windows. This file can be damaged due to mismatch of System Files or 3rd party software. If this file gets damaged, then this error causes the PC not to boot to the Windows login screen.
- csrss.exe: The second file causing this error is Csrss.exe. This .exe file belongs to Microsoft server or client. So, this file can also be damaged resulting in this error.
Method #1: Repair Corrupt System Files
Download and run Reimage Plus by clicking here to scan for corrupt files. If corrupt and missing files are found, repair them.
Method #2: Boot Windows Manually
In order to resolve this problem, you have to boot Windows manually. Booting Windows in safe mode wouldn’t work in most cases. So, you have to boot it using the force drivers to have signature disabled option available inside Advanced Boot Options.
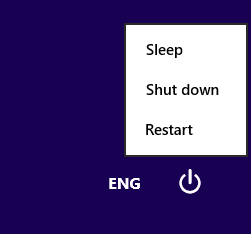
- Restart the PC from Windows holding the Shift key and clicking on Restart. If you can’t access the Restart option on your Windows, then you might need to boot through a Windows bootable USB.
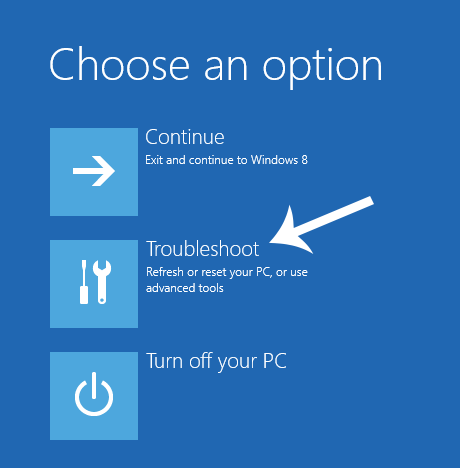
- It will take you to an option screen. Select Troubleshoot to access the advanced tools.
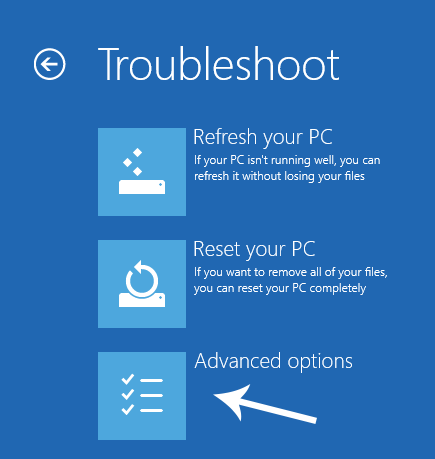
- From the next screen, choose the Advanced option.
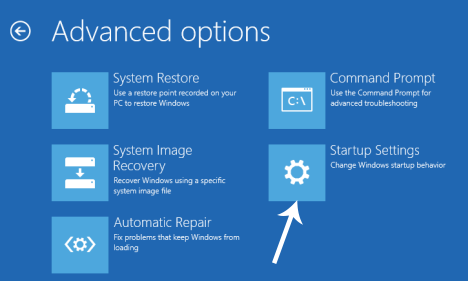
- On the next screen, you will see plenty of options. All you need to do is click on Startup Settings as shown in the picture below.
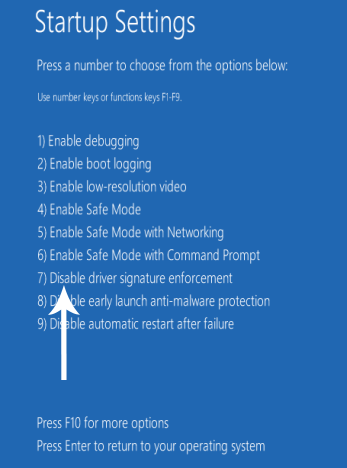
- On the startup screen, there would be a number of options to select from. Press F7 labeled as Disable driver signature enforcement.
Your PC would restart with the option you selected, and now, you can tweak your PC using different options.
Method #3: Fix the Issue using SFC Scan
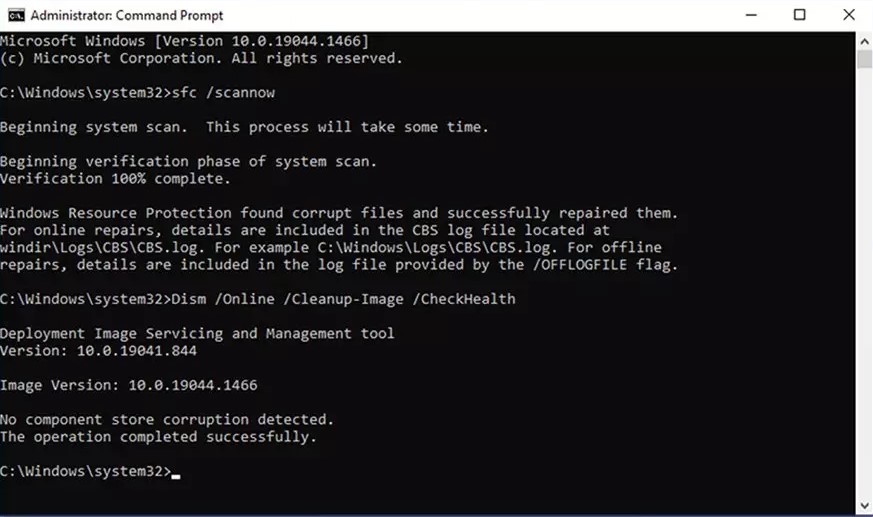
If the above-mentioned method doesn’t solve your issue, you can use System File Checker Scan in order to resolve issues related to corrupted files causing this error. Follow this link to run a full SFC scan on your PC.
Method #4: Reset the computer’s BIOS
Many users affected by this issue have reported success with resetting their computers’ BIOS. A computer’s BIOS can be reset by simply removing the CMOS battery from its motherboard for a couple of minutes, although this trick doesn’t work with laptops as their motherboards are not readily accessible.
- Shut the computer down.
- Remove any and all power cables from the computer, making sure that the computer’s access to electricity is completely cut off.
- Pry open the computer’s chassis.
- Locate the computer’s CMOS battery (it will be found somewhere on the computer’s motherboard) and remove it.
- Wait for around 1-2 minutes.
- Replace the battery once you have waited long enough.
- Put the computer’s casing back together.
- Start the computer up and check to see whether or not it successfully boots into Windows.
Method #5: Replace any and all corrupted registry hive files with backups
Your computer may be affected by this issue because Windows tries to access essential registry hive files when it boots up (like it is supposed to do) but is unable to access them because they have been damaged or corrupted. If that is the case, replacing any and all corrupted registry hive files with their backups should fix the issue. However, since your computer won’t boot up, you can’t replace the damaged registry hive files via the File Explorer. You are going to have to do so using a Command Prompt in the Windows Recovery Environment.
In order to get into the Windows Recovery Environment, though, you are going to need a Windows installation USB or disc containing the installation files for the same version of Windows as the one that’s currently installed on your computer.
- Insert the Windows installation disc or USB into the affected computer and restart it.
- As soon as the computer starts booting up, get into its BIOS settings and configure the computer’s boot order to boot from the installation media instead of its HDD/SSD. Instructions for getting into the computer’s BIOS will vary from one computer to another but will almost always be found at the first screen you see when the computer boots up.
- Save the changes and exit the BIOS.
- If prompted to do so, press any key to boot from the installation media.
- Select your language, time zone, and keyboard layout preferences and then click on Next.
- When you reach a window with an Install now button at its center, look for and click on Repair your computer in the bottom left corner of the window.
You should now arrive at the Startup Options screen. Once you are here, you need to:
- Click on Troubleshoot > Advanced options.
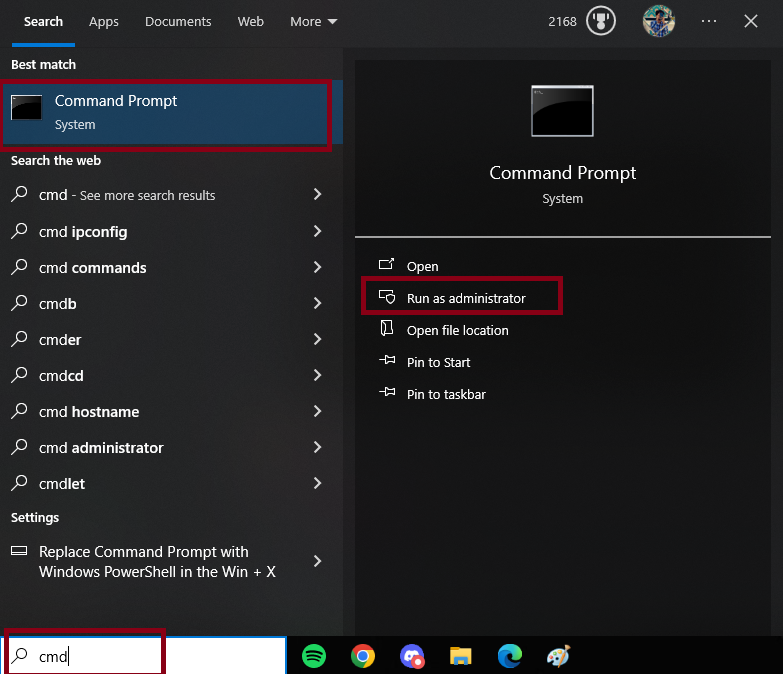
- Click on Command Prompt, and a Command Prompt will be launched.
- Type c: into the Command prompt and press Enter. If Windows is installed on a partition of your computer’s HDD/SSD other than the C drive, replace c with the drive letter that corresponds to the partition of the HDD/SSD that Windows is installed in.
- Type cd windows\system32\config into the Command Prompt and press Enter.
- Type dir into the Command Prompt and press Enter. The Command Prompt will now display all the files and folders present in the directory.
- One by one, for each file (not folder, only file) present in the directory, type the ren (File Name) (File Name).old command and press Enter.
For example: Type in ren SYSTEM SYSTEM.old for the SYSTEM file in the directory, and ren SECURITY SECURITY.old for the SECURITY file in the directory.
- Once you have renamed each of the files in the directory (creating backups of each of them), type cd RegBack into the Command Prompt and press Enter.
- Type dir into the Command Prompt and press Enter. You will now see all of the files and folders present in this directory.
- Now type the following commands one by one:
copy /Y SOFTWARE
copy /Y SAM
copy /Y SYSTEM
and any other folder that was renamed, we now need to put the registry hives back for the folders we renamed.
Once done, close the Command Prompt and get out of the Windows Recovery Environment by typing EXIT and pressing ENTER. Remove the Windows installation media and restart the computer to see whether it is able to successfully boot up without running into the 0xc000021a screen.