How to Fix Error 0x80300024 When Installing Windows?
Error code 0X80300024 is accompanied by an error message stating “Windows is unable to install to the selected location.” This error indicates a software-related or hardware-related issue, with the hard disk partition where the Windows installation is being attempted.
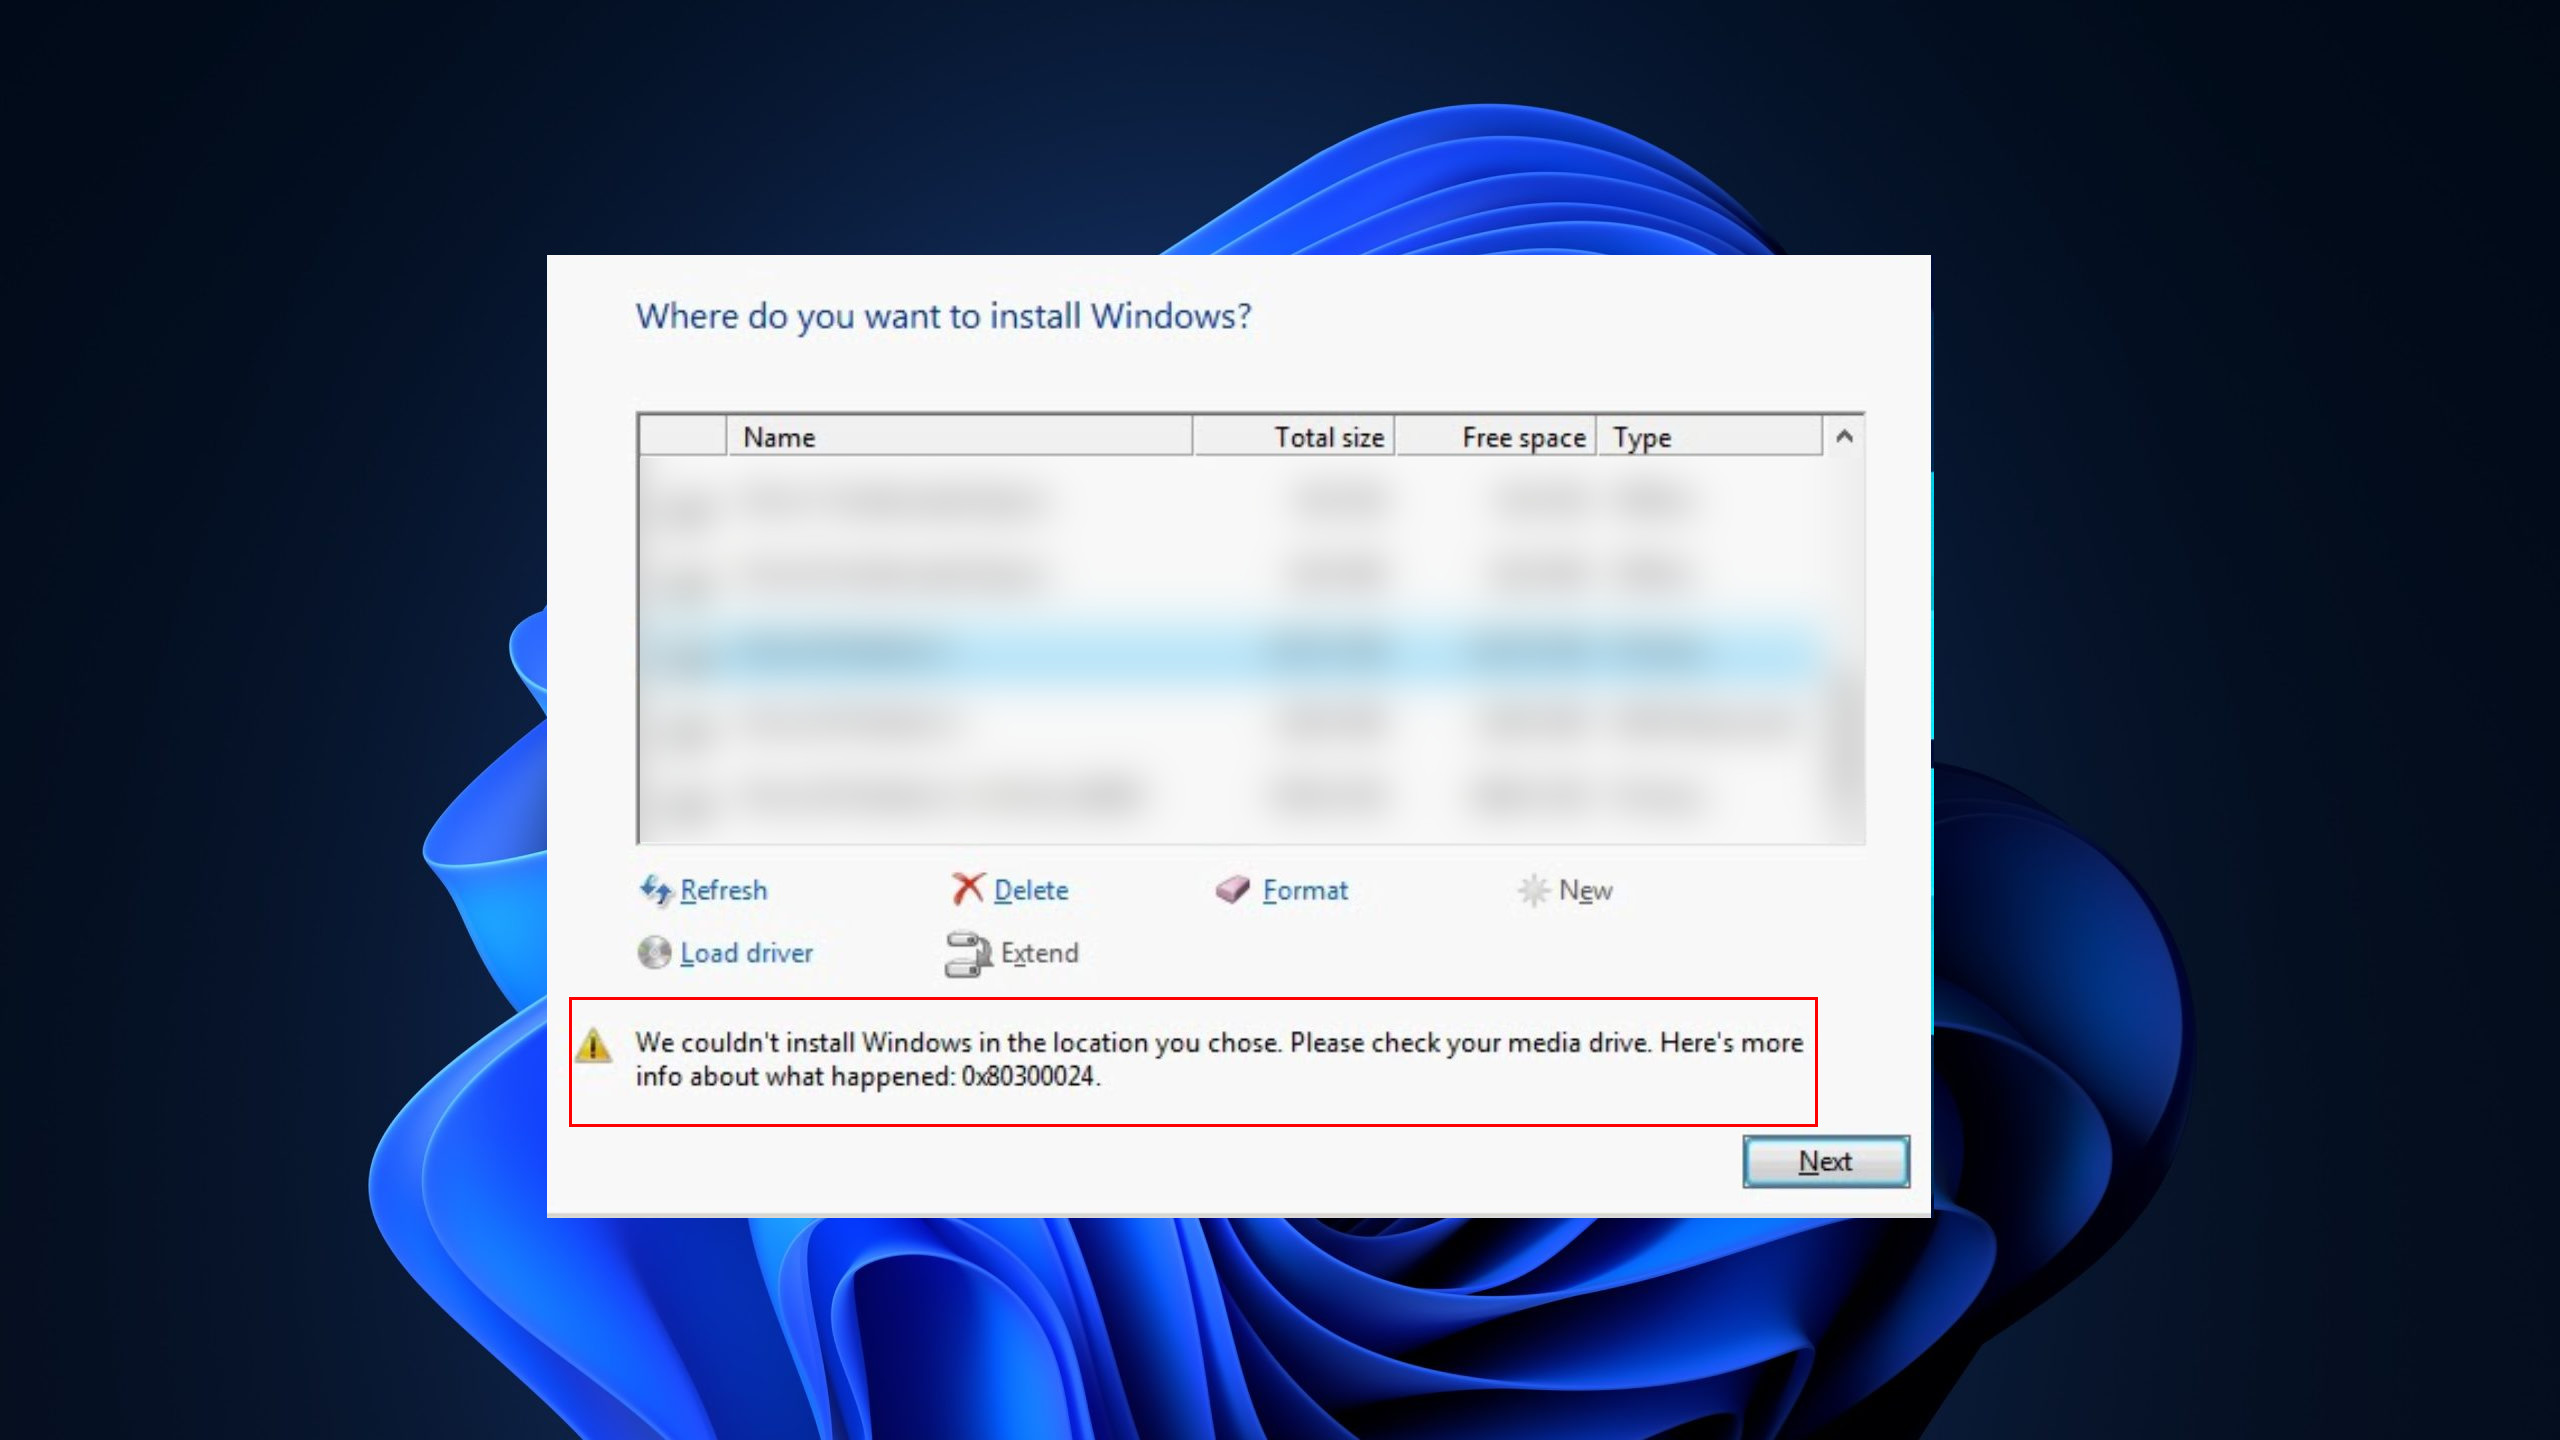
Possible causes for this error include insufficient disk space on the destination drive, damaged or corrupted installation media, or a faulty hard drive.
Below are some of the most effective solutions to resolve error code 0X80300024 and successfully install Windows:
1. Plug Installation Media in a Different Port
Using a different USB port can resolve issues related to port malfunctions or compatibility problems between USB versions. If the original port is faulty or not providing sufficient power or data transfer rate, the installation process can fail, causing error codes like 0X80300024.
Switching ports can help establish a stable connection and smooth data transfer for the installation media.
2. Prioritize Target Drive in Boot Sequence
Setting the target drive as the primary option in the boot order makes sure that the computer prioritizes it when booting up.
This can help resolve installation issues because it allows the Windows installation process to communicate directly with the intended drive from the start, minimizing potential conflicts with other drives or devices that might be trying to boot simultaneously.
- Power on your computer.
- When you see the first screen on boot, look for instructions to press a specific key (often Delete, F1, or F2) to access the BIOS/Setup. Press the indicated key.
- Within the BIOS, find the boot order/configuration, usually located under the BIOS’s Boot tab.
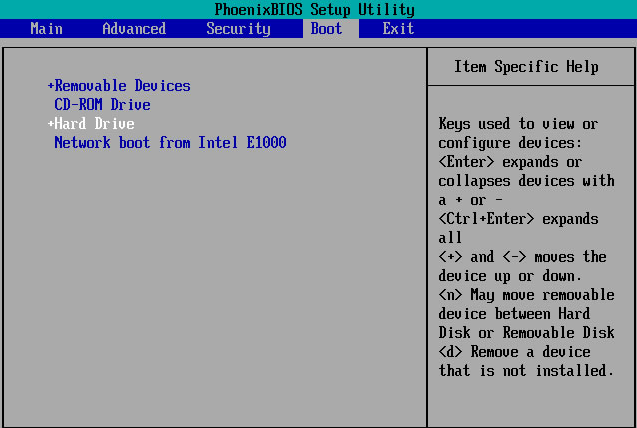
- Adjust the boot order to position the hard drive for the Windows installation at the top.
- Exit the BIOS, saving the changes made.
3. Format the Installation Location
Formatting the installation location effectively clears any existing data or corruption on the target partition or drive, which might be causing the installation issue.
This step creates a clean slate, removing potential problems that can interfere with the Windows installation process.
Warning: Formatting will permanently erase all data on the partition, so you should ensure that any important files are backed up before proceeding with this action.
- Insert the bootable Windows installation media into your computer and restart it. If you lack installation media, you will need to create it.
- On startup, boot from the installation media.
- Set your language, keyboard layout, and other preferences.
- Select Custom when prompted for the installation type.

- Select Drive options (advanced) on the screen where you choose the installation location.
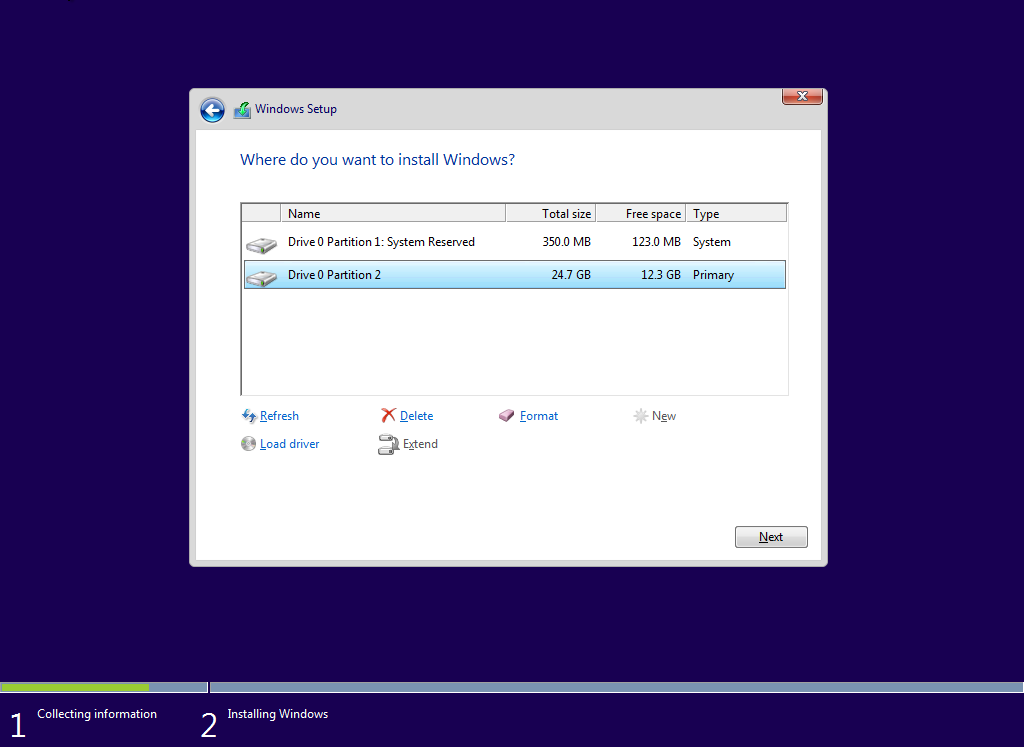
- Choose the target partition and click Format.
- Confirm the formatting.
- Once formatted, click Next to proceed with the installation.
- If the issue persists, instead click Delete to turn the drive into unallocated space and then recreate the partition to install Windows.
- If the error continues, delete the partition again, leave the space unallocated, boot from the installation media, and select this space to install Windows.
- Verify if the error has been resolved.
4. Clean the Drive using DiskPart
We can use DiskPart’s clean command to clear the disk’s partition table, resolving potential corruptions or misconfigurations that might prevent the Windows installation process from executing.
When the drive is cleaned, it becomes a raw, unallocated space, allowing you to set up fresh partitions for a new Windows installation. This could resolve any problems related to disk structure that were preventing the installation.
Note: This process will erase all data on the disk.
- During setup, identify the System partition and make a note of its label.
- Press Shift + F10 to open the command prompt, and then type-in Diskpart.
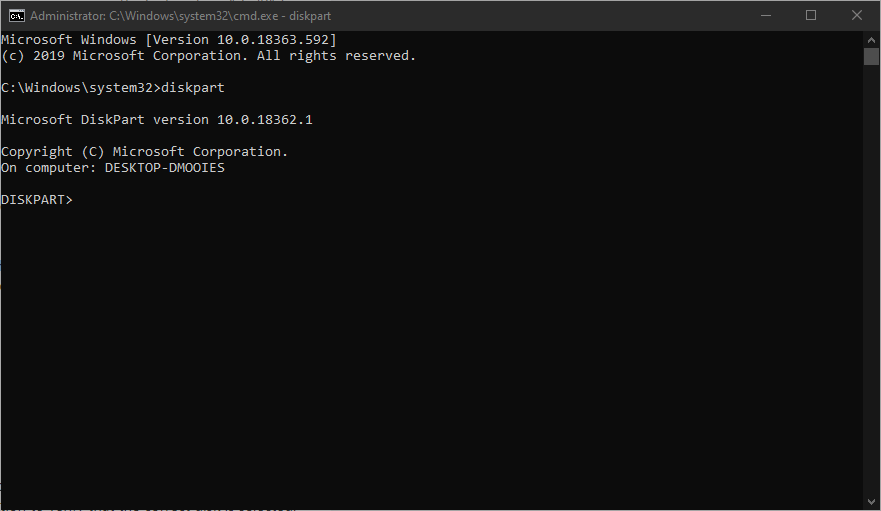
Opening the Diskpart tool - Type List disk to display all connected disks.
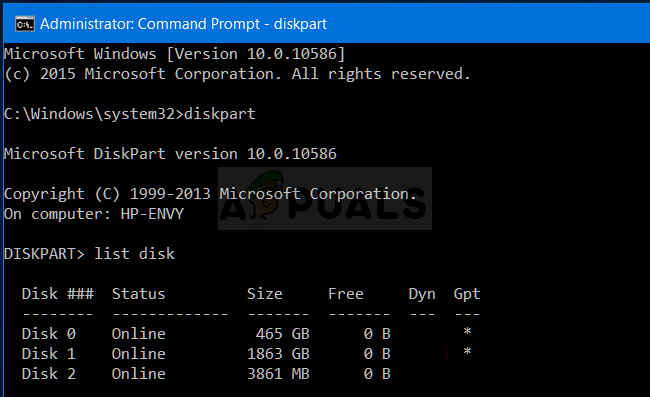
Listing available disks in DISKPART - Type Select Disk [number of the partition]. (for example, Select Disk 1 if it is Disk 1).
- Type Clean and press Enter.
- Reattempt the installation to see if the issue has been resolved.
If none of the solutions work, your hard drive may be failing or has already failed. A malfunctioning hard drive can prevent the installation of an operating system like Windows. In this case, replacing the hard drive with a new one should eliminate error code 0X80300024.
great, man. You saved my life. Thanks