How to Fix Error 0x8007007e in Windows?
You can get the 0x8007007e error while upgrading to Windows 10 or performing a Windows update. This error usually prevents you from upgrading or updating your system. Sometimes the error shows up with a “Windows have encountered and unknown error” or “Failed to install the update/build. Please Try again” message as well.
There are usually two things that can cause this issue. The first one is any third party software, especially an antivirus, preventing the update or upgrade. The second is a corrupted windows file or a system file or a registry file.
The issue can be solved by checking what is causing the issue. If a third party software is the reason behind the error then disabling it during the upgrade solves this problem. But if that doesn’t solve the problem then fixing Windows files solves the problem.

First try the method 1 which will most likely solve the issue. If that doesn’t solve the problem then try method 3 to check if a software or service is causing the problem. At the end, try the method 2 which will definitely solve the issue.
Method 1: Disable 3rd party Antivirus
- Right click the antivirus icon in the system tray (on the right bottom corner) and select Disable.
- If that doesn’t work, double click the antivirus icon. Select the Disable option from the pop up.
Now try to upgrade and see if the issue is still there.
Note: Having an antivirus is important as it protects your computer from threats. Do not forget to enable your antivirus after you are finished upgrading the Windows.
To enable the antivirus, follow these steps
- Right click the antivirus icon in the system tray (on the right bottom corner) and select Enable.
- If that doesn’t work, double click the antivirus icon. Select the Enable option from the pop up.
Method 2: Manually reset Windows Update Components
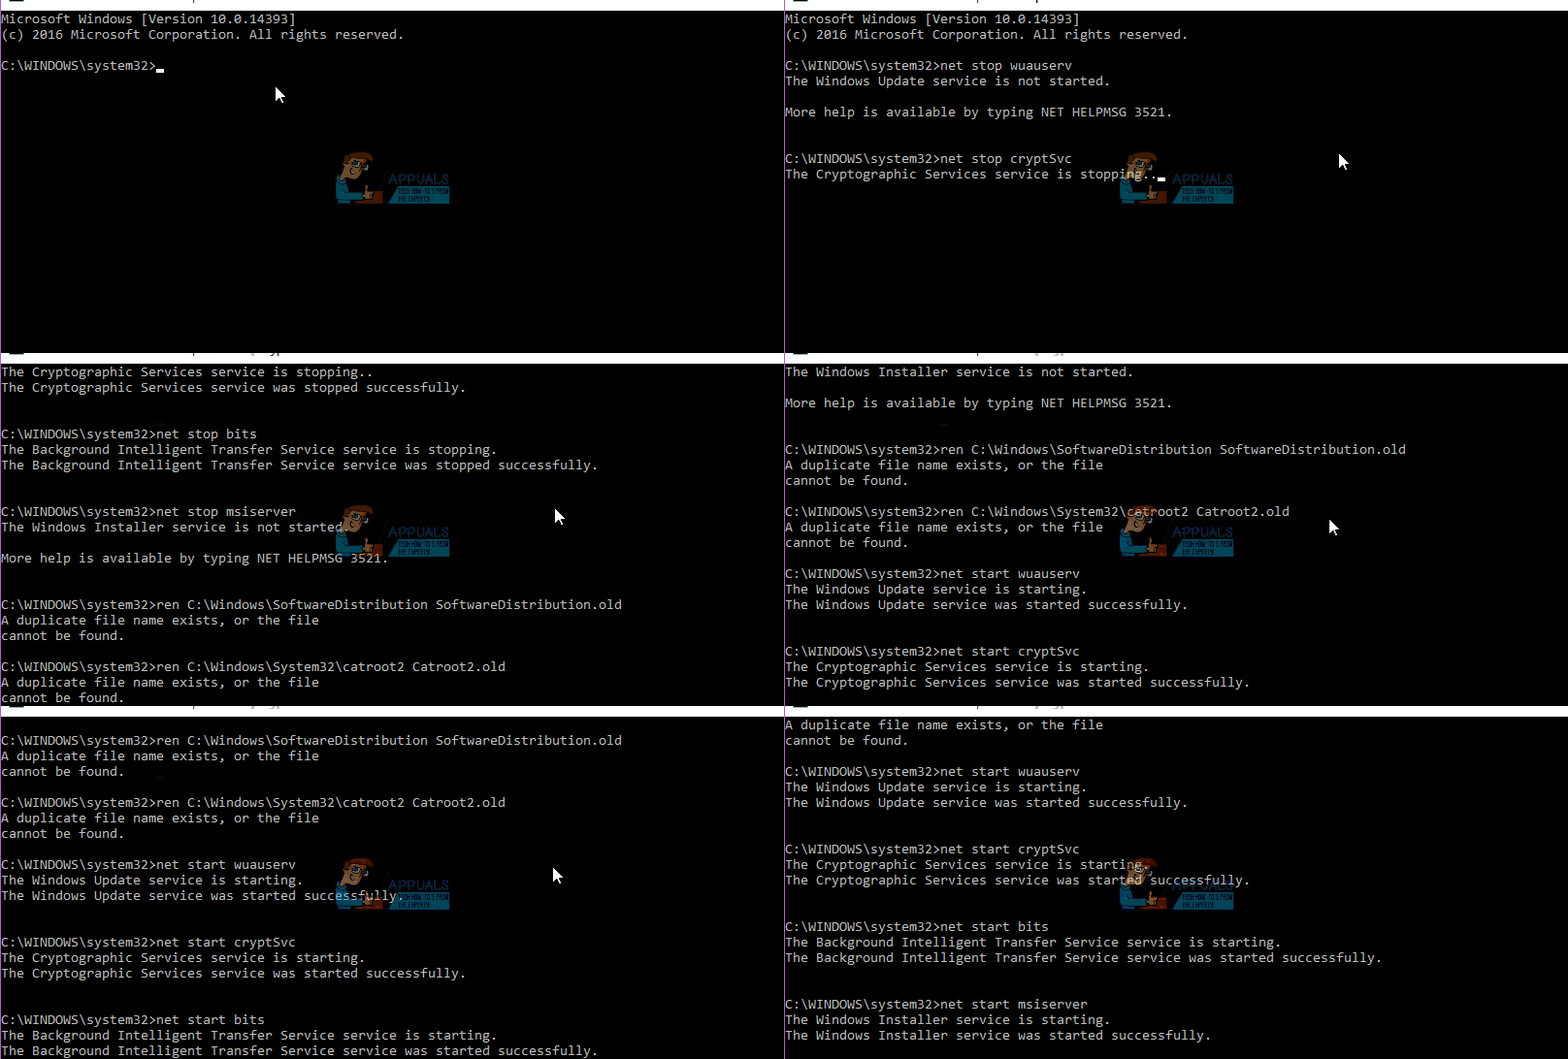
In this method we will manually restart the BITS, Cryptographic, MSI Installer and the Windows Update Services and rename the SoftwareDistribution and Catroot2 folders which definitely solves the problem.
- Hold Windows Key and press X (release Windows Key). Click Command Prompt (Admin)
- Type net stop wuauserv and press Enter
- Type net stop cryptSvc and press Enter
- Type net stop bits and press Enter
- Type net stop msiserver and press Enter
- Type ren C:\Windows\SoftwareDistribution SoftwareDistribution.old and press Enter
- Type ren C:\Windows\System32\catroot2 Catroot2.old and press Enter
- Type net start wuauserv and press Enter
- Type net start cryptSvc and press Enter
- Type net start bits and press Enter
- Type net start msiserver and press Enter
- Close the Command Prompt
Sometimes one of the services will start on its own so you don’t have to worry. Now try to upgrade the Windows again and it should work without any problems.

Method 3: Clean Boot
Performing a clean boot will help you identify if the problem is because of the interference of a third party software or a service.
- Hold Windows Key and press R (release Windows Key)
- Type msconfig and press Enter
- Click the Services tab
- Check Hide All Microsoft Services and click Disable All (if the button is not greyed out)
- Click Startup tab and select Disable All. If there is not disable all option then click the Open Task Manager. Now select each task and click Disable.
- Now restart your computer
- Check Don’t show this message or launch the System when the System Configuration Utility window appears.
You can also view and read detailed steps to clean boot.
NOTE: Check step 5 before posting. The step 5 wasn’t working for me so I added what I thought might work
Now check if you can download and install the update without any issue.