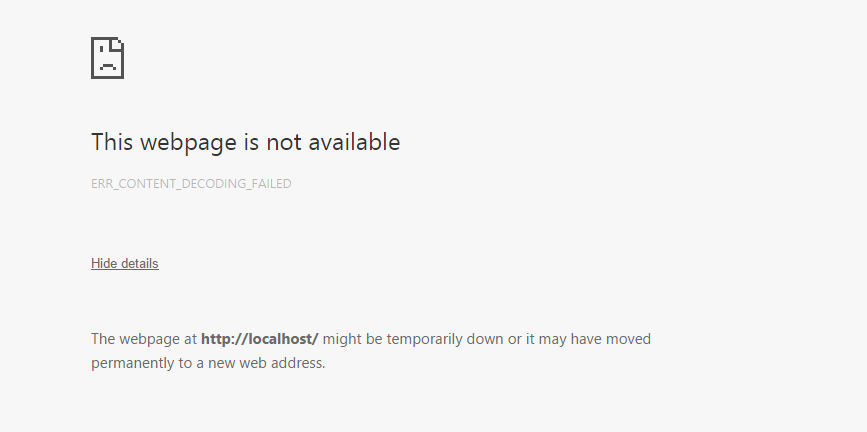
How to Fix ‘ERR_CONTENT_DECODING_FAILED’ Error
The error “ERR_CONTENT_DECODING_FAILED” is seen on almost all browsers. Sometimes, it pops up while loading a particular website but it can also start appearing when you migrate to a new server. This error persists even after refreshing the page a couple of times. In this article, we will discuss some of the reasons due to which this error might be triggered and also provide viable solutions to eradicate it completely.
What Causes the “ERR_CONTENT_DECODING_FAILED” Error?
Unfortunately, the reason due to which the error is triggered can’t be pinpointed to a single culprit. However, some of the most common reasons are listed below
- False Encoding Claim: In some cases, HTTP’s request headers might claim that the content is gzip encoded when it’s not. This can cause conflict during the decoding process and trigger the error.
- Browser’s Cache/Cookies: Cache is stored by applications to decrease loading times and to provide a smoother experience. Cookies are stored by sites for similar purposes. However, over time they might get corrupted and interfere with important elements of the browser.
- Proxy/VPN: Sometimes, a proxy or a VPN can cause issues during the decoding process and prevent the browser from loading the webpage.
- Socket Pools: If socket pooling is enabled for your browser, it doesn’t create a new socket every time; instead, it maintains a pool of sockets. However, this socket pool might get corrupted and it might prevent the decoding process from functioning correctly.
- DNS Configurations: Similar to the Socket Pools, DNS information/configurations are stored on the computer instead of creating new ones each time, This helps in enhancing performance and increasing speed. However, over time this can be corrupted and it might interfere with important elements of the browser.
- MTU Limit: In certain cases, the MTU limit is not set for the adapter and it causes conflicts during the decoding process.
- Windows Firewall: It is possible that the Windows Firewall might be blocking the connection to the site due to which this error is triggered.
- Wrong DNS Address: If the Wrong DNS Configurations are being obtained by Windows, it can prevent the connection from being established due to which this error might be triggered.
- Network Adapter Drivers: In some cases, the Network Adapter Drivers aren’t installed on the system correctly. Due to this, the connection to the site might not be established correctly and it might trigger this error.
Now that you have a basic understanding of the nature of the problem, we will move on towards the solutions. Make sure to implement these in the specific order in which they are presented.
Solution 1: Disabling G-Zip Encoding
Sometimes, the G-Zip encoding is the reason due to which this error is triggered. Not many browsers provide the customization to disable this without using any third-party extensions. Therefore, in this step, we will be downloading and installing an extension and then disabling G-Zip encoding using that extension.
- Open Chrome and navigate to this address.
- Click on the “Add to Chrome” button and then select “Add Extension” option in the prompt.

Clicking on the Add to chrome option - The extension will now automatically be added to Chrome.
- Open a new tab and click on the extension’s icon on the top right side of the window.

Clicking on the extension’s icon - Click on the blank space under “Request Header” heading and type in the following command
accept-encoding - Type in the following command in the Value option
gzip;q=0,deflate;q=0
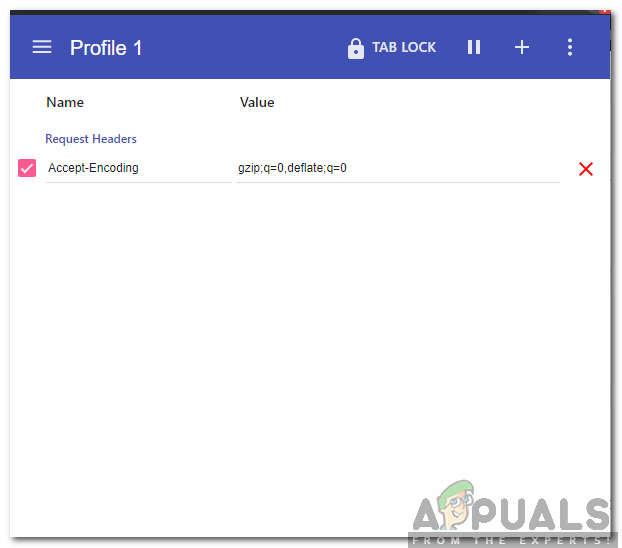
Typing in the commands - Now G-Zip encoding has been disabled, If you are experiencing trouble with a particular site then it is recommended to open that site and repeat the above process.
- Once done refresh the page and check to see if the issue persists.
Solution 2: Clearing Browser History and Cookies
Sometimes, the browser’s history or Cookies can be corrupted. Due to this, the encoding process can be affected. Therefore, in this step, we will be clearing the browser’s history and Cookies. Depending upon your browser, the process can differentiate a little bit. The methods to clear the history and Cookies for some of the most commonly used browsers are listed below.
For Chrome:
- Launch Chrome and open a new tab.
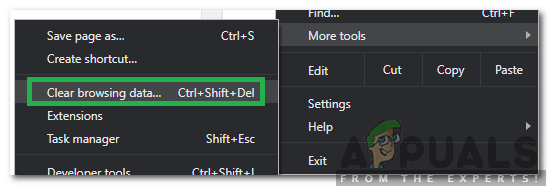
- Press the three vertical dots in the top right corner and hover the pointer to “More Tools“.
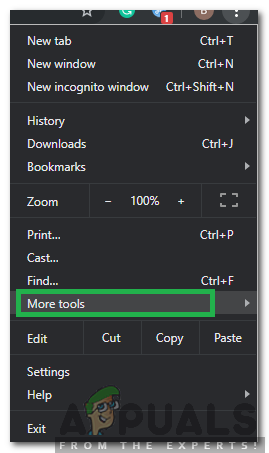
Hovering the pointer to the “More Tools” option - Select “Clear Browser History” from the menu.
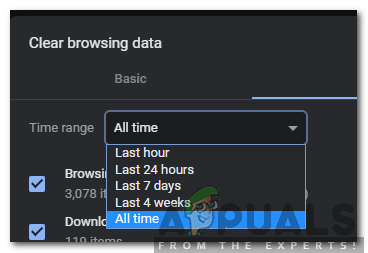
Selecting “Clear Browsing Data” from the menu - Click on the “Time Range” dropdown and select “All Time“.
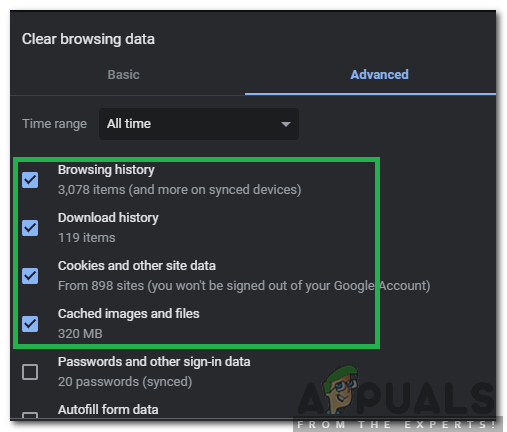
Selecting “All Time” as the Time Range - Click on “Advanced” and check the first four options.
Clicking on Advanced and checking the first four options - Click on the “Clear Data” option and select “Yes” in the prompt.
- Check to see if the issue persists.
For Firefox:
- Launch Firefox and open a new tab.
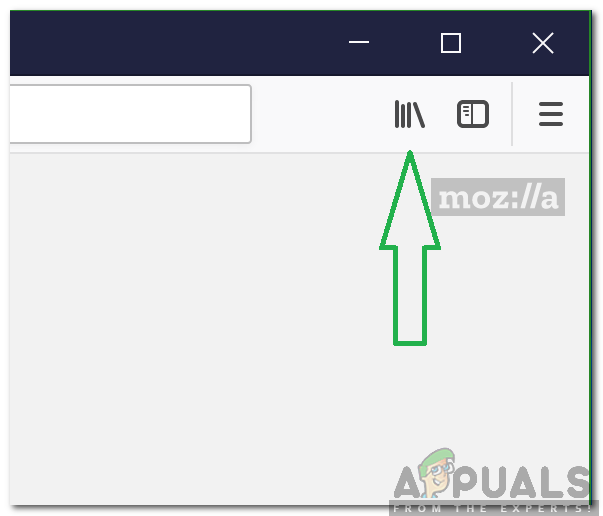
- Click on the “Library” icon on the top right side and select the “History” option.
Library button Firefox - Click on the “Clear Recent History” button and click on the dropdown next to the “Time range to Clear” option.
- Select “All time” and check all the boxes under the “History” heading.
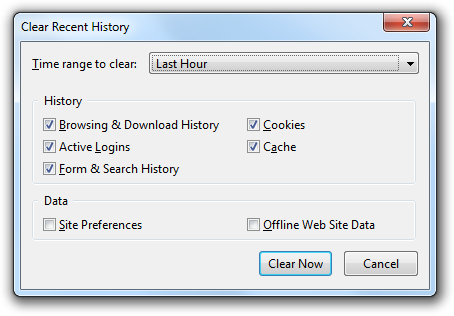
Checking all the boxes - Click on the “Clear Now” option and select “yes” in the prompt.
- The Cookies and history for your browser have now been cleared, check to see if the issue persists.
For Microsoft Edge:
- Launch the browser and open a new tab.
- Click on the three vertical dots on the top right corner.

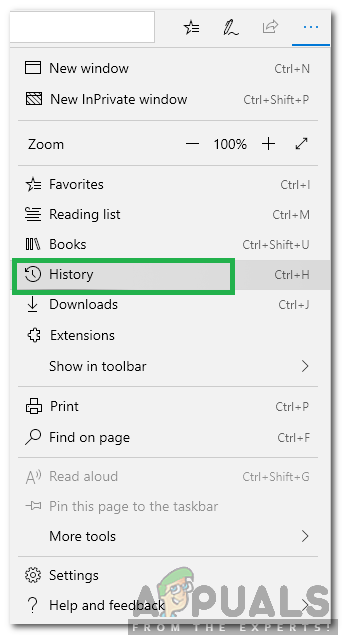
Vertical dots on the top right corner - Click on the “History” option and select the “Clear History” button.
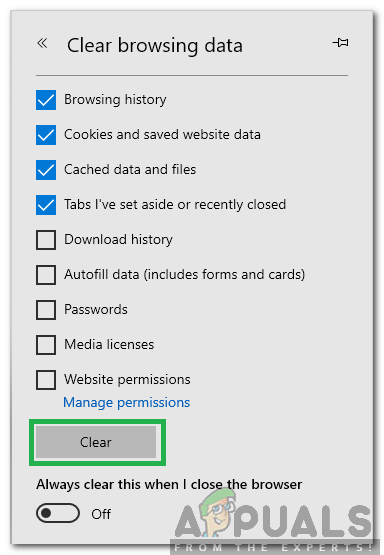
Clicking on the “History” option in the menu - Check the first four options and click on the “Clear” option.
Checking the first four options and selecting “Clear” - Check to see if the issue persists.
Solution 3: Disabling Proxy/VPN
If you are using a proxy or VPN while connecting to the internet it might affect your connection to some sites and the decoding process might not proceed smoothly. Therefore, in this step, we will be disabling the Windows’ default proxy that might be activated. It is up to you to disable the VPN if you are using one. In order to disable the proxy:
- Press the “Windows” + “I” keys simultaneously.
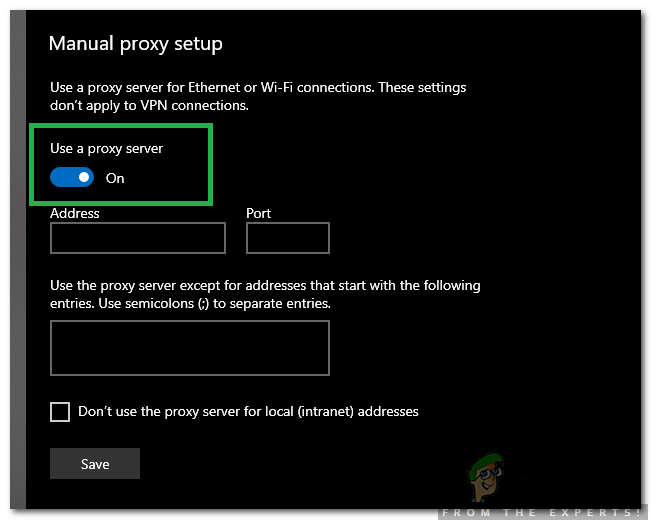
- Click on the “Network & Internet” option and select “Proxy” from the left pane.

Selecting Proxy from the left pane - Click on the “Use a Proxy” button to toggle it off.
Clicking on the toggle to turn the proxy off - Check to see if the issue persists.
Solution 4: Flushing the Socket Pools
The Socket Pools stored by the browser can sometimes be corrupted. Therefore, in this step, we will be flushing the socket pools. In order to do that:
- Launch Chrome and open a new tab
- Type in the following command in the address bar and press enter.
chrome://net-internals
- Click on the “Sockets” option in the left pane and select the “Flush Socket Pools” option.

Clicking on the sockets option and then selecting “Flush Socket Pools” - Check to see if the issue persists.
Note: This process is only valid for Chrome
Solution 5: Resetting Winsock
There are certain internet configurations that are stored on the computer. Sometimes, these configurations can get corrupted and they need to be refreshed. In this step, we are going to be resetting the Winsock configurations. For that:
- Press “Windows” + “R” keys simultaneously to open the Run prompt.
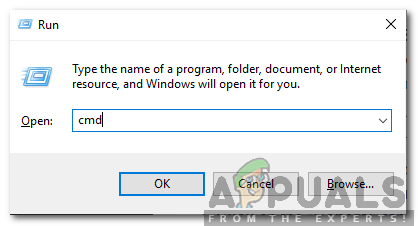
Opening Run Prompt - Type in “cmd” and press “shift” + “Ctrl” + “Enter” keys simultaneously.
Typing cmd in the Run Prompt and pressing Shift + Alt + Enter to open an elevated Command Prompt - Click on “Yes” in the prompt to open the command prompt as an Administrator.
- Type in the following command in the command prompt and press enter
netsh Winsock reset

Resetting Winsock - Wait for the process to be completed, restart your computer and check to see if the issue persists.
Solution 6: Settings Maximum Transmission Unit
MTU should be set up for every internet connection that is used on the computer for an optimal experience. Therefore, in this step, we will be settings up the MTU for our connection. In order to do that:
- Press “Windows” + “R” keys simultaneously.
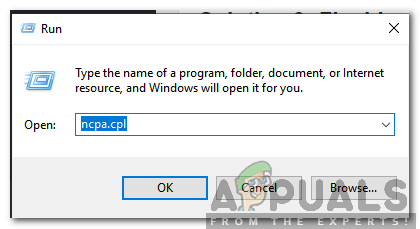
- Type in “ncpa.cpl” and press enter.
Typing in the command and pressing enter - Note down the name of the Internet connection that you are currently using.
- Close all the Windows and press “Windows” + “R” again.
- Type in “cmd” and press “Shift” + “Ctrl” + “Enter” simultaneously.
Typing cmd in the Run Prompt and pressing Shift + Alt + Enter to open an elevated Command Prompt - Type in the following command and press “Enter“.
netsh interface IPV4 set subinterface "Connection Name" mtu=1472 store=persitent
- Check to see if the issue persists.
Solution 7: Turning off Firewall
It is possible that the Firewall or an Antivirus that you are using might be blocking your connection to a particular site or the internet. Therefore, it is recommended to try and disable the connection for a while and check to see if the issue persists.
Solution 8: Assigning DNS Manually
It is possible that the DNS obtained by Windows automatically isn’t the correct one. Therefore, in this step, we will be using the default DNS used by Google. For that:
- Press “Windows” + “R” keys simultaneously.
- Type in “ncpa.cpl” and press “enter“.
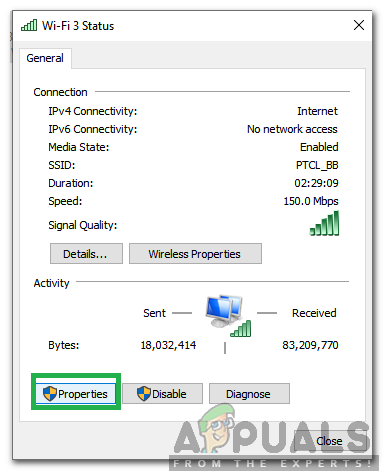
Typing in the command and pressing enter - Double–click on the connection that you are using and select “Properties“.
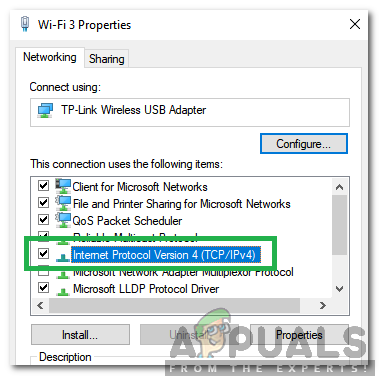
Double-clicking on the connection and selecting “Properties” - Click on the “Network” tab and double click on the “Internet Protocol Version 4 (TCP/IPV4)” option.
Clicking on the IPV4 option - Check the “Use the Following DNS Server Addresses” option.
- Type in “8.8.8.8″ in the “Preferred DNS Server” option and “8.8.4.4” in the “Alternate DNS Server” option.
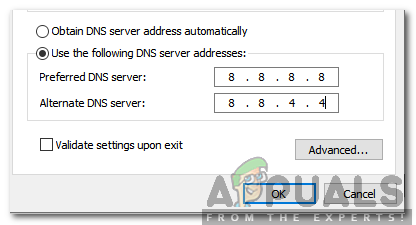
Typing in the new DNS addresses - Click on “OK” and check to see if the issue persists.
Solution 9: Flushing DNS
It is possible that the DNS configurations have been corrupted. Therefore, in this step, we will be flushing the DNS. In order to do that:
- Press “Windows” + “R” keys simultaneously.
- Type in “cmd” and press “Shift” + “Ctrl” + “Enter” simultaneously.
Typing cmd in the Run Prompt and pressing Shift + Alt + Enter to open an elevated Command Prompt - Type in the following command and press enter
ipconfig /flushdns
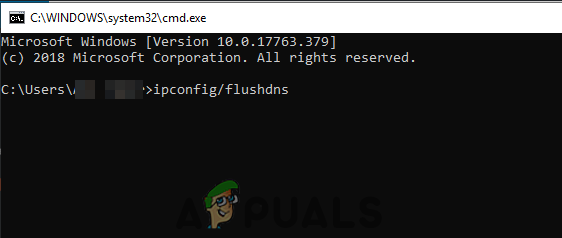
Typing in “ipconfig/flushdns” and pressing enter - Wait for the process to be completed and check to see if the issue persists.