How to Fix Disk not Initialized Problem on Windows?
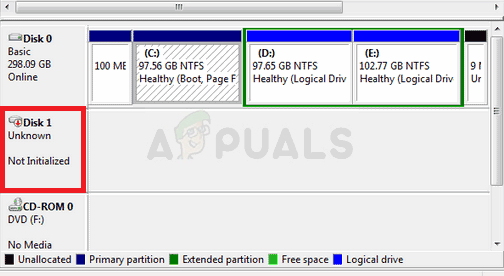
The problem when users struggle to initialize their disk on Windows 10 usually appears when inserting a brand new external hard drive or SSD. This problem can also appear in various other scenarios and it’s really important to resolve it since you are unable to use the drive before resolving this issue.
Not being able to initialize the drive is something that troubled many users and they were able to come up with several working methods. We have gathered these methods in an article so please check it out and good luck!
What Causes the Can’t Initialize Disk Problem on Windows 10?
Not being able to initialize your disk in any format is often related to faulty drives. If the drive is physically damaged beyond repair, you can only take it to a professional to extract what can be extracted. In other cases, you can check out the list of causes we have prepared below to identify your scenario!
- Use Diskpart instead of Disk Management – Using Disk Management has proven to be a difficult way of handling drives and many users suggest that they managed to initialize disks only by using Diskpart with admin permissions.
- BIOS battery issues – Even though the BIOS battery seems unrelated to this problem, many users found out that properly cleaning the BIOS battery and thus resetting BIOS settings managed to resolve the drive initialization problem easily.
- Faulty drivers – If you drive has a faulty driver installed, it can refuse to be initialized unless you install a working driver.
Solution 1: Use Diskpart to Resolve the Problem
Using Diskpart properly can help you resolve almost any hard drive problem as long as you use it carefully. The following set of commands is executed in Command Prompt and it will clean your drive, format it as GPT, create a partition, format it for NTFS file system and you should be ready to use it without issues. Check it out below!
- If your computer’s system is down, you will have to use the installation media used to install windows for this process. Insert the installation drive you own or which you have just created and boot your computer.
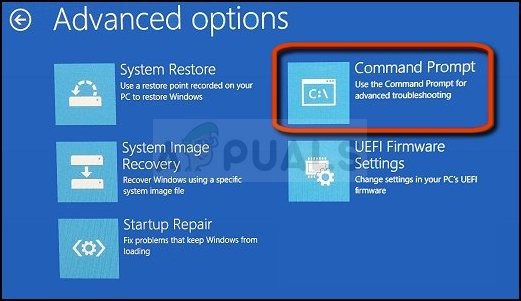
- You will see a Choose your keyboard layout window so choose the one you want to use. The Choose an option screen will appear so navigate to Troubleshoot >> Advanced Options >> Command Prompt.
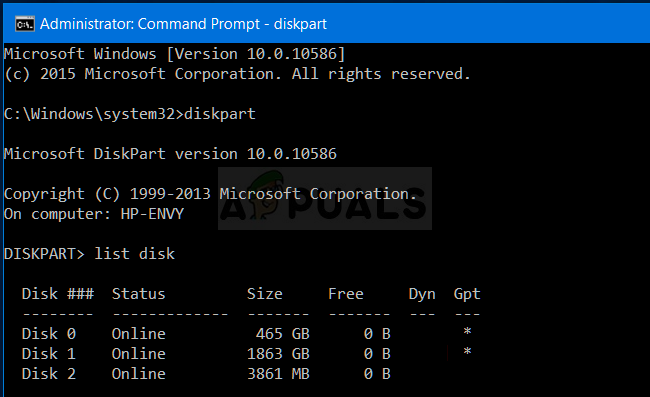
- Otherwise, simply search for Command Prompt, right-click on it, and choose Run as administrator. At the command prompt window, type in simply “diskpart” in a new line and click the Enter key to run this command.
- This will change the Command Prompt window to enable you to run various Diskpart The first one you will run is the one which will enable you to see the complete list of all available drives. Type this in and make sure you click Enter afterward:
DISKPART> list disk
- Make sure you choose your drive carefully, depending on which number is assigned to it in the list of volumes. Let’s say that its number is 1. Now run the following command to select your required drive:
DISKPART> select disk 1
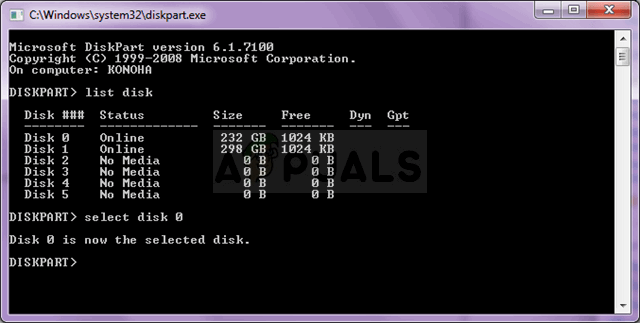
- A message should appear saying something like “Disk 1 is the selected disk”.
Note: If you are unsure about which drive number belongs to your drive, the easiest way to do so is to check its size at the right pane. Additionally, it’s the same number which appears in the Disk Management tool.
- To clean this volume, all you need to do is to type in the command displayed below, click the Enter key afterward, and stay patient for the process to complete. The process should now be successful for a change. This set of commands will also create a Primary Partition and make it active so that you can format it without problems.
Clean
Create Partition Primary
Active
- Finally, this last command will format the drive in the file system you choose. When considering the file system, the rule of thumb is to choose FAT32 for drives up to 4 GB of storage and NTFS for larger volumes. Let’s say you chose NTFS! Type in the following command and tap Enter afterward:
format fs=ntfs quick
- Exit Command Prompt and check to see if your device has been successfully formatted and ready to use!
Solution 2: Clear the CMOS Battery
Clearing the CMOS battery will effectively cause two things: the BIOS settings which relate to the way your computer boots will be reset and you will start from the beginning when it comes to the boot, which is a thing which can solve this problem on its own. Before proceeding, make sure you turn off your computer and disconnect all cables from the problematic drive.
- Open the computer case and find the battery on the computer motherboard. If you are unable to locate your CMOS battery, refer to your motherboard or computer documentation. You can also browse the Internet or contact your computer manufacturer for additional assistance in locating it.
Note: With some computers, you may need to disconnect cables, remove drives, or remove other parts of the PC to get full access to the CMOS battery.
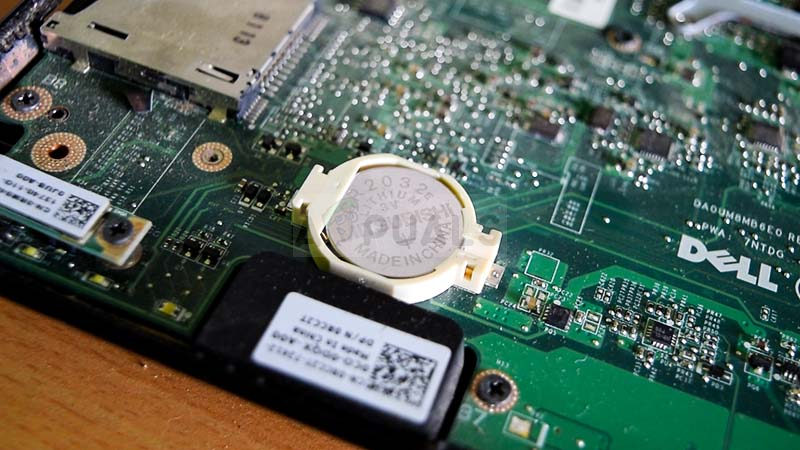
- If your computer is using a coin cell battery, removing the battery is relatively simple. Use your fingers to grab on the edge of the battery and pull it up and out of the socket holding it in place. Some motherboards have a clip holding the battery down and you may need to move it up to pull the battery out.
- Let it stay removed for 10 minutes, clean it, put it back in, and try to initialize your drive the same way you tried before. Check to see if any errors pop up!
Solution 3: Update Disk Drivers
Even though the methods above are more complicated, they also have a higher success rate and that is why we decided to rank them higher on our list. Updating drivers is also a useful method which can be used if you are not able to initialize your HDD or SSD. Faulty driver files will make it difficult for you to use your device and it’s important to keep them up to date.
- Tap the Start menu button at the lower left part of the screen, type in “Device Manager”, and select its entry from the list of resulting entries by clicking the first one.
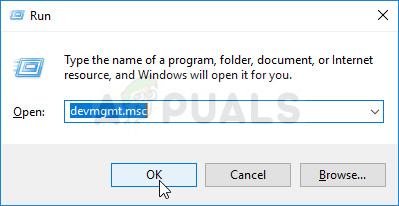
- You can also use the Windows Key + R key combination to bring up the Run utility box. Type in “devmgmt.msc” in the dialog box and click OK to open Device Manager.
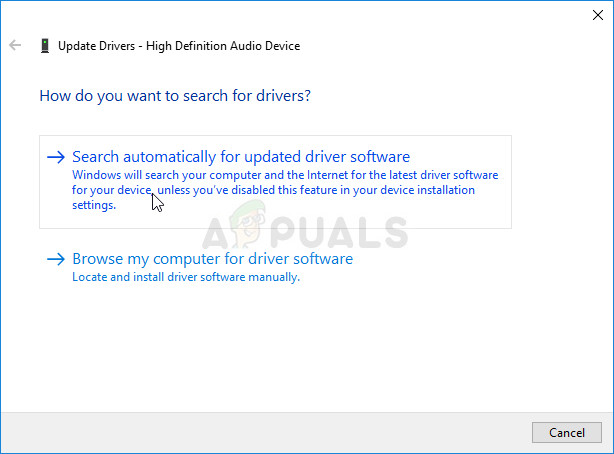
- Since you want to update the driver for your hard drive or solid-state drive, expand the Disk drives section by left-clicking the arrow next to their entry in Device Manager. Right-click on the correct entry in the list and choose Update driver from the context menu.
- Choose the Search automatically for updated driver software option from the new screen which will appear and wait to see if the tool can find newer drivers for your drive.
- Check to see if you are now able to use Disk Management to initialize your drive properly!


I tried this and when I tried to create partition I get the error message:DiskPart has encountered an error: Incorrect function.
See the System Event Log for more information.I have tried on 3 different disks and 2 different laptops (both windows 10 professional Lenovo laptops).