How to Fix Bishock2 Crashes and Stopped Working Errors
BioShock 2 is one of the most popular first person shooting games of all time and the games can always brag about their superiour graphics, storyline, and powers you can use throughout the game. However, looking from a technical aspect, the games are far from perfect as there are users who are simply unable to play them properly because of constant crashes.
In this article, we will focus on the successful methods which have worked for players who have struggled with the same problem. We hope that, by the end of the article, you will be able to continue playing the game normally.
What Causes BioShock 2 to Crash and Stop Working?
There are quite a few causes for this problem and they are often not even similar one to another. Game crashes are a broad topic and one game can crash due to a variety of different reasons but here are some of the most common causes:
- The use of DirectX10 can cause the game to crash on various PCs which don’t fully support this technology.
- A corrupt save may stop the game from launching completely and deleting it from your computer is the only way to solve the problem.
- Missing or corrupt game files where some of them need to be deleted or redownloaded.
- A problematic Windows 7 update which deals with DirectX issues.
Disable DirectX10 (Force DirectX9)
This is definitely one of the most popular methods among all of them available online as it appears that the game was simply not made to be fully compatible with DX10. This is a shame but you can easily revert these changes if you have downloaded the game via Steam. Follow the steps below in order to force the game to use DirectX9 instead of 10!
- Open up Steam on your computer by double-clicking its entry on the Desktop or by searching for it in the Start menu. Windows 10 users can also search for it using Cortana or the search bar, both of them next to the Start menu.
- Navigate to the Library tab in the Steam window by locating the Library tab at the top of the window, and locate BioShock 2 in the list of games you have in your respective library.
- Right-click on the game’s icon in the list and choose the Properties option from the context menu which will show up. Stay in the General tab in the Properties window and click the Set launch options button.
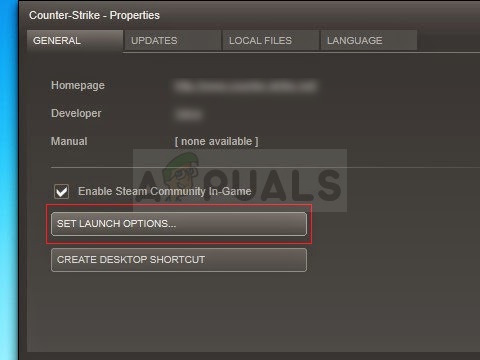
- Type “-dx9” in the bar. If there were some other options located there you are possibly using, make sure you separate this one with a coma. Click the Ok button in order to confirm the changes.
- Try launching BioShock 2 from the Library tab and check to see if the game crashes occur as often as they did before.
Locate a Faulty Save File
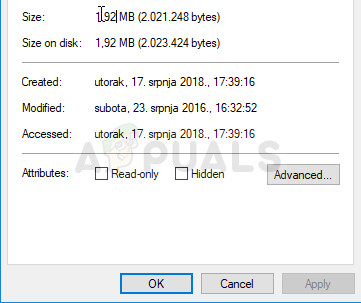
Sometimes the crashes can be blamed on a single save file which can’t be accessed properly by the game. The file can be located on your computer easily and you can delete as it shouldn’t be tied to any of your saved games. You can recognize this file as its size should read 0KB.
- Navigate to the default save file location in the File Explorer simply by opening a folder and clicking This PC or My Computer from the left navigation pane or by searching for this entry in the Start menu.
- Anyway, in This PC or My Computer, double-click to open your Local Disk from the bottom and navigate to Users >> Your Account’s Name >> Documents >> BioShock 2 >> Saved Games.
- Enter the Saved Games folder and look for a save file whose size reads 0KB. You can check the size by right-clicking and choosing Properties from the context menu and checking under size or you can change the view to Details to see the size of every file in the folder.
- Restart the game afterwards by relaunching Steam and double-clicking the game from the Steam Library tab to see if BioShock 2 keeps crashing.
Keep DirectX On and Increase Available VRAM for Textures
This method is sort of an opposition to Solution 1 because we are now switching back to DirectX. The reason for this is pretty obscure but we will have to do so in order to tweak the game’s configuration files properly to increase the memory limit game is allowed to acquire when it comes to VRAM.
First of all, undo the changes you have made in Solution 1 simply by opening the BioShock 2 properties, and deleting the “-dx9” entry from the Launch options.
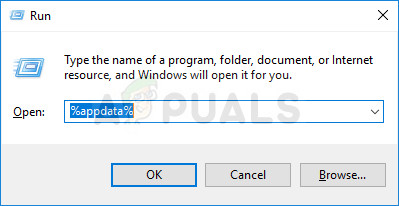
- Press the Windows Logo Key + R button combination in order to bring up the Run dialog box. Make sure you type “%appdata” in the dialog box and click OK in order to open this location in File Explorer.
- Instead of that, you can also open the File Explorer on your computer (opening a folder) and navigate to the folder manually. First of all, locate My Computer or This PC at the right navigation screen after opening File Explorer and click your Local Disk.
- Navigate to Users >> AppData. If you are unable to see the AppData folder, the reason is because the folder is hidden by default and you are unable to see it without changing a certain setting in File Explorer.
- Click on the “View” tab on File Explorer’s menu and click on the “Hidden items” checkbox in the Show/hide section. File Explorer will now be able to show the AppData folder so double-click to open it.

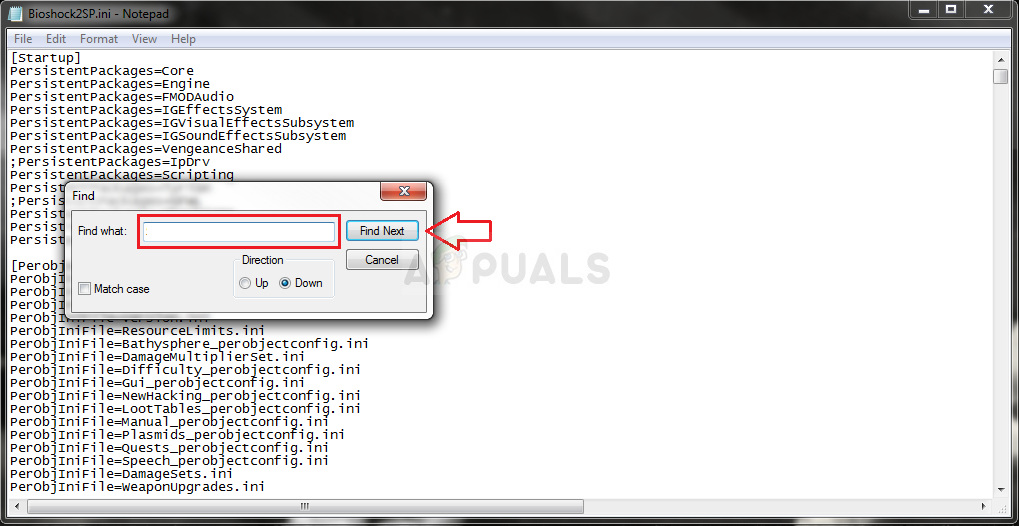
- Locate a folder named Bioshock 2 or Bioshock2Steam It may be in the Roaming sub-folder as well. Open it by double-clicking, and try to locate a file called “Bioshock2SP.ini”. Double-click to open the file and choose to open it with Notepad if Notepad isn’t launched automatically.
- Use the Ctrl + F key combination or click Edit at the top menu and select the Find option from the dropdown menu in order to open the Search box.
- Type “TextureStreamingMemoryLimit” in the box and change the value next to it from 256 to 2048. Use the Ctrl + S key combination in order to save the changes or click File >> Save and exit Notepad.
- Try running the game again in order to check if BioShock 2 keeps crashing on startup after performing these steps.
Note: Other people claim that simply deleting the BioShock 2 folder in the AppData folder has helped solve the problem so you should definitely consider trying that out. Keep in mind to backup the save files which may be located in that folder!
Verify Integrity of Game Files
Several users posted about this method as it has helped them solve their problem. The tool managed to file a file or two simply missing and redownloading them seems to have resolved the problem and they stopped experienced crashes throughout the game. This method is easy to execute so make sure to try it out.
- Open up Steam on your computer by double-clicking its entry on the Desktop or by searching for it in the Start menu. Windows 10 users can also search for it using Cortana or the search bar, both of them next to the Start menu.
- Navigate to the Library tab in the Steam window by locating the Library tab at the top of the window, and locate BioShock 2 in the list of games you have in your respective library.
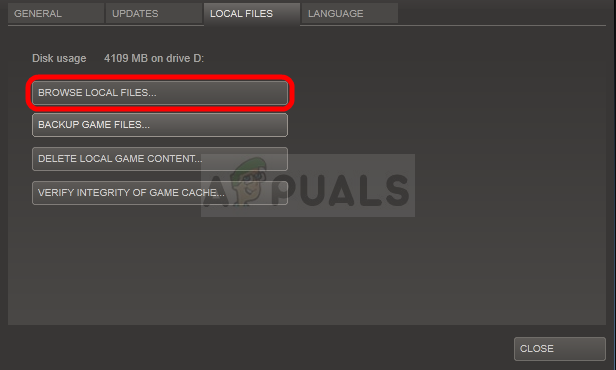
- Right-click on the game’s icon in the list and choose the Properties option from the context menu which will show up. Make sure you navigate to the Local Files tab from the top navigation menu.
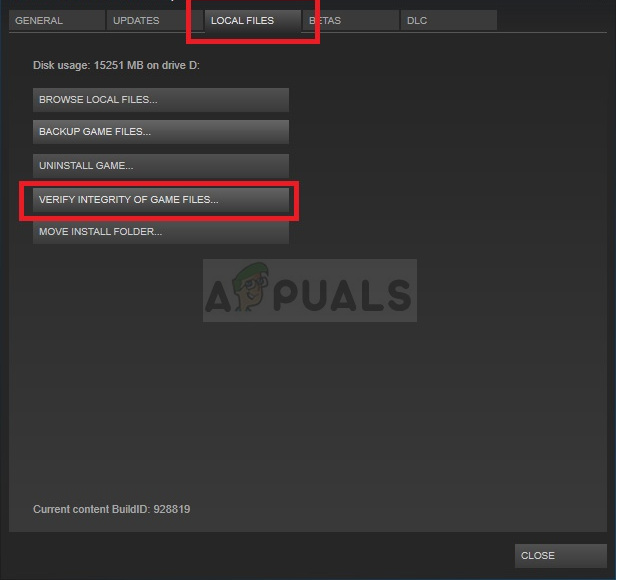
- Click the Verify Integrity of Game Files button at the bottom of the window and wait for the process to finish checking for your game files. The tool should download any missing or corrupt files and you should launch BioShock 2 afterwards to see if BioShock 2 keeps crashing!
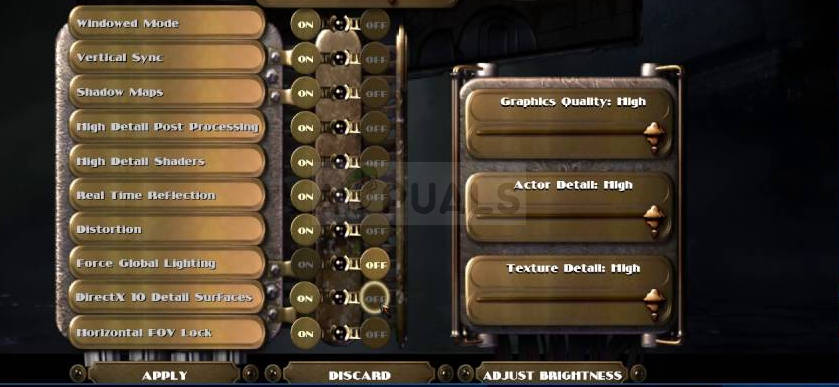
Disable Detail Surfaces from In-Game Settings
Disabling this option from in-game settings has a positive impact on the game’s overall performance and plenty of users claim that the game has seized to crash after they have disabled this option from in-game settings.
- Open up Steam on your computer by double-clicking its entry on the Desktop or by searching for it in the Start menu. Windows 10 users can also search for it using Cortana or the search bar, both of them next to the Start menu.
- Navigate to the Library tab in the Steam window by locating the Library tab at the top of the window, and double-click BioShock 2 in the list of games you have in your respective library in order to launch it.
- From the first screen which will appear (Main Menu), choose Options and click on Graphics Options. Scroll down until you see the “DirectX 10 Detail Surfaces” entry on the list. Click the Off button next to it and click the Apply button below before checking to see if the game still crashes.
Tampering with the Game’s Folders
There is a BioShock 2 folder in My Documents as well which holds some preference files along with your save files. Users have reported that you can fix the problem using the following set of steps which include deleting some things as well as disabling the “Read-only” properties of various files and folders.
- Navigate to the proper location in the File Explorer simply by opening a folder and clicking This PC or My Computer from the left navigation pane or by searching for this entry in the Start menu.
- Anyway, in This PC or My Computer, double-click to open your Local Disk and navigate to Users >> Your Account’s Name >> Documents >> BioShock 2.
- Right-click the BioShock 2 folder and choose Copy from the context menu and make sure you paste it somewhere else for backup (Desktop preferably). Select the same folder, right-click, and choose the Delete option from the context menu.
- Open the game afterwards by opening Steam and double-clicking the game from the Steam Library tab and make sure you start a new game in BioShock 2. Save the game and exit. In the Documents folder, you should see a new BioShock 2 folder.
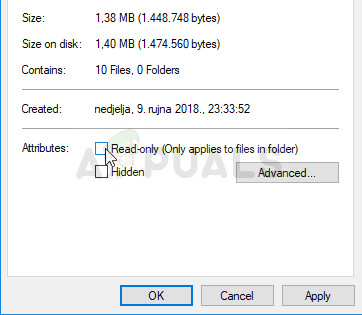
- Right-click this folder and choose Properties from the context menu. Under the Attributes section, clear the box next to the Read-only entry and apply the changes.
- Locate the backed up BioShock 2 folder, open it, and open the SaveGames folder inside. Move any files you find there to the original location at Documents >> BioShock 2 >> SaveGames and reopen the game to see if it still crashes. Repeat the “Read-only” removal process once more.
Uninstall a Windows Update (Windows 7 Users Only)
There is a certain Windows Update which has made changes to DirectX files and changes certain settings which the game hasn’t planned on. This update caused other gaming issues as well so it’s for the best if you simply uninstall it. This update came out for Windows 7 only so this method is only helpful for people using Windows 7.
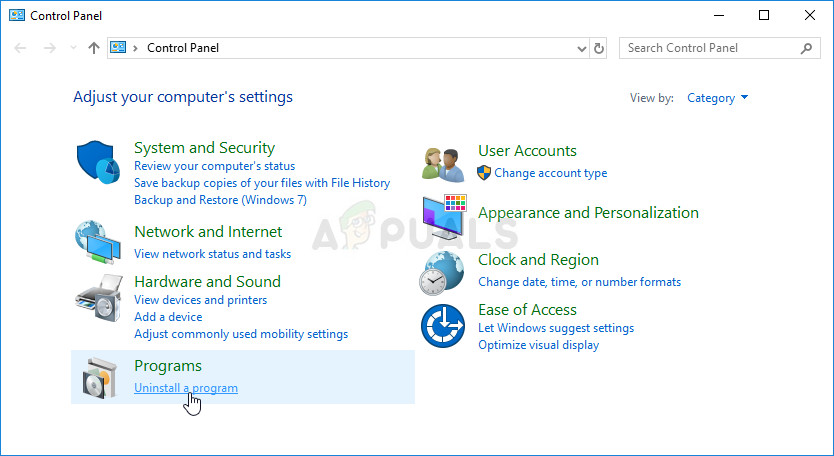
- Click the Start menu button and open Control Panel by typing its name and clicking the first option at the top or by locating its entry in the Start menu initial screen.
- Switch to View as: Category at the top right corner and click on Uninstall a Program under the Programs area. At the right side of the screen, you should see the View installed updates button in blue so click on it.
- You should now be able to see the list of all installed Windows updates for your computer. Check the Microsoft Windows section at the bottom for the relevant updates which may have affected BioShock 2 and caused constant crashes.
- Scroll to the left in order to check the Installed on column which should display the date when the update was installed so make sure you locate the update whose KB number is KB2670838.
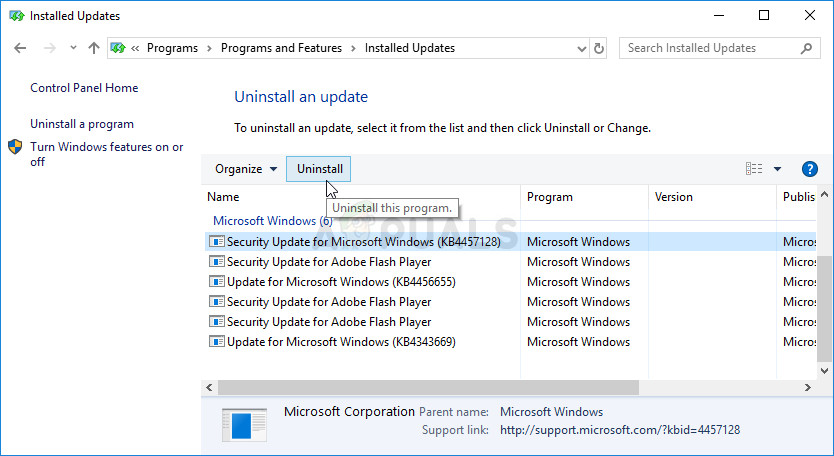
- Click on the update once and choose the Uninstall option at the top and follow the instructions which will appear on screen in order to get rid of the update.
- Wait for Microsoft to release a new update which should be installed automatically if you have configured automatic Windows updates.
Run the Game in Compatibility Mode and as an Administrator
Since is game is somewhat older, running it on operating systems older than Windows Vista Service Pack 2 was not planned on by the developers, meaning you might need to run the game’s executable in compatibility mode for this operating system. Also, running the game as an administrator grants it more access and these two combined should stop the crashing issues.
- Open up Steam on your computer and navigate to the Library tab in the Steam window by locating the Library tab at the top of the window, and locate BioShock 2 in the list of games you have in your respective library.
- Right-click on its entry and choose Properties. Navigate to the Local Files tab and choose Browse Local Files.
- If you haven’t installed the game via Steam, you can still locate the game’s installation folder manually. The easiest way would be to right-click the game’s shortcut on Desktop or anywhere else and choose Open file location from the context menu.
- Anyway, once inside the folder. Right-click the BioShock 2 main executable and choose Properties. Navigate to the Compatibility tab and check the box next to the “Run this program in compatibility mode for” entry. Choose Windows Vista Service Pack 2 entry from the drop-down list.
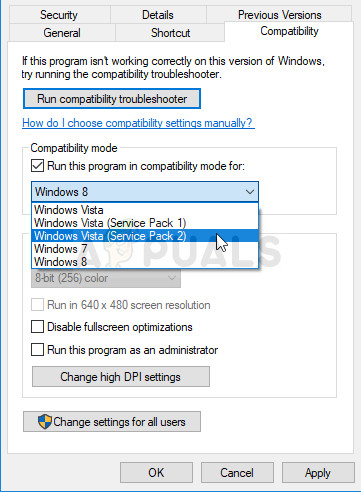
- Under the Settings section in the same Properties window, check the box next to the “Run this program as an administrator” entry.
- Apply the changes and try relaunching the game to see if the crashing has stopped.
Disable SLI (for NVIDIA Users)
Scalable Link Interface (SLI) is a video card technology made by NVIDIA for combining two or more video cards to produce a single high-quality output. SLI is a parallel processing algorithm for video, meant to increase the available processing power.
However, BioShock 2 doesn’t appear to support this technology and you should turn it off while playing the game. Most users have said that disabling this option for the game has prevented the crashes from occurring afterwards.
- Right-click on your desktop screen and select the NVIDIA Control Panel entry from the context menu or double-click the NVIDIA icon in the system tray if you see it. NVIDIA Control Panel can also be located in the regular Control Panel by switching to the Large icons view and locating it.
- Once you’ve opened the NVIDIA Control Panel, navigate to the 3D settings menu at the left side navigation pane and click the Set SLI configuration option.
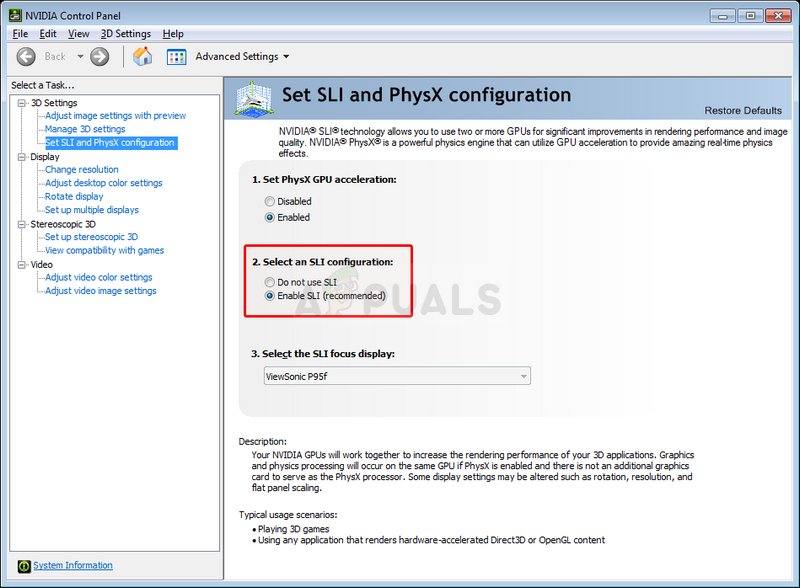
- At the end, select the Do not use SLI technology option and click on Apply to confirm the changes. Launch BioShock 2 again and check to see if the same error still appears.


