How to Fix Adobe Premier Pro Crashing/Shutting down?
Adobe’s Premiere Pro is a time-line based video editing software which has made rounds on the internet and has become the go-to choice for video developers and graphics editors. The application is part of Adobe’s Creative Cloud suite and is known to be seamless in experience.

However, since the latest update, reports have been coming in from users where they reported an increase in the crashing or random shutting down of the application. The issue persisted before but after the update, it started occurring for everyone. In some cases, the application crashes on startup or in some, it crashes when it is rendering media. In this article, we will go through all the causes as to why this occurs and what the possible workarounds are to fix it.
What causes Adobe Premier Pro to Crash?
After our initial investigation and analysis of user reports, we concluded that the crash occurred due to several different reasons ranging from hardware to software problems. The causes why Premiere Pro crashes are but not limited to:
- Acceleration: Premiere Pro offers users to select the type of acceleration that they require when they are using the application. Sometimes, some accelerations might not work as expected and cause several problems with the application itself.
- Outdated Application: Adobe’s engineers frequently release updates to target bugs and introduce new features. If your application isn’t updated to the latest version, the application might crash and cause unexpected behavior.
- Overheating: Premier Pro consumes a lot of resources on your computer and when it does, your computer heats up because of the magnitude of computation. If the threshold level is reached, the computer will shut the application down forcefully.
- Multitasking: If you are running several different processes while also using Premier Pro, the CPU will become overloaded and the application will crash. Reducing the amount of load might help.
- Administrative access: This cause cannot be ignored. Since Premiere Pro performs so many computations, it is normal for it to require administrative accesses to operate. If these are not provided, the application will crash.
- Media cache files: The media cache files sometimes accumulate to huge heaps which not only slow down the computer but also increases the burden on the application. If these are corrupt or unattended for, you might experience the crashing situation.
- Nesting Sequences: Another bizarre issue which we came across was where the sequences of the video, if not nested before the rendering, caused the crashing.
- Outdated Graphics Drivers: Graphics Drivers are the main modules in running graphics-intensive applications like Premiere Pro and Photoshop. If the graphics drivers themselves are not updated or are corrupt, you will experience numerous issues.
- Project files corrupt: Whenever you load a new item, it either loads up in the main application or it gets started as a new project. The latter seems to avoid the crashing situation so we will try that later on.
- Corrupt application: This is a very common case with Adobe applications. If their installation files have become corrupt or are missing important modules, you will experience numerous issues including the crashing.
- Thermal Management Drivers: Some thermal management drivers are known to cause issues with the application and force it to close randomly. Disabling these drivers will fix the problem.
- Corrupt Fonts: The fonts you set on your preferences of Premiere Pro determine the type of text you will see in the application. If the font is somehow not working with the application, it will conflict with it cause issues.
- Corrupt Temporary Configurations: If you have corrupt temporary configurations, the application will attempt to load them and crash if they are not imported properly. Deleting these corrupt configurations might be your shot.
Before we start with the solution, make sure that you are logged in as an administrator on your account. Furthermore, you should also have an active internet connection and make sure that you save your work before proceeding.
Solution 1: Changing Acceleration of Premiere Pro
Before we start with the technical solutions, we will first attempt at trying some basic changes to the configuration. The first one on our list is the acceleration type used in the Premiere Pro applications. According to your hardware specifications, there will be different accelerations available to you. In this solution, we will navigate to your Premiere Pro settings and then change the acceleration type. If one doesn’t work for you, you can keep rotating until some do.
- Launch Premiere Pro and then click on File. Now, scroll down and click Project settings > General.
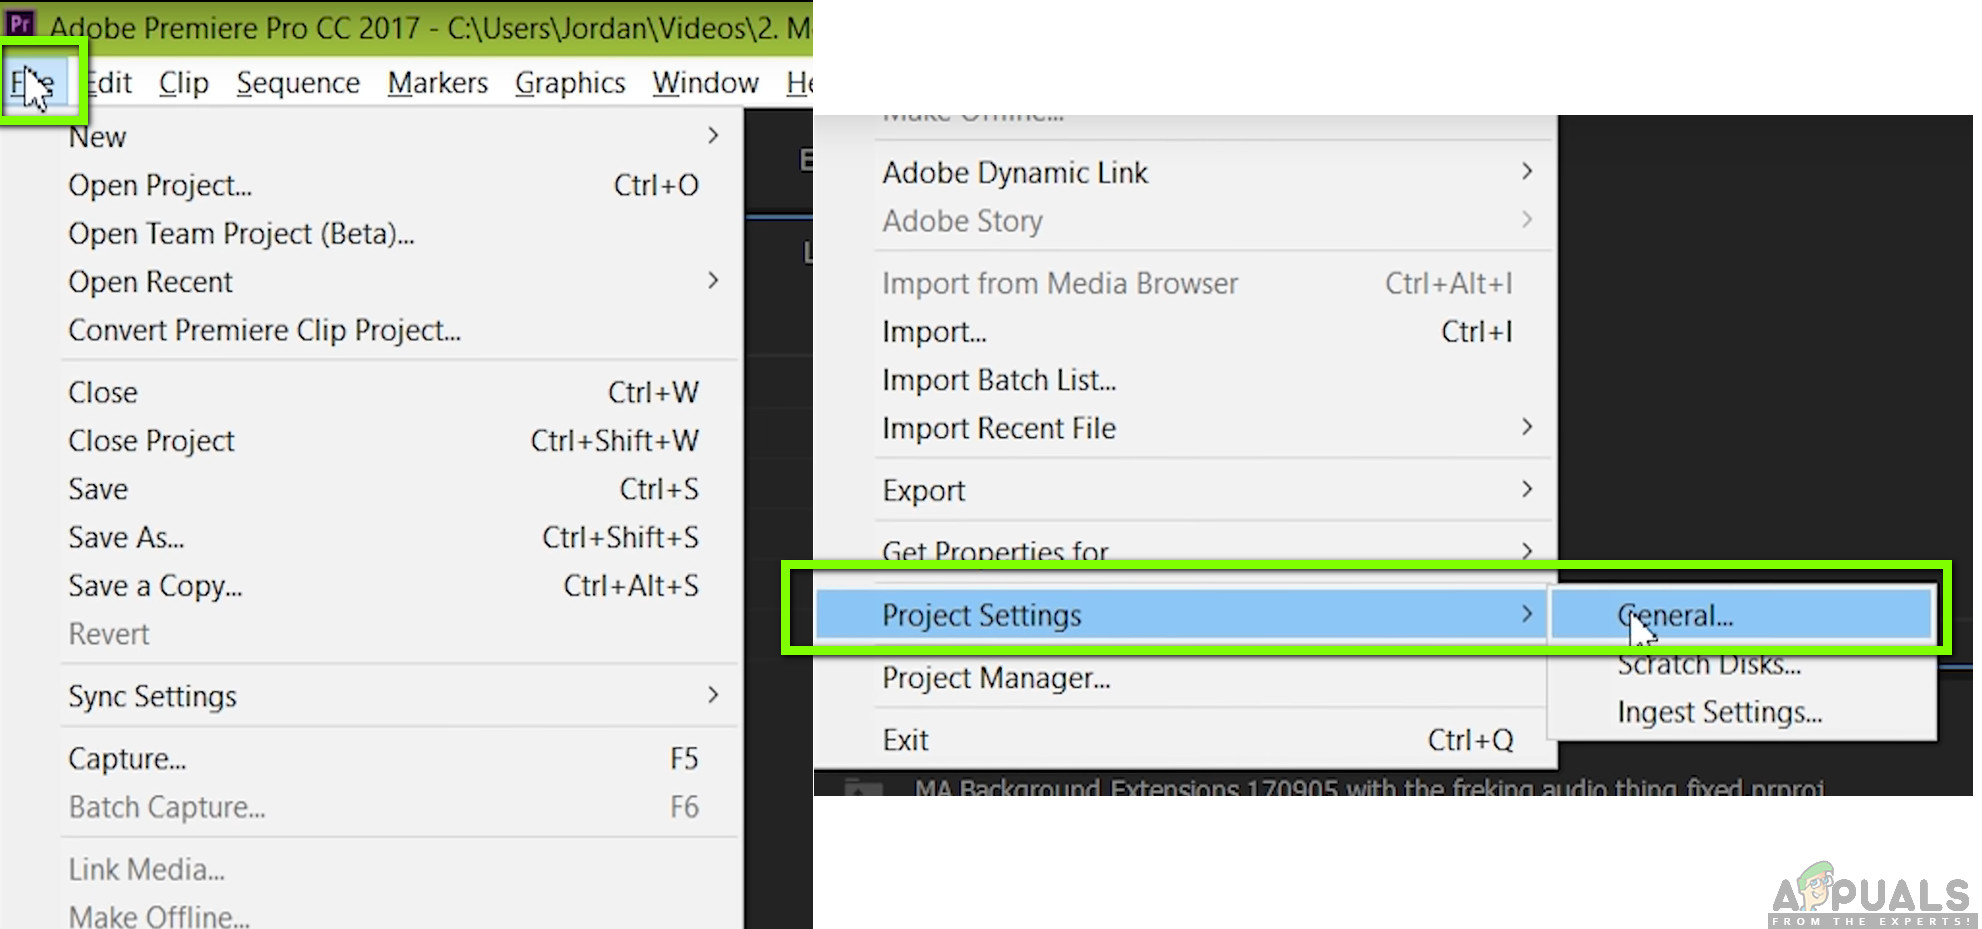
Project settings > General - Once the settings open, click on General tab and under the heading of Video Rendering Playback, you will see the Renderer for whom several different options will be present.
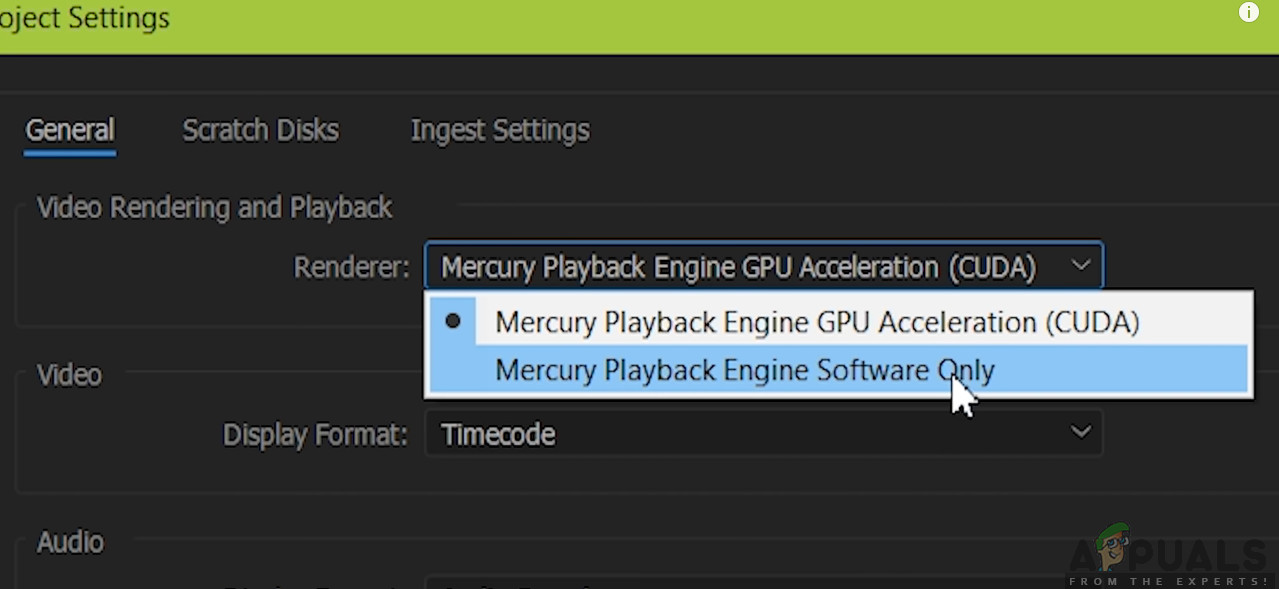
Changing Renderer - Change the renderer and relaunch the application. Start working and see if this fixes the problem.
If this doesn’t work, move on to the next solution.
Solution 2: Updating Premier Pro
Another thing to test our luck on is updating the Premiere Pro application to the latest version available. Even though it seems that the latest update broke the application, Adobe’s engineers released a software update which fixes most of the problems. If you are hesitating and holding back, it is recommended that you do so as soon as possible. Make sure that you have an active internet connection and some time on your hands.
- Launch the Creative Cloud application on your computer. Now, click on Apps from the top tab.
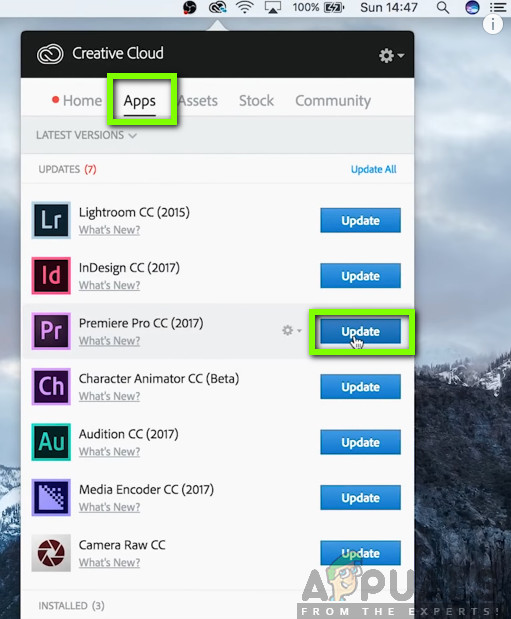
Updating through Adobe CC - Locate Premiere Pro and click the button of Update. After the application is updated, restart your computer and launch it. Try working on it and see if the issue is resolved.
Note: Consider updating all your Adobe products.
Solution 3: Checking for Overheating
Computers often get overheated when they used extensively or when they are performing heavy computations. Similar cases were seen to occur with Adobe Premier Pro. It seemed that whenever the computer overheated, the users were given no warning of any such and the application automatically crashed.
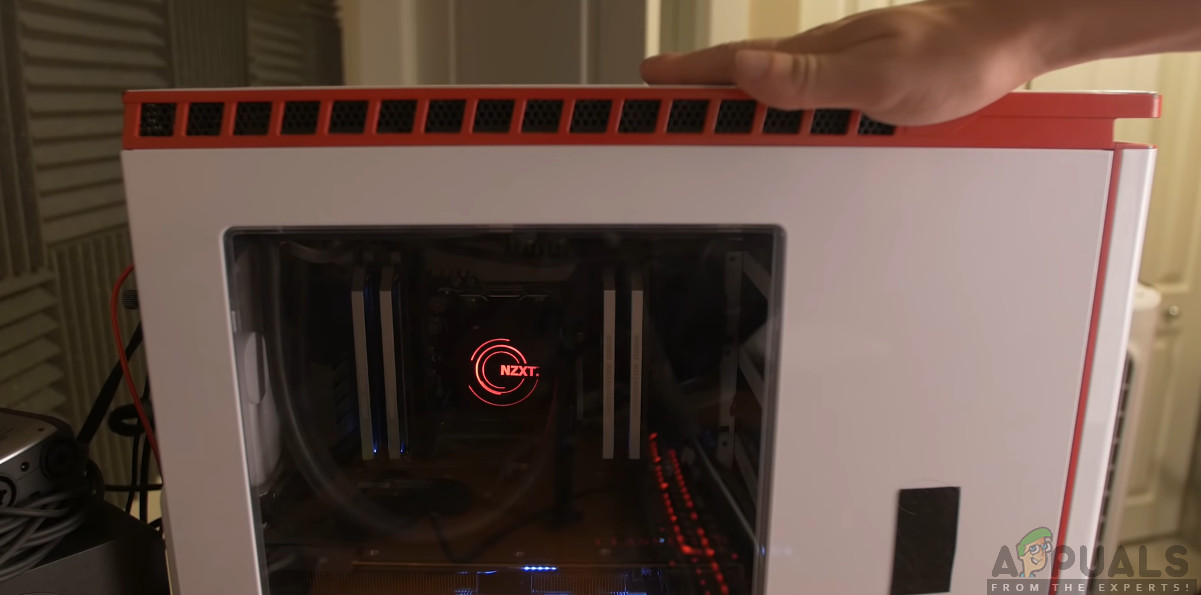
Here, you should check your components whether the cooling system is indeed working properly and dust isn’t blocking anything. You can also download temperature checking utilities and measure the temperature when the application is running. Make sure that no components (especially the graphics card) are overheating.
Solution 4: Checking Third-Party Applications
There are numerous cases where third-party applications conflict with Adobe Premier Pro. Here the applications can be of any category including browsers, games, or background services which are consuming resources. Check for anything which you think might be causing the issue and terminate it and launch the application again. If the issue vanishes, this means the application was causing the problem.
Here, we are talking about two things; third-party applications either conflicting with Premier Pro or they are consuming CPU resources such that the requirement of Premiere Pro isn’t fulfilled and the application crashes.
Note: It is also advised that you disable your Antivirus software and check to launch the game. These are also known to conflict.
- Press + R, type “taskmgr” in the dialogue box and press Enter.
- Once in the task manager, search for any processes which you think are conflicting. Right-click on them and select End Task.
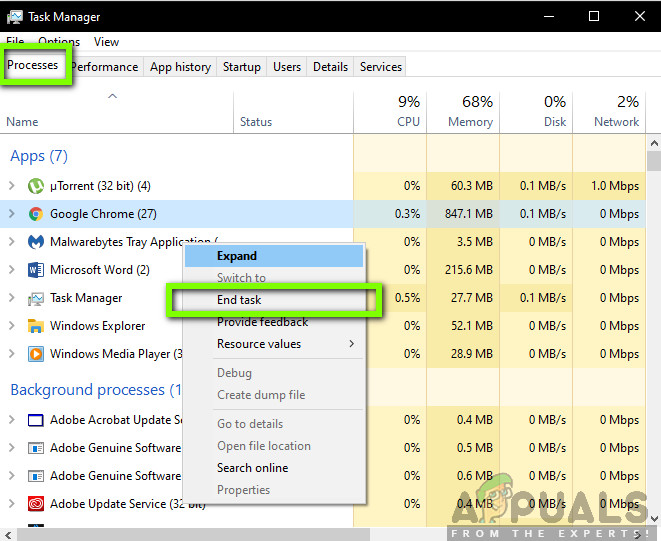
Checking Third-Party Applications - You can also check your task bar’s right corner. You can look for any notifications of any application running in the background.
If you detect the application causing the issue, prevent it from starting or update it to the latest version.
Solution 5: Running as Administrator
As you all might already know, Premier Pro has huge consumption of resources of your computer and people usually use the application to work on projects consisting of an enormous amount of data. When an application is transferring this much data, it is sometimes blocked or is choked down the permissions drain. Administrative privileges are a must for these kinds of applications because if they do not get an elevated status, they will not perform as expected. In this solution, we will enable an option which will permanently get Premiere Pro to run as an administrator until you turn the option off again.
- Locate the Premiere Pro application, right-click it and select Properties.
- Once in the properties window, navigate to the compatibility tab and select Run this program as an administrator.
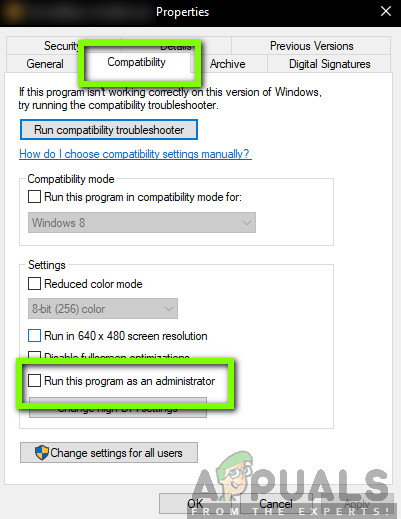
Running as Administrator - Press Apply to save changes and exit. Restart your computer and launch the application again. Check if the issue is resolved.
Solution 6: Deleting Media Cache
The Media Cache on your Premiere Pro is temporary storage which stores the copied files and media on your computer. It enables Premier Pro to quickly access the assets you are working on in various projects. When you are done with your project, there might be instances where the media cache might still be present. The application has its mechanism of deleting the media cache on your computer automatically but by default, the wait is too long and during this time, the application gets choked and crashes. In this solution, we will navigate to the settings and manually clear the media cache.
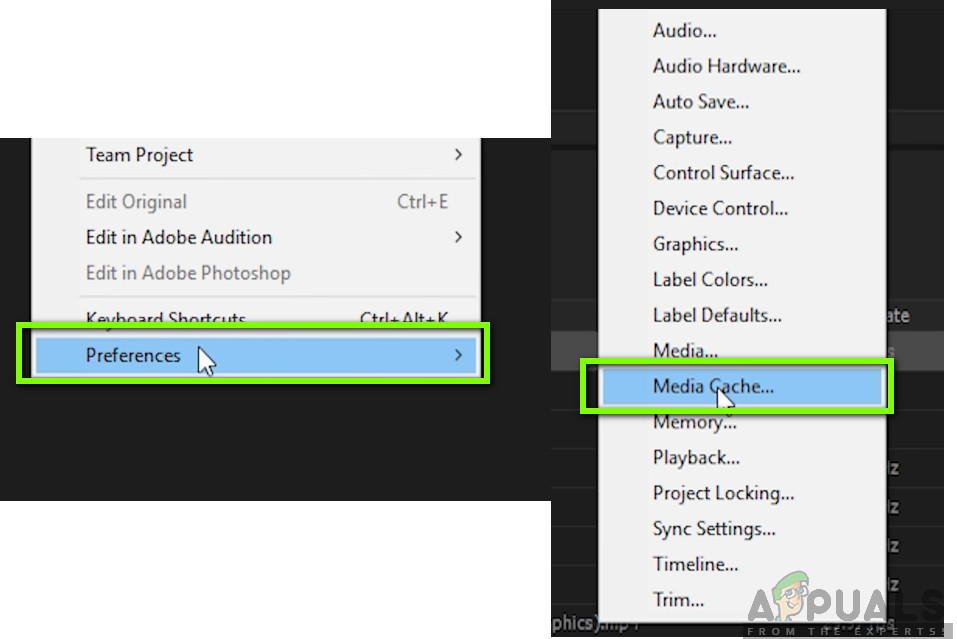
- Launch Premiere Pro and click on the Edit From the drop-down, click on Preferences and then click on Media Cache.
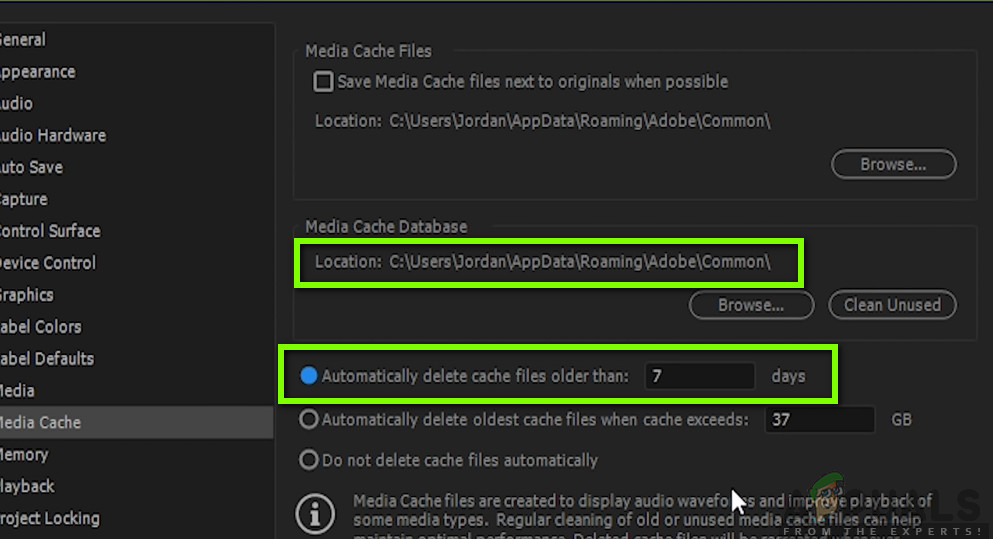
Media Cache - Once in Media cache settings, underneath the heading of Media Cache Database, click on Clean Unused.
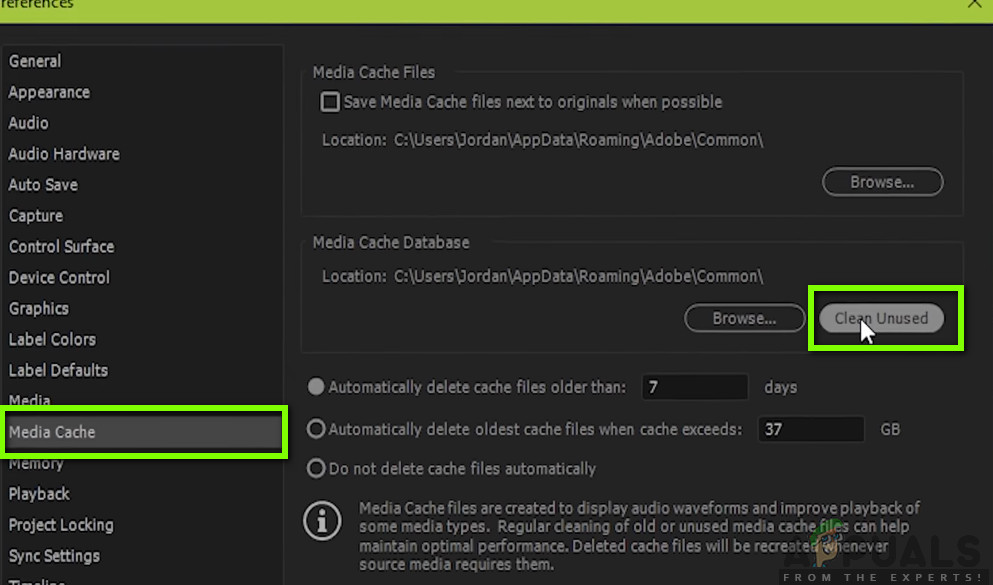
Clean Unused Cache - The Media Cache will now start cleaning and removing excessive data.
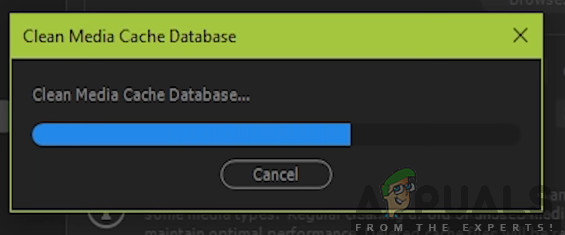
Media cache being cleaned - Now try launching the Premiere Pro. If it works properly, you are good to go. Now, we will try performing some more solutions to make sure that the issue doesn’t happen again. Navigate back to the cache settings and select the option of Automatically delete cache files older than: and set 2 or 3 days.
Media cache being cleaned - Furthermore, you can also navigate to the location where the cache files are being stored. Navigate to the directory as shown below (press Windows + E to launch the Explorer) and delete the cache files in the directory.
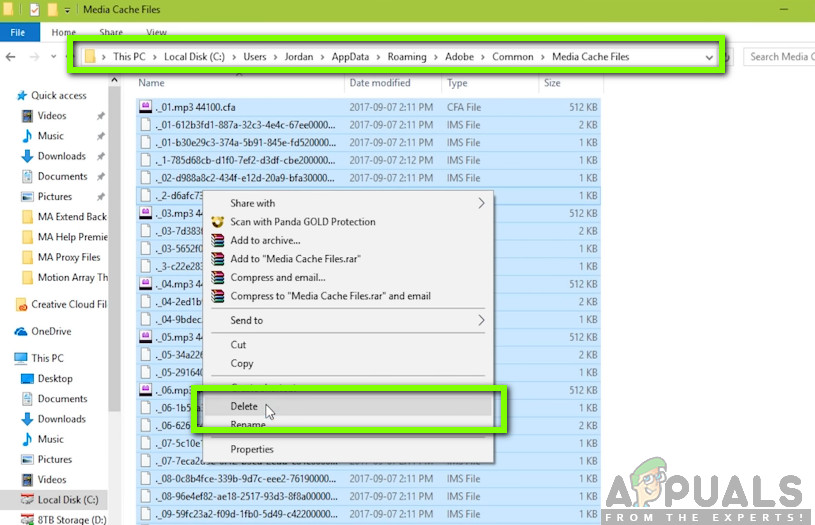
Manually deleting Media Cache - Restart your computer and launch Premiere Pro. Check if the crashing/shutting down issue is resolved.
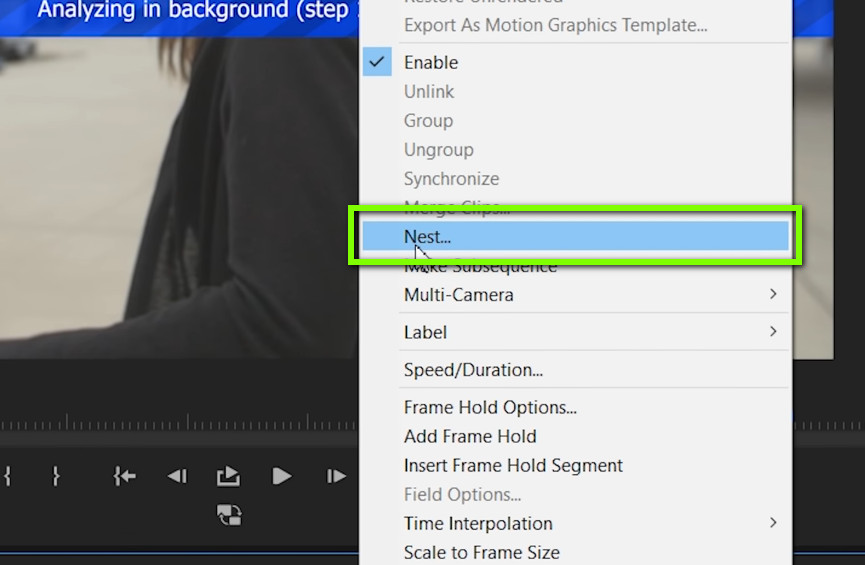
Solution 7: Nesting Different Layers
Nesting is a nifty feature in Premiere Pro which places one sequence inside another sequence. It is applied to bunch together some clips and organizes them effectively. It removes the clutter on your dashboard and lets you see single clips instead of small edits which you performed. Here, you can also duplicate the nesting by copy-pasting it on other areas. Nesting also helps reduce the load of your CPU.
Start making use of Nesting and see if this changes anything. If it does, try to make a habit of nesting. It will help your computer as well as you when editing.
Solution 8: Importing as New Project
If you are directly opening your work into Premiere Pro, you can try importing your work as a new project altogether. This will help in initializing all the default configurations and eliminate those which were corrupt.

If importing your work as a new project works, then try importing every work you do as a new project unless you want to add something to the existing work.
Solution 9: Checking Thermal Management Drivers
Another thing to check before we start updating drivers and reinstalling the application is to see whether the thermal management drivers on your computer aren’t causing issues. Normally, whenever your computer heats up due to computation, the thermal management drivers come into action and kill applications which might be causing the heat surge.
In this solution, you should check your computer yourself for potential Thermal Management Drivers like the one Intel installs, uninstall them and then try launching the application.
Solution 10: Using Default Font
Fonts dictate the way you see text when you are using Adobe Premiere Pro on your computer. These are usually changed and customized by end-users who change them according to their preferences.
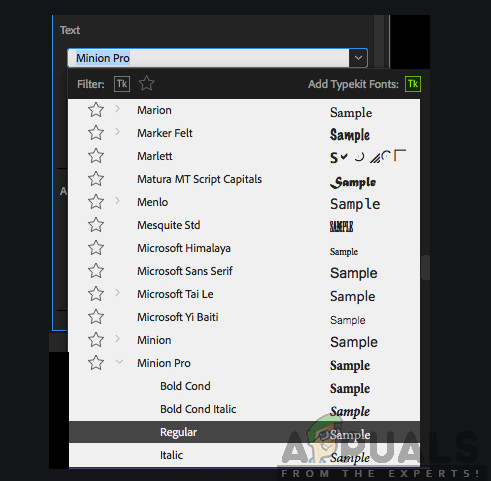
However, we saw that changing the default font to something else might conflict with the application’s engine itself if both are not compatible with each other causing unexpected crashing and shutting down. Hence, if you have enabled some other Font rather than the default one, change it back and see if this fixes the problem.
Solution 11: Deleting Configurations JSON File
The last thing we will try before remove and reinstall your graphics drivers and the application is deleting a configuration JSON file. According to your investigation, there is a JSON file which Premiere Pro uses to save preferences and configurations then, later on, fetches from here. If these are somehow corrupt, the data will not be loaded and instead, the application will crash. Make sure that you are logged in as an administrator before proceeding.
Note: You can create a copy of the file and store it to some other directory in case you require it later on.
- Press Windows + E to launch the Windows Explorer and navigate to the following directory:
users\name\APPDATA\ROAMING\ADOBE\Common\Essential Sound\SharedTags.json
- Delete the JSON file and restart your computer. Now, launch Premiere Pro and check if the crashing issue is fixed.
Solution 12: Updating Graphics Drivers
If all the above methods don’t work, there is a possibility that you don’t have correct graphics drivers installed on your computer. Drivers are the main components which facilitate the interaction between Premiere Pro and the hardware. If the drivers are outdated or corrupt, the application might not display correctly and cause lagging and eventually, crash. In this solution, we will first remove the current drivers using DDU and then install fresh copies.
- Download and install DDU (Display driver uninstaller) from its official website.
- After installing Display Driver Uninstaller (DDU), launch your computer in safe mode. You can check our article on how to boot your computer into safe mode.
- After launching the DDU, select the first option “Clean and restart”.
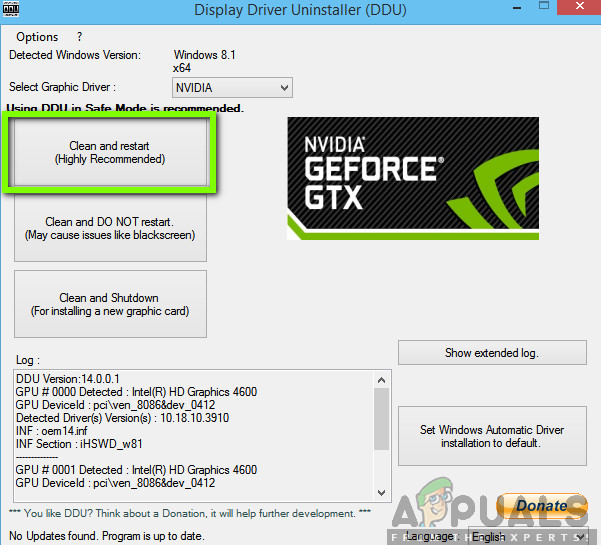
Cleaning and restart – DDU
- Now after the uninstallation, boot your computer normally without safe mode. Type “devmgmt.msc” in the box after you press Enter. Now, right-click anywhere on the device manager (empty white space) and click Search for hardware changes. The default drivers will be installed. Try launching the game and check if this solves the problem.
- In the majority of the cases, the default drivers will not work for you so you can either install the latest drivers through Windows update or navigate to your manufacturer’s website and download the latest ones.
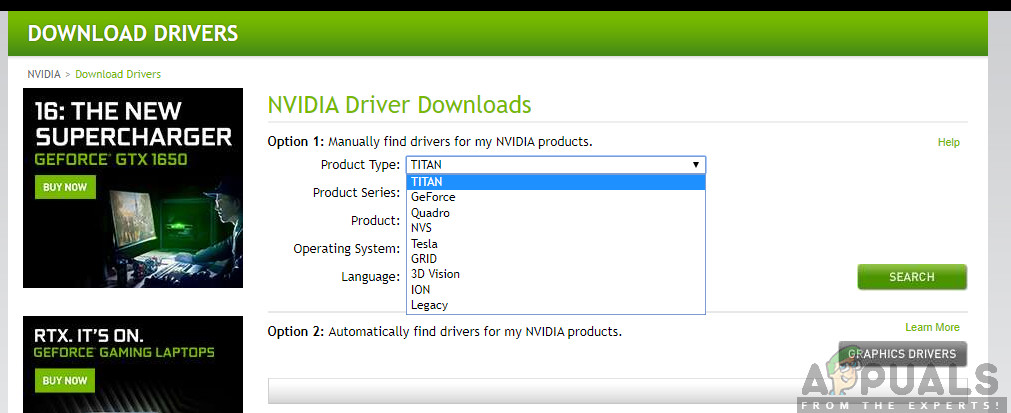
NVIDIA Drivers - After you have installed the drivers, restart your computer and check if the problem is solved.
Solution 13: Reinstalling Adobe Premiere Pro
If all the above methods fail to work and you are still unable to stop the crashing/shutting down of Adobe Premiere Pro, you should consider uninstalling it completely, deleting the files and then reinstalling it. This will remove any error configurations (if any) and solve your problem. Make sure that you have your Adobe Creative Cloud credentials at hand and sometimes for the download to complete.
- Navigate to the Official Adobe CC Cleaner Tool website.
- Now select the correct version of the operating system. In this case, Windows.
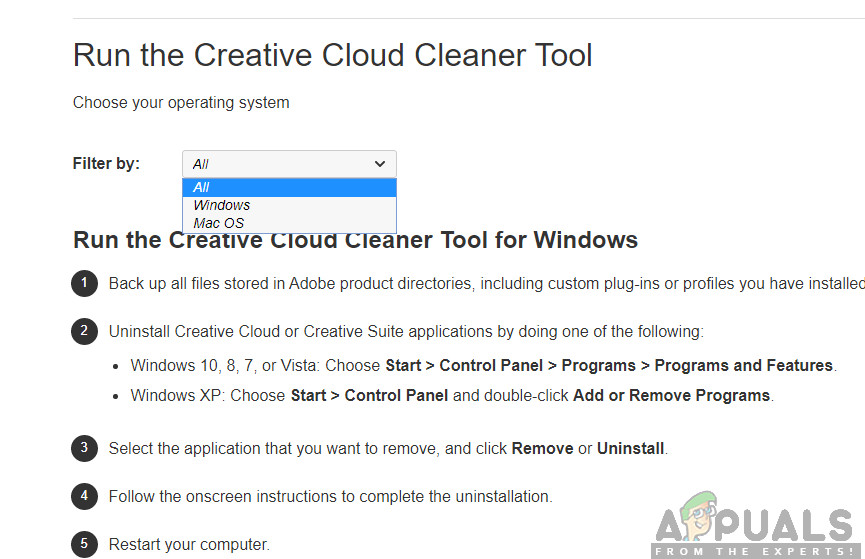
Installing the CC Cleaner Tool - After you have selected the OS, follow the steps. Press Windows + R, type “appwiz.cpl” in the dialogue box and press Enter. Locate Adobe Premiere Pro and after right-clicking, select Uninstall.
Now move to the 6th step and download the executable to an accessible location.
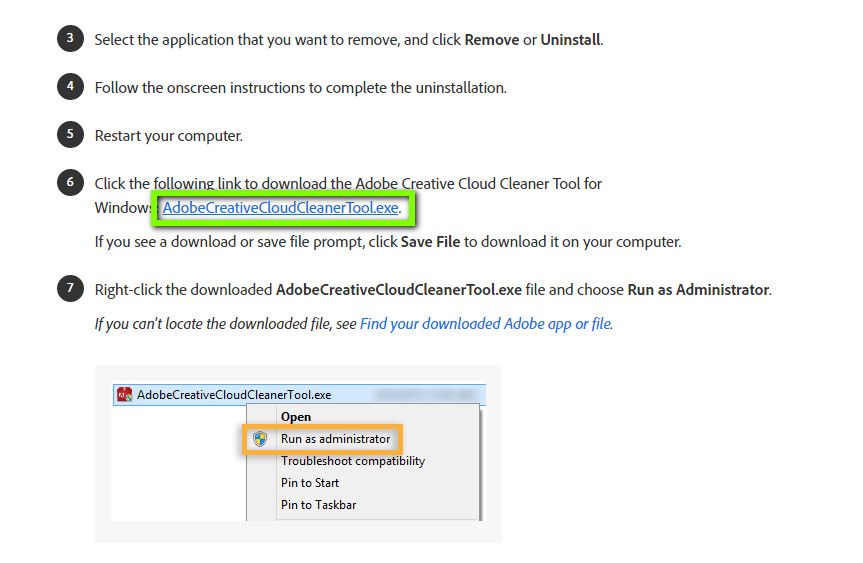
- After the download is complete, right-click on the application and select Run as administrator.
- After a while, a command prompt will come forward with a list of options. Select the option according to your situation and press Enter.
- Now the cleaner will proceed with the uninstallation and remove the program/s from your computer. Restart your computer and install Creative Cloud again. Then install the Premiere Pro again and check if the issue is resolved.


