How to Fix 0x80780166 Error when Backing up Windows?
Several affected users have been reaching us with questions after being unable to back up their Windows 10 installation. Most affected users are reporting that they are seeing the 0x80780166 error code after the backup procedure fails. The issue is not exclusive to a certain Windows version since it’s confirmed to occur on Windows 7, Windows 8.1 and Windows 10.
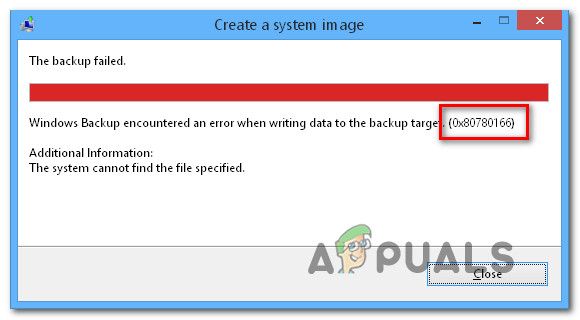
What’s causing the 0x80780166 error code?
We investigated this particular issue by looking at various user reports and by trying out the different repair strategies that are recommended by other users that have successfully managed to resolve the issue. As it turns out, several different scenarios might trigger this error code. Here’s a shortlist of potential culprits:
- VSS service is set to Automatic – As it turns out, an improper instance of the Volume Shadow Copy Service (VSS). This is the most likely cause that will make interrupt the backup procedure. If this scenario is applicable, you should be able to resolve the issue by changing the startup service from Manual to Automatic.
- Corrupted data inside the WindowsImageBackup folder – If you’re retrying the backup procedure after a botched procedure, the leftover data may be interfering with the new backup attempt. In this case, you should be able to resolve the issue by clearing the contents of the WindowsImageBackup folder.
- System file corruption – System File corruption is also a common suspect when it comes to this particular error code. During the backup procedure, multiple associated services are involved, which means that a large number of files can end up interrupting the procedure if they become corrupted. In situations like this one, your best chance of fixing the error code is to fix the system file corruption with built-in utilities like SFC and DISM.
- Underlying file corruption – Under certain situations, the issue can due to a more serious case of system file corruption that cannot be resolved conventionally. In situations like this, your only hope of resolving the issue is to reset every OS component either by using a System Restore snapshot or by performing a repair install.
Method 1: Setting the status of the VSS service to Automatic
The most common cause that will cause the 0x80780166 error code is an improper instance of the Volume Shadow Copy service (commonly referred to as VSS service). Most likely, the backup procedure can’t complete because the startup type of the VSS service is set to Manual.
Several users that also had this issue have reported that they finally managed to resolve the issue by changing the startup type of the Volume Shadow Copy service to Automatically from Manual. After doing this, most affected users have reported that they were able to complete the backup process without encountering the 0x80780166 error code.
Here’s a quick guide on modifying the status type of the Volume Shadow Copy Service to Automatic:
Note: These instructions will work regardless of the operating system version that you’re encountering the issue on.
- Press Windows key + R to open up a Run dialog box. Once you’re inside the Run box, type “service.msc” and press Enter to open up the Services window.
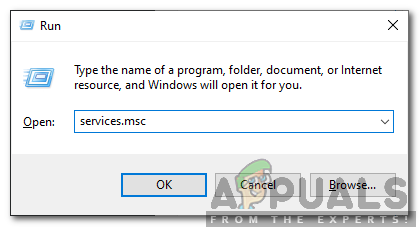
Running Services Manager - Once you’re inside the Services screen, scroll down through the list of Services (Local) and locate Volume Shadow Copy. Once you see it, right-click on it and choose Properties from the newly appeared context menu.

Accessing the Properties screen of the VSS service - Once you’re inside the Properties screen of the Volume Shadow Copy Service, select the General tab from the list of menu options and change the Startup type to Automatic. Next, click on Apply to save the changes.
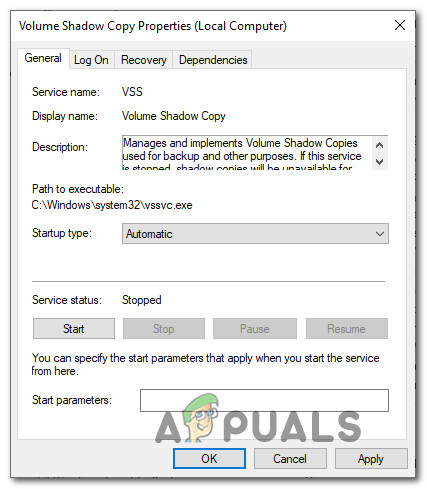
Change the status tab to Automatic - Restart your computer and repeat the action that was triggering the 0x80780166 error code at the next startup.
If the same issue is still occurring, move down to the next method below.
Method 2: Cleaning the WindowsImageBackup folder
As it turns out, this particular issue can occur in instances where the drive where the user tries to store the backup already contains leftover files from a previous backup. In most cases, this error code will occur in case the previous backup procedure was interrupted or didn’t have enough space to complete.
Several users that found themselves in a similar situation have confirmed that they managed to resolve the issue by accessing the drive where they tried to store the backup on and cleared the contents of the windows image backup windowsimagebackup folder. After doing this and retrying the procedure, most affected users have reported that the issue was no longer occurring.
Here are a few steps that will allow you to clear the windowsimagebackup folder to resolve the 0x80780166 error code:
- Open File Explorer and navigate to the drive that you just tried to create the backup on.
- Once you get there, look for the WindowsImageBackup folder and double click on it to access it. Keep in mind that this folder is hidden by default, so if you can’t see it, go to the View tab at the top of the screen and check the box associated with Hidden items.

View Hidden Items option is checked - Once the hidden folders are visible, access the WindowsImageBackup folder, select every file and delete everything until the folder is empty.
- Run the backup procedure once again and see if the issue is now resolved.
If the same 0x80780166 error code is still occurring, move down to the next potential fix below.
Method 3: Running SFC and DISM scans
According to several different user reports, this issue can also occur due to some type of system file corruption that is somehow interfering with the backup procedure. As it turns out, in situations such as this one, you should be able to resolve the 0x80780166 error by running a couple of utilities capable of fixing logical errors and system file corruption instances: DISM (Deployment Image Servicing and Management) and SFC (System File Checker).
Keep in mind that both tools are useful for situations that are caused by system file errors, but they have different approaches to the way they approach file corruption. For example, SFC is better fixing logical errors since it relies on a locally cached copy when having to replace corrupted items with healthy copies. On the other hand, DISM is better at resolving broken OS component and it uses the WU (Windows Update) component to download fresh copies that will be used to replace corrupted files.
Both utilities are useful in their way, so we advise you to run both if you’re facing the 0x80780166 error and the previous fixes didn’t help. Here’s what you need to do:
- Open up the Run dialog box by pressing Windows key + R. Next, type ‘cmd’ inside the text menu and press Ctrl + Shift + Enter to open up a Command Prompt with admin access. When you see the UAC (User Account Control), click Yes to grant administrative privileges.
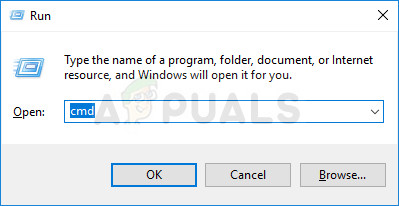
Running Command Prompt - Once you’re inside the elevated CMD window, type the following command and press Enter to initiate a DISM scan:
Dism.exe /online /cleanup-image /scanhealth
Dism.exe /online /cleanup-image /restorehealth
Note: Keep in mind that DISM will actively be using Windows Update to download healthy copies of the files that need to be replaced. Ensure that you have a reliable Internet connection before starting this procedure. The first command (scanhealth) is used to scan and look for system inconsistencies, while the second command (restorehealth) is used to replace inconsistencies found by the first scan.
- Once the DISM scan is finished, restart your computer and wait for the next startup sequence to complete.
- After the next complete startup, follow step 1 again to open up another elevated Command Prompt, then type the following command and press Enter once again to initiate another SFC scan:
sfc /scannow
Note: Keep in mind that after you start the SFC scan, interrupting the process is not recommended. Doing this will leave your system exposed to other logical errors in the future.
- Restart your computer once again and see if the 0x80780166 error is now resolved.
If the same problem is still occurring, move down to the next potential fix below.
Method 4: Using the System Restore utility
If the 0x80780166 error is still and the problem only started occurring after you performed a certain action that ended up prematurely (with an unexpected shutdown, critical error, etc.), you might be able to fix the issue by utilizing the System Restore utility to restore your computer state back to a healthy point when the error was not occurring.
This tool is capable of utilizing snapshots to restore the machine state to a previous point in time. Keep in mind that by default, Windows is configured to create new snapshots at every important PC event ( app installation, major update, security scan, etc.) If you’re didn’t change the default behavior, chances are you will have plenty of snapshots to choose from.
Before you start following the instructions below to get your machine to a previous point in time, keep in mind that all changes that you’ve made since you created it will be lost. This means that any application, user preference or anything else that was enforced during that time will be reverted.
If you decide to go forward with the system restore, here’s a step-by-step guide through the whole thing:
- Press Windows key + R to open up a Run dialog box. Once you’re inside the text box, type ‘rstrui’ and press Enter to open up the System Restore wizard.

Opening the System Restore wizard via Run box - Once you’re inside the System Restore wizard, click Next at the initial prompt to advance to the next menu.
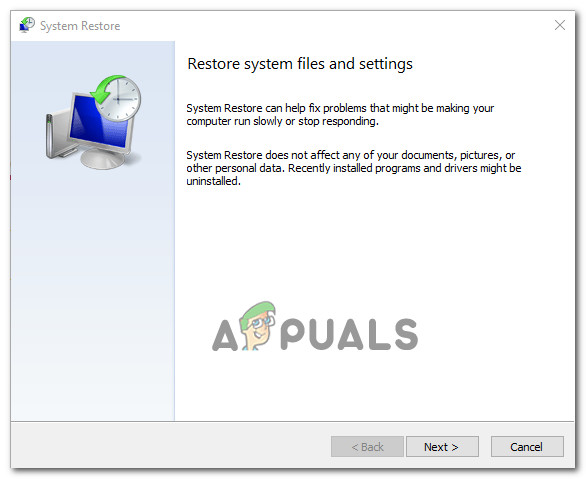
Getting past the initial screen of System Restore - Then, go ahead and select a restore point that is dated before you first tried to create the backup and click Next to advance to the final menu.
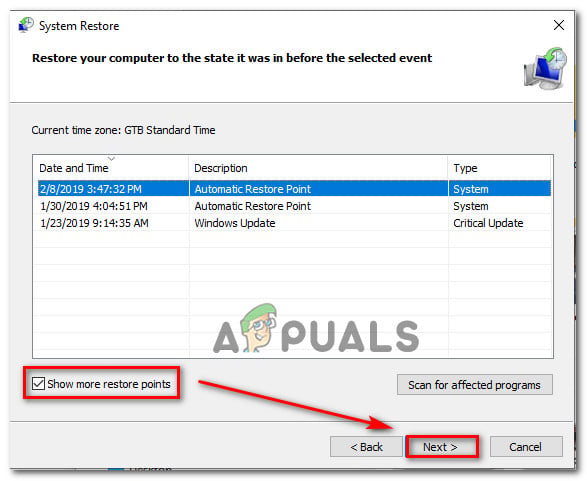
Restoring your system to a previous point in time - To start the restoring process, simply click Finish and then click Yes at the confirmation prompt to start the restoring process.

Starting the System Restore process - After a couple of seconds, your computer will restart and the new state will be enforced at the next system startup.
- Once the old state is enforced, try to backup your OS once again and see if the same error is occurring.
If you’re still seeing the 0x80780166 error when during the late stages of backing up your Windows version, move down to the next method below.
Method 5: Performing a Repair/Clean install
If none of the potential fixes featured above have allowed you to resolve the issue, chances are you’re dealing with an underlying system file corruption issue that cannot be resolved conventionally. If this scenario is applicable, you should be able to resolve the issue by resetting every operating system component to make sure that every instance of system file corruption is completely eradicated.
Several Windows users that were also struggling to resolve the 0x80780166 error have confirmed that the problem stopped occurring and they were able to create backups without issues after performing a repair install or a clean install procedure.
If you want the quickest possible procedure and you are not concerned about data loss, the best way to go is a clean install. This focused approach will reset every Windows component that might be affected by corruption. But the major downside is that all personal files including apps, games, user preferences, and personal data are also lost (if you don’t back up your data with a 3rd party utility).
A more lengthy but more efficient approach that will allow you to keep most of your files (including apps, games and personal data) is to perform a repair install (in-place repair). But keep in mind that you need an installation media or create one in case you don’t already have one.


