How to Extract and Open RAR Files on MacOS
Are you familiar with RAR files? Majority of the file content that you download from the internet comes in compressed .rar files. If you like to view and use the compressed data on your Mac, first, you need to extract the RAR file. However, because macOS does not include a native RAR explorer, it can be a little tricky. In this article, we will show you an easy way to extract RAR files on MAC OSX.
What Exactly are RAR files
Roshal Archive Compressed (RAR) files are one of the most popular archive file formats for compressing data. They are widely used for sharing and transferring data through the internet. People use these RAR files for decreasing the overall size and packing together various files and folders into a single file. The final compressed archive file is much smaller compared to the size of the uncompressed files and folders included in it. These RAR archives are ideal for sending a variety of files via emails or other sharing methods.
The only downside of using RAR files is that you must unpack the archive before you access the compressed content. However, this procedure is mandatory for all archive file formats like ZIP, RAR, 7-zip, TAR, etc.
RAR or ZIP – What’s the difference?
Mac operating systems provide a built-in ZIP extractor. However, macOS does not have native support for RAR files. You must install third-party software to access extract RAR archives. If you are asking, why people use RAR instead of ZIP files, I would say, because it is more efficient in every aspect. RAR archives use secure AES-128 encryption standard and offer higher compression ratios compared to the ZIP files. So, RARs are undeniably high-quality archiving formats, which you will meet frequently. And, if you haven’t noticed yet, “.rar” is the extension of these files (example tutorials.rar).
Easy Way to Open RAR Archives
Despite the fact that macOS and OS X provide a built-in archive utility tool, it is not capable of opening RAR files. You can use this tool for managing a variety of archives like ZIP, TAR, GZIP, etc. However, if you like to use RAR files, you will need to get an appropriate software.
There are many apps capable of managing RAR files on macOS and OS X. In the next section, I will show you an easy way to extract RAR files on Mac using The Unarchiver.
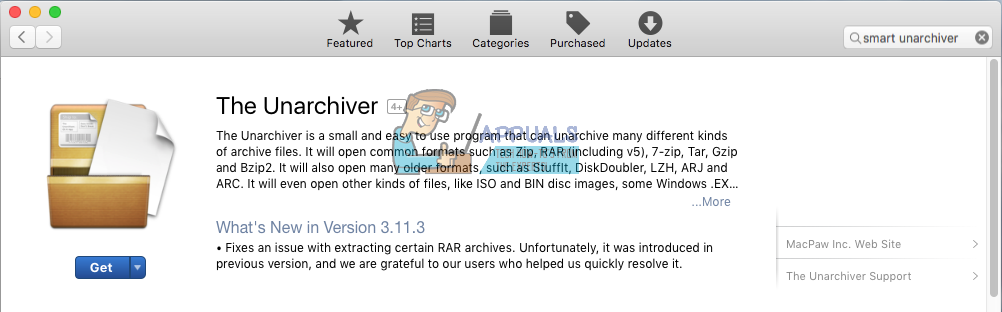
The Unarchiver for Mac
The Unarchiver is a free and light app that you can find in the utility section of the Mac App Store. It has a simple, easy-to-use interface, and it is an open source project. The Unarchiver is capable of unarchiving the most used archive files, including ZIP, 7-zip, GZIP, TAR, BZIP2, and RAR.
Additionally, if any reason you use some of the older formats, like DiskDoubler or Stuffit, The Unarchiver is the right app for you. It can even open BIN and ISO disk images, as well as some .EXE installers, common from the Windows platform.
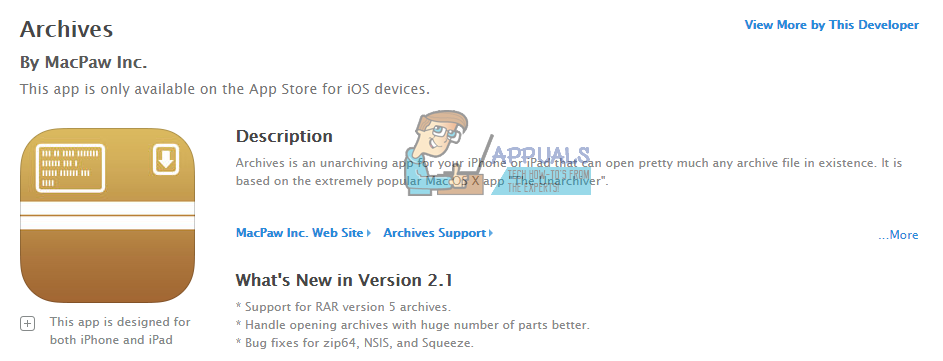
(Archives) The Unarchiver for iOS
One good thing about The Unarchiver is that it has its companion iOS app. It is called Archives, and you can download it from the iOS App Store. The mobile version of The Unarchiver supports almost all the archive file formats that supports its desktop variant. With Archives, you can quickly open the attachments of your emails, downloaded files from the internet, or any other compressed file on your iOS device. That can be really handy in today’s world of high data transfer.
Easy Way to Use The Unarchiver for Extracting RAR files
- Download The Unarchiver
The first thing you need to do in order to use The Unarchiver is to download it. You can do it on its official The Unarchiver site or the Mac App Store. The developer suggests using its website as a download source, because of the limitations set by Apple on the Mac App Store. They have special sandboxing requirements that restrict the capabilities of the app, claims the developer.
If you decide to use The Unarchiver, make sure that your OS is later than OS X 10.7. This is the only requirement for running the latest version of the app. However, if you own an older OS version, you can still use some of the older releases of The Unarchiver. They are available in The Unarchiver site.
- Extract Rar Files
When you finish with the installation of The Unarchiver, you can start using it for extracting RAR files.
The extracting procedure is a simple drag-and-drop action. Select your RAR file and drag it onto The Unarchiver’s icon and your archived data is ready for use. Also, you can right click on the RAR files and from the “Open With” section choose The Unarchiver option. However, the simplest method is to double click on the RAR file, and The Unarchiver will extract the archive for you. The Unarchiver places all the extracted files in the same folder where the RAR file exists.
After the extracting process, you can manage the unpacked data as any other data on your Mac.

Possible Issues Using The Unarchiver
The Unarchiver is mostly stable app. However, in some rear circumstances, it may not work properly. The most common scenario is if you upgraded your operating system recently. The solution is pretty simple. You just need to uninstall The Unarchiver and install it again from the Mac App Store or the official website. Sometimes, OS updates may make some conflicts for The Unarchiver.
Another possible issue with The Unarchiver may make your firewall. To prevent this problem, go to firewall settings and make sure you enable The Unarchiver to receive incoming connections. That’s how you will allow the app the needed access. You can find detailed instructions in the following section of the article.
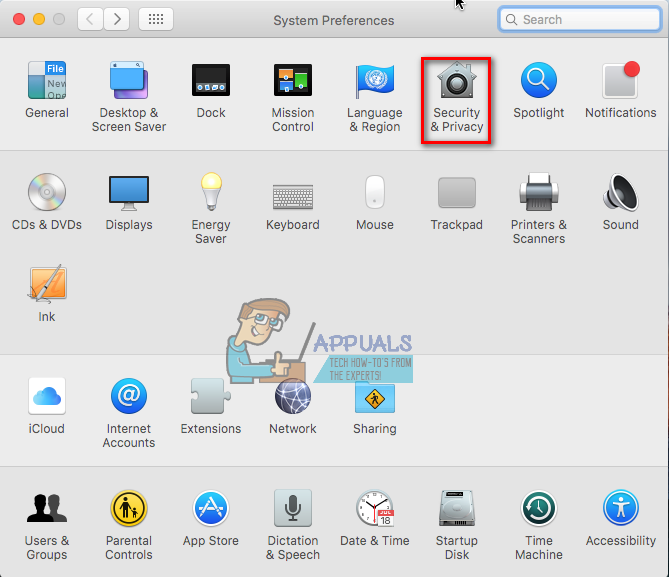
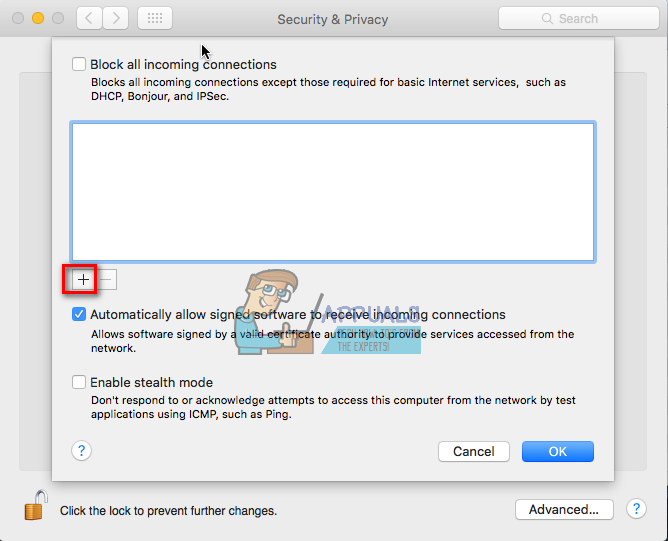
Firewall Instructions for Enabling Access
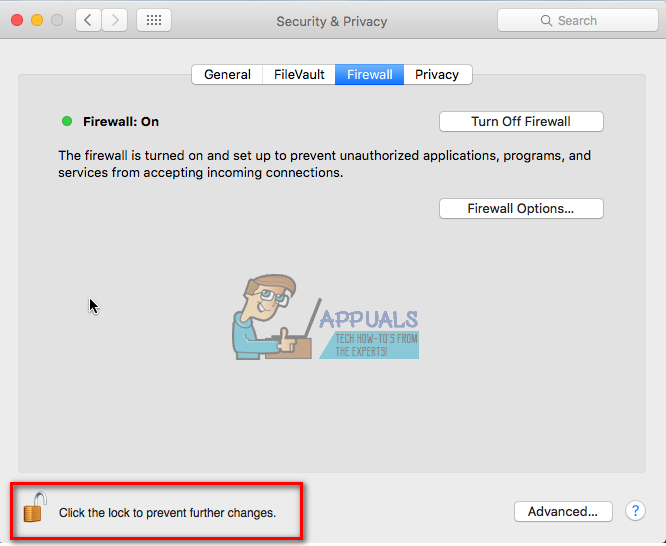
- Go to System Preferences and in the section Security & Privacy choose Firewall.
- Click on the lock icon in the bottom left corner, and enter your username and password.
- Open Firewall Options and click on the “+” button.
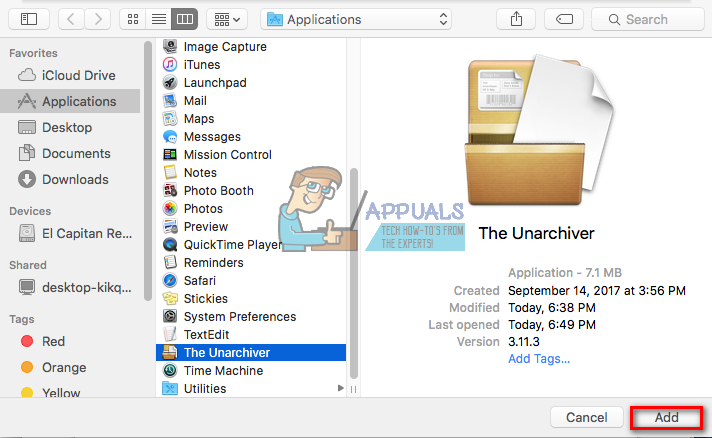
- In the Applications section, scroll down and choose The Unarchiver. Then tap on the Add button.
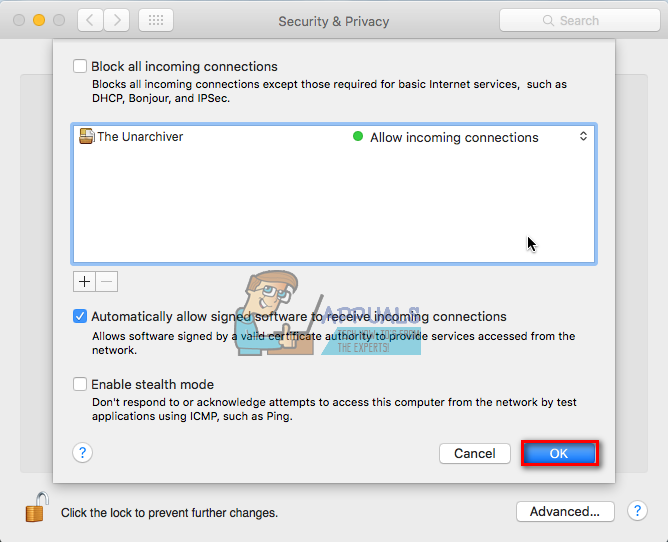
- Now, click on the OK button, and lock the firewall settings by clicking on the lock icon.
If for, you want to remove the permission for The Unarchiver, you can follow the same steps with the difference in step 4. To remove the permission click on the “–“ button, and continue with the following step.