How to Extract and Flash Huawei Stock Firmware
For advanced Android users that own Huawei devices, there may be scenarios where you only want to flash specific files from an OTA update. For example, if your device accidentally becomes bricked, and you know for a fact that flashing specific files from an update package (instead of an entire ROM) would help you recover your device.
In this Appuals guide, we are going to show you exactly how to extract and flash specific files from Huawei firmware update packages. We offer 3 methods – Huawei Update Extractor for Windows, SplitUpdate script for Linux / Mac, and an alternative script also for Linux with a couple additional features.
Requirements
- Firmware Update.zip
- Huawei Update Extractor (Windows only)
- SplitUpdate perl script (Source) (Linux / Mac / Windows)
- Alternative script (extracts to same folder as ‘splitupdate’ instead of output/, and includes a mount script for Linux only)
First you should determine your current Huawei firmware version. Check in Settings > System > About Phone, then copy down your Build Number.
You should see for example something like: BLA-L29 8.0.0.132(C636)
This translates into: BLA-L29C636B132. Because you will replace “8.0.0.” with C636, and add a B in front of 132.
A brief note on Nougat versus Oreo
The partitions were changed a bit in Oreo. The boot partition was split into ‘ramdisk’ and ‘kernel’. Recovery partition was split into recovery_ramdisk, recovery_vendor, and recovery_vbmeta – which also shares the kernel partition with ramdisk.
So with that information, you probably want to flash ramdisk and recovery_ramdisk – ramdisk is where Magisk/SuperSU would be flashed, and recovery_ramdisk is where TWRP would be flashed.
So let’s say for example you have the firmware BLA-L29C636B132.
You would go to Pro-Teammt firmware database then enter your full firmware into the finder, and search for your model.
Then you locate the row that indicates “FullOTA-MF” and click the “Update” button on that row.
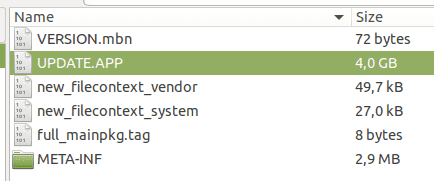
It will then download the full OTA update.zip. You need to open this in an archive manager, and extract the “Update.app” file on your computer.
Huawei Update Extractor method (Windows Only)
Download the Huawei Update Extractor, and extract it on your computer. Launch the HuaweiUpdateExtractor.exe program inside the main folder.

Head over to the Settings tab, and uncheck the option for ‘Verify header checksum’.
Now go back to the Extract tab, and click the … button to choose your update.app file that you extracted earlier.
The screen will populate with all the files inside the update.app file. Now you can right-click on any of these files and choose ‘Extract Selected’, which will give you another dialogue to choose where to send the extracted file.
You can then use fastboot to flash the extracted files, for example, to the ramdisk.
For example, you place the files you want to flash in your main ADB pathway, and launch an ADB terminal.
Then you place your device in fastboot mode using ‘adb reboot bootloader’
After this you can flash the file using fastboot. So if you wanted to flash something to the ramdisk, you would use the ADB command: fastboot flash ramdisk xxxxx.img
However, on Nougat you will extract ‘BOOT’ from the update.app file, and flash it using: fastboot flash boot boot.img
Perl Script Method (Linux and Mac)
First you download the splitupdate.zip and extract it.
Now enter the extracted ‘split’ folder, and launch a terminal. Enter the following commands in your terminal:
chmod +x splitupdate
chmod +x crc
Now following the instructions in the Windows section of this guide for obtaining a full OTA update .zip, extract the update.app into the ‘Split’ folder, and open another terminal. Enter these commands:
./splitupdate UPDATE.APP file_to_extract
If you write ‘file_to_extract’ or anything that is or is not in the UPDATE.APP it will list all images in it.
./splitupdate UPDATE.APP’ will extract all files in update.app – it will output files to the newly created ‘output’ folder. The filtering is not perfect.
If you use ‘./splitupdate UPDATE.APP RAMDISK’, it will extract all images with RAMDISK in its name, so you will get RAMDISK.img and RECOVERY_RAMDISK.img.
Alternative Script Method
You will chmod the following files inside the alternative script folder, using the terminal:
chmod +x simg2img
chmod +x mount.sh
If you will use mount.sh, you need to edit the script and replace YOUR_SUDO_PASSWORD_HERE with your actual password. Alternatively you can remove ‘echo YOUR_SUDO_PASSWORD_HERE | ‘ and then manually enter your password while using the script.
You then extract system.img or any other file you like, and use ‘’./mount.sh SYSTEM’.
This will convert SYSTEM.img to SYSTEM.raw and mount it to ‘split_folder/SYSTEM/’ as a loop device, it will also chmod 777 everything in SYSTEM/.


