How to Execute SH Files on Windows
Bash shell script files are written in bash scripting language for Linux. It contains commands that you can normally run on the command line. These files can be called in Terminal to execute and can be opened by double-clicking. However, Windows does not know what an SH file is and how to execute it. If you are looking for a way to execute SH file in Windows then this article will provide you with all possible methods.
What are the SH Files?
SH files (also known as script files) are the scripts that the Bash application programs and use. Bash language is used to write the instructions in these files. Program developers mostly use these files. Since they contain the commands to execute programs, they are indeed important. However, these files are for Linux, so executing them on Windows will require some software or environment that we will provide in methods of this article.
For further information about SH files, you can check our article here. Moving on towards methods for executing SH files on Windows.
Method 1: Using Cygwin to Execute SH Files
Cygwin is an open source command line interface environment similar to Unix. It allows Unix or Linux applications to be compiled and run on a Windows operating system from within a Linux-like interface. By using Cygwin, we can easily execute SH files without any problems.
- Go to the Official Cygwin site to download the 32bit or 64bit setup file: Cygwin
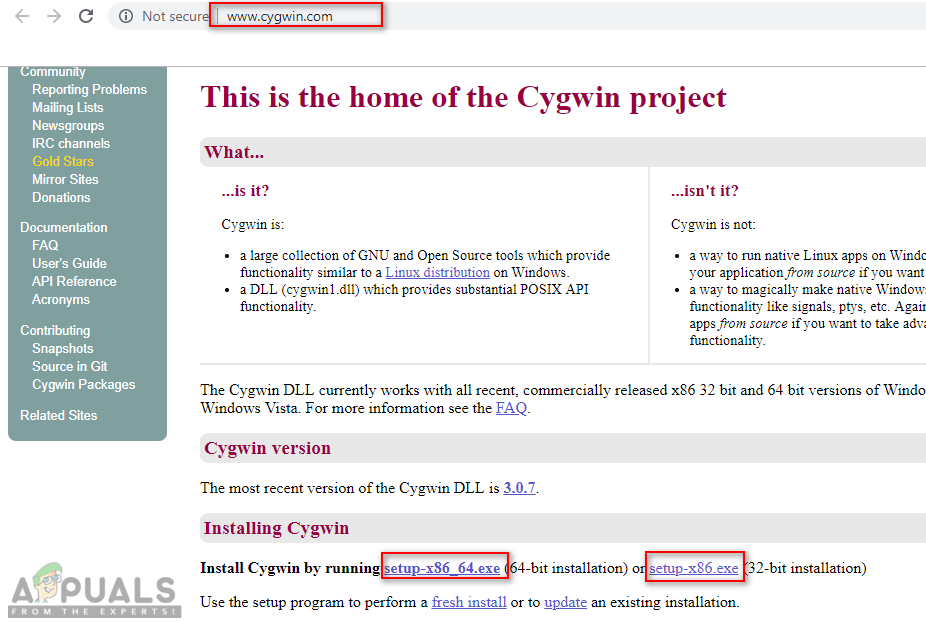
Download site for Cygwin - Open the downloaded setup file and follow the process of downloading and installing Cygwin. There are different options in the installation process so choose the ones you prefer.
- After installation, open Cygwin64 Terminal by double-clicking the shortcut on the desktop.
- Now use the following command to change directory to where the file exists:
cd C:Users/Username/Desktop
This will change the directory to the desktop. Now type the following command to execute SH File:
sh appuals.sh
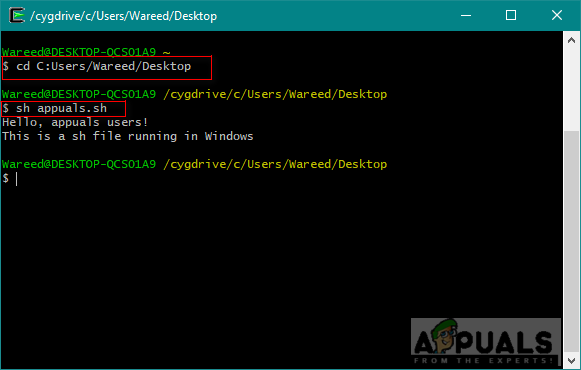
Executing script file through Cygwin
Method 2: Using the Windows Subsystem for Linux Feature in Windows 10
The Windows Subsystem for Linux (aka WSL) is a feature that allows users to run Linux command lines on a computer with a Windows 10 operating system installed. This feature was first added to Windows 10 in 2016. Just like Linux has Wine software for running Windows software, now Windows has WSL for running Linux software. However, enabling and working through this feature will require many steps, which is why we divided this method into three major steps and they are listed as follow:
Step 1: Enabling the Windows Subsystem for Linux
- Hold Windows Key and Press R to open Run, then type appwiz.cpl and Enter.

Opening Programs and Features - Click on the Turn Windows Features on or off on the left side.
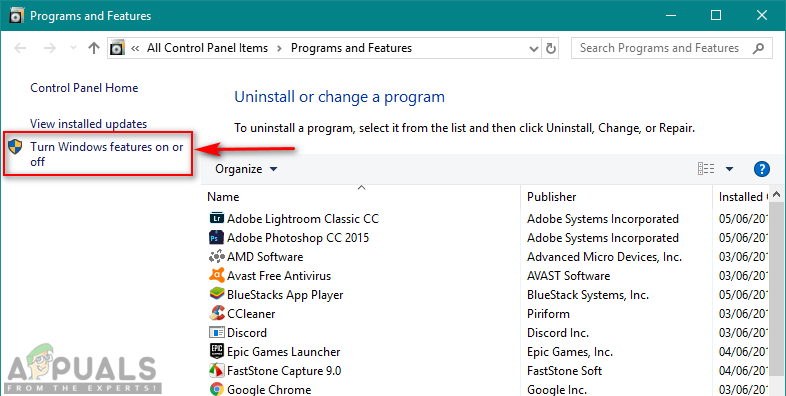
Opening Turn Windows features on or off option - Scroll down to the bottom and tick Windows Subsystem for Linux and click Ok to install.
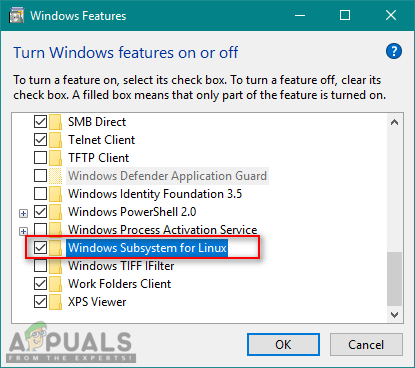
Enabling Windows Subsystem for Linux - Once this is done, move to the next step.
Step 2: Installing a Linux Distro for the Windows
There are three different ways to install a distro for Windows. However, sometimes one of the methods will not work for a specific user, so we are going to provide all three methods below:
- Hold Windows key and press R to open Run, type ‘ms-windows-store:‘ without the quotation marks and Enter.
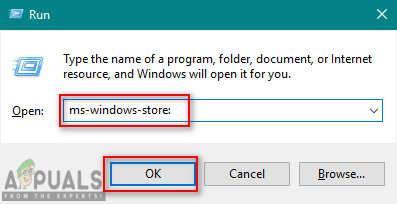
Opening the Windows Store - Search for Ubuntu. Click on the one that is shown below and download it:

Downloading Ubuntu from Windows Store - The second method is to use the following Power shell command to download Linux distro:
Invoke-WebRequest -Uri https://aka.ms/wsl-ubuntu-1604 -OutFile Ubuntu.appx -UseBasicParsing

Downloading distro through Power Shell - The third method to download the distro is using the following curl command:
curl.exe -L -o ubuntu-1604.appx https://aka.ms/wsl-ubuntu-1604

Downloading distro through curl command Note: If your Windows 10 build number is less than 1706 then you need to download curl manually and change directory to that location where curl.exe is located. However, if your windows 10 build number is 1706 or later then curl is included by default and you need to run cmd as an administrator.
- Once you download a distro, it will start the installation automatically and you need to just agree and provide the new username and password as shown below:
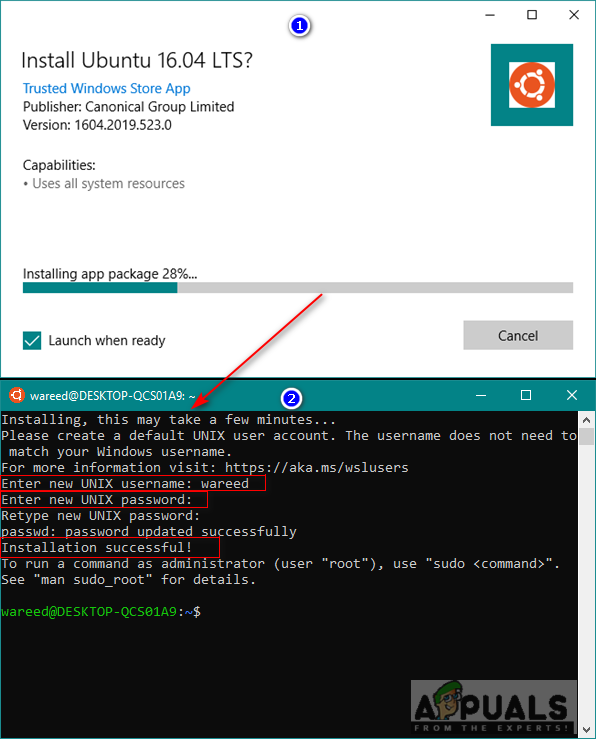
Installing and setting up ubuntu
Step 3: Initializing a Newly Installed Distro and Executing SH File
- Most distros that you will install comes with empty/minimal package catalog. So you need to update and upgrade the packages by using the following command:
sudo apt update && sudo apt upgrade
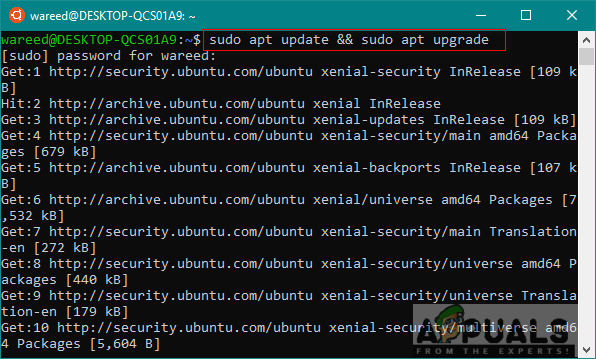
Updating and Upgrading packages - Once you are done with the distro, now you can change directory to the SH file location by using the following commands:
cd /mnt
This will mount your Windows drives. Now you can go to the location you want to:
cd c/Users/Username/Desktop/
Note: Since the sample file was on a desktop so we changed the directory to desktop.
- Type the following command to execute the SH file:
sh appuals.sh
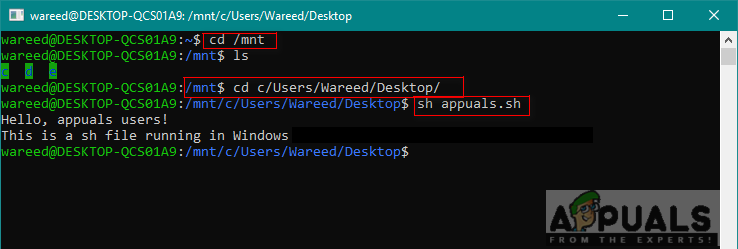
Changing directory and executing the SH file
Method 3: Using Git Command Line for Executing SH Files
Git is a free and open source distributed version control system tool available for all operating systems. By default, Git is installed on Linux and macOS computers as a command line option. However, you can also download it from the official site for all operating systems.
- Go to the following link to download Git for your Operating System: Git

Downloading Git for Windows - Open the downloaded setup file to install Git. Go through the installation process and do check the options which you want and which you don’t.
- Hold Windows key and Press S to open search function, type Git Bash and Enter.

Opening Git Bash - Change directory to where your file is located by the following command:
cd desktop
Note: Desktop can be the name of the folder where your file is located.
- Now type the SH executing command:
sh appuals.sh
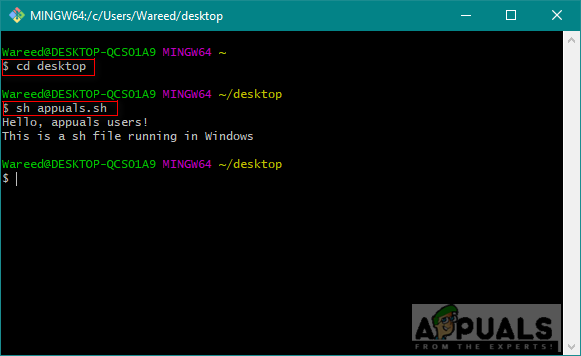
Executing SH file in Git Bash
Method 4: Translate Script File into Batch File
This method is not recommended for average users, but for the users who know script and bat files commands very well. You can just change the format and extension of SH file. It does require the skill of translating the script file into a batch file, so you should avoid using this method unless you know what format both these files use. We are going to show you the simple steps required for the sample code changes.
- Right-click on your SH file and choose Open with > Notepad.
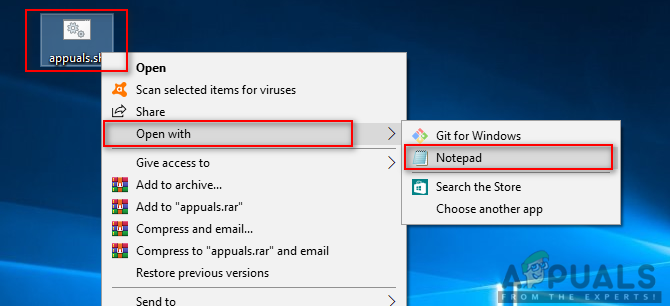
Opening SH file in Notepad - Remove the shebang line from the code as shown below:

Removing the shebang line Note: The comments will have a different syntax “::” than the one in this sample.
- Click on the File and choose Save in the list to save the changes.

Saving the changes - Left-click on the SH file and press F2 key to rename the file. You can also right-click on a file and choose rename.
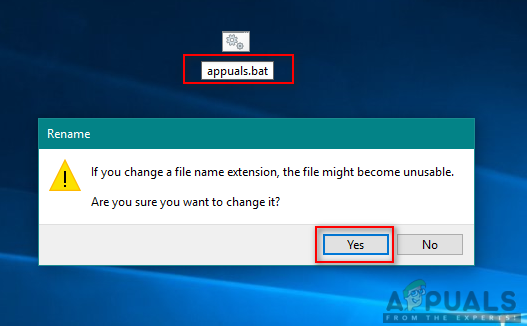
Changing the extension of the file Change the extension from .sh to .bat and click Yes for the changes.
- Hold Windows key and Press S to open search function, then type cmd and Enter.
- Change the directory to the path where the file is located by using the cd command:
cd desktop
Note: Desktop can be the folder name that you are trying to access.
- Now simply type the name of the file with extension:
appuals.bat
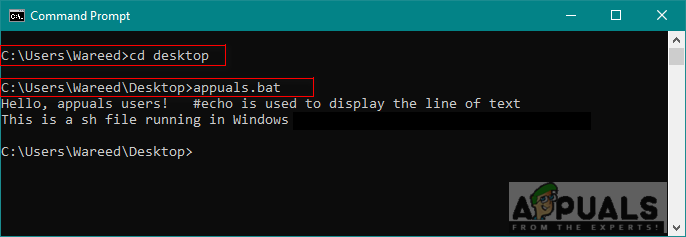
Opening batch file in cmd However, you will notice that the syntax that works in script files are not working in a batch file. As you can see, the comment is being ignored and the text will be printed twice without echo ‘on/off’.


