How to Disable Xfinity Wi-Fi on a Mac
Many MacBook users have a problem with unwanted automatically and continually joining Xfinity Wi-Fi whenever it is available. This happens even for users that don’t have Xfinity account. Instead of connecting to an active Wi-Fi network with internet access, users are stuck on Xfinity Wi-Fi connections. Even setting another connection as default doesn’t solve this problem permanently – It works until shut down. When users turn on their MacBooks again, they go back to a non-working Xfinity network. If you have this problem and want to stop it, here is how to do it.
Method #1: Remove the Xfinity Network
If you are dealing with one Xfinity network (you use your computer at home, and instead on your Wi-Fi, it connects to one specific Xfinity network), you can remove the Xfinity network from your Mac.
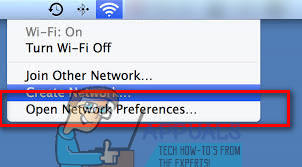
- First, click on the Network icon in the top right corner of your Mac’s screen.
- From the drop-down menu, choose Open Network Preferences.
- Click on the Advanced button, and select the Wi-Fi tab.
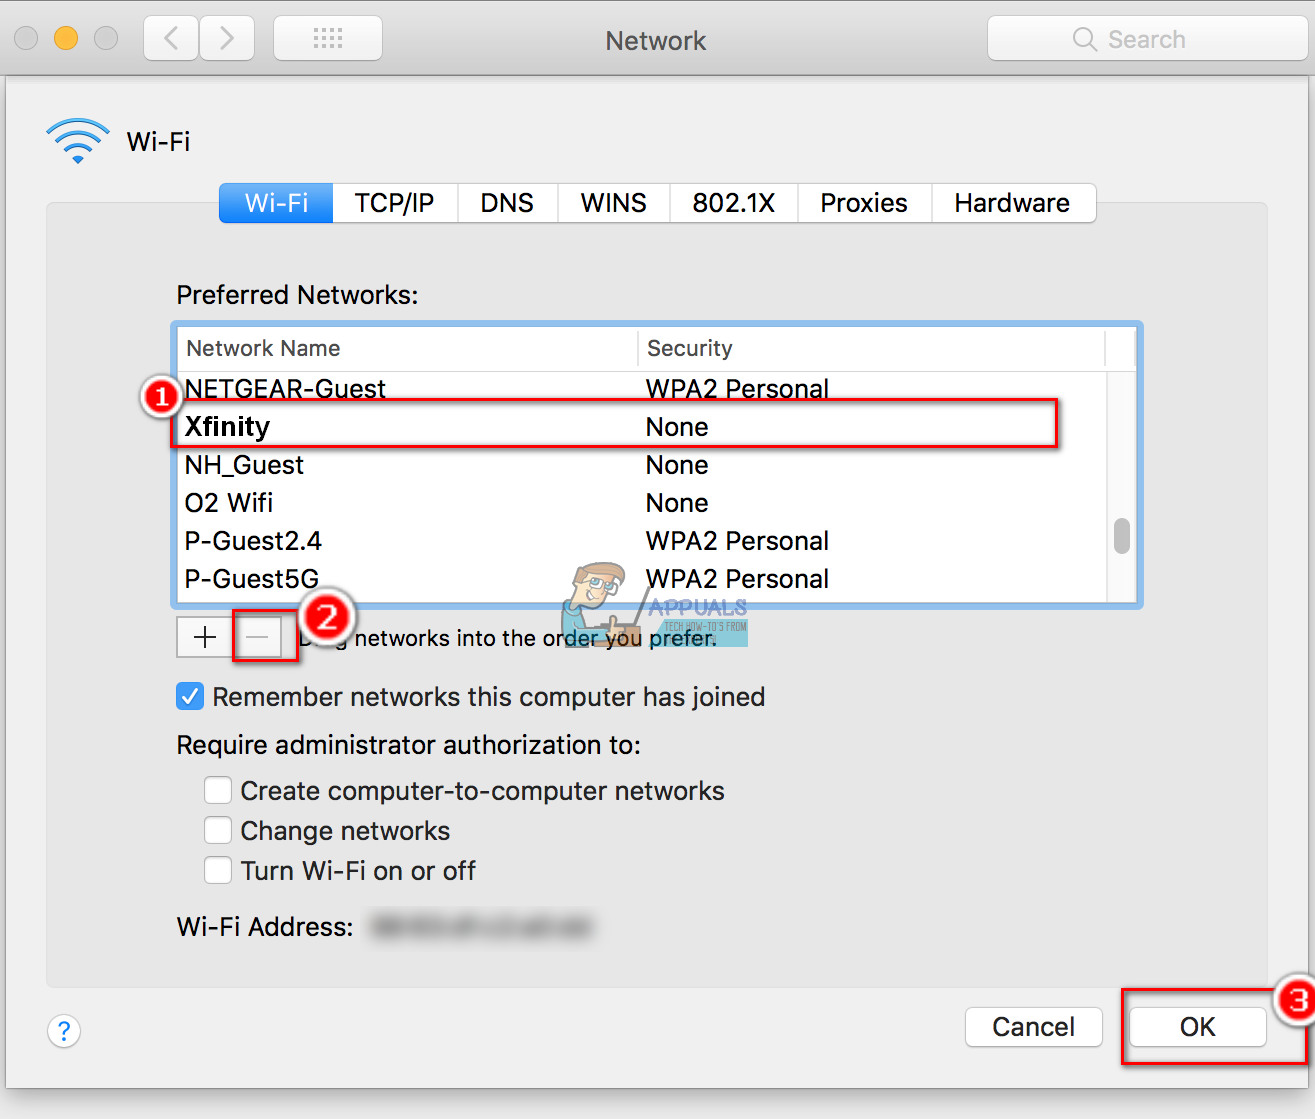
- In the Preferred Networks window, select the Xfinity network that bothers you.
- While selected, click on the “–“ (minus) sign below the Preferred Networks window.
- When asked to confirm, click Remove. (This should remove the network from your stored network settings.)
- Now, click OK, and click Apply. Then close the window.
You can use this method for removing all Wi-Fi networks that you don’t want to connect on.
Method #2: Change Wi-Fi Networks Priority
If you use your MacBook on the go (which most of us do), you can prioritize the Wi-Fi networks you use, and set Xfinity networks to the bottom. That way, whenever you are in that area, your MacBook will connect on the higher-priority networks.
- Click on the Network icon in the top left corner of your Mac.
- From the drop-down menu choose Open Network Preferences.
- Click on the Advanced button, and select the Wi–Fi tab.
- Select the network you want to use and drag it to the top of the list.
- Select the Xfinity network(s) and drag them to the bottom.

- Click OK.
- Click Apply to save the changes, and close the window.
Method #3: Disable Auto-Joining Xfinity Networks
- Click on the Apple icon in the top left corner of your screen.
- Select System Preferences from the drop-down menu.
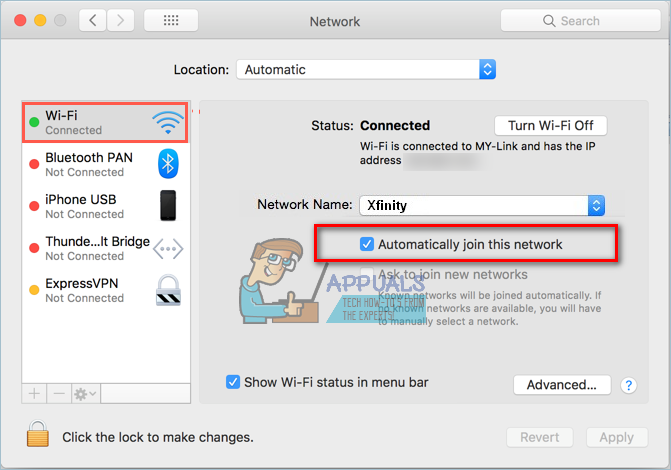
- Click on Network.
- In the networks list, select the Xfinity network you want to stop joining automatically. (You have to be within Wi-Fi range of that network to see it on this list.)
- Uncheck the box Automatically join this network.
- Repeat this process for all Wi-Fi networks you want to prevent automatically connecting.
Let us know which of these methods is the most convenient for you. Also, feel free to share with us if you know any other solution for this common problem, in the comments section below.
I followed all three methods with no success. I hate Xfinity and can’t stand that my Mac won’t stop connecting to it.