How to Disable BCSSync.exe from Startup Items
If you make a thorough analysis of all your Windows processes, you’ll discover that a lot of them are eating away at your system resources without any real benefit. Getting to know your non-system processes will enable you to disable unnecessary ones and free up valuable RAM and leave your CPU to work on other chores.
BCSSync.exe is a good example of a process that you can do without. The bcssync.exe is a legit component of SharePoint Server 2010. Its job is to facilitate sync data and automatic cache refresh in SharePoint. Think of BCSSync.exe as a bridge between the client’s machine and other client files hosted on the SharePoint server.
Note: You won’t encounter this process if you don’t have SharePoint or Office 2010 installed on your computer.
But if you don’t use SharePoint, it doesn’t really make sense to leave it open. However, deleting the file can cause severe consequences to your Microsoft Office 2010 suite. Some users have reported that their entire suite of Microsoft programs stopped working after removing the bcssync.exe file.
Should I disable bcssync.exe?
Yes, but you shouldn’t delete the file altogether. As a matter of fact, all non-system processes can be disabled without affecting your operating system. BCSync.exe is requested by SharePoint Server 2010, and even if you force close it from the taskbar, you’ll find that it will start again at a later time automatically.
Note: The default location for the BCSSync.exe process is in C:/ Program Files / Microsoft Office > Office14.
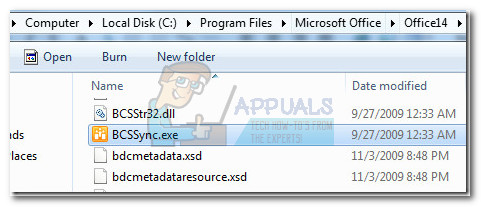
Disabling the bcssync.exe process will not affect your system in any other way than limiting SharePoint’s ability to sync and cache data. But if you don’t use SharePoint, you won’t see any negative effect on your system after disabling the process.
How to disable Bcssync.exe?
Well, deleting the bcssync.exe file is not an option since it will break your entire Microsoft Office 2010 suite. But there are several ways to tackle this issue. A temporary fix would be to kill the entire Microsoft SharePoint tree. But as I’ve said above, this fix will only last for a while. At the next startup, the bcssync.exe will get opened again.
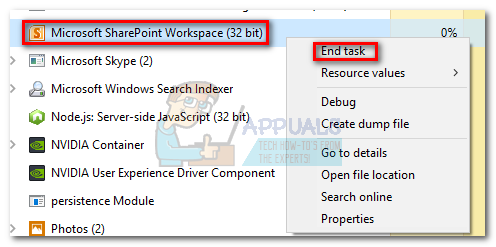
But if you’re looking for a permanent fix, there are 3 different methods that you can use. Follow one of the fixes below to prevent bcssync.exe from ever opening up again. Although the approaches are different, the end result is the same, so follow whichever method seems more convenable.
Method 1: Disabling BCSSync.exe from Microsoft SharePoint
This method implies preventing the bcssync.exe process from starting by preventing Microsoft SharePoint from opening a background process at system startup. This is the more elegant solution, but you’ll be required to go through the initial setup if you never opened SharePoint before. Nevertheless, here’s what you need to do:
- Press Windows key + R to open a run window. Type “groove.exe” and hit Enter to open SharePoint.
 Note: If this is the first you open SharePoint, you will be prompted to provide your credentials and verify your email address.
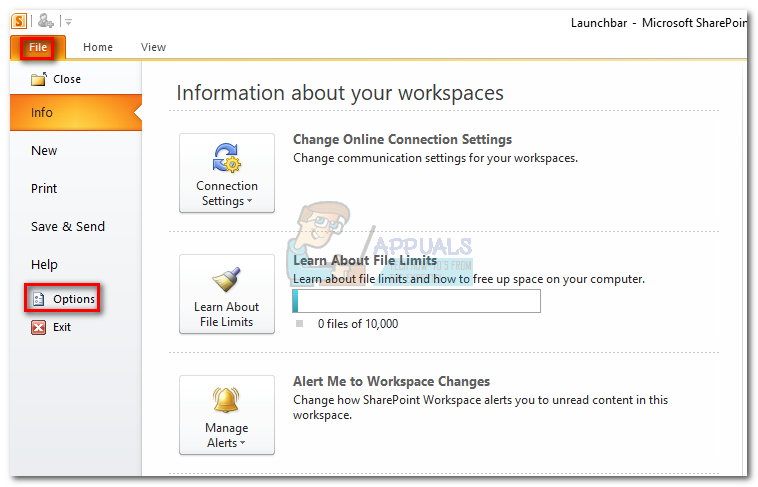
 - Once you’re in SharePoint, go to File and click on Options.
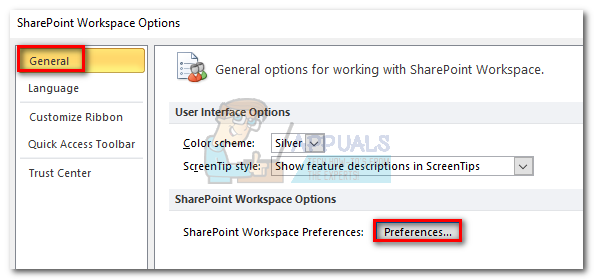
- In SharePoint Workspace Options, expand the General tab and click on Preferences.
- Under Preferences, select the Options tab and disable the box under Startup Settings. Once SharePoint Workspace is prevented from launching at Windows Startup, hit Ok and close SharePoint.
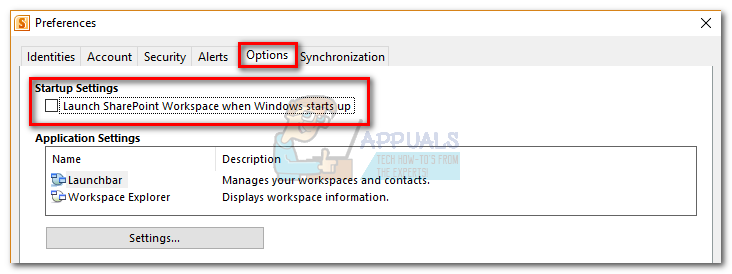 That’s it. The bcssync.exe process will not run in the background or start by itself ever again. It’s possible that the process is still opened until the next time you start your system. If you want to speed up the process go to Task manager and close it manually one last time.
Method 2: Disabling bcssync.exe from the installation wizard
Disabling Business Connectivity Services (the services behind bcssync.exe) can also be accomplished by running the installation wizard of Office 2010. If you can, use this method instead of Method 3, because it will also remove other unnecessary files related to BCS. Here’s what you need to do:
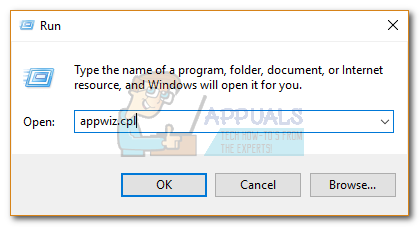
- Press Windows key + R to open up a Run window. Type “appwiz.cpl” and press Enter to access Programs and Features.
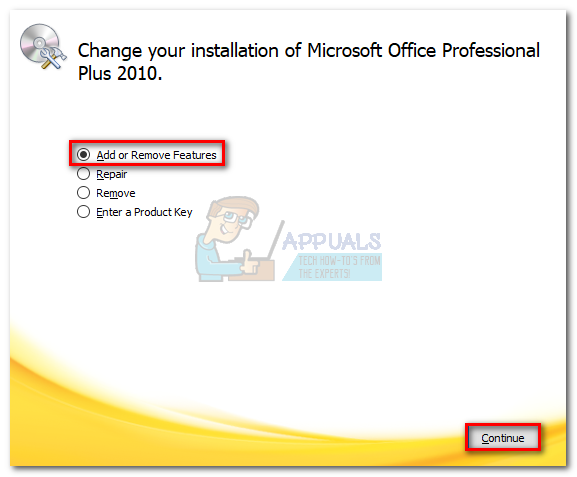
- Scroll down and find Microsoft Office Professional (Plus) 2010. Then, right-click on it and select Change.

- Activate the toggle next to Add and Remove Features and click Continue.
- Scroll down and expand the Office Shared Features menu. Then, expand the drop-down menu next to Business Connectivity Services and set it to Not Available. Hit Continue to proceed.
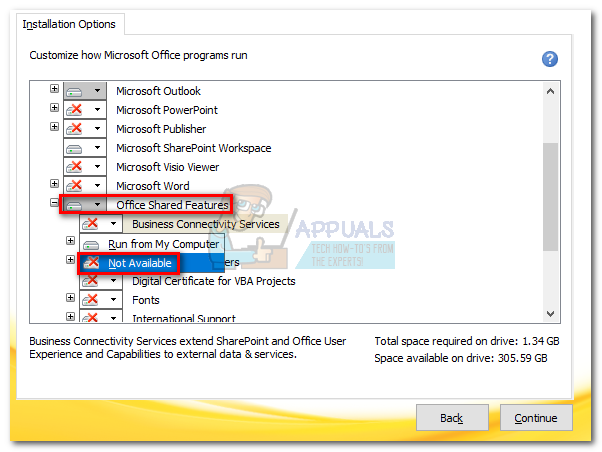 Note: If you don’t use SharePoint at all, this would be a good time to disable it completely. All you have to do is access the drop-down menu near Microsoft SharePoint Workspace and set it to Not Available.
 - Now, wait until Microsoft Office restructures itself to get rid of Business Connectivity Services (BCS).
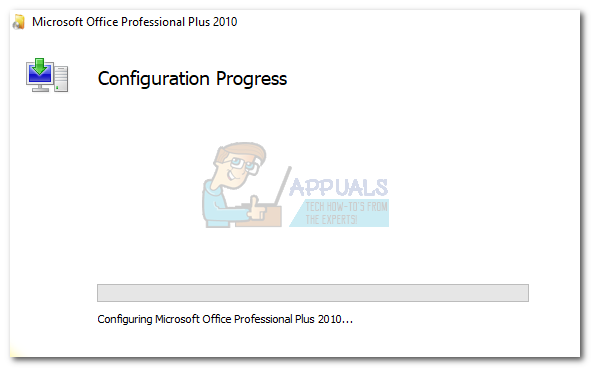
That’s it. The bcssync.exe process is removed from your computer.
Method 3: Removing the bcssync.exe process with MSconfig
Even if MSconfig is mainly used for troubleshooting, you can also use it to disable the startup of applications and services. Unless you use Sharepoint, these steps won’t have any unpleasant repercussions on Microsoft Suite or Windows for that matter. Here’s what you need to do:
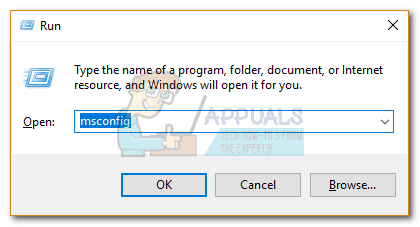
- Press the Windows key + R to open a Run command. Type “msconfig” and hit Enter to open System Configuration.
- In System Configuration, go to the Startup tab.
 Note: On Window 10, you’ll also need to click Open Task Manager to get a list of all processes that run at startup.
 - Look for Microsoft Office 2010 and uncheck the box next to it.
 Note: In Windows 10, disable Microsoft SharePoint Workspace.
That’s it. The bcssync.exe process will not open at the next system startup.