How to Digitize Old Photos & Bring Them Back to Life
 Reviewed by Huzaifa Haroon
Having your printed images scanned is the most reliable way to keep them safe and accessible for years to come. By scanning photos onto a computer or other device, you may rest assured that even if the physical prints are lost, you will always have a digital copy of your memories.

You may be weighing your alternatives for converting photographs into digital format. Print photographs are often digitized using the following methods.
Scanning at Home with a Scanner App
You might not want a photo scanner if you only need a quick way to convert paper images into digital format. You could always use your phone’s camera to snap a shot. However, this could lead to problems including imbalanced contrast, incorrect exposure, distortion, and just downright degradation in quality.
Apps like these make it easier to walk through the scanning procedure while working out those shortcomings:
-
PhotoScan by Google Photos

The Google PhotoScan app, available for iOS and Android, scans your photos many times and then stitches them together to minimize glare and improve image clarity. Prints in either matte or glossy finishes, as well as those stored in or removed from albums, can be seen using the app.
-
Microsoft Lens
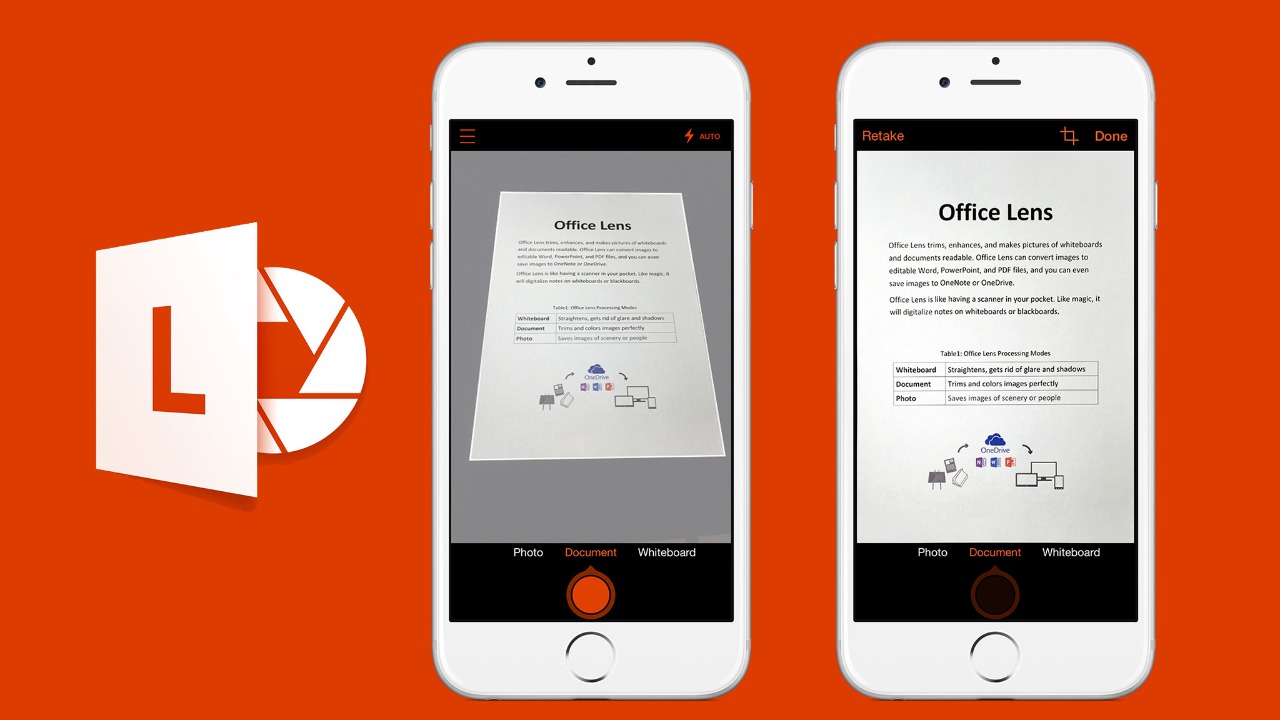
Microsoft Lens is a free scanning program for business use, available for both Android and iOS. It can be used to digitize printed materials, whiteboards, postcards, invoices, menus, signage, handwritten memos and, of course, your old photos. It even has an option to sync with Microsoft 365 for added backup options.
-
FilmBox by Photomyne
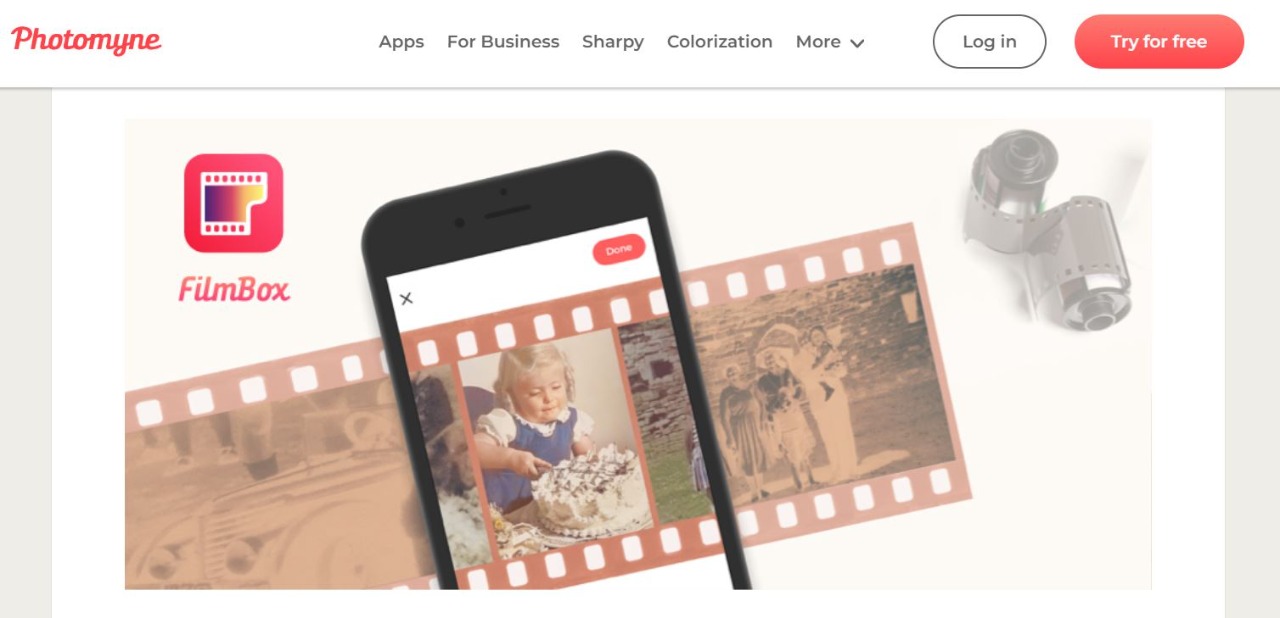
With the help of FilmBox, you can convert your film negatives into digital files without needing a hardware scanner. It is now possible to see, capture, and save film negatives, making them much easier to browse, organize, and share. FilmBox converts the image’s negative colors to their positive counterparts and improves its overall quality. FilmBox is only available for iPhones and iPads.
-
Use Your Camera
Taking a picture of a photo might sound odd, but using a good camera, like a DSLR, mirrorless, or a modern phone, is a great way to update your family photo albums. A tripod helps keep the camera steady and prevents blurry images. Use bright natural light for prints, and a lightbox if you’re working with negatives.
Set up the camera on a tripod so it points straight down at the photo. Place the photo or negative flat underneath, focus the camera, and take the picture. Then, transfer the images to your computer or phone for editing, sharing, or saving.
Scan it yourself with a Home Scanner
If you’re on a budget or want to digitize your photos yourself, a home scanner is a great choice. Scanners come in different price ranges and make it easy to save your photos digitally. You can also turn this into a fun activity by involving your family and looking back at old memories together.
When picking a scanner, think about your needs—like if you want to enlarge photos for printing or display. Below are some suggestions to help you choose the right scanner.
- Best portable scanner: Doxie Go SE
- Most budget-friendly: Canon CanoScan LiDE 300
- For the film, slide shows, and prints: Epson Perfection V600 Photo Scanner
- Best scanner for pros: An HP Scanjet Enterprise Flow 7500 Flatbed Scanner (L2725B)
Hiring a Photo Scanning Service
It’s not hard to find a service that scans your photographs. In most cases, you’ll need to send your pictures to a company, which they’ll then scan them after some time has passed. After the digitization process is complete, the business will offer you a link or login to an account where you can access all of your digital copies of photos.
Images can also be purchased on physical media, like USB devices. The company will return your original images by postal service after completing the job. Here are a few reasons why you might consider employing a photo scanning service:
- Professional results
- Ease, as some businesses even provide packaging supplies.
- The time-consuming task of scanning each image is handled by someone else.
Here are some of the drawbacks of using an online photo scanning service:
- Sending original photographs over the mail risks them being damaged or lost in transit.
- Price; while some businesses promote a low per-photo rate, you may discover the entire cost to be significantly more once you factor in volume pricing, additional costs for retouching, and other expenses.
- Expense, as it may take weeks or months to receive your original photographs back, based on the number of orders currently being processed.
Tips for Digitizing Old Photos
1. Choose the best phone
A photo-scanning app’s accuracy depends on the quality of your phone’s camera. The effects will be excellent on a modern iPhone or Android but not so much on an older model.
2. Remove from albums
Scanning images while still in frames or photo albums can seem like a time-saving option, but the presence of plastic and glass increases the likelihood of reflections.
3. Clean your photos
Dust can be wiped away with a gentle brush or blown away with the help of compressed air. If there are scratches or stains, you can use a lint-free cloth, but you shouldn’t use any cleaning supplies and move carefully and softly. In most cases, even water will do more harm than good.
4. Natural lighting is vital
Find a spot with plenty of natural light that is both bright and soft, and practice a few times there. It’s best to avoid direct, bright sunlight and artificial lights as they can generate glare.
5. Position carefully
Position yourself right over the pictures and as near to them as you can get. Make sure your photos are focused and taken at a straight angle before scanning. The importance of maintaining a steady position to prevent blurring is also highlighted. Use a tripod if you feel like your hands are causing a lot of micro-movements.
Reviewed by Huzaifa Haroon


