How to Delete Unnecessary Breaks from a Microsoft Word Document
Once you have completed your work on a Microsoft Word document, there are chances that you want to bring a few changes in the formatting of the file. While, it can be the text, the color or even the spacing between the lines which you want to alter. Sometimes people create empty spaces between pages and don’t realize that until after they have checked the document thoroughly. If by mistake you have created some gaps in the pages, you can edit that as well.
While you can manually delete the pages, by going to each empty page and pressing the backspace button and repeating the step for all of the empty pages created ever. However, this will become a very long and tiresome process, consuming too much time and you might even want to leave those spaces just as it is.
Or, you can follow the steps as mentioned below to delete the empty pages and save your time.
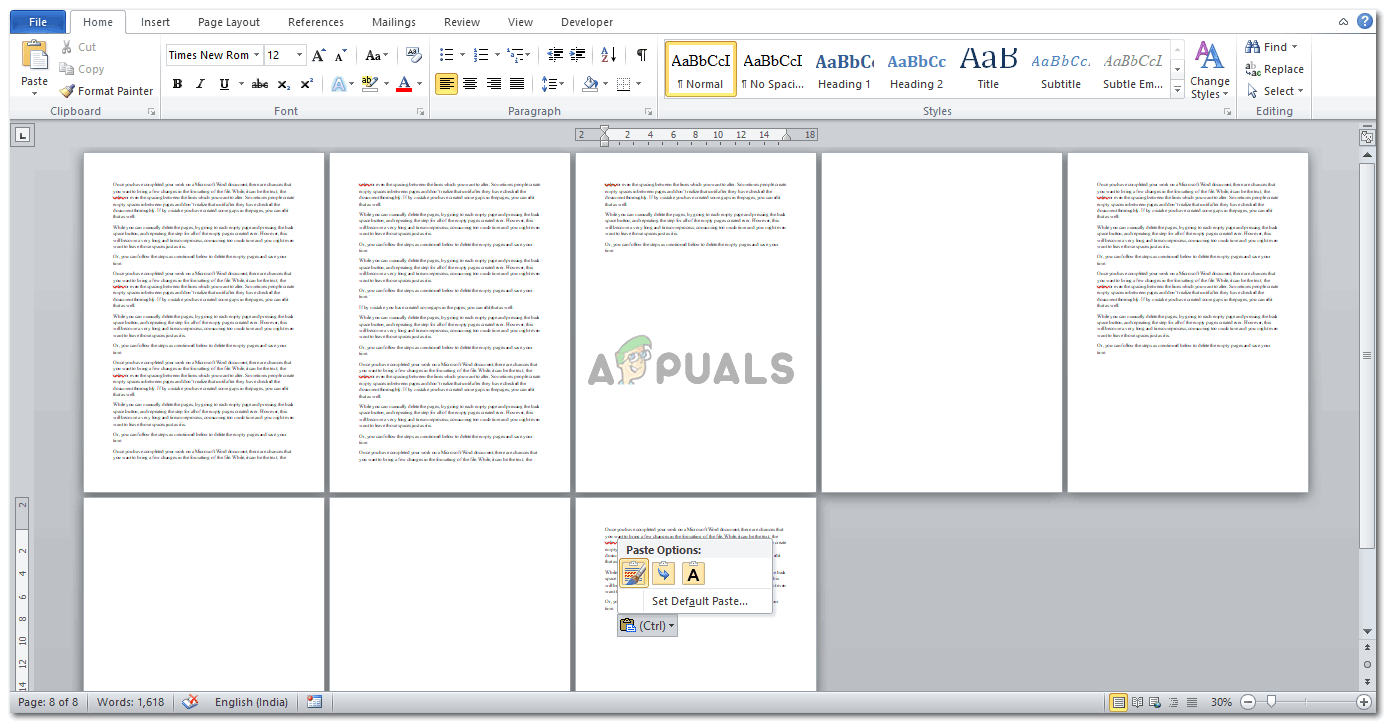
- I created a document with empty pages. As you can see in the image below. It is totally alright if you make these empty pages too often in your document because, through these steps, you can delete those empty pages within minutes and without much hassle.
Ope the document for which you want to delete all the empty pages for. You can follow these steps for as many documents. - While this document is open, you need to open the find and replace tab which can be accessed through two methods.You can either click on the ‘replace’ tab which is on the top toolbar towards the right side of the page. Look at the image below. It will help you find the replace tab.

Locate the ‘Replace’ tab on the top toolbar on Microsoft Word. You can either click on this tab to open the replace dialogue box, or you can use the short keys Or, you can use the short keys to open the replace dialogue box instantly. This is an easier and quicker way of opening the dialogue box for replacing.Click the key Ctrl and H on the keyboard, both at the same time and it will open the dialogue box for replacing, the minute you click these keys.
- This is how the dialogue box looks like.
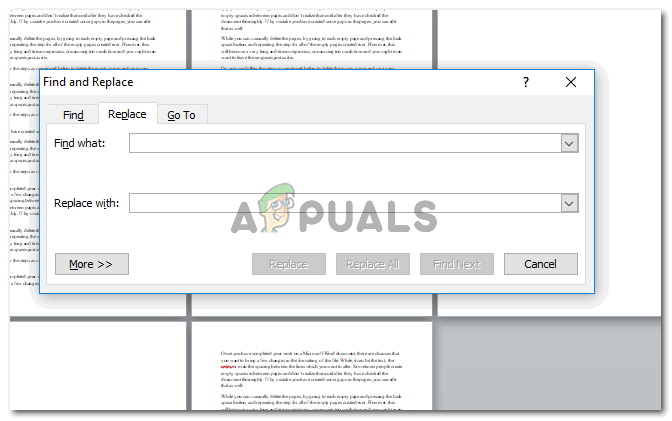
Pressing Ctrl+H on the keyboard or clicking the tab on the top toolbar will open this dialogue box. This is the best way to find a word and replace it with another word within seconds. This is the same dialogue box used to delete empty pages from documents. The only difference is that in the place for ‘find what’, you will write:^p^p.The letter ‘p’ in this should be in lower case to make the method effective. If you type the alphabet ‘p’ in upper case, for example, ^P, and when you click replace all, the program will not move forward and this dialogue box will appear instead.
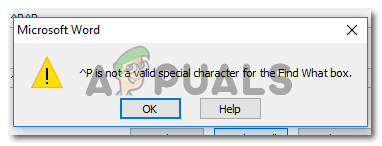
The character needs to be special for Microsoft to recognize the character and make the changes as per the program.
- Next, you need to add another special character in the space for ‘Replace with’.
^p
- Once you have written the right characters in the right spaces, you can double check your replace dialogue box with the image below just to be sure.
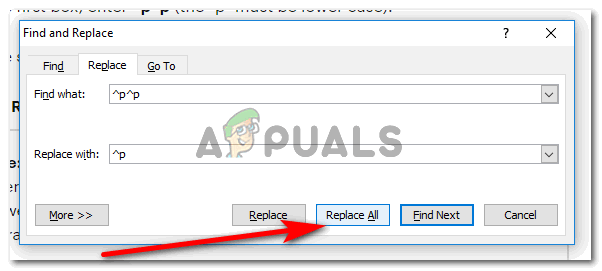
Once you have added the right characters in their right forms, you need to click on the ‘Replace All’ tab to make the formatting happen. - Now click on the tab for ‘Replace All’ to make the program delete all the empty pages from the file within an instant. When you click on the ‘Replace All’ tab, and once the pages have been deleted from the document, this dialogue box will appear which will inform you the number of changes that have been made in your file.
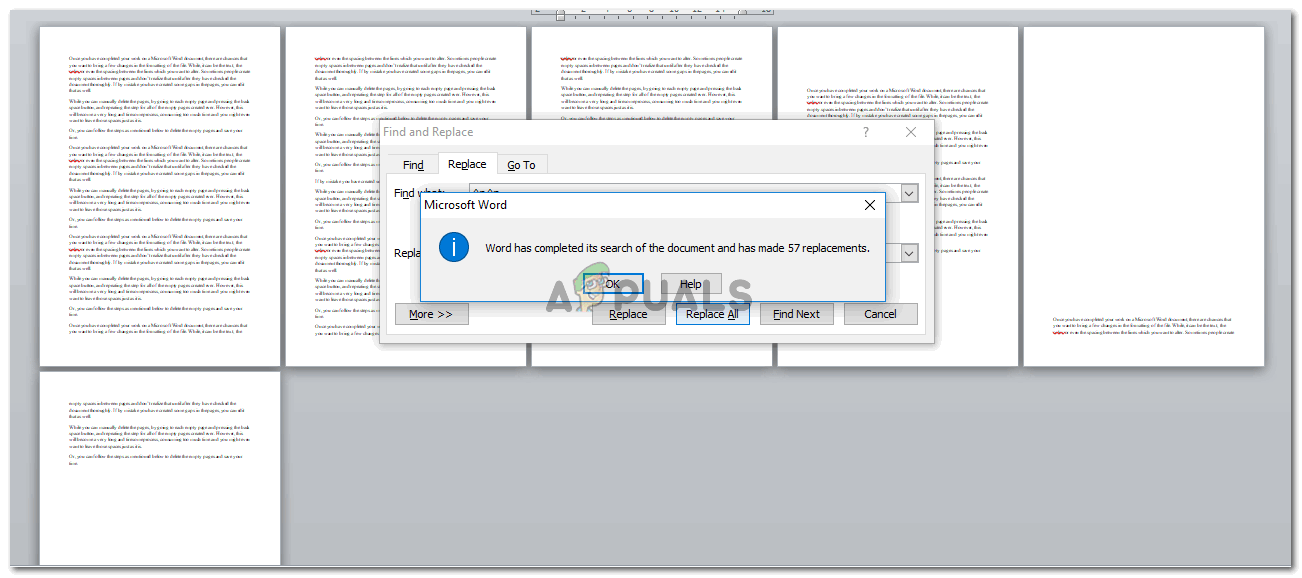
Once you clicked on Replace all, a dialogue box will appear showing you the number of changes made. You can also witness the changes in the document where the blank pages have now been deleted.
Only if I had known this method in my college days my life would have become so much easier. I remember how I had to scroll down my thesis to delete all the empty pages. But now that you have learned this, I am sure this will save you so much more time which can be used elsewhere.
For people who need to add data directly from the internet to a Word document, the method mentioned above might not work for them. If your document includes content from the internet, you need to type the following in the first box:
^i
And this in the second box:
^p
Both alphabets should be in the lower case. And after adding these details, click the ‘Replace All’ tab.


