How to Delete Skype Messages & Conversations
Some VOIP (voice over IP) services like Discord are slowly conquering market share. However, Skype is still in the books to dominate this market for years to come. Millions upon millions of people use the software every day for everything from business conferences to virtual family gatherings.
But even with a user base as big as Skype’s, the service is far from being perfect. One recurrent problem that seems to be bothering a lot of Skype users is the inability to delete specific conversations. Microsoft’s forums are filled with user questions asking how to delete individual messages and specific conversations. Until recently, Skype didn’t provide a way to delete conversations other than deleting all conversations as a whole. To be fair, Microsoft did include a way to delete specific messages, but as you’ll come to see, the feature is quite limiting.
Build-in ways of removing conversations
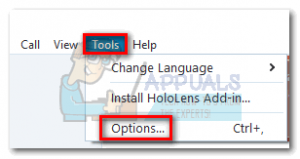
The official way of removing conversations is to clear the entire chat history. If you wanted to delete an entire conversation with a user (or a specific part of it), this is highly impractical. Nevertheless, if you decide to go this route, here’s a quick guide:
- Open Skype and go to Tools > Options.
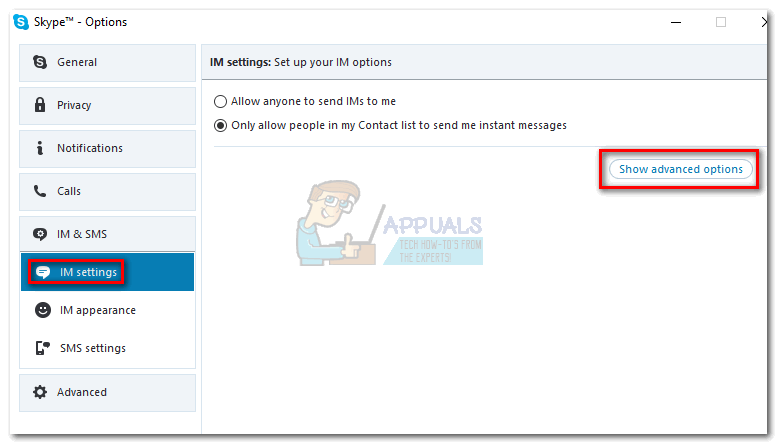
- Select IM Settings, then click on Show advanced options.
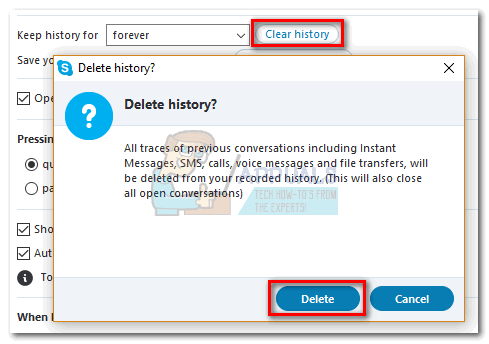
- Click on Clear History, then click Delete to confirm.
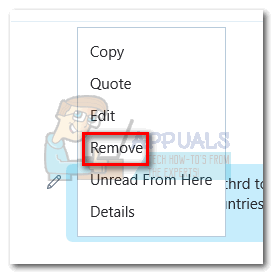
If you’re looking for a more focused approach, there is actually a native way of removing a single message. This method can be applied to messages that haven’t been sent yet, but it’s only going to work for a limited period of time. This means you can’t use this for older messages, which makes this method quite unreliable. To remove a message with this method, simply right-click on it and click Remove.
In the event that you’re not satisfied with the native options of removing Skype conversations, you’d be pleased to know there is a better alternative. This method will allow you to delete a specific conversation with a single user, but it will require you to get your hands dirty. To make things easier for you, we have put together a guide to help you get it done. Let’s begin.
How to Delete Skype Chat History of a Specific Contact
Skype keeps a local copy of your text chats and contacts in an SQL database called main.db. With the right tool, you can access and edit this file to delete certain conversations that you want to be removed. The steps below are completely risk-free, as long as you follow them to the letter (especially the ones about creating a backup).
After a while, you might find that Skype will automatically override the local backup with the cloud copy, and the conversations you delete might become visible again. It’s recommended to treat this fix as a temporary one and not a done deal. Let’s begin:
Note: This fix will not be possible if you use the Skype version that is built-in on Windows 10. You need to use the desktop version which can be downloaded from here.
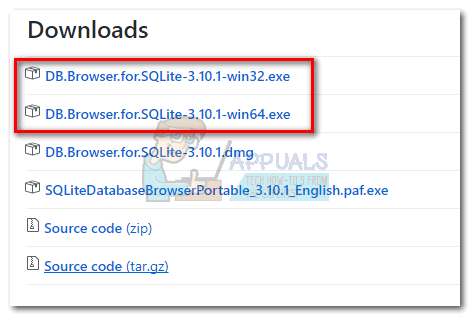
- Download and install SQLite Browser from this link. To do that, scroll down to the Downloads section and download the installer appropriate to your Windows architecture.
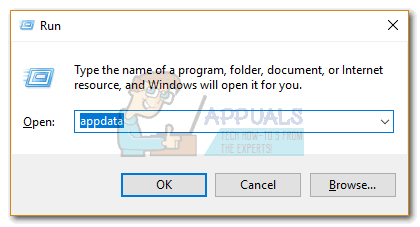
- Now, let’s locate the file that we need to modify. Press Windows key + R to open a run window and type “appdata”, then press Enter.
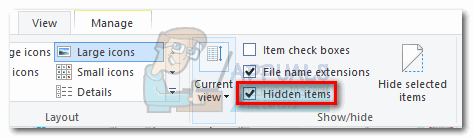
 Note: If we’re unable to locate the appdata folder, open a File Explorer window, click the View tab and tick the box next to Hidden items. Once you have hidden folders enabled, repeat step 2.
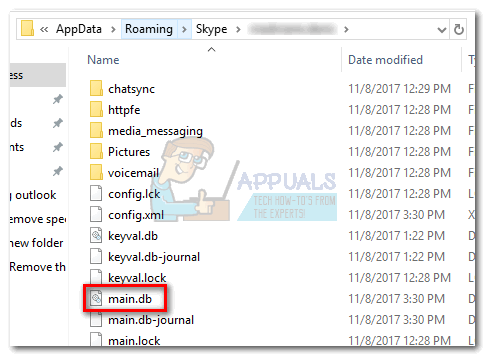
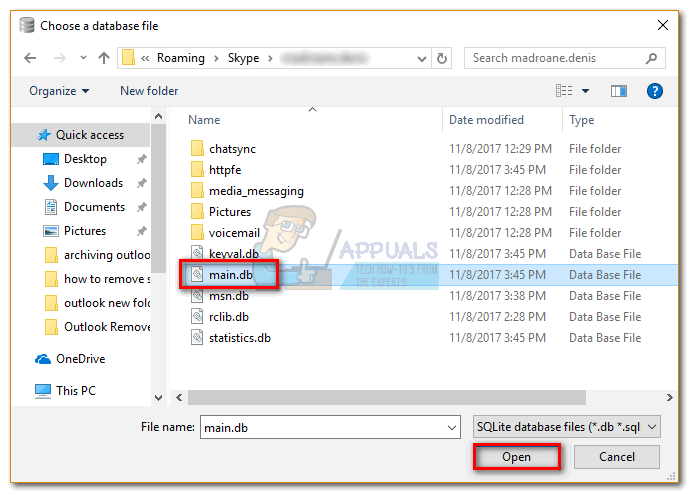
- Navigate to Roaming > Skype > “Your username” and locate the main.db file. Go ahead and create a copy of this file and store it somewhere safe, just in case you end up messing up your Skype conversations.
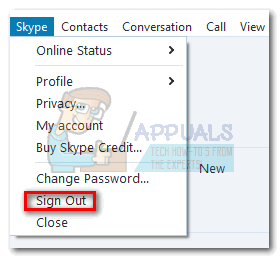
- Make sure you sign out of Skype before closing it completely.
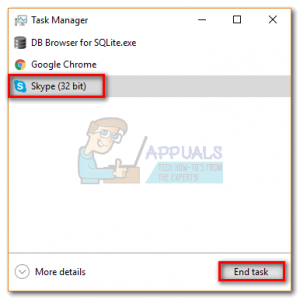
 Note: For this to work, you need to make sure that Skype is not running in the background. To do this, press Ctrl + Alt + Delete, select Skype and click End task.
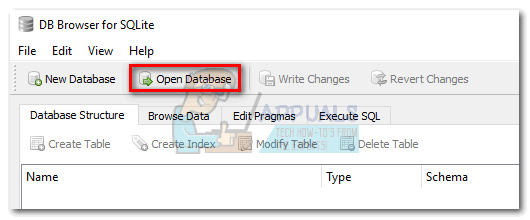
- Open SQLite Browser and click on Open Database.
- Navigate to C: > AppData > Roaming > Skype > “Your username”, click on main.db to select it, then click Open.
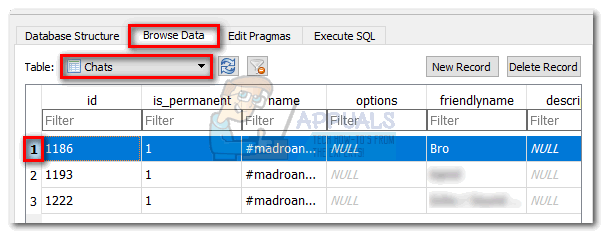
- Click the Browse Data tab and select Charts from the drop-down menu near Table. Identify the conversation you want to delete by looking at the name under friendlyname. Then, select the entire row by clicking on the number located on the left.
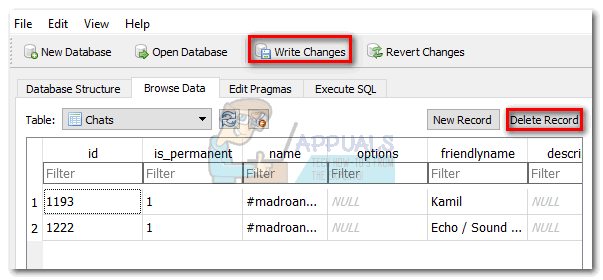
- Once you’ve located the conversation click on Delete Record followed by Write Changes.
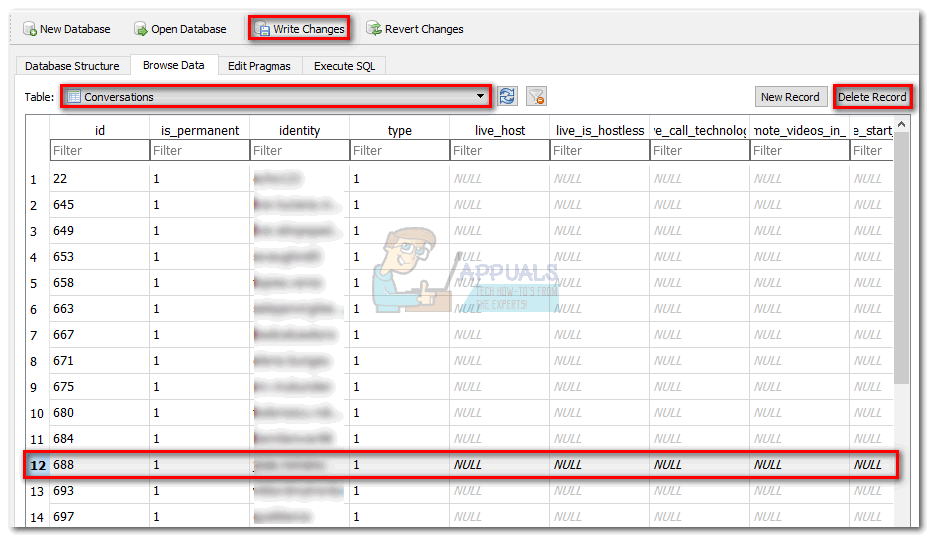
- Now change active table to Conversations and look for the Skype id with which you had the conversation under the identity column. Select it via the number on the left, then click on Delete Record followed by Write Changes.
- Close SQLite Browser, open Skype and log in with your id. The conversation that you removed from the main.db file won’t be visible anymore.