‘Completely uninstall Third-Party security program’ [Full Guide]
In this day and age, our computers are like extensions of our beings – they not only help us with everyday tasks but also contain some of our most sensitive information and data. That being the case, every person who owns a computer spares no effort when it comes to ensuring their computer’s security. All versions of the Windows Operating System come with built-in security programs – Windows Firewall bundled with either Windows Defender (on Windows 8, 8.1 and 10) or Microsoft Security Essentials (on Windows 7 or older). However, many Windows users, believing that Windows’ built-in security measures simply aren’t enough, install third-party computer security programs (antivirus, anti-malware, and firewall applications, for example).
Acquiring a third-party security program is extremely easy seeing as there are dozens out there for every niche, and there is no denying that there are various merits to the use of most third-party security programs. Be that as it may, though, those who install and use third-party computer security programs often find themselves needing to uninstall them in the future, and doing so is no easy task in most cases.
Some Windows users often find that they need to uninstall third-party security programs due to reasons such as expired licenses, conflicts with other computer elements, or simply not wanting the programs anymore. Regardless of your reasons, uninstalling most third-party security applications can be challenging. To successfully and thoroughly remove a third-party security application from your computer, follow these steps:
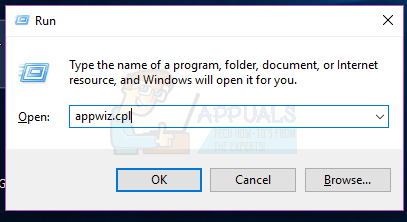
- Press the Windows Logo key + R to launch a Run
- Type appwiz.cpl into the Run dialog and press Enter.

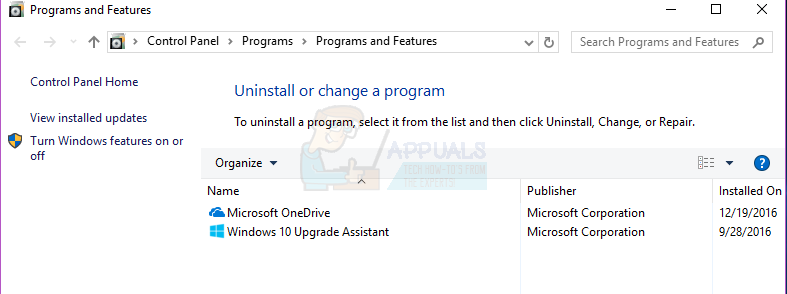
- You will be presented with a list of all the programs installed on your computer. Locate the third-party security program you want to uninstall in this list, right-click on it and click on Uninstall.

- Go through the uninstallation wizard to uninstall the application.
The application will have been successfully uninstalled by the time you reach the end of the uninstallation wizard, although you may need to restart the computer for the changes to take effect.
Unfortunately, uninstalling the third-party security application is usually the easy part. The real challenge lies in eliminating all residual files and settings that these applications typically leave behind. Failing to remove these traces can lead to future difficulties. Therefore, in order to fully clean your system of any remnants from a once-installed third-party security application, consider the following steps:
- Click here to be directed to a list of the removal tools for all widely used third-party security applications.
- Go through the list and locate the entry for the security program you uninstalled from your computer.
- Click on the provided link for the respective application’s removal tool.
- Carefully read any instructions you find on the page the link directs you to, and download the removal tool from there.
- After downloading the removal tool, navigate to its location and double-click to launch it.
- Follow the onscreen instructions and go through the removal tool to get rid of anything and everything left behind by the uninstalled application.
Do not leave your computer vulnerable! If you uninstall a third-party security program and do not have another as a backup, be sure to enable your computer’s built-in security program (Windows Defender or Microsoft Security Essentials) to make sure it remains protected.