2 Steps to Close a Microsoft account permanently and delete data
There are a lot of reasons why you’d be tempted to close your Microsoft account. Maybe you’re using another account, or maybe you are moving towards a different desktop operating system. Even with all the new features that where implemented, Windows 10 is far from being a universal success. The many privacy violations, the poorly designed start menu and the whole suite of bloatware might make you consider deleting your Microsoft account for good.
But deleting your Microsoft account does far more than being a rage declaration to the parent company – it’s a great way of ensuring that none of your data will be used by Microsoft without your consent. If you go the extra mile and remove yourself from the company’s database, you will also prohibit any third-party source from collecting behavioral information about you.
With this in mind, we’ve created a series of step-by-step guides that will make the process of deleting all your account data easier for you guys. Below you have two equally important steps that will ensure that you delete every data present in your Microsoft account from the company’s servers.
How to delete your Microsoft account permanently
There are two large steps that you need to take in order to ensure that all your Microsoft account data is scrubbed.
First, we are going to show you how to delete your Microsoft account data locally. Then, in case you’re also using an Outlook account, you’ll need to log-in to the web version and close it.
Finally, the last step is to scrub your account & account information from Microsoft’s website. Follow the methods below in order to ensure that you delete your Microsoft Account & other associated data properly.
Step 1: Deleting the Microsoft account locally
Let’s start by making sure that we take care of any account data present on your local machine. Keep in mind that if you’re still signed in with the same account you’re trying to delete, you won’t be able to delete it. You’ll need to create an additional local account instead.
Follow the steps below to delete your Microsoft account locally:
- Make sure you are logged into a Microsoft account different from the one that you’re trying to delete. It can be a local account or another Microsoft account.
- Press Windows key + R to open up a new Run dialog box. Then, type “ms-settings:otherusers” and press Enter to open the Family & other people tab of the Settings pane.

Run dialog : ms-settings:otherusers - Click on the account that you wish to delete and choose Remove. Then, click Yes again to confirm the deletion of your Microsoft account from this PC.
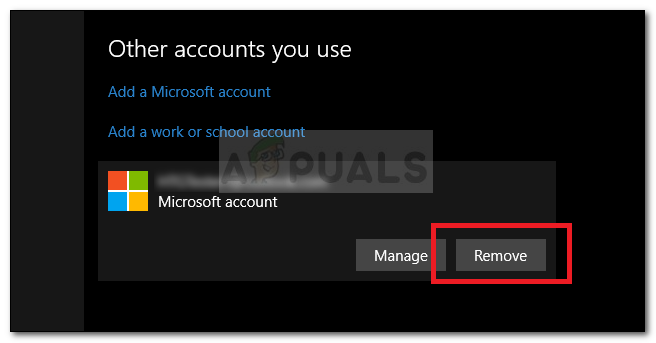
Remove your Microsoft account locally
Step 2: Remove your Account from Microsoft’s database
Keep in mind that after you completed step 1, your data is still present on Microsoft’s server and is still readily accessible by Microsoft and other 3rd party companies that buy behavioral data in bulk.
Luckily, there is a way to scrub all your account information from Microsoft’s database. But before we walk you through the whole process, it’s important that you empty your digital wallet from the Windows Store and cancel all of your active subscriptions. Even more, make sure that any documents, pictures, or any other type of personal data are safely saved.
Once you are ready to proceed, follow the steps down below:
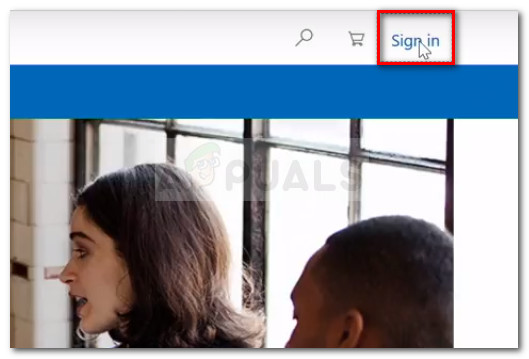
- Visit this link (here) and click the Sign in button in the top-right corner.
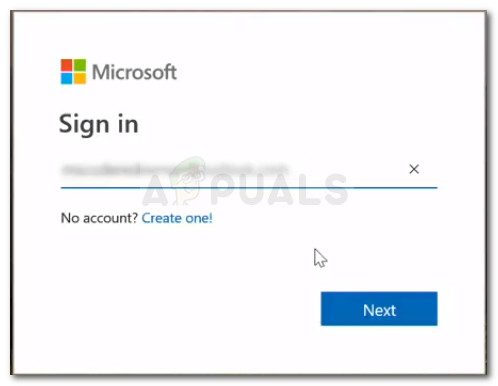
Click Sign in in the top-right corner - Log-in with the Microsoft account that you wish to close via you’re preferred sign-in method.
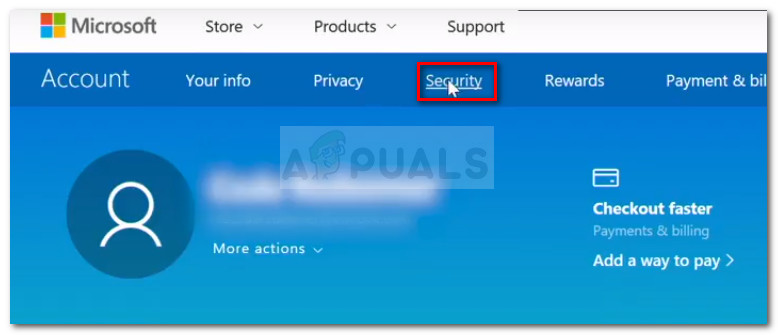
Sign in to Microsoft account - Once you are logged in with the Microsoft account that you wish to close, click on the Security tab (under Account).
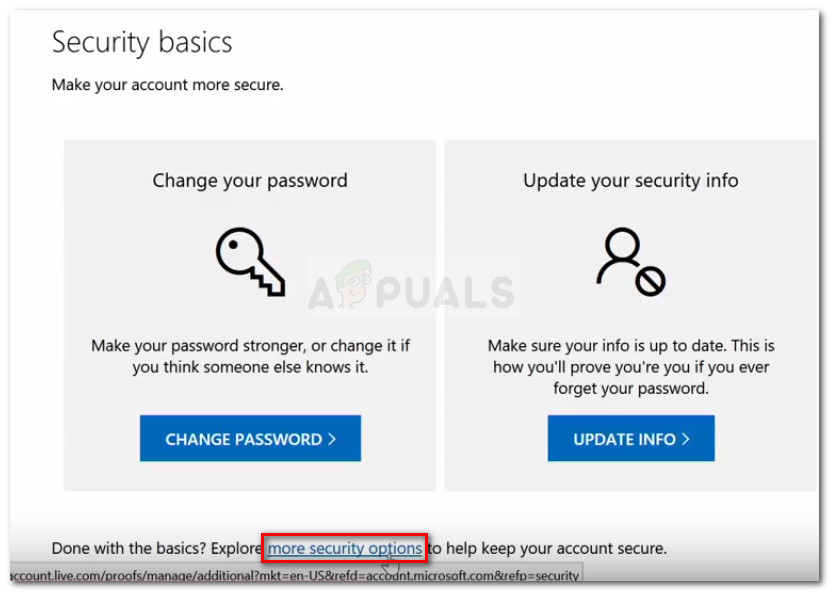
Access the Security tab of your account - Scroll down to the bottom of the Security basics page and click on more security options.
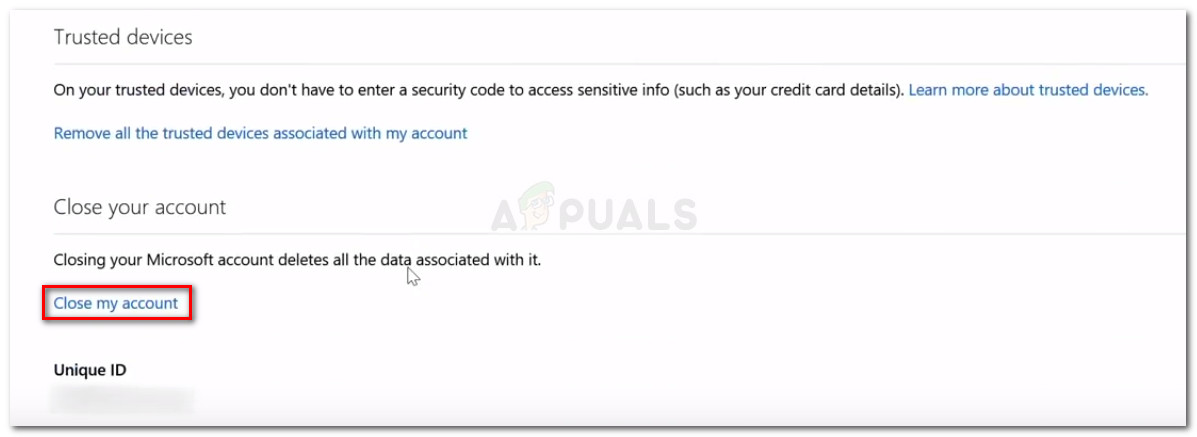
Click on more security options at the bottom of the Security page - In Advanced Security options menu, scroll down to the next bottom of the page and click on Close my account under Close your account.
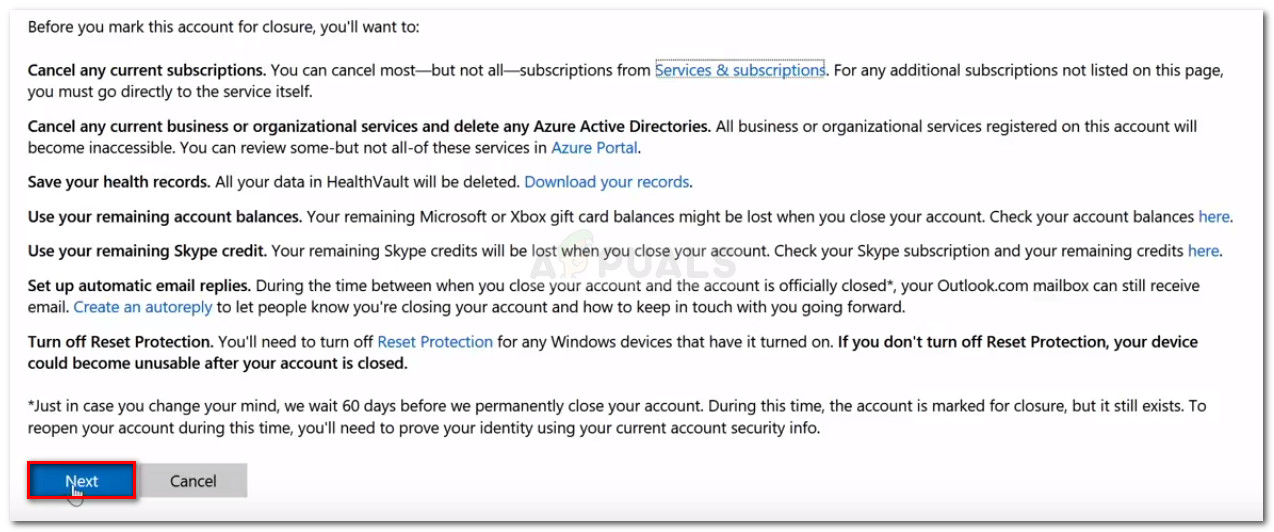
Click on Close my account at the bottom of the page - In the next page, read through the to-do list to ensure that you’re not losing any data or credits. Once you’ve made sure that you’re ready to go, click the Next button.
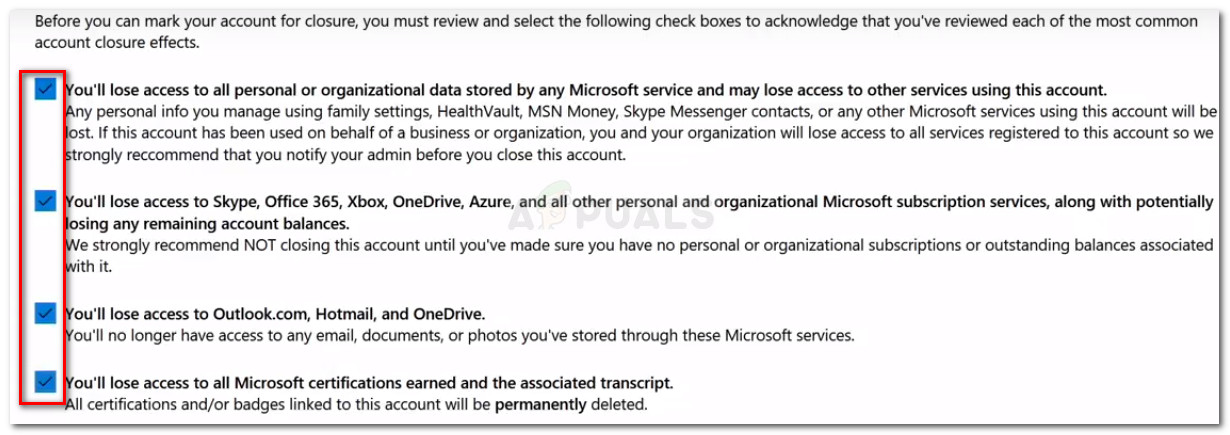
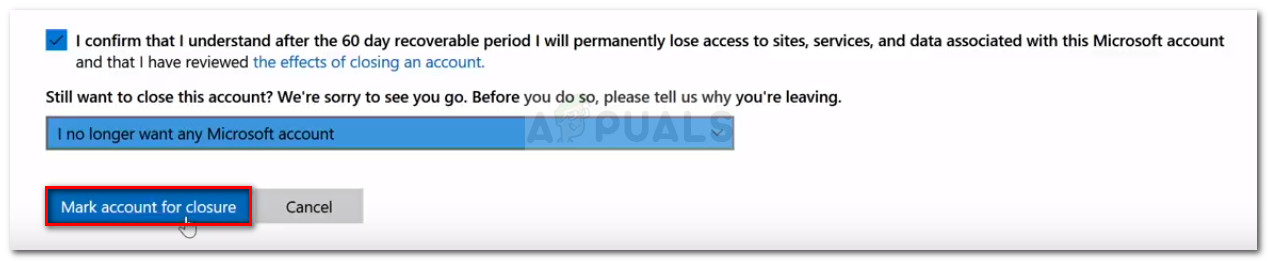
Click next to proceed to account closure screen - Read every account closure effect and check every associated checkbox to acknowledge the fact that you received the warnings.
Check every warning box - Once all checkboxes have been checked, click the Select a reason drop-down list and select the entry closest to your scenario. Once you have the reason selected, click on Mark account for closure.
Select a closure reason, then click on Mark account for closure - When you get this far, note that your account is marked for closure. After 60 days, your account along with all associated information will permanently be removed from Microsoft’s servers. But keep in mind that during this time you still have a window of opportunity to stop the closing procedure. You can do this by simply logging in with your account at this link (here).


