How to Change Your Account Name on Windows 10
On the sign-in screen on any computer running on the Windows 10 Operating System, all of the accounts that exist on the computer are listed, along with the full names of each user account. You can create two different kinds of user accounts on Windows 10 – a local user account, the name of which you decide for yourself while creating the account, and a Microsoft account, the name of which the computer itself pulls from the Microsoft account the user account is associated with. Many Windows 10 users often need to change the names of their user accounts but don’t know exactly how one can go about doing so as changing your account name on Windows 10 isn’t exactly the same as it used to be on older versions of Windows.
On Windows 10, you can go about changing the name of your user account two different ways – the way you need to use depends on whether the user account you want to change the name of is a local user account or a Microsoft account.
How to change the name of a local user account
Changing the name of a local user account on Windows 10 is a pretty simple procedure, similar to how it used to be on older versions of the Windows Operating System. To change the name of a local user account on Windows 10, you need to:
- Right-click on the Start Menu button or press the Windows Logo key + X to open the WinX Menu.
- Click on Control Panel in the WinX Menu.
- Click on Change account type.
- Click on your local user account to select it.
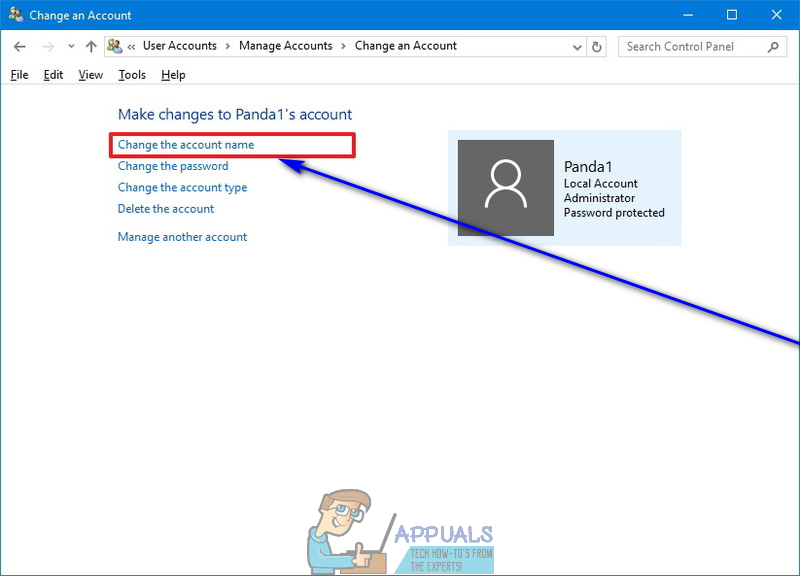
- Click on Change the account name.
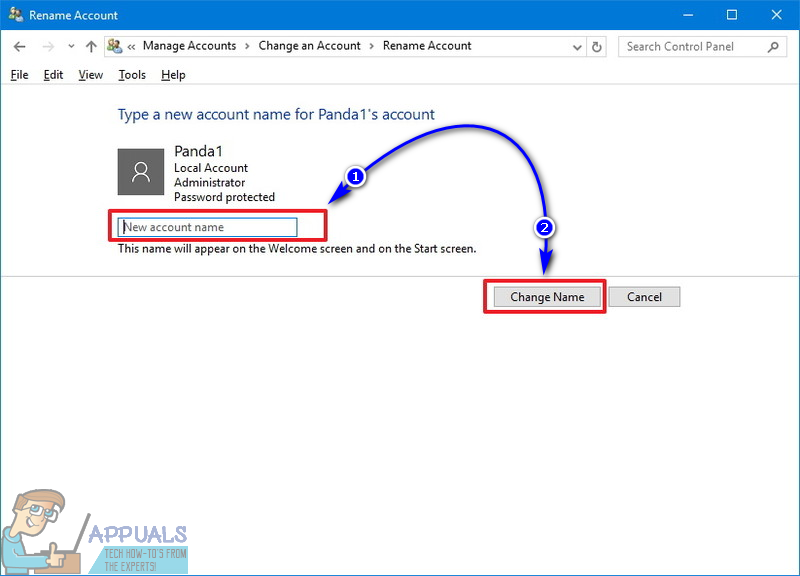
- Type the new name you want the user account to have in the New account name field.
- Click on Change Name.
Once done, the name of the local user account will be changed everywhere – from the Windows 10 sign-in screen to within the Operating System itself, the local user account will be referred to by its new name.
How to change the name of a Microsoft account
Changing the name of a user account gets a tad more complicated when it comes to user accounts tethered to Microsoft accounts. The account names of Microsoft accounts on Windows 10 are pulled from the Microsoft accounts associated with them, which means that your user account on your Windows 10 computer will have the same name as the name of the Microsoft account you used to create it. That being the case, to change the name of your Windows 10 user account, you are going to have to change the name of the Microsoft account associated with it. In order to do so, simply:
- Press the Windows Logo key + I to open Settings. Alternatively, you can also open the Start Menu and click on Settings to achieve the same result.
- Click on Accounts.
- Click on Your email and accounts in the left pane.
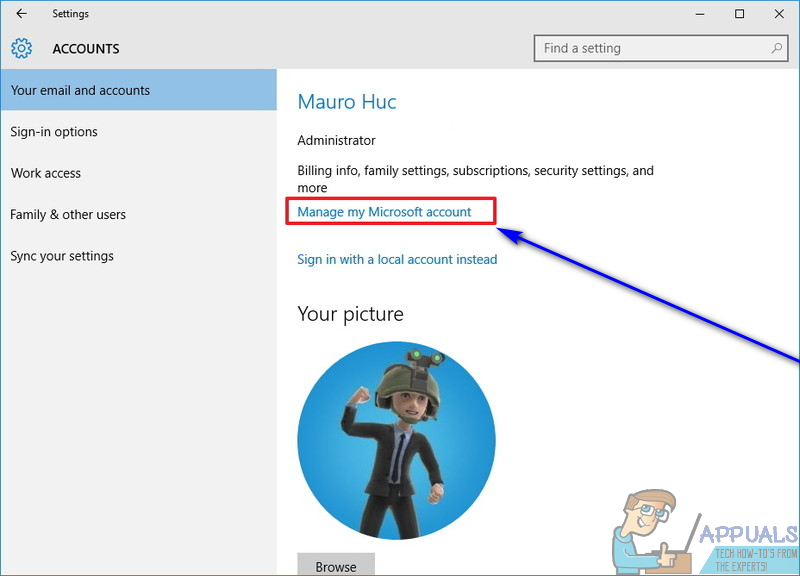
- In the right pane, click on Manage my Microsoft account – doing so will launch your web browser of choice and take you to your Microsoft account’s settings.
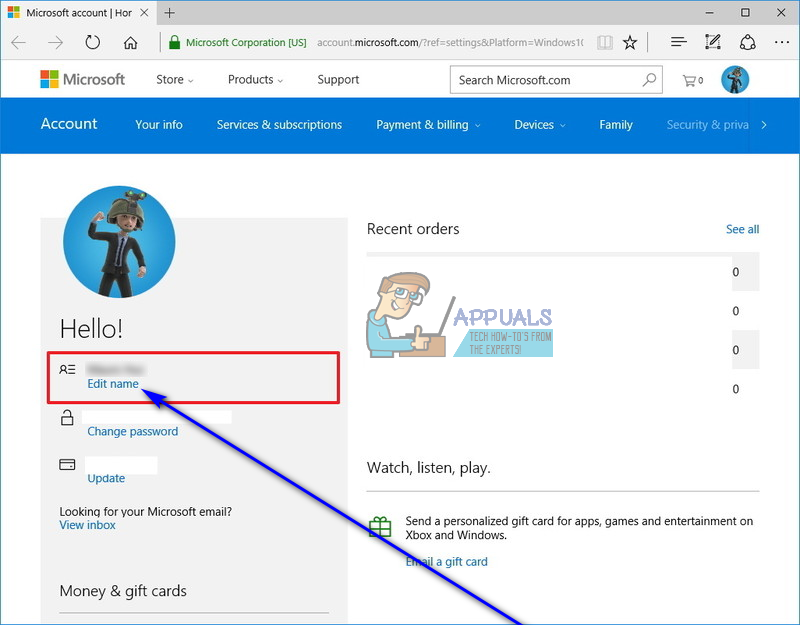
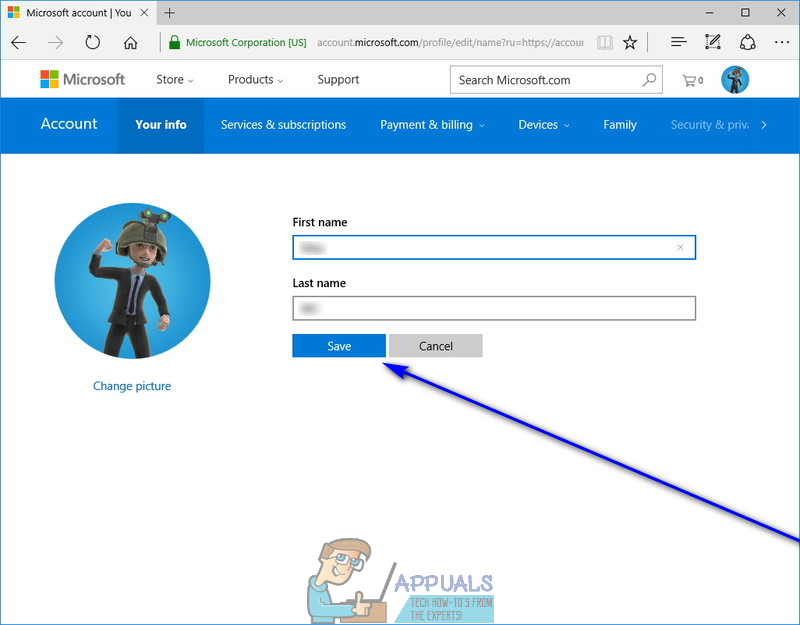
- Click on the Edit name link under the name of your Microsoft account.
- Type whatever name you want your Windows 10 user account to have into the First name and Last name fields.
- Click on Save and close the internet browser.
- Restart your computer.
When the computer boots up, you’ll see that the name of your user account on the sign-in screen has been changed, although it might take a few minutes for the change to be applied to some other parts of your computer. It is certainly worth noting that changing the name of your Microsoft account will not only change the name of your Windows 10 user account that is associated with the Microsoft account but will also change your account names on Outlook and across all other Microsoft services, along with the names of any other user accounts on any other Windows 10 computers that are associated with your Microsoft account.