How to Change the System Locale on a Windows Computer
On a Windows computer, the system locale determines what language the text in programs that do not support Unicode is displayed in. The language that non-Unicode applications display text in is determined solely by what the system locale on your computer it set to. Not only does system locale determine the default character set (letters, numbers and symbols) non-Unicode applications use but also determines what font non-Unicode applications display text in, as well as a number of other things.
The system locale setting is primarily aimed at Windows users who speak more than one language and would like non-Unicode programs on their computers to display a certain language of their choosing. It should be noted that the system locale only controls the language of non-Unicode programs – everything on a Windows computer that uses Unicode (from Windows menus to dialog boxes and everything in between), on the other hand, is not affected by a change in system locale in any way. Not having your system locale correctly configured can cause problems when using non-Unicode applications such as Java, which is why setting your system locale and configuring it correctly is highly important.
Changing the system locale on a Windows computer is a pretty simple and straightforward process, although it varies slightly depending on what version of the Windows Operating System your computer is running on. Before you can actually change your computer’s system locale, however, you need to make sure that you are logged into an account on your computer that has administrative privileges and that you have the appropriate language packs for the language you want to set as your computer’s system locale. To change the system locale on a Windows computer, you need to:
- Click on Start.
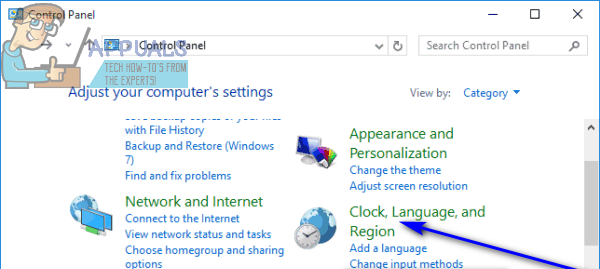
- Click on Control Panel (or search for “control panel” and click on the search result titled Control Panel).
- With the Control Panel in Category view, click on Clock, Language and Region.
- Click on:
Regional and Language Options if you’re using Windows XP
Region and Language if you’re using Windows 7
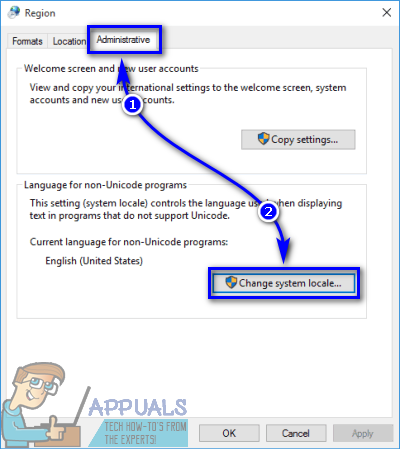
Region if you’re using Windows 8, 8.1 or 10 - In the Region and Language dialog that opens up, navigate to the Administrative tab (or the Advanced tab, if you’re using Windows XP).
- Click on Change system locale… under the Language for non-Unicode programs section.
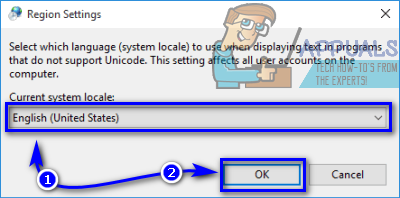
- Open the dropdown menu located directly under Current system locale: and click on the language you want to set as your system locale to select it.
- Click on OK.
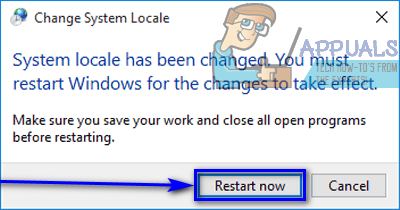
- Click on Apply and then on OK in the Region and Language dialog.
- In the dialog box that pops up asking if you would like to restart your computer right now, make sure you’ve saved all your work and then click on Restart now to restart your computer.
When the computer boots up, launch a non-Unicode program and you will see that the display language has been changed to the new system locale you set on your computer. You will also see that the display language for Windows and almost all of its areas (the ones which support and use Unicode) has been left unchanged and that it is the same as it was before you changed your computer’s system locale.