How to Change the Size of the Document on Microsoft Word
Microsoft Word can be used to make a lot of documents, in different formats and different sizes. If you are using Microsoft Word to make a document, you can either choose from any of the sizes that are available on the program. Or, customize the dimensions of the page according to your requirements. And this is not it, you can also choose a specific format according to the page size on Microsoft Word that will help you make your document even better.
The size for an A4 sheet is 8.5 by 11 inches. This is the size of a usual printing sheet that is often used in schools for printing assignments and tests, and even in offices for printing presentations. But for documents that are supposed to be larger in size in comparison to these sheets, users might want to change the size of their printing document. While physically, they can print the document on a larger scale by using a different printer and a larger piece of paper, but unless you edit the document manually on Microsoft word, the size of the document will remain pretty much the same.
So, if you need to print a document on a larger scale, say on A3, then you must alter the size of the document on the software first. The process is very simple which can be followed easily to change the size of a page. Follow the steps as mentioned below to change the size of the document you are working on, on Microsoft Word.
- Open your Microsoft Word file. The default settings for a Word file is the size of an A4 sheet, which is the most commonly used size for printing when working on Microsoft. But sometimes, business and workplaces require other important sizes like legal papers, or letters, which can also be made on Microsoft Word.
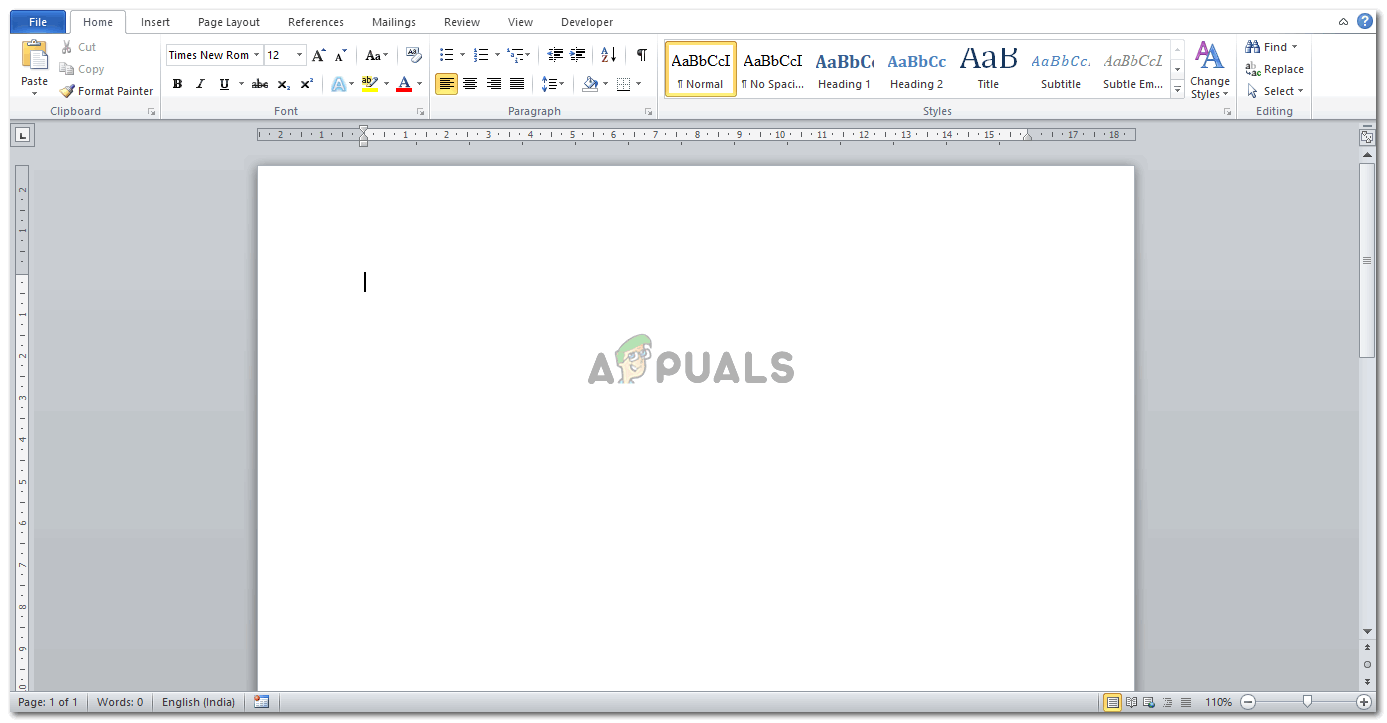
Open a Word file - Now, look at the top ribbon of options for Microsoft Word. Currently, you would be on the Home tab. You need to click on the ‘Page Layout’ which is right next to Insert. This is where you will find options to change the size of your page.

Click on the Page Layout tab on the top tool panel - Right under the Page Layout tab, is another tab for ‘Size’, with an icon with looks like a page with lines for its width and height. This is where you can edit the size of your page the way you want to.
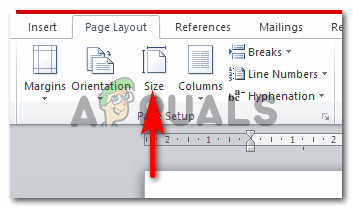
Size tab, to change the size of the page - When you click on Size, a dropdown list of options will appear. All these options are of different sizes. Letter, Tabloid, Legal, Statement,Executive,A3,A4,A5,B4, and B5. These are the mentioned types of paper sizes that are available on Microsoft Word. If any of these is what you require for your work, all you have to do is click on one of these to make it your page size on the current document you are working for.
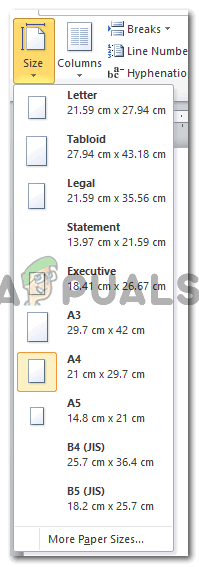
Select a page size, or customize it 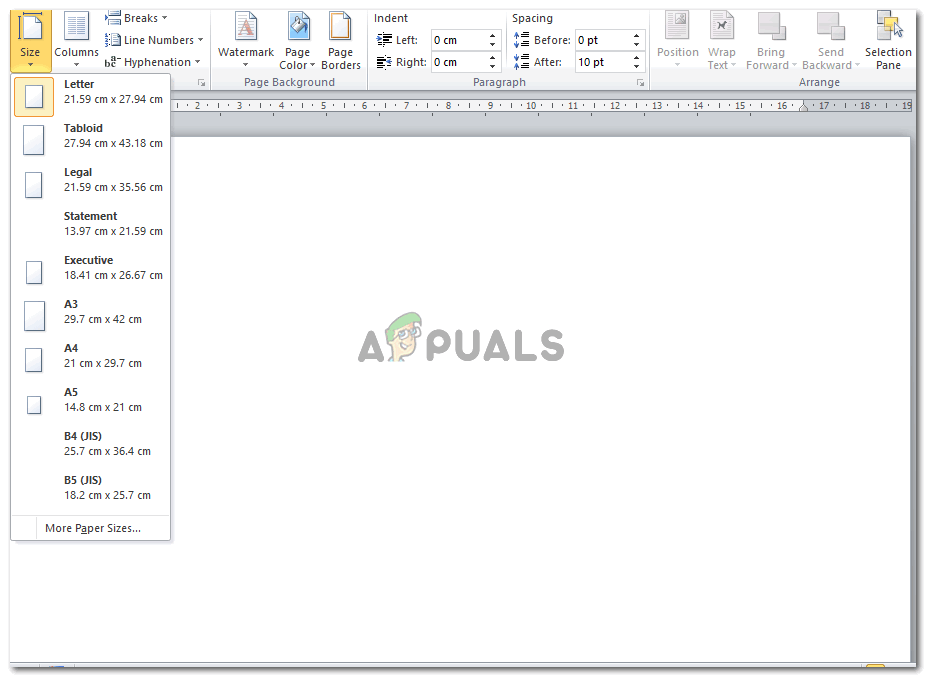
I selected a different page size to show how the space for work changes If, however, these are not the sizes you need, and the dimensions for your document are entirely different, then you should click on the option right at the end of this dropdown list which says ‘More Paper Sizes’.
- Clicking on More Paper Sizes will show you a new box, which is the Page Setup Box. You can enter the dimensions of your page here in place for width and height. You can either type in the number of inches, or press the upward or downward arrows next to the space for width and height to adjust the dimensions.
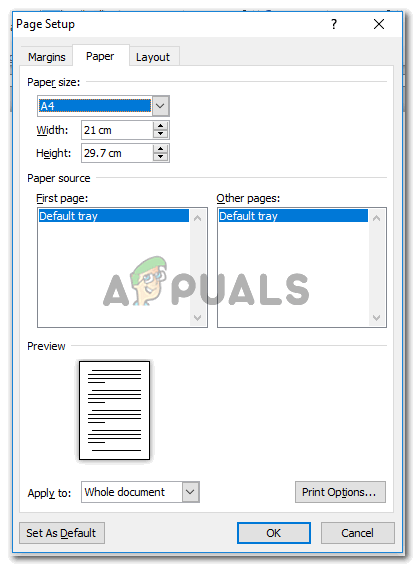
Add dimensions for the page as per your requirement Another important thing that you should not is that right at the end of this box, there is a tab that says ‘Apply to’. This could be the option for people who don’t want to apply the same size as the page on the whole document but only bits of it. Here, when you click on the downward arrow for Apply to, you can choose the second option which says ‘This Point Forward’. This will apply the dimensions that you entered on only the pages that are going to appear this point forward.
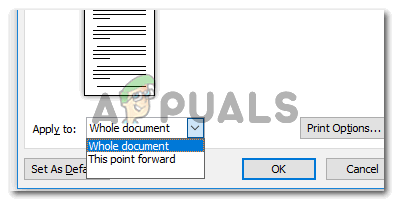
Apply on Whole Document or This Point Forward, you can choose from this dropdown list.
Can You Alter the Size of a Page After a Document has been Made?
Of course, you can. The option for altering the page size can be accessed at all times. However, the slight problem here is that every time you change the page size after a document has been made is that you will have to edit the formatting of your work every time as the work gets adjusted according to the page size.


