How to Change the Screensaver on Windows 10
Necessity is the mother of invention – this saying is completely true in the case of computer screensavers. Back in the day when computers first came into existence, monitors used to face burn-in issues. If a monitor used to display the same image on the screen for a long period of time, the image would be burned into the display, hurting the monitor and decreasing its lifespan. To avoid images being burned in to monitor screens, screensavers were invented and people started using them. It has been a long time since screensavers were essential to computers, but people still use screensavers in today’s day and age for everything from power conservation purposes to nostalgic or novelty purposes.
That being the case, the ability to set a screensaver and have your computer display it after a set amount of time also exists on Windows 10 – the latest and greatest in a long line of Windows Operating Systems. Regardless of why you want to use a screensaver on your computer, you can easily set and use one on Windows 10. Windows 10 comes with six different screensavers built in to it, but one of these options allows you to have an array of pictures of your choosing from your computer be turned into the screensaver, so the possibilities are basically endless.
The Windows Operating System has come a long way since screensavers were absolutely necessary for computers. However, that hasn’t chance the simplicity of the process of setting a screensaver and configuring your screensaver settings on Windows. Setting a screensaver, or changing your screensaver if you already have one, is pretty easy on Windows 10 and can be accomplished from the OS’s Screen Saver Settings. There are two different ways you can go about if you want to get to the Screen Saver Settings, however. You can either:
- Open the Start Menu.
- Search for “screen saver“.
- Click on the search result titled Change screen saver, and the Screen Saver Settings window will appear.
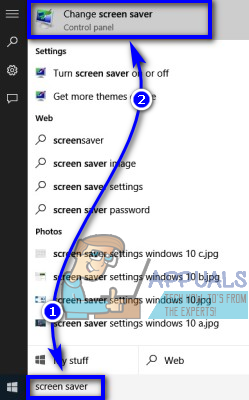
Or, you can:
- Right-click on an empty space on your computer’s Desktop.
- Click on Personalize.
- In the left pane of the Personalization window, click on Lock screen.
- Scroll down until you see the Screen saver settings option and click on it. Doing so will cause the Screen Saver Settings window to appear.
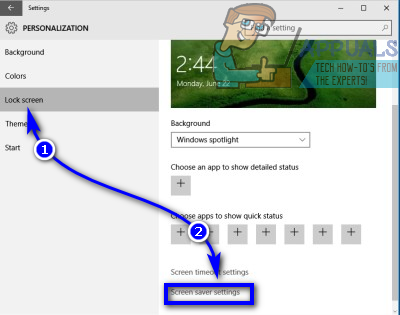
Once you are in the Screen Saver Settings window, you can not only change your computer’s screensaver but also configure all of its settings and preferences. To do so, simply:
- Open the dropdown menu located directly under Screen saver and click on the screensaver you want to select it. You can choose from 3D Text, Blank, Bubbles, Mystify, Photos and Ribbons.
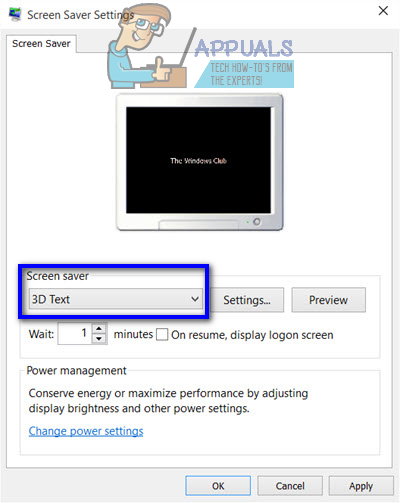
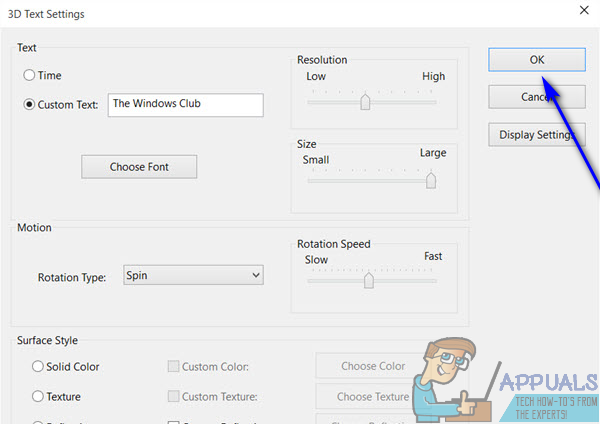
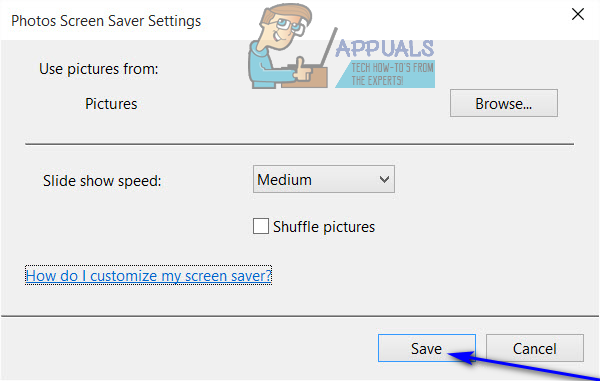
- Click on Settings… to configure the default settings of your screensaver, if the screensaver you chose has any to offer. For example, the 3D Text screensaver allows users to decide what text is displayed, along with a number of different options such as the resolution, size, font and motion of the text being displayed, and the Photos screensavers allows users to set a bunch of pictures of their choosing from their computer as their screensaver. Once you are done configuring your screensaver’s settings, click on OK or Save (whichever applies).
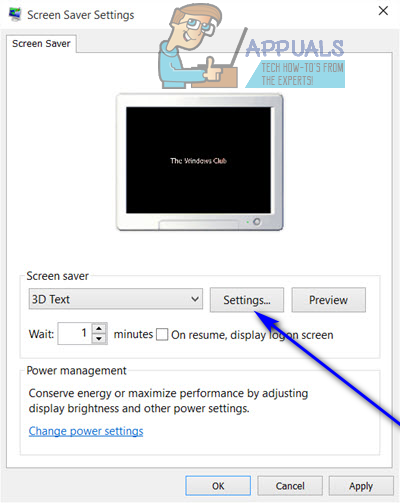
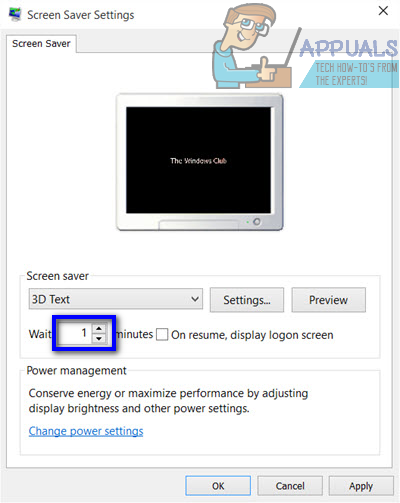
- Type however many minutes you want your computer to start displaying the screensaver after in the Wait: field.
- Click on Apply and then on OK.
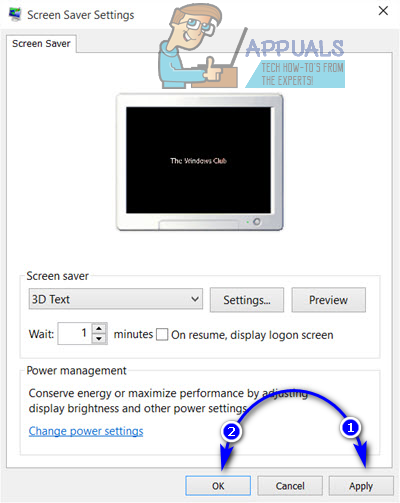
As soon as you do so, you and your computer’s screensaver will be all set. There is no need to restart your computer or anything as the changes you have made will take effect immediately – once your computer is idle for the period of time you specified, it will automatically start displaying the screensaver that you have just configured.