How to Bring Back the Language Bar on Windows
Language Bar has Disappeared on Windows
Some users are reporting that the language bar has suddenly disappeared from the taskbar in Windows 10. This particular issue is typically reported to occur after a big update is installed or after the user upgrades from an older Windows version to Windows 10.
This issue is not related to any anti-piracy measures enforced by Microsoft and is typically caused a glitch or system file corruption.
What causes the Language bar disappearing issue?
After recreating the issue and looking at various user reports, we identified a series of scenarios that might potentially trigger this particular issue. Here’s a list of culprits might be responsible for the language bar disappearing issue:
- System file corruption – System file corruption might break the language bar and prompt your OS to stop display it in the taskbar. SFC and DISM scan are usually successful in resolving the issue in this case.
- Registry key was deleted – Apparently, there’s a couple of Windows update that might mess with your language bar, causing it to disappear. There is one registry hack that is usually successful in getting the issue fixed.
- Input Indicator is turned off from Settings – This setting removes the Language bar from the taskbar. Although the setting is enabled by default, certain 3rd party applications or manual user interaction might disable it.
How to fix the language icon disappearing issue?
If the language bar has disappeared in your case and you’re looking for ways to bring it back, this article will provide you with a list of verified troubleshooting steps. Below you have a list of methods that other users in a similar situation have used to get the issue resolved.
For the best results, start with the first method and then work your way down to the next ones in the order that they are presented until you find a fix that is effective in resolving the issue in your particular scenario. Let’s begin!
Method 1: Enabling Input Indicator from the Settings menu
The language bar can be disabled via the Input Indicator button from the Settings menu. This setting is enabled by default, but certain third-party applications, Windows updates or manual user interaction might turn it off.
Before we do anything else, let’s see whether the Input Indicator setting is turned off from the Settings menu. Here’s a quick guide on how to do this:
- Press Windows key + R to open up a Run dialog box. Then, type “ms-settings:about” and press Enter to open the About tab of the Settings app.
Run dialog: ms-settings:about - In the search bar under the Home button, type system icons and click on Turn System icons on or off.
- Enable the toggle associated with Input Indicator if it’s turned off.
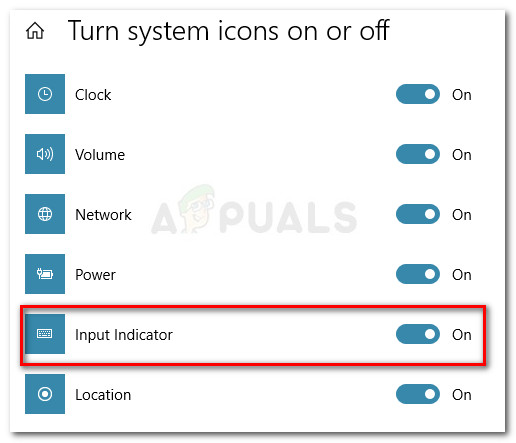
Enable Input Indicator - Close the Settings app, restart your computer and see if the language bar re-appears at the next startup.
If the issue is still not resolved, continue down with the next method below.
Method 2: Modifying the registry
If none of the methods above have managed to fix the issue in your particular scenario, let’s try to solve it by getting a little technical. A couple of users have reported managing to fix the language bar disappeared issue after performing a minor registry tweak.
Apparently, this fix is typically effective if the language bar disappeared momentarily after a Windows update was complete. Follow the instructions down below to hack your registry in order to restore the Language bar:
- Press Windows key + R to open up a Run dialog box. Then, type “regedit” Enter to open Registry Editor. When prompted by the UAC (User Account Control), choose Yes.
Run dialog: regedit - Inside Registry Editor, use the left pane to navigate to the following location HKEY_LOCAL_MACHINE \ SOFTWARE \ Microsoft \ Windows \ CurrentVersion \ Run.
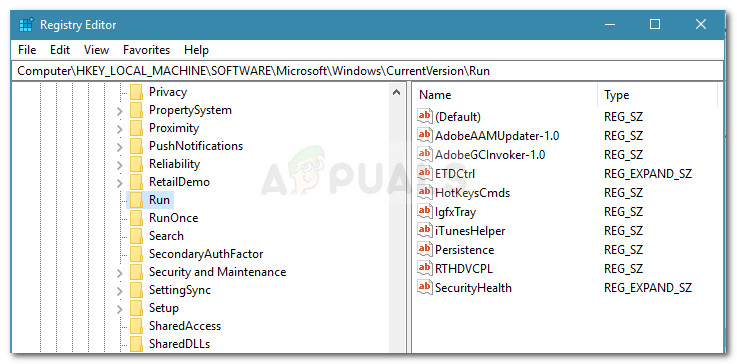
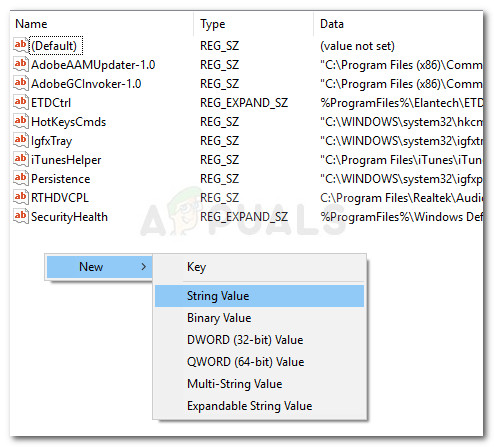
Navigating to the Run key - With the Run key selected, move over to the right pane, right-click on an empty space and choose New > String Value.
- Right-click the registry value LanguageBarFix. Even though the name is not important to the fix, it’s good to keep order.
- Right-click on LanguageBarFix and choose Modify.
- In the Edit string window, paste the following line into the Value data field and click OK:
"ctfmon"="CTFMON.EXE"
- Close Registry Editor and restart your computer. If the fix was effective, the Language Bar should be back into your system tray at the next startup.
If the startup bar is still not visible, continue down with the next methods below.
Method 3: Performing an SFC and DISM scan
If the first methods have not been effective, there’s a high chance that the issue is caused by an underlying system corruption issue. Several users finding themselves in a similar situation have reported that the issue was fixed as soon as they fixed their corrupted files with utility scans such as SFC or DISM.
Follow the instructions below to verify whether the language bar issue can be resolved by completing a built-in utility scan:
- Press Windows key + R to open up a Run dialog box. Next, type “cmd” and press Ctrl + Shift + Enter to open up an elevated Command Prompt. When prompted by the UAC (User Account Control), choose Yes to grant admin privileges.
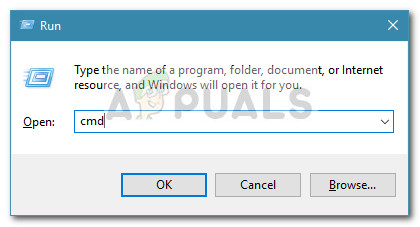
Run dialog: cmd and press Ctrl + Shift + Enter - In the elevated Command Prompt, type the following command and press Enter to perform an SFC scan:
sfc /scannow
Note: This command line utility will scan all protected system files and replace corrupted files with locally stored copies located in a compressed folder ( %WinDir%\System32\dllcache)
- Once the scan is complete, reboot your computer and see if the language bar returns at the next startup.
- If the language bar is still absent from your taskbar, use step 1 again to open another elevated Command Prompt.
- In the newly opened elevated Command Prompt, paste the following command and press Enter to initiate a DISM scan:
DISM.exe /Online /Cleanup-image /Restorehealth
Note: This command will use DISM (Deployment Image Servicing and Management) to fetch the files that are required to fix corruption. Because of this, you’ll need to ensure that your network connection is stable before initiating the scan.
Once the DISM scan is complete, reboot your computer and see if the language bar has returned at the next startup. If it’s still missing, continue down with the next method below.
Method 4: Ensuring that Input Indicator Stays ON
For some users, it seems like the Input Indicator disables itself automatically after some time, making the language bar to vanish all over again. This is confirmed to happen because of the ctfmon.exe process is glitching with a particular user profile.
Some users have managed to make the change permanent by exporting some registry keys from a new user profile to the old one. This involves creating a new Windows user account and using Registry Editor to migrate the settings from the new account to the old account. Here’s a quick guide on how to do this:
- Press Windows key + R to open up a new Run dialog box. Then, type “ms-settings:otherusers” and press Enter to open the Accounts tab of the Settings app.
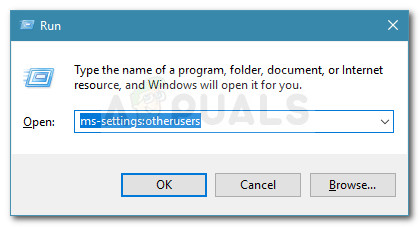
Run dialog: ms-settings:otherusers - Inside the Family & other people tab, click on Add someone else to this PC
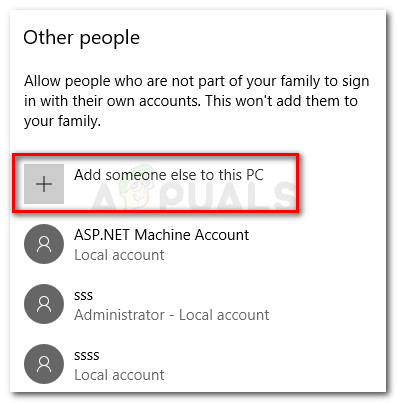
Add someone else to this PC - Next, click on I don’t have this person’s sign-in information and then choose to Add a user without a Microsoft account.
- Insert the log-in credentials to complete the creation of a new local account. Once the account has been created, go to the Start menu, log out of your account and login with the new user.
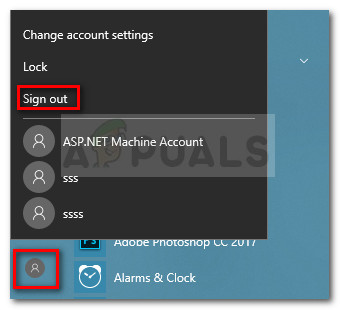
Sign out from the main account via the Accounts icon - If the language bar is back into your taskbar, continue with the steps below. If the language bar is still absent, jump straight to Method 5.
- Press Windows key + R to open up a Run dialog box. Next, type “regedit” and press Enter to open up Registry Editor. If you are prompted by the UAC (User Account Control), choose Yes to grant admin privileges.
- Inside Registry Editor, use the right-pane to navigate to the following location:
Computer \ HKEY_CURRENT_USER \ Software \ Microsoft
- Right-click on IME and choose Export, then select an easy to access location. Next, repeat the same procedure with Input, InputMethod and InputPersonalization keys.
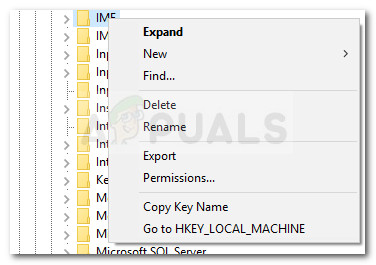
Exporting keys - Once all keys have been exported from the new account, access the Start menu again and login with the old user.
- Now open regedit again while log-in with the old account (follow step 6) and go to File > Import. Next, systematically import every key that we previously exported.
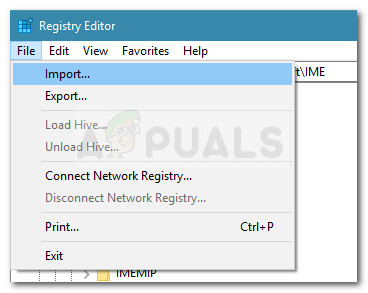
Importing keys - Once all keys have been imported, close Registry Editor and reboot your computer.
- At the next startup, follow Method 1 again to enable Input Indicator again. This time it should remain enabled indefinitely.
Method 5: Performing a clean install or repair install
If you’ve come this far without a viable option, it’s very likely that your system is suffering from a system file error that could not be corrected via the built-in utilities.
By now, the only surefire option of resolving the issue is to do a clean install. Of course, this will make you lose all your personal data and applications which is less than ideal.
A more elegant way is to perform a repair install. A repair install will repair all Windows-related components while allowing you to keep your personal files and applications. This minimizes the damage while allowing you to get the issue resolved. If you decide to do a repair install, follow our step by step guide (here).


