How to Hide Taskbar on Multiple Displays in Windows 10?
The multiple display setup has become commonplace nowadays. It not only looks great, but it improves productivity when multitasking with several apps. Windows 10 has created several features and settings to support multiple displays on a single system. Users can choose what they want to see on each of the displays they have. Most of the users will want to enable or disable the Taskbar for multiple displays according to their needs.
However, if your PC is used by multiple users, then other standard users can also enable and disable the Taskbar for multiple displays. In this article, we will show you methods for enabling/disabling the Taskbar for multiple displays and prevent users from changing your setting.
Hiding Taskbar through the Settings App
The Taskbar for multiple displays can be enabled or disabled through the Settings app. This specific setting can be found under the Taskbar settings. This is the default method for configuring this specific setting on Windows 10. However, if this setting is grayed out, then try checking other methods for enabling or disabling this setting.
- Press the Windows + I keys together on your keyboard to open the Settings app.
- Navigate to the Personalization > Taskbar settings.
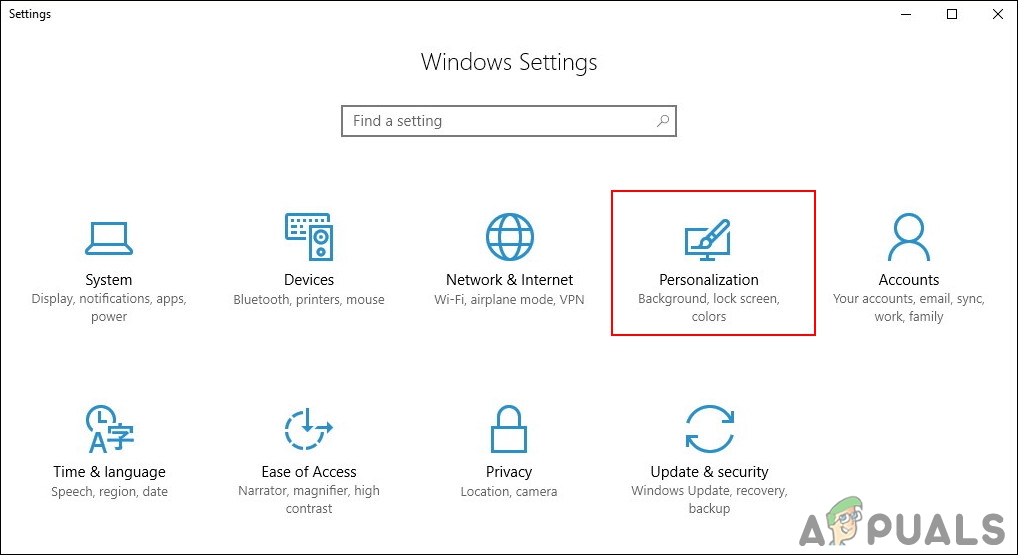
Opening Personalization settings in the Settings app - Scroll down to find the Multiple displays option. Now toggle Off the Show taskbar on all displays.
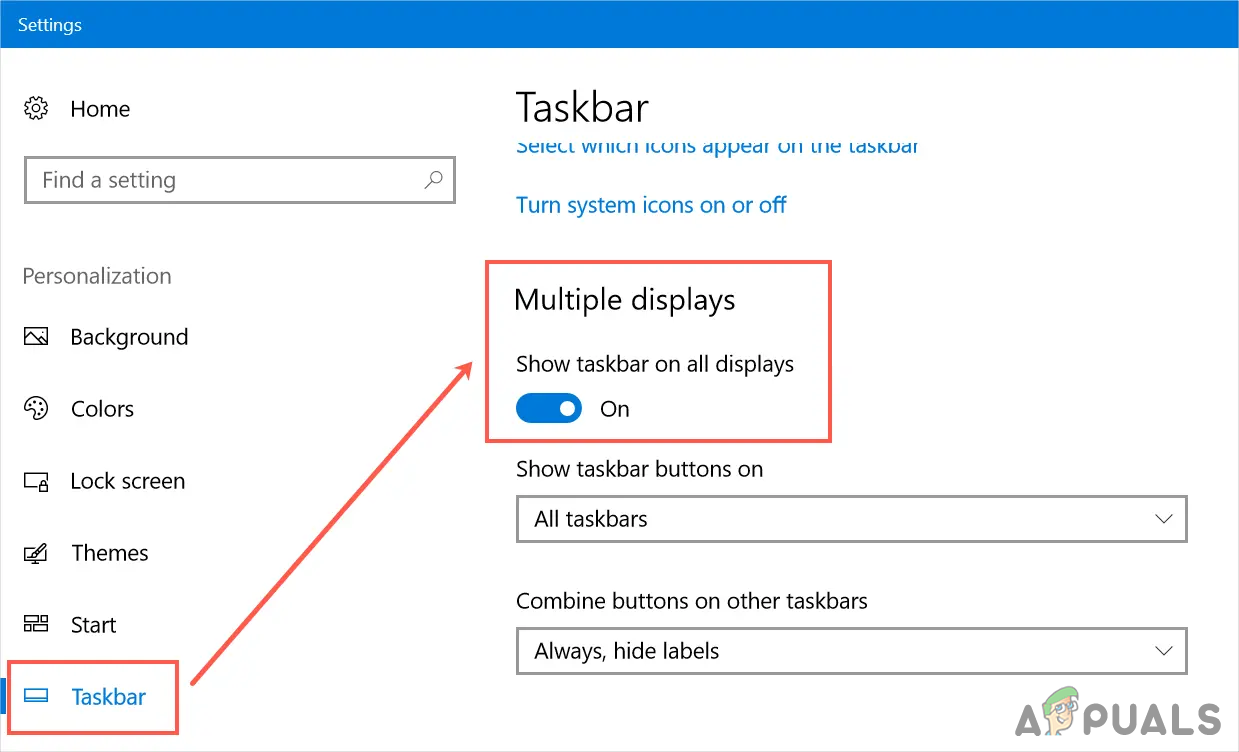
Turn off the toggle option - This will disable the Taskbar for other displays.
Hiding Taskbar through the Local Group Policy Editor
The Local Group Policy Editor method will disable the Taskbar on multiple displays and it will also gray-out the settings for this in the Settings app. Unlike the Registry Editor, the Local Group Policy Editor is pretty safe and the user can enable and disable the settings anytime.
Note: The Local Group Policy Editor is only available for Windows Professional, Enterprise, and Ultimate versions. Skip this method, if you are using the Windows Home version.
- Open the Run dialog window by pressing the Windows and R buttons together on your keyboard. Now to open the Local Group Policy Editor, type “gpedit.msc” and press the Enter key.
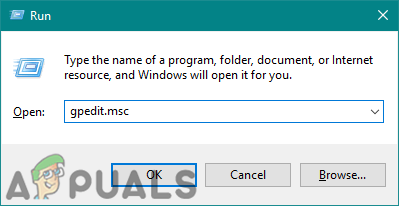
Opening the Local Group Policy Editor - In the Local Group Policy Editor window, navigate to the provided path:
User Configuration\ Administrative Templates\ Start Menu and Taskbar\
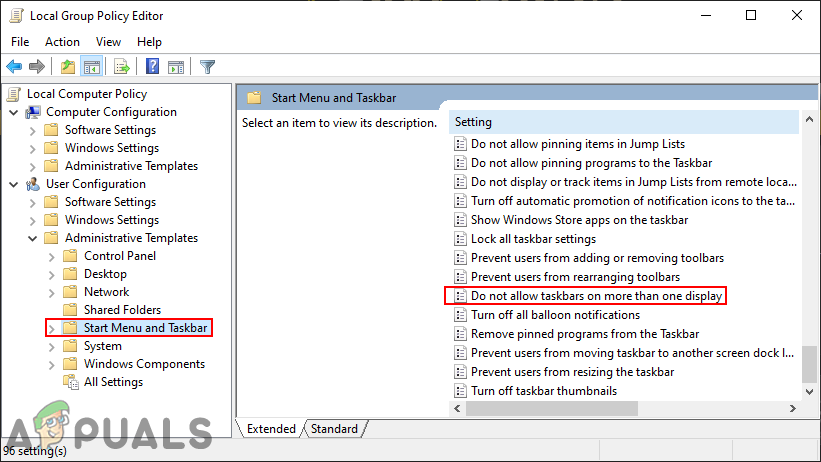
Navigating to the setting - Open the “Do not allow taskbars on more than one display” setting by double-clicking on it. Now change the toggle option from Not Configured to Enabled.
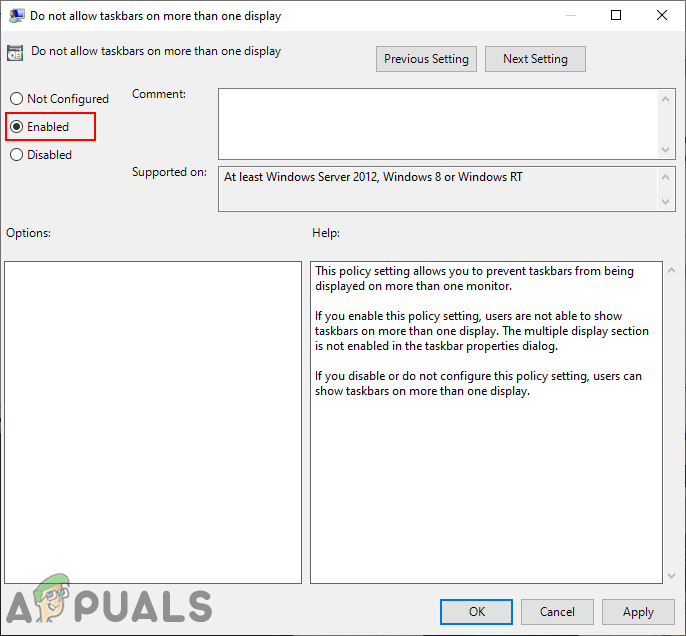
Enabling the setting - Lastly, click on the Apply or Ok button to save the changes. This will disable the Taskbar from other display screens.
- To enable it back, you can simply change the toggle option back to Not Configured or Disabled in step 3.
Hiding Taskbar through the Registry Editor
The Registry Editor method is a bit technical than the other methods in this article. This will require a few extra steps from users for creating the missing key or value in the Registry. Unlike the Settings app or the Local Group Policy Editor, the Registry Editor will not have this setting by default.
Note: You can always create a backup of Registry before making any new changes in it.
- Open a Run dialog box by pressing the Windows and R buttons together on your keyboard. Now to open the Registry Editor, type “regedit” and press the Enter key. For UAC (User Account Control) prompt, click on the Yes button.
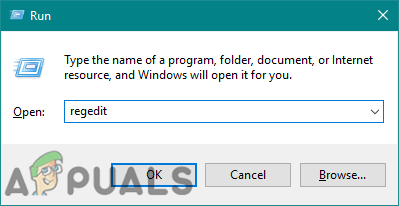
Opening the Registry Editor - In the Registry Editor window, navigate to the provided path:
HKEY_CURRENT_USER\Software\Policies\Microsoft\Windows\Explorer
- Create a value by right-clicking on the right pane and choosing the New > DWORD (32-bit) Value option. Name this value as “TaskbarNoMultimon“.
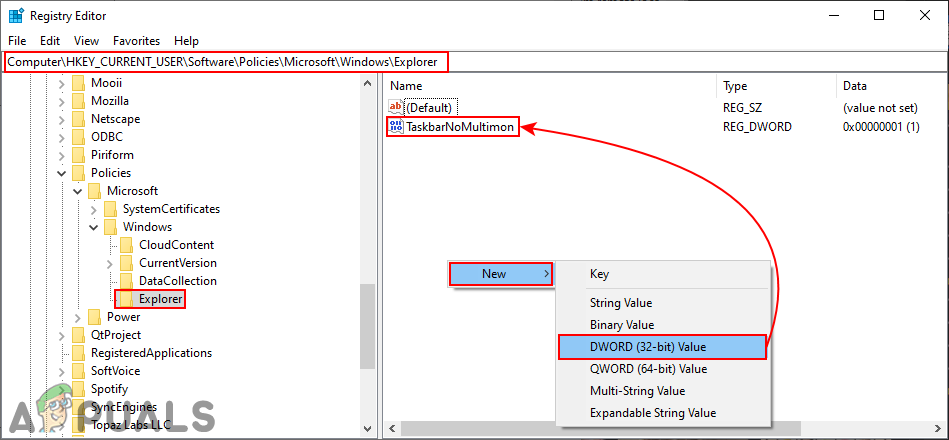
Creating a new value in the Registry - Double-click on the TaskbarNoMultimon value and then change the value data to 1.
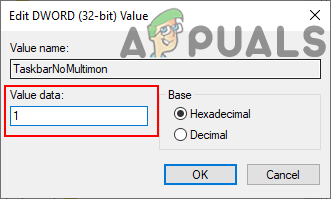
Enabling the value - Finally, after making all the changes, make sure to restart your system to apply those changes. This will disable the Taskbar for multiple displays.
- To enable it back, you will need to set the value data to 0 or remove the value from the Registry Editor.


