Fix: GIMP not Showing Newly Installed Fonts
Most users will need to install a different kind of font in the GIMP to edit their images. Every font has a different style that will make an impact on the image. However, GIMP may not be able to show the newly installed fonts due to a variety of different reasons. This issue can be caused because of the GIMP missing the path to look for the fonts or the font cache file may not be recognizing the newly installed fonts.
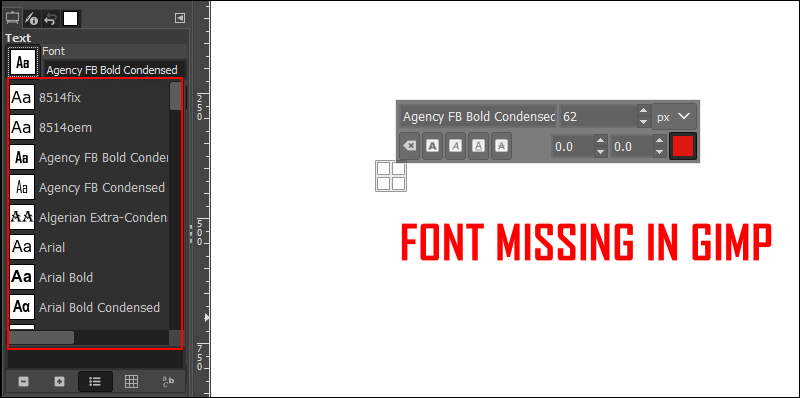
Before proceeding with the below methods to fix the issue for the fonts not showing in GIMP, try to check the new fonts in other similar applications. Make sure the fonts are correctly installed on your system and it works on one of the other programs without any issue.
Adding the Path of Font Folder in GIMP
The GIMP will have only a few paths to look for the font in the system. Sometimes it may not have the path where the Windows will save the newly installed font files. The user needs to manually add those paths in the GIMP preferences option. By adding these paths, the GIMP will try to look for all the new installed fonts in those paths and all the fonts will show up in GIMP. Follow the below steps to try it out:
- Open your GIMP program by double-clicking the shortcut or searching it through the Windows search feature.
- Click on the Edit menu in the menu bar and choose the Preferences option in the list.
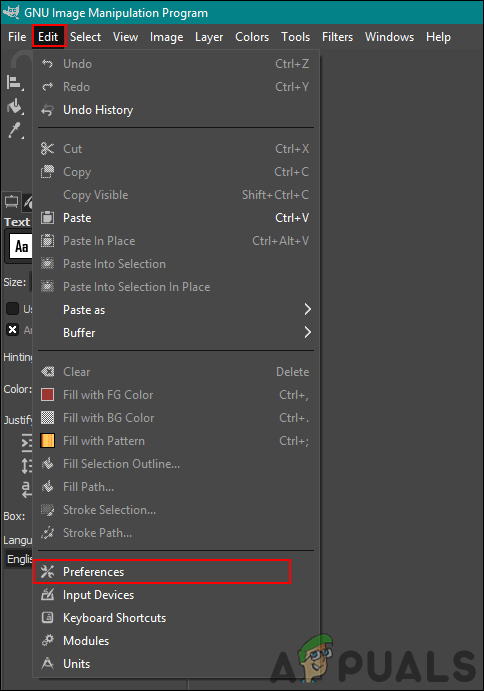
Opening the GIMP Preferences - Click on the Folder in the left panel to expand and choose Fonts. Now add the path of the Windows Font folder in there.
Note: You can add all the paths that have the font files.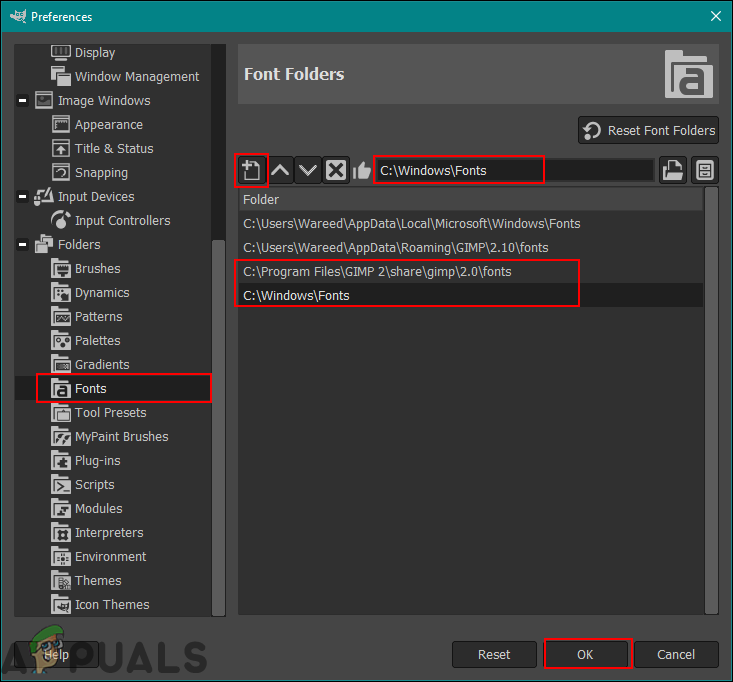
Adding paths for fonts folders - Once you are done, click on the Ok button and restart your GIMP program.
- Now you can check the font after adding the text on the image.
Copying Fonts to Directly to GIMP Font Folder
Another method of solving this issue is to simply copy the newly downloaded fonts to the GIMP font folder. This is because the GIMP will already have the path to its own folder to look for fonts. Sometimes the GIMP program will be unable to get the fonts from the Windows folder, but it will be able to easily show the fonts of its own folder. Follow the below steps to find the font folder of GIMP.
- Download the font that you want to add to your system. Once downloaded, you can copy the downloaded file or you can also copy the font from the Windows font folder.
- Paste the font files into the GIMP folder directory as shown below.
C:\Program Files\GIMP 2\share\gimp\2.0\fonts
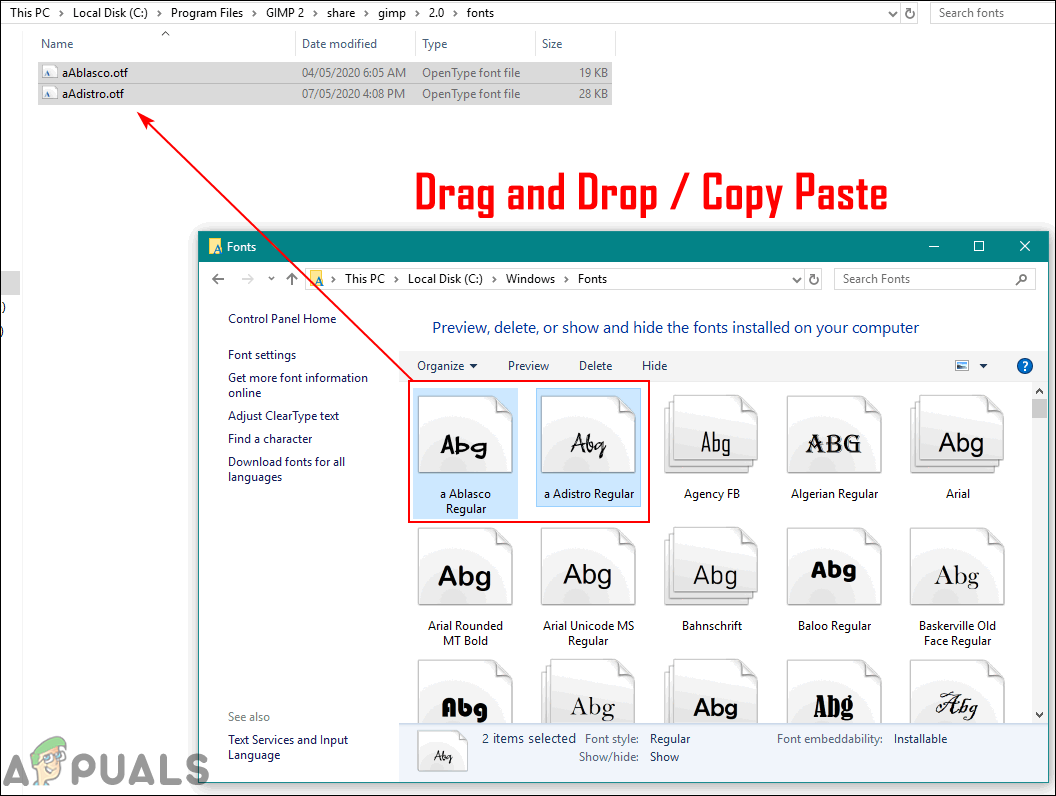
Copying files to GIMP font folder - Restart the GIMP if it is already running and check your font now.
Clearing the Font Cache Files for GIMP
Some of the users fixed this issue by clearing the font cache files in their system. The cache font folder may have a different path for each operating system. We will be showing you this in the Windows 10 operating system. We will also show the step where you can check the path for your cache folder by opening the fonts.conf file as shown below:
- Open your File Explorer and go to the following directory to find the font cache folder.
%UserProfile%\.cache\fontconfig
- Delete all the files in this folder and restart your GIMP program. Now check if the font is shown in the GIMP.

Deleting the cache font files - If you are unable to find the font cache folder in the above path, then go to the GIMP directory and open the fonts.conf file.
C:\Program Files\GIMP 2\etc\fonts
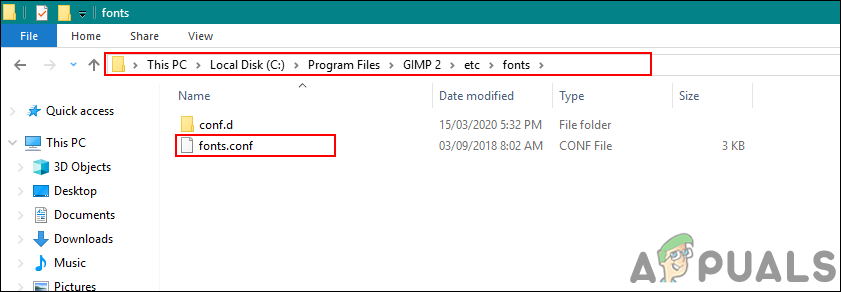
Opening the font.conf file in the text editor - You will find the font cache directory list section and there you can find the cache folder path easily.
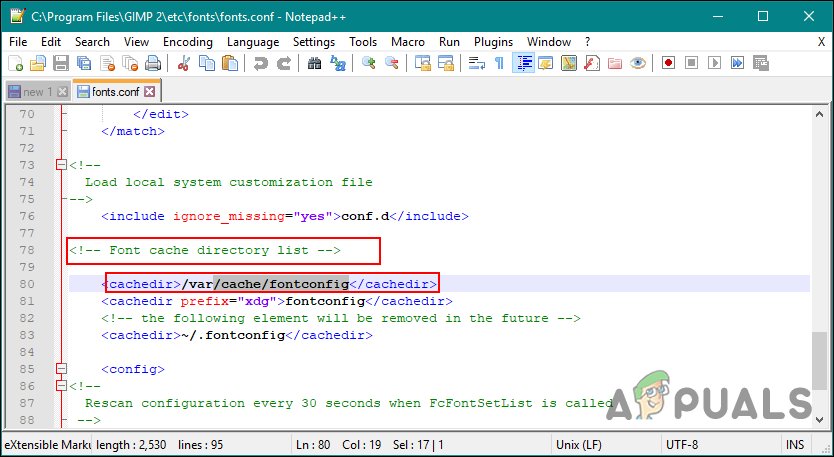
Finding the path for font cache folder


