How to Freeze Row and Column in Microsoft Excel
Many users working on larger Excel spreadsheets will frequently check the specific data again and again to compare. The data can be in a row or column depending on the type of spreadsheet. This can make the work a bit harder and time-consuming for the users. However, the freezing feature can be used to help in resolving this issue. The Freeze feature in excel allows users to freeze rows or columns in the spreadsheet. After freezing the row or column, it will be always visible after scrolling down.
This article will provide you methods through which you can easily freeze rows and columns in Excel. There are also some alternatives to freezing that we have included in this article.
1. Freezing a Single Row in Excel
Microsoft Excel provides the Freeze Panes feature to freeze the first row of the spreadsheet. You can also select multiple rows of the spreadsheet to freeze. However, freezing a specific row in the spreadsheet is something that cannot be done with this feature yet. We can also use the Split feature as a workaround for the specific row. Using the Split feature, we can kind of freeze or at least keep any specific row in a split spreadsheet while working.
If you are just freezing the top row, then use the Freeze Panes feature. However, if you want to see a custom row while scrolling a spreadsheet, then use the Split feature to get the same results.
Using the Freeze Panes Feature:
- Open Microsoft Excel by double-clicking on the shortcut or searching it through the Windows search feature. After that, open the Excel spreadsheet with the data available in it.
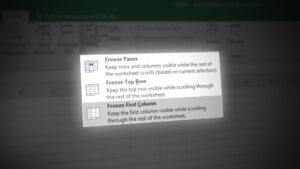
- Click on the View tab, then click on the Freeze Panes, and choose the Freeze Top Row option. This will freeze the top row of the spreadsheet.
Note: You can also select the first cell of the second row and use the Freeze Panes option in the list.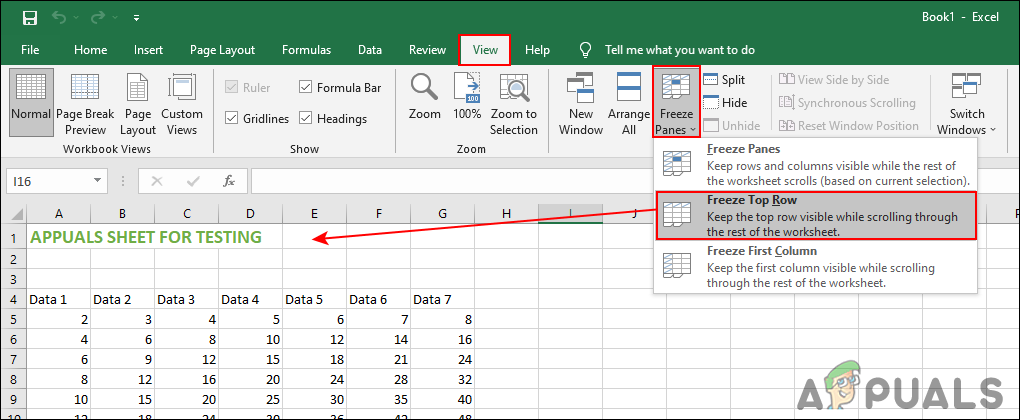
Freezing the top row - You can unfreeze this by clicking again on the Freeze Panes and choosing the Unfreeze Panes option.
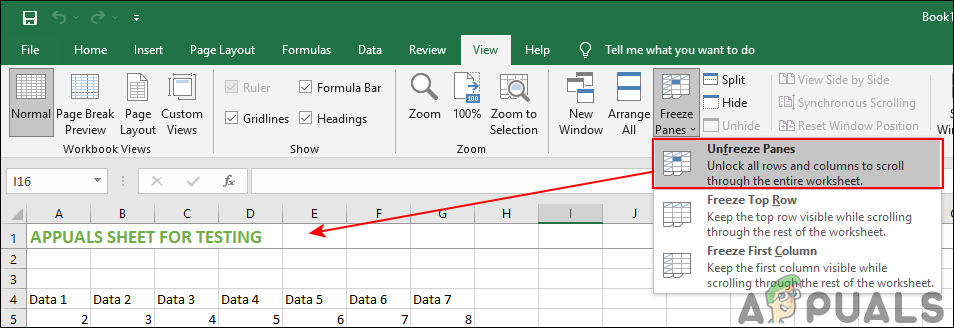
Unfreezing the row
Using the Split Feature:
- Open your Microsoft Excel and then open the spreadsheet that you are trying to use for this method.
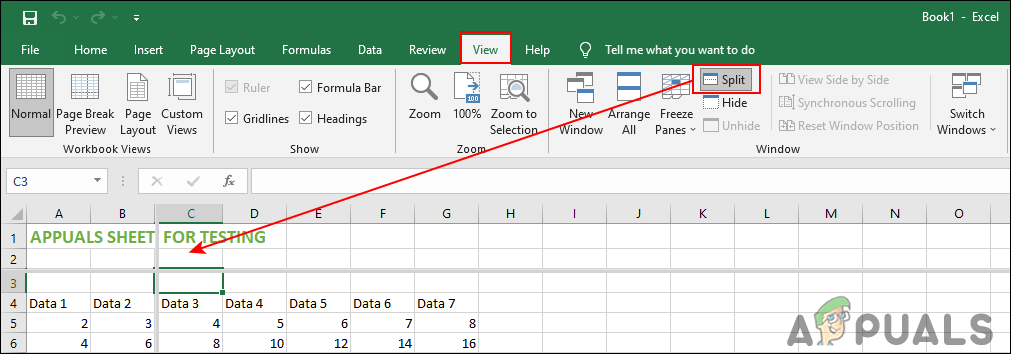
- Select the cell of the second row. Click on the View tab and then click on the Split option.
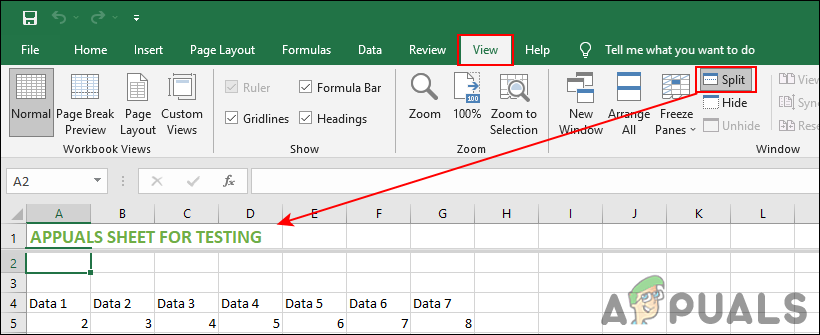
Splitting single row - It will split the spreadsheet into two and the first row will show one line at a time for a full spreadsheet. You can use the scroll bar to select any specific row and then work in the below spreadsheet.
- Once you are done with the work, click on the Split option again to merge the spreadsheet into one again.
2. Freezing a Single Column in Excel
The Freeze Panes feature provides an option for freezing the first column of the spreadsheet. This is similar to the top row freezing as in the above method. You can also freeze multiple columns with this feature. However, when it comes to freezing a specific column, it is not possible yet. We can use the Split feature as an alternative for getting any specific column sticking while working.
Using the Freeze Panes Feature:
- Open Microsoft Excel through the Windows search feature or by double-clicking on a shortcut. Now open the spreadsheet that you want to use for this.
- Select the View tab in the top menu. Now click on the Freeze Panes option and choose the Freeze First Column.
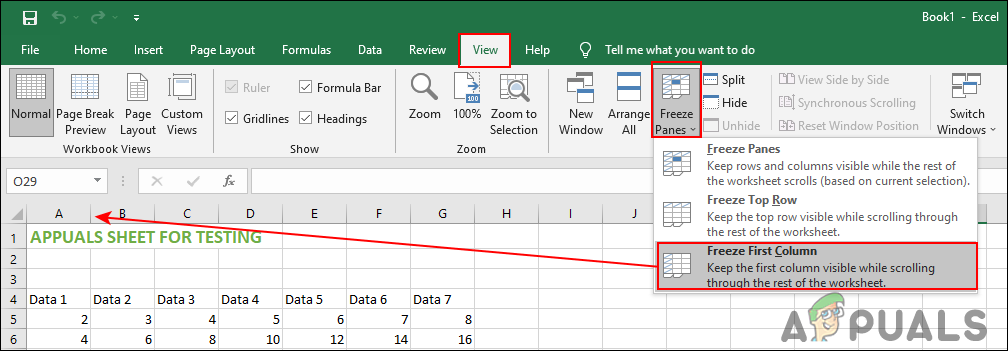
Freezing the first column - It will freeze the first column of the spreadsheet. You can unfreeze it by clicking on the Freeze Panes and selecting Unfreeze Panes option.
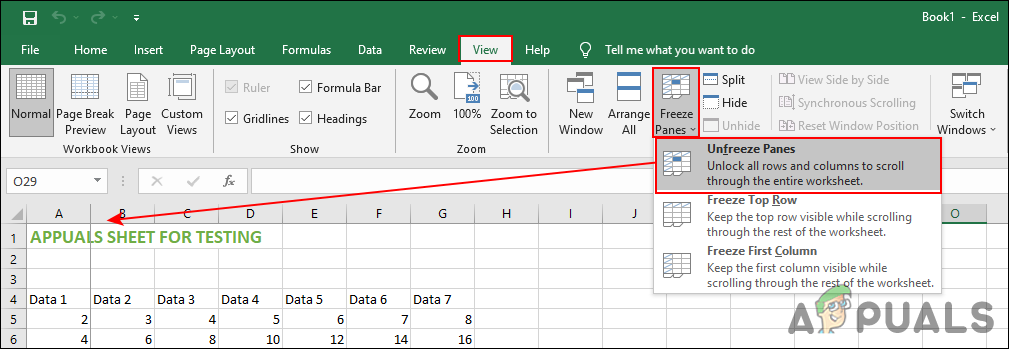
Unfreezing the first column
Using the Split Feature:
- Open your spreadsheet in Microsoft Excel and navigate to the View tab.
- Click on the second cell of the first row and then click on the Split option. This will split the spreadsheet into two.

Splitting a single column - The first column will show a single column at a time. You can use the scroll bar to select any specific column while you work on the bigger spreadsheet.
- Once you are done, simply click on the Split option again from the menu to merge it with new changes.
3. Freezing Row and Column Together
There are situations where you will need to freeze both columns and rows for your spreadsheet. You can do that by using the same features as in the above methods. You just need to select the specific cell in the spreadsheet to freeze the rows and columns. Try selecting the next cell to the column and row you want to freeze always. The same goes for the Split feature in this method.
Using the Freeze Panes Feature
- Open the Microsoft Excel and then open your spreadsheet file.
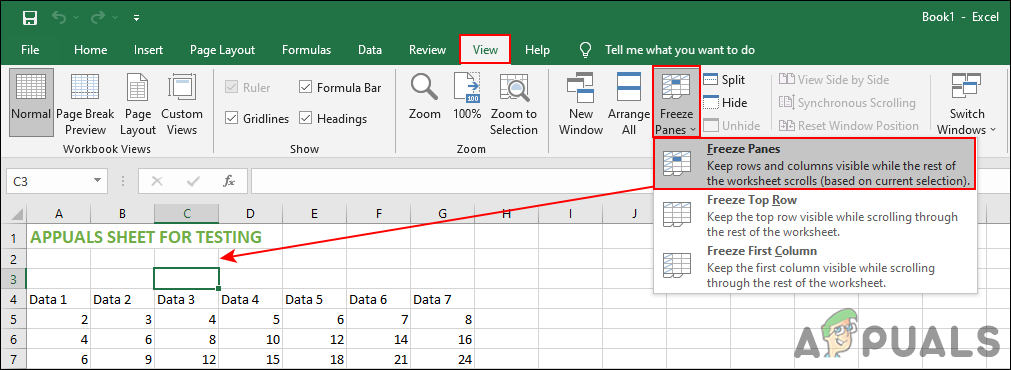
- Click on the cell after the row and column that you want to freeze. If you are trying to freeze the first two rows and two columns, then select the C3 cell for that.
- Select the View tab from the top menu. Click on the Freeze Panes and select the Freeze Panes option in it.
Freezing rows and columns together - You can experiment with the freezing of rows and columns together by trying different cells.
- To unfreeze rows and columns, simply click on Freeze Panes again and then choose the Unfreeze Panes option.
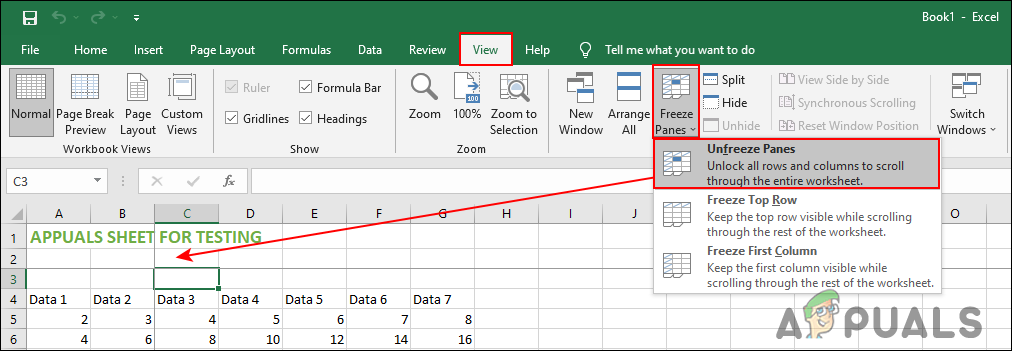
Unfreezing rows and columns
Using the Split Feature
- Open Microsoft Excel and your spreadsheet that you want to use.
- Click on the cell that comes after the row and column that you want to freeze. Now click on the Split option in the top menu.
Splitting rows and columns together - This will split the spreadsheet into two and you can use one of them to apply for your work while the other one will be visible.
- Once the work is completed you can simply click on the Split option again to merge them and save your spreadsheet.


