Fix: Your PC needs to be repaired Error 0x0000034
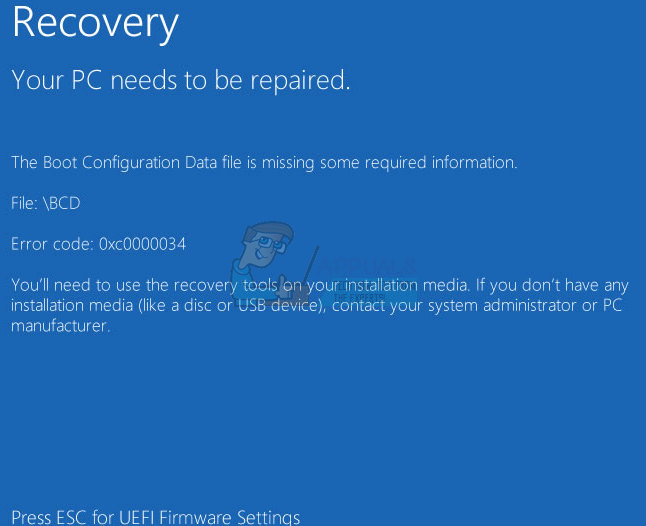
Sometimes, PC users can encounter this error in the form of a blue screen with the following text:
Your PC needs to be repaired. An unexpected error has occurred. Error code: 0x0000034
The error can occur at any time without any prior warnings or symptoms. The computer will automatically shut down and upon restarting, it will show the above given message on a blue screen.
This error code usually appears when partitioning goes wrong either when a manual partitioning is done or after Windows OS upgrades. Most of the users described that they accidentally deleted the system partition during the installation of the Windows before this error occurred.
Unfortunately, when this error occurs, the user is unable to operate the system effectively until the PC is repaired. In order to fix this error, the PC user will need the Installation disc or USB for the Windows OS software in the PC. The following should essentially fix the problem successfully.
Method 1: Using a Bootable Disk
This method requires the use of an installation disc or USB to repair the Windows OS. So make sure that you have a Windows installation disc or USB available.
If you don’t have any bootable Windows installation disc or USB then you can download it via the Microsoft’s official website. Then, go here and follow the steps given in the section Creating Bootable Drives to create a bootable drive from the installation media.
Once you are done, follow the steps given below.
- Insert the bootable disc or USB and turn on your PC.
- If your PC doesn’t boot from the USB then you need to set your USB or CD/DVD on the top of your boot order. You can do that by following the steps given below
- When your computer starts, press F10, F11 or ESC. The key depends on your manufacturer but it will be mentioned on the corner of the screen when your manufacturer’s logo appears. For example press F10 to go to boot menu.
- A new menu will appear with multiple options. Look for an option about Boot order or Boot options or Boot. Use your arrow keys and enter key to move and select the option respectively. If you see a Boot tab then select that and then you will see the options of Boot order etc.
- Now you will be able to see a list of devices like Hard Drive then CD Rom then USB. These are mentioned in their proper order. You need to make sure that your USB device is on the top of the list so that your computer boots from your USB. Use the arrow key and enter key to change the order and switch your bootable media to the top of the list.
- Now restart.
- Once the PC turns on, select the Windows Operating System version e.g. Windows 10 and continue.
- The System should reboot and open the Windows installation page.
- On this page, select the language you wish to install in, the time and currency format and the keyboard or input device of your choice and click next.
- Click on repair your computer
- When it responds, click troubleshoot.
- Click Automatic repair
- Select the operating system you wish to repair or install from the list that appears.
- The system should repair successfully from here and you should be back up running in no time.
Note that this process requires a minimum of 30 minutes to complete the installation.
Method 2: Using Command Prompt
You can also use Command Prompt to run a few commands and fix the issue. Basically you will use the mounted USB or CD/DBD of your Windows Installation to repair the BCD (Boot Configuration Data file).
For this to work, you need Windows installation media on a USB or CD/DVD.
- Insert your Windows Media Installation USB
- Follow the steps given in Method 1 from steps 1-7
- Select Advanced Options
- Select Command Prompt
- Type bootrec /fixMBR and press Enter in the Command Prompt
- Type bootrec /fixBoot and press Enter
- Type bootrec /rebuildBCD and press Enter
- Once you are done. You might see a message saying Add installation to boot list. Type Y (for yes) when you see that message
- You will be able to see an acknowledgement message saying The operation completed successfully
- Now type exit and press Enter
Restart your computer and you should be good to go.
Method 3: Command Prompt (Alternative)
If the above methods didn’t work for you especially the method 1 then this method will most likely work. The above mentioned methods are more likely to work for BIOS/MBR systems.
If you don’t know what UEFI or BIOS are or what’s the difference then don’t worry. Simply follow the steps given below and it should work for you.
- Insert the bootable disc or USB and turn on your PC.
- If your PC doesn’t boot from the USB then you need to set your USB or CD/DVD on the top of your boot order (Check the second step in method 1).
- Once the PC turns on, select the Windows Operating System version e.g. Windows 10 and continue.
- The System should reboot and open the Windows installation page.
- On this page, select the language you wish to install in, the time and currency format and the keyboard or input device of your choice and click next.
- Click on repair your computer
- When it responds, click Troubleshoot.
- Select Advanced Options
- Select Command Prompt
- Type diskpart and press Enter
- Type list disk and press Enter
- Type select disk 0 and press Enter
- Type list volume and press Here you need to check if you can see your system volume (volume with your Windows installed). Sometimes your system volume might be hidden. If your system volume is hidden then follow these steps:
- Type list partition and press Enter
- Type select partition 2 and press Enter (replace “2” with your system partition number)
- Type help set and press Enter
- Type set id=ebd0a0a2-b9e5-4433-87c0-68b6b72699c7 and press Enter
- Now your volume should not be hidden anymore
- Type list volume and press Enter. Now continue to the normal steps to solve this problem.
- Type select volume 2 and press Enter (replace “2” with the volume number of your system partition)
- Type assign letter=b: and press Enter
- Type exit and press Enter
- Type cd /d b:\EFI\Microsoft\Boot\ and press Enter
- Type ren BCD BCD.bak and press Enter
- Type bootrec /fixboot and press Enter
- Type bcdboot c:\Windows and press If it gives error then try typing this bcdboot c:\Windows /s b: /f ALL and then press Enter
- Now type these commands given below and press Enter after each one
Bootrec /fixmbr
Bootrec /fixboot
Bootrec /scanos
Bootrec /rebuildbcd
Now your system should be fine. Restart your computer and check if the problem is solved or not.
Method 4: Using BIOS Setup
Sometimes using the BIOS menu to turn off and turn on the Windows Boot Manager forces the system to start and configure the Windows.
- When the blue screen appears (with the error message) Press ESC key on your keyboard and it should open the BIOS Setup page
- Look for an option named Advanced Boot Options and click it. The name might vary slightly depending on your manufacturer but there should be something related to Boot Options.
- In the Advanced Boot Options, look for an option Boot Manager. Once you find it, click it
- On this page, you should see two options to select from; Windows Boot Manager and Disabled. Select Disabled
- Select save and exit to save your changes and exit the BIOS Setup page. This may display a message saying “no files found”, ignore the message and wait until it clears off and returns to the BIOS Setup page.
- Repeat Steps 1 to 3 as described above and this time around, select Windows Boot Manager instead of Disabled.
- Select save and exit. This should enable Windows to startup properly again.
Windows may startup with recovery and when this happens, follow the on-screen instructions (if any) and let the PC configure Windows. The system should repair successfully from here. Note that this process requires a minimum of 30 minutes to complete the installation.
On step 17 on method 3 it always gives me the message
“The system cannot find the path specified”