Fix: Your IT Administrator has Limited Access
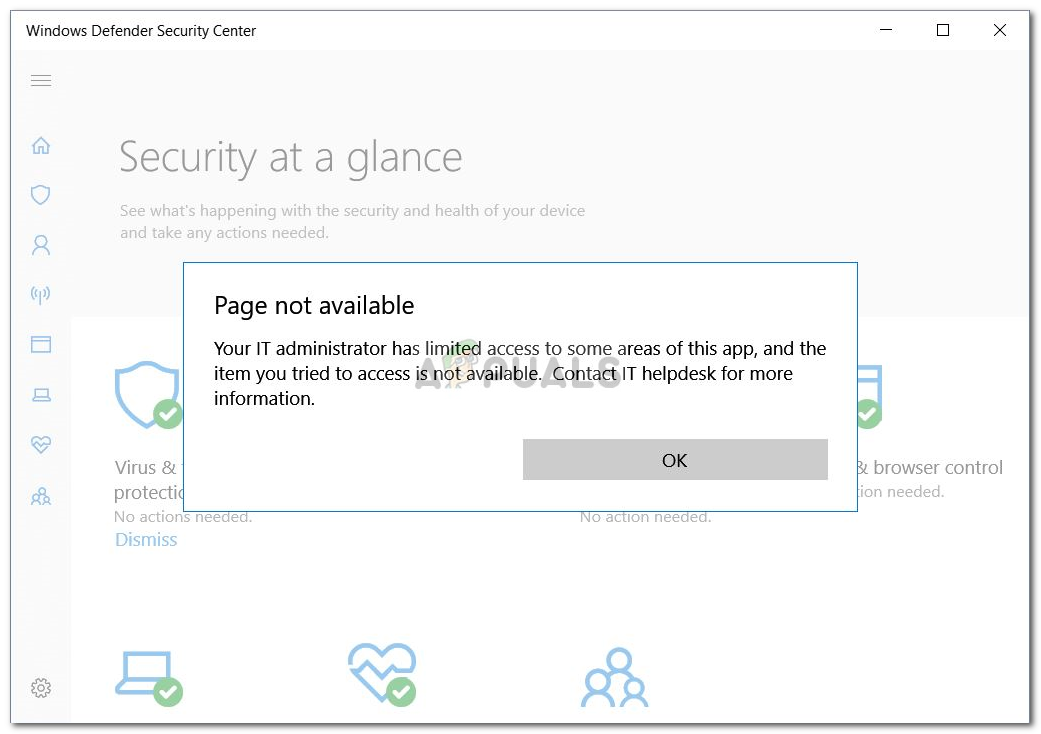
The error ‘Your IT Administrator has Limited Access’ can potentially be caused by third-party antivirus software and pops up when you’ve recently updated your Windows 10 and try to turn on the Windows Defender. The Windows Defender is an integral part of the Windows 10 that scans your PC without bothering you every time you boot up your system like the other third-party antivirus software out there. The Windows Defender is really effective and requires updates to keep your system safe from the newest malware on the internet. As it’s a built-in component so you can’t really uninstall it however what you can do is turn it off which is something to avoid if you are not a tech guru.
As you can tell from the error itself, it pops up when you try to turn on Windows defender all the while not having the permissions to do it. There are a few ways you can implement to get this error sorted — so no need to worry about that.

What causes your IT Administrator has Limited Access on Windows 10?
The error refers to insufficient permissions which can be due to —
- Third-party antivirus software. If you’ve been using a third-party antivirus software before the error popped up, it could be due to the antivirus interference.
- Group policies. Another reason for this error emerging would be group policies. If you’ve set the Windows Defender to disabled in the Group policies, that could be stopping you from turning it back on.
To solve the error, go through the following solutions:-
Solution 1: Sign in as an Administrator
Before you try to turn on Windows Defender, make sure you are signed in as an Administrator. If you have multiple accounts created on your system, log in to the administrative account. If you use a guest or any other non-administrative account, it will result in the error popping up so make sure you’re clear there.
Solution 2: Remove your Antivirus
Another reason for the error appearing could be your third-party antivirus software that is installed on your system. It could potentially be interfering with your system and preventing you from turning on Windows Defender or it might’ve messed up with Windows Defender files due to which it is unable to start again. Therefore, make sure you’ve uninstalled your antivirus before trying to turn on the Windows Defender.
Solution 3: Using a Hidden Administrator Account
When you install Windows on your computer, a hidden administrator account is created automatically. This account is usually utilized by Microsoft Support or any other technicians when you report an error that you’re encountering to them. Hence, to make use of its privileges, use the account to turn on Windows Defender. Here’s how to log into it:
- Press Winkey + X and select ‘Command Prompt (Admin)‘.
- In the command prompt, type in the following:

Windows command prompt
net user administrator /active:yes
- This command makes the hidden account active so you can log into it on the Login screen.
- Log out of your account, and log into the hidden administrator account.
- Now, try to turn on Windows defender again.
Please make sure to avoid using the account under normal conditions as it can be risky. You can use the following command to make the account inactive:
net user administrator /active:no

Solution 4: Editing Group Policies
If you’ve set the ‘Turn off Windows Defender’ policy to ‘Enabled’, that could be one of the reasons the error is popping up. In such an event, you’ll have to edit the Group Policies. Here’s how to do it:
- Press Winkey + R to open Run.
- Type in ‘gpedit.msc’ to open Group Policies Editor.
- Under Computer Configuration, click ‘Administrative Templates’.
- Click ‘Windows Components’ to expand the list.
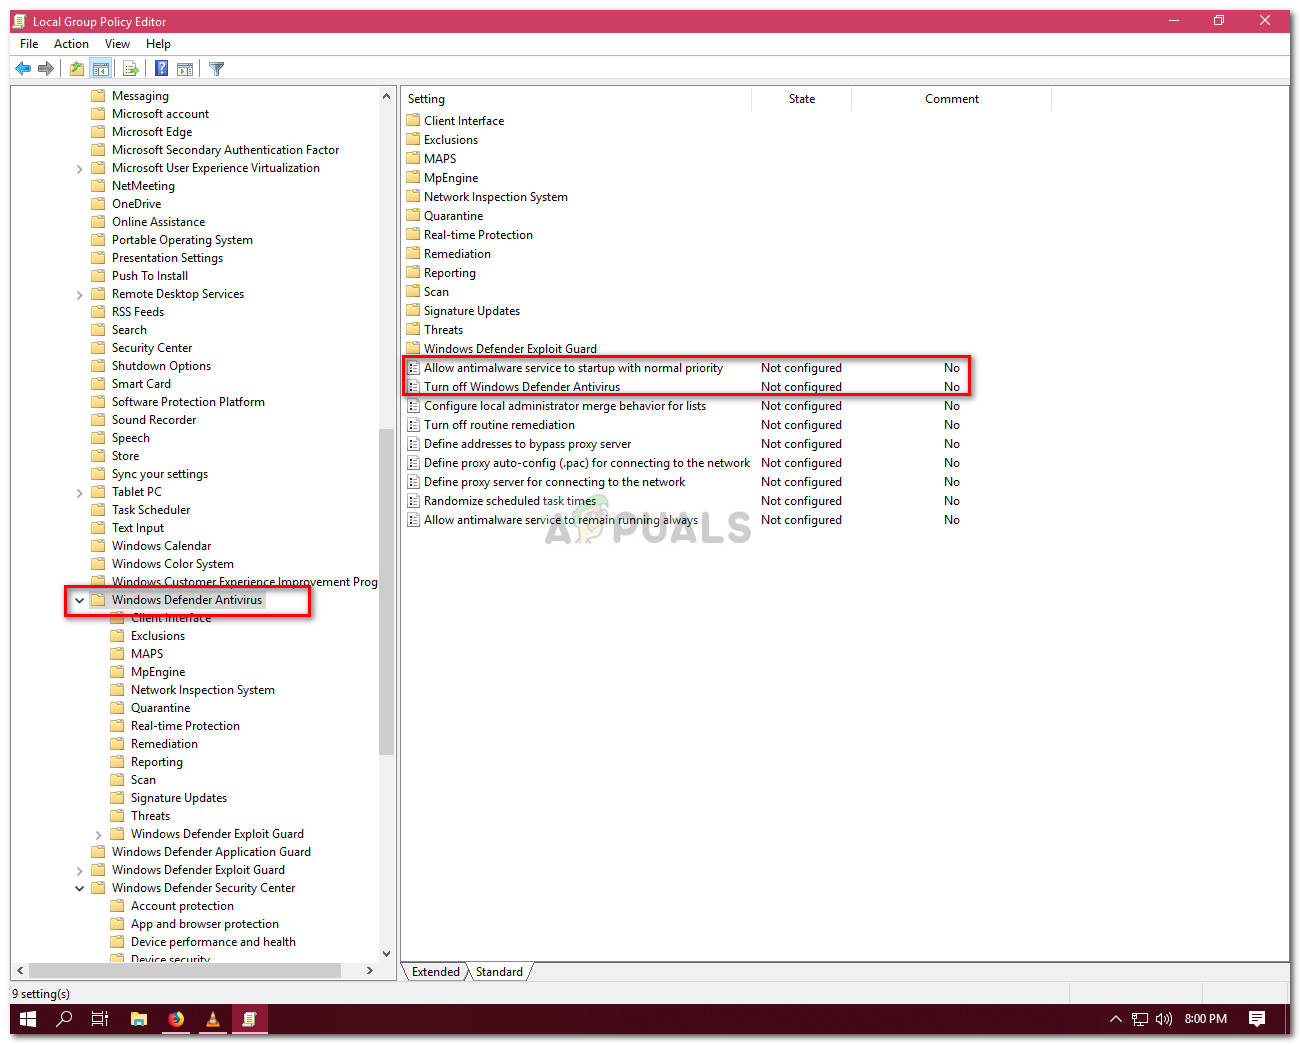
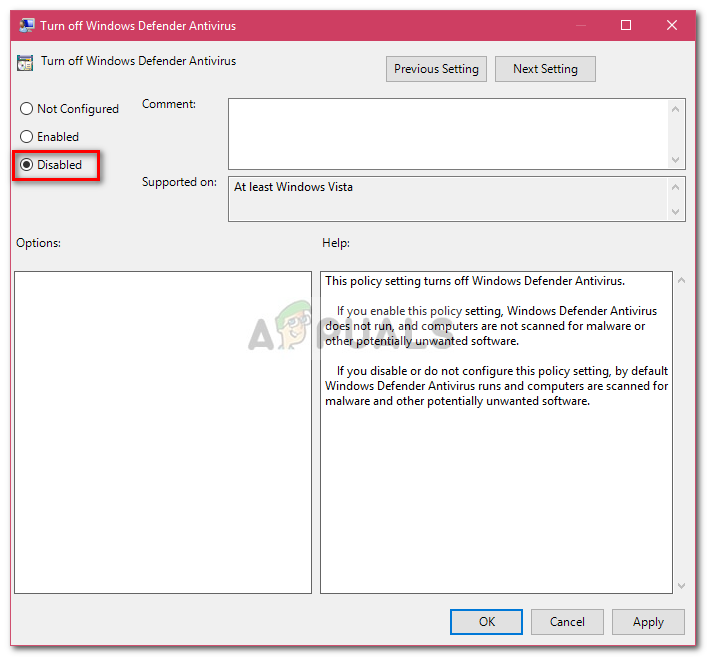
- Find ‘Windows Defender’ and on the right-side double-click ‘Turn off Windows Defender’ and ‘Allow antimalware service to startup with normal priority’.

Windows Defender Policies - Select Disabled, hit Apply and then click OK.

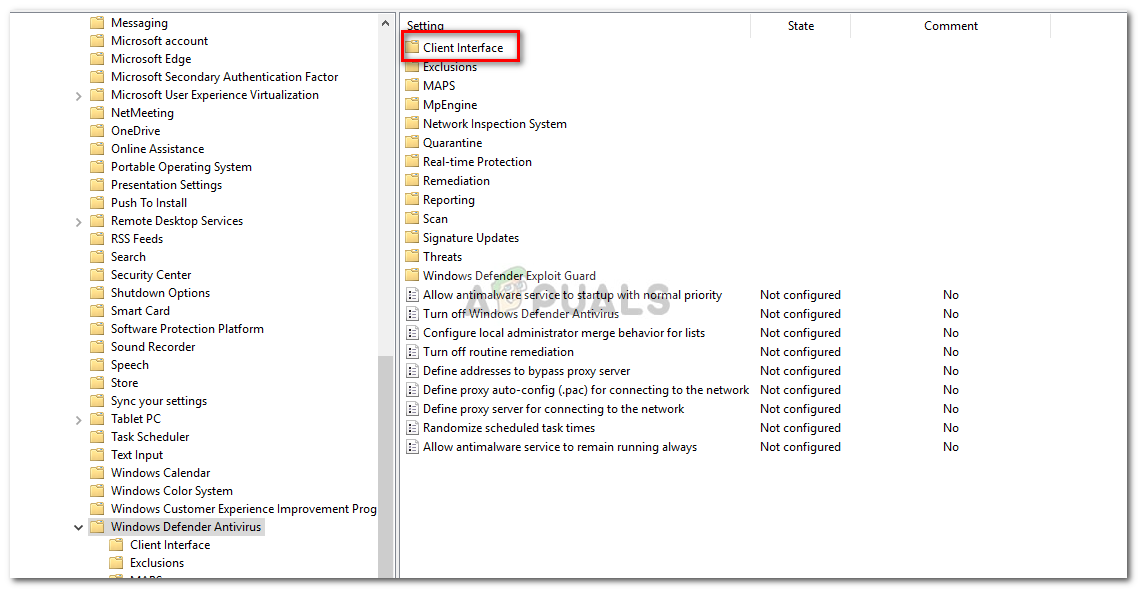
Windows Defender policies editor - After that, on the same list at the top, you’ll find ‘Client Interface’.

Windows Group Policy – Windows Defender - Open up ‘Client Interface‘ and then finally double-click ‘Enable headless UI mode’.

Windows Defender Client Interface - Set it to ‘Disabled’.
- Hit Apply and OK.
- Close the Group Policy Editor and try to turn on Windows Defender (might require a reboot).


