How to Fix “Your Credentials Did not Work” in Remote Desktop
“Your Credentials Did Not Work” means the credentials you entered are rejected, preventing you from accessing the target system. This usually happens because of wrong login details, old saved credentials, or using the wrong domain. The main cause is often incorrect credentials, usually due to changed passwords or domain settings.
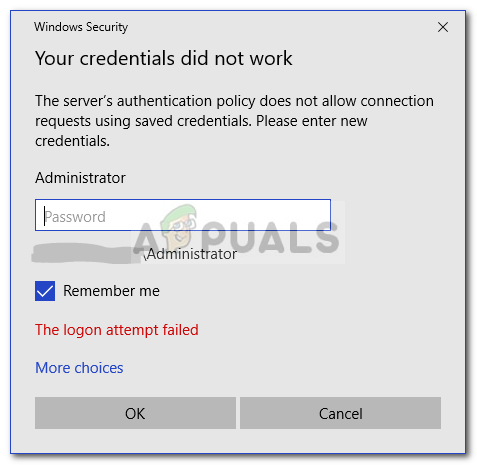
Other causes include security policy issues, account lockout, and problems with DNS or firewall settings.
Now that you know the possible causes of the error, lets discuss the solutions.
1. Revert the Username
Sometimes, just changing the username back can fix Remote Desktop login problems. If the username was changed, even by mistake, or is saved wrong, it can stop the login from working. By setting it back to what it was before, you make sure the Remote Desktop uses the right login details that the server knows.
2. Edit Windows Security Policy
Modifying Windows Security Policy fixes permission issues that block Remote Desktop connections. By changing settings in the Local Security Policy, especially the “Allow log on through Remote Desktop Services” option, you make sure your account or user group has permission to access the remote system.
- Press Windows + R to open the Run dialog box.
- Type secpol.msc and press Enter.
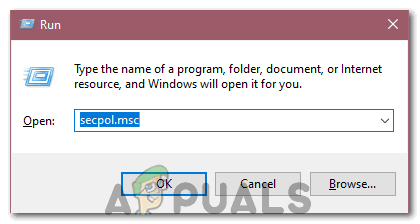
- Expand Local Policies and select User Rights Assignment.
- On the right-hand side, locate and double-click ‘Allow log on through Remote Desktop Services‘ or ‘Allow log on through Terminal Services‘.
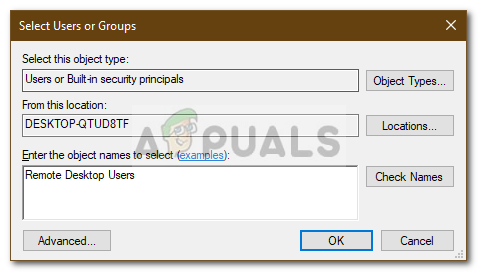
- Click Add User or Group and type Remote Desktop Users.
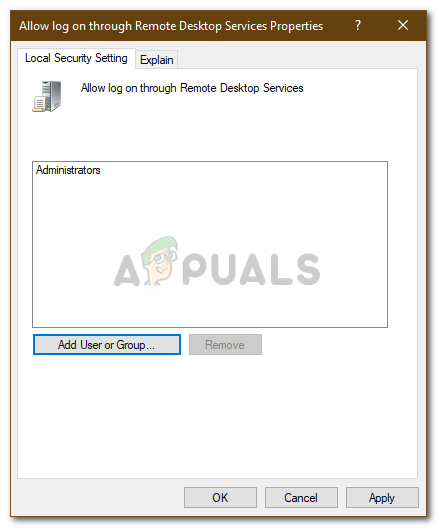
Adding User to Grant Access - Click OK, then Apply, and click OK again.
Allowing Remote Desktop Users Access - Restart your system for the changes to take effect.
- Check if it resolves the issue.
3. Edit Local Group Policy
By adjusting the “Allow log on through Remote Desktop Services” policy, you make sure authorized users can access the system remotely. This change is important when strict security policies block access because it gives needed permissions to the user or group.
- Press Windows Key + R to open Run.
- Type ‘gpedit.msc‘ to open the Local Group Policy Editor.

- Navigate to the following path:
Computer Configuration > Administrative Templates > System > Credentials Delegation
- Double-click the ‘Allow delegating default credentials with NTLM-only server authentication‘ policy to edit it.
- Set it to Enabled and then click Show.

Editing Local Group Policy - Double-click under Value, type TERMSRV/*, and then click OK.
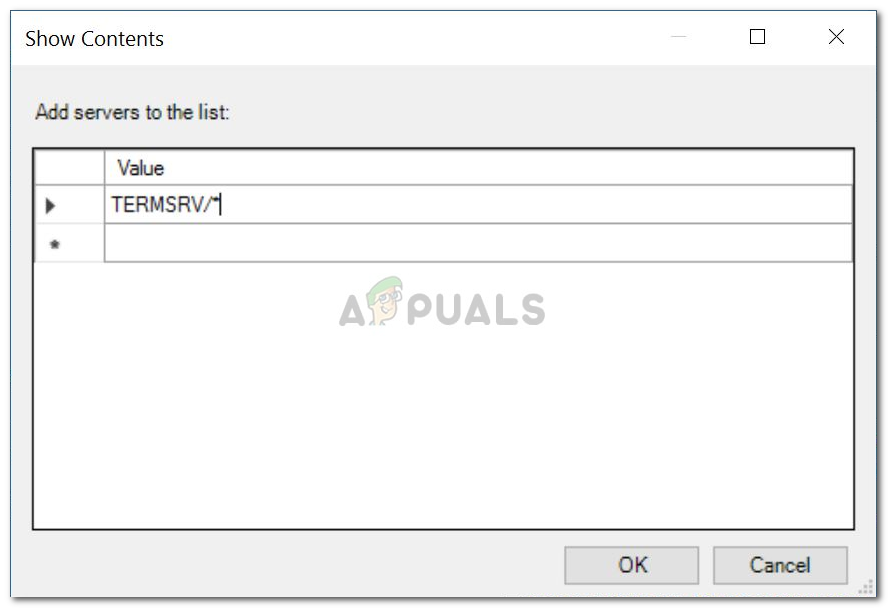
Adding Server to the List - Repeat this process for the following policies:
Allow delegating default credentials
Allow delegating saved credentials
Allow delegating saved credentials with NTLM-only server authentication
- Close the Local Group Policy Editor and restart your system.
- Check if the issue persists.
4. Edit Registry
This issue can be resolved by adjusting how the system handles specific security protocols that Remote Desktop relies on. If these protocols are set up incorrectly or blocked, like after a system update, they can prevent proper credential checks.
- Press Windows + R to open the Run dialog box.
- Type ‘Regedit‘ and press Enter.
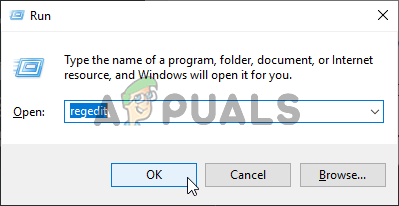
Opening the Registry Editor - Navigate to the following path:
Computer\HKEY_LOCAL_MACHINE\SYSTEM\CurrentControlSet\Control\Lsa
- Click on the “LsaCompatibilityLevel” option.
- Double-click on the “REG_DWORD” option and change the value to “1”.
- Check if the issue persists.
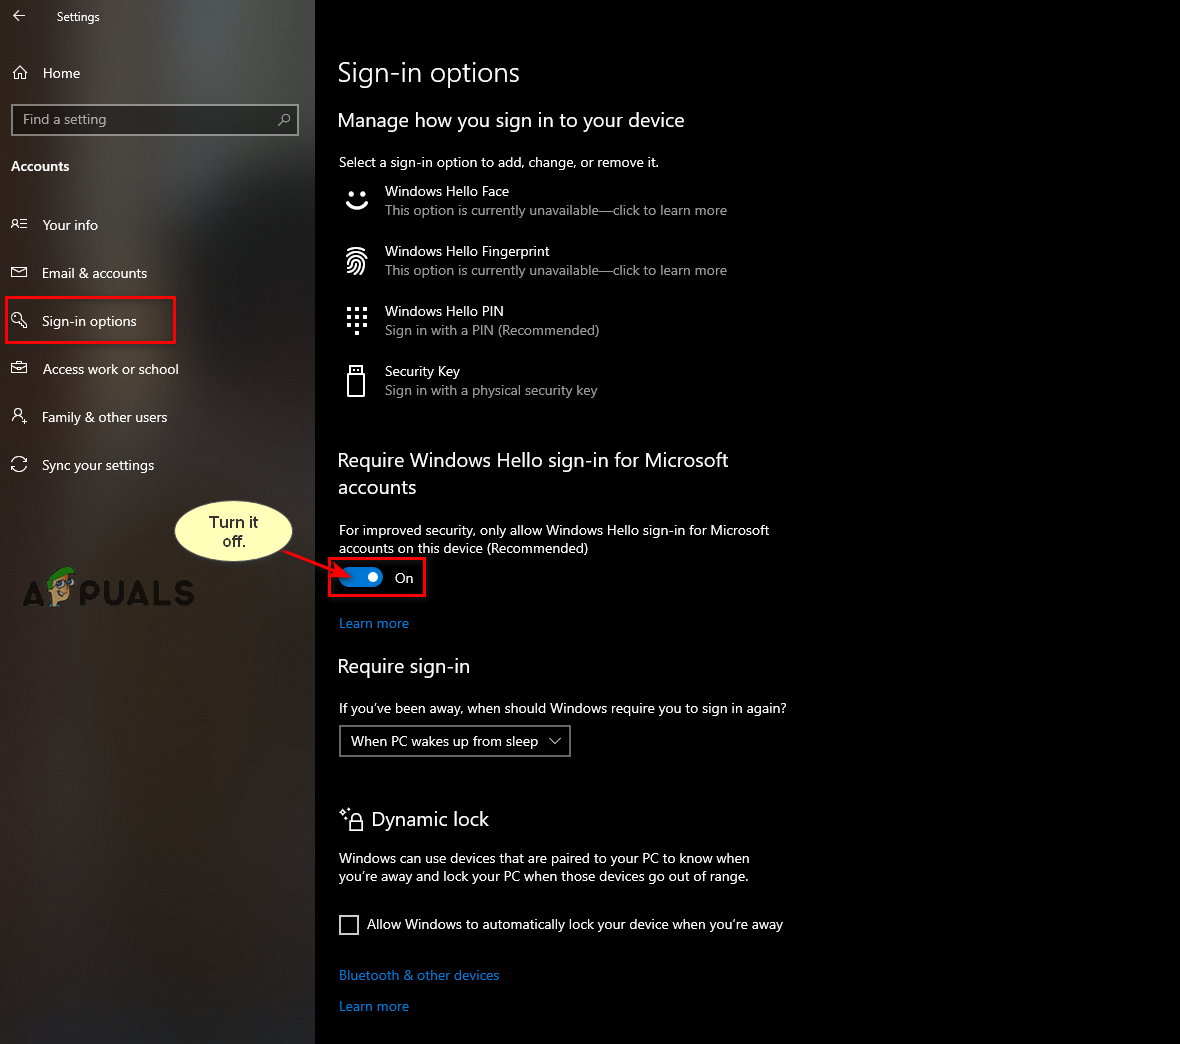
5. Disable Windows Hello sign-in (If applicable)
If Windows Hello is on, the system may use biometric or PIN login instead of a regular password. This can cause issues with Remote Desktop, which usually needs a standard username and password.
- Press Windows + I to open Settings.
- Navigate to Accounts > Sign-in options.
- Disable Windows Hello sign-in.
Turning off Windows Hello sign-in - Set a normal password by clicking on the “Password” option, then click “Add”.
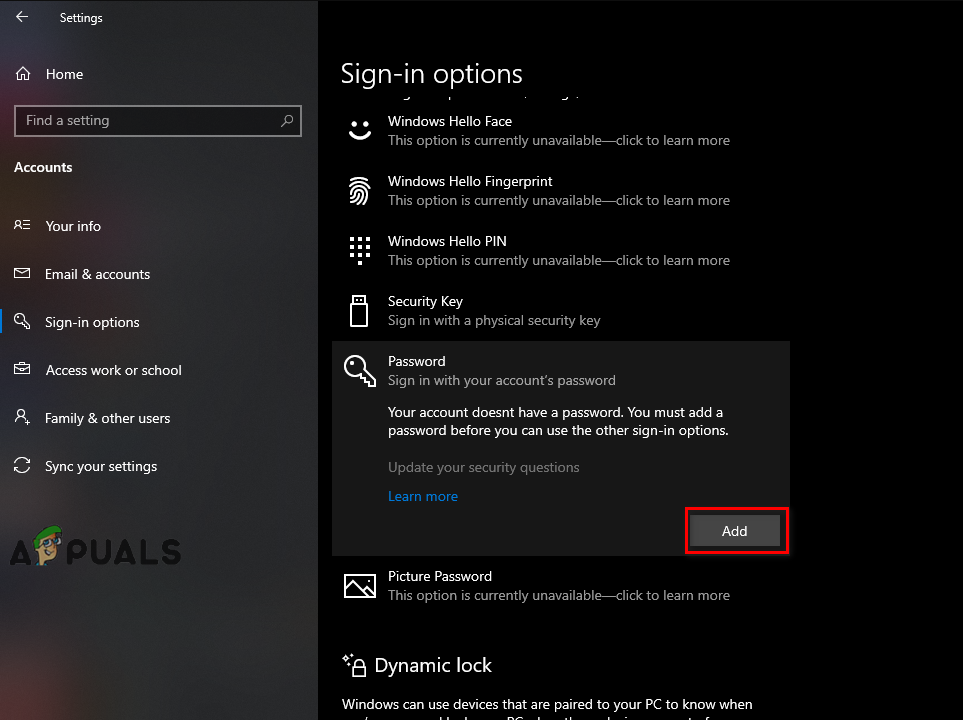
Setting a normal Password - Press the Add button, and a pop-up will appear asking for your new Password and a hint for that password.
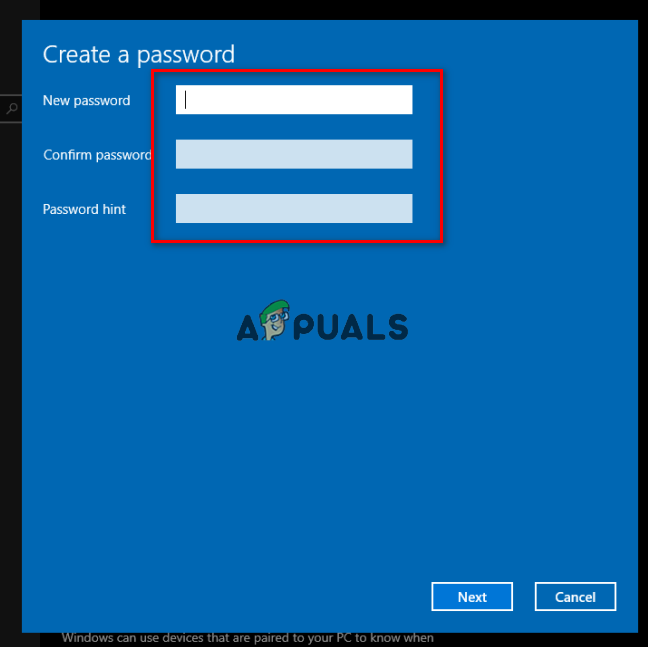
Creating a new password - Enter the new password and the hint. You should be good to go.
- Check if the issue persists.


What works for me:Delete Credentials for TERMSRV/* on Vault in Control PanelEdir Regedit:HKLMSYSTEMCurrentControlSetControlLsa
LmCompatibilityLevel
REG_DWORD
Value:1