Fix: Your Computer is Running Low on Resources
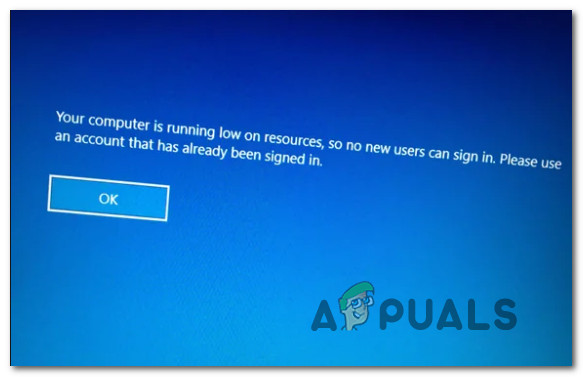
Several Windows users are seeing the “Your Computer is running low on resources” error message when attempting to log in with an existing user account. Most affected users are reporting that this error message creates a loop – Upon clicking on a user account to log in, users are only left with an Ok button which ends up returning them to the previous screen. With no further intervention, the user is left with no way of accessing any of the signed in accounts present on that particular computer.
Update: On Windows 10, most affected users have reported that the issue started occurring after they installed a pending Windows update.
What is causing the “Computer is Running Low on Resources” issue?
We investigated this particular issue by looking at various user reports and the repair strategies that are commonly deployed to resolve this problem. Based on our investigations, it looks like there are several different scenarios that will spawn this particular error message:
- The issue is caused by uneven RAM allocation – As a lot of users have reported, this issue will occur when multiple users have signed in an out multiple times without the machine restarting. From our investigations, it looks like the issue has something to do with how the OS is allocation RAM to each account that is currently signed in. In this case, powering off the machine manually is the quickest way to get past the error message.
- Windows 10 update caused the issue – Several users reports are inclining towards that possibility that a bad Windows update ended up creating this issue. This was semi-confirmed by Microsoft – they released a hot-fix just days after the update started producing this issue. In this case, ensuring that you install every pending update should resolve the issue automatically.
- Corrupted system files associated with a user account – This issue can also occur if you’re dealing with corrupted system files. This might end up tricking your system into believing that the account is using much more RAM than what is being used in reality. In this case, a DISM or SFC (or both) scan should resolve the issue.
If you’re currently struggling to bypass this same exact issue, this article will provide you with several different troubleshooting strategies that other users in a similar situation have successfully used to resolve the problem.
If you want to remain as efficient as possible, we encourage you to follow the methods in the same order that they are presented in. One of them is bound to resolve the issue for you, regardless of your particular scenario.
Method 1: Power down manually
The majority of affected users have reported that the only way around this issue is to do a manual power off – holding the power button until the machine is powered off forcibly. And keep in mind that simply pressing the Restart button is often reported to lead you right back to the “Your Computer is running low on resources” error message.
Furthermore, it’s important to remember that this method will not treat the underlying cause of the issue. It’s simply a workaround that will allow you to bypass the error screen and allow you to keep using your computer.
But chances are that the same error will return after some time. If you’re looking for a method that will resolve the issue permanently, move down to the next methods below.
Method 2: Install every pending Windows Update (Windows 10 only)
Since the issue can also be caused by a Windows 10 glitched caused by a broken Windows update that essentially tricks the system into believing that the resources available are not enough to accommodate a new user account. Fortunately, Microsoft was fairly quick in resolving the issue with the release of a hotfix. As of now, it will automatically get installed on every activated Windows 10 version.
By ensuring that you install every pending Windows 10 update, you’ll eliminate the possibility of encountering this issue because of a broken update. Here’s a quick guide on installing every pending Windows 10 update:
- Press Windows key + R to open up a Run box. Then, type “ms-settings:windowsupdate” and press Enter to open up the Windows Update tab of the Settings app.

Run dialog: ms-settings:windowsupdate - Inside the Windows Update tab, click on Check for updates and wait for the initial scan to determine if you have any pending updates.

Checking for downloadable Updates - If updates are ready to install, follow the on-screen prompts to install every pending update. If you’re prompted to restart, do so and then make sure to return to this screen again to ensure that every pending update gets installed.
- Once every pending update gest installed, do a final restart and see if the issue is still occurring.
If you’re still encountering the “Your Computer is running low on resources” error, move down to the next method below.
Method 3: Performing SFC & DISM scans
If you find that the issue is recurring and it promptly returns sometime after following Method 1, it’s likely that you’re having some problem with your system files belonging to your user account. Several users that found themselves in a similar situation have reported that the error message stopped occurring after they used SFC or DISM scans to find and fix corrupted system files.
Here’s a quick guide on running these scans:
- Press Windows key + R to open up a Run dialog box. Then, type ‘cmd’ and press Ctrl + Shift + Enter to open up an elevated Command Prompt. When the UAC (User Account Control) pops up, click Yes to grant administrative privileges.

Running CMD using Run box - Inside the elevated command prompt, run the following command and press Enter to initiate a System File Checker scan:
sfc /scannow
Note: The System File Checker scan will analyze all protected system files and replace corrupted occurrences with healthy copies from a locally saved cached copy located in a compressed folder – exact location is %WinDir%\System32\dllcache
- Once the process is finished, restart your computer and see if the error is still returning. If it is, proceed with the next steps below.
- Follow step 1 again to open another elevated Command Prompt. Inside of it, type the following command and press Enter to initiate a DISM scan:
DISM.exe /Online /Cleanup-image /Restorehealth
Note: A DISM (Deployment Image Servicing and Management) scan uses Windows Update to provide the files that are required to fix corrupted files.
- Once the scan is finished, restart your computer and see if the issue has been resolved.


What about the computer simply having too much running for the CPU and or RAM to cope with? With Laptops what about the effect of heat?