How to Fix Windows Update Error 0x80244019 on Windows?
The Windows update error 0x80244019 is usually caused by issues with your Windows update settings or update components. This error prevents users from successfully installing updates and, as a result, from accessing new features, security enhancements, bug fixes, and driver updates—all of which are important for system performance.

Unfortunately, Windows update errors are a common issue. However, there is no need to stress. This article will guide you through the error itself and provide possible solutions to overcome it. Please note that an administrator account is necessary for some of these solutions, which require administrative privileges. For the best results, carry out the solutions in the order presented.
What Causes the Windows Update Error 0x80244019?
After reviewing user reports, we’ve identified several potential factors that can trigger this error. These factors include, but are not limited to:
- Windows update settings: For many users, the error was a result of their update configuration, particularly when receiving updates for other Microsoft products.
- Windows update components: Issues can also occur if the update files do not download correctly. Redownloading the updates often resolves this problem.
- Third-party antivirus: Occasionally, third-party antivirus software may cause update errors. Disabling it can be an effective fix.
With this information, let’s explore various actionable solutions. Remember that these solutions are to be performed with administrative privileges.
1. Change Windows Update Settings
Changing Windows update settings works by streamlining the update process to focus on Windows alone, hence eliminating potential conflicts that could come from attempts to simultaneously update other Microsoft products.
By isolating the updates to the operating system, you create a more stable environment for the updates to download and install, minimizing complications and making way for a successful update experience.
- Press Windows Key + I to open Settings.
- Head to Update & Security.
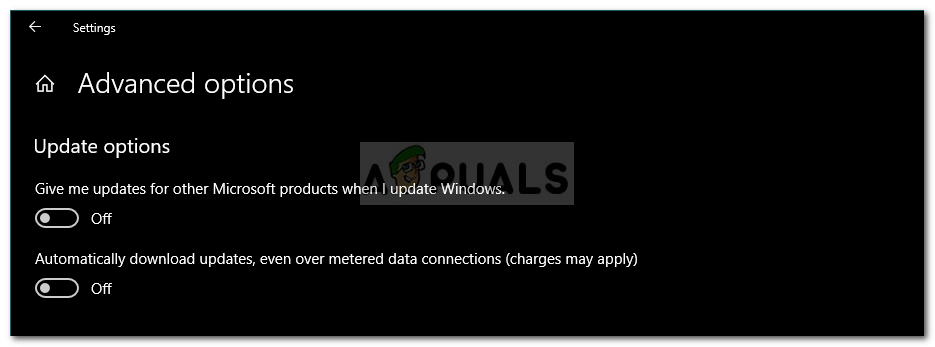
- Select Advanced options.
- Toggle off the Get updates for other Microsoft products when I update Windows option.
2. Run Windows Update Troubleshooter
This inbuilt Windows tool methodically scans for disruptions or malfunctions within the update process. If detected, it tries to automatically resolve any issues, streamlining the path towards a successful update installation. By deploying this troubleshooter, you’re basically allowing the system to self-diagnose and potentially resolve any complications that might be causing the error.
- Press Windows Key + I to open Settings.
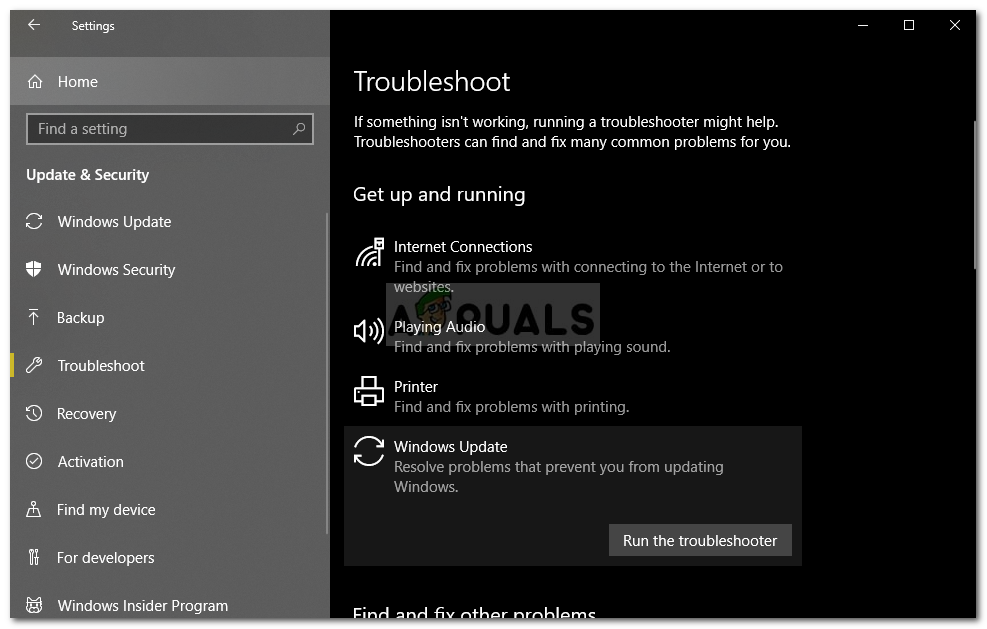
- Navigate to Update & Security and then to the Troubleshoot tab.
- Select Windows Update and then click on Run the troubleshooter.
- Allow the troubleshooter to finish its process.
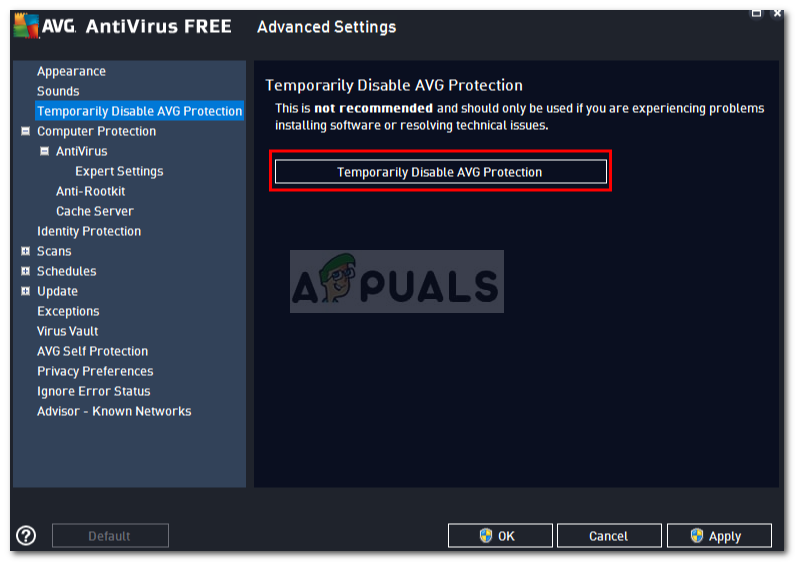
3. Disable Third-party Antivirus
Antivirus programs often incorporate real-time scanning and other protective features that can accidentally block or restrict access to the files and processes required for a Windows update to install properly. By temporarily turning off your antivirus software, you remove these barriers, allowing the update to proceed without external interference.
It’s similar to giving Windows a clear runway for takeoff, ensuring a smooth installation of the latest features and security improvements. Once the update is successful, you can promptly re-enable your antivirus to keep guarding your system.
4. Reset Windows Update Components
Resetting Windows update components clears out any glitched update files that could be causing the error by effectively renaming the storage folders. When you restart the update services after this reset, Windows will create new, untouched folders to download the update files newly. This often resolves any conflicts or corruptions within the update system, making way for a smooth update installation.
- Press Windows Key + X and select Command Prompt (Admin) or Windows PowerShell (Admin).
- Stop several Windows Update services by running these commands one by one:
net stop wuauserv

net stop cryptSvc

net stop bits

net stop msiserver

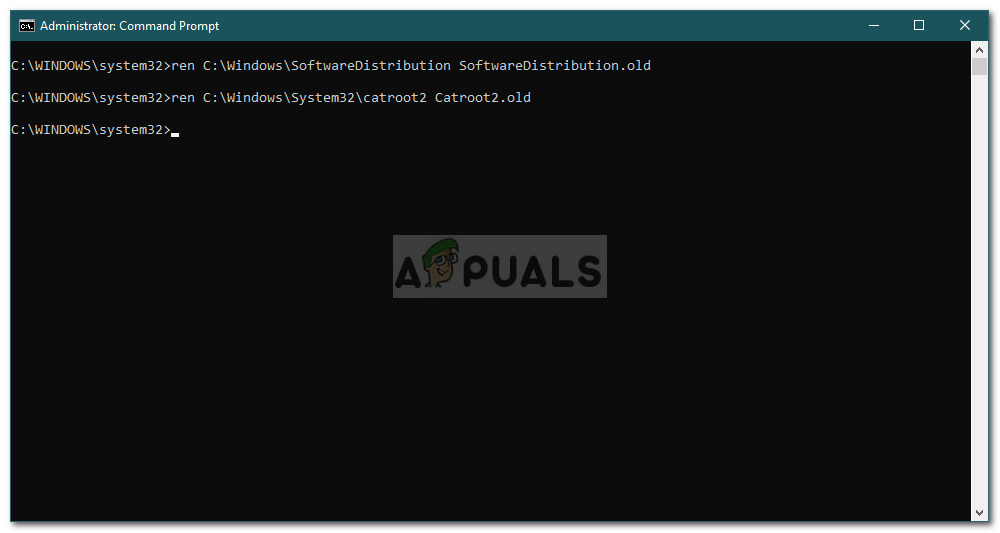
Stopping Windows Update Services - Rename the folders containing Windows Update files using these commands, followed by the Enter key after each:
ren C:\Windows\SoftwareDistribution SoftwareDistribution.old

ren C:\Windows\System32\catroot2 Catroot2.old
Renaming Catroot2 and SoftwareDistribution Folder - Restart the services you previously stopped by entering the following commands:
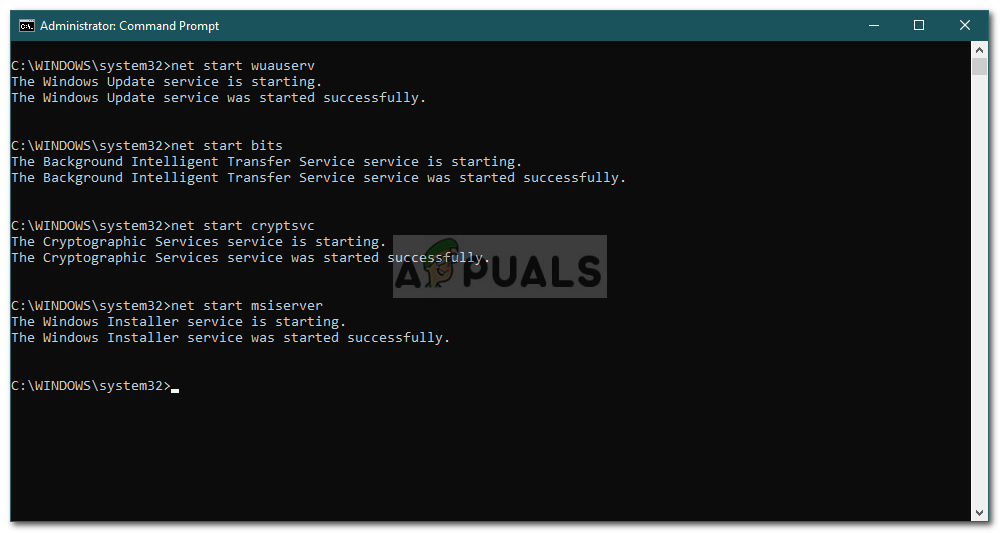
net start wuauserv

net start cryptSvc

net start bits

net start msiserver
Starting Windows Update Services - Close the command prompt and attempt to run the update once more.


