Fix: Windows Update Error 0x8024000b on Windows 10
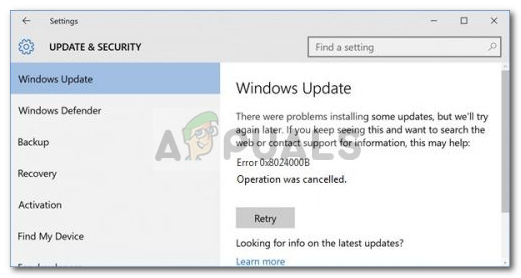
The Windows update error 0x8024000b is caused when the operating system cannot access the manifest files for updates that are used while installing updates on the system. Manifest files are basically XML files that are accompanied by applications as well as Windows updates.

Microsoft pushes out updates for various Windows applications as well as for the operating system to keep things going smoothly. These updates are often packed with security flaw patches, various bug fixes along with stability and sometimes a new design for certain applications. Even though updates are appreciated, they can sometimes tend to be daunting without providing much information about the possible cause of the error. Nonetheless, in this article, we’ll be going through the cause of the said error code and later on provide a list of solutions that you can implement to get rid of it.
What causes the Windows Update Error 0x8024000b on Windows 10?
To provide you with more detailed insight, let us cover what actually triggers the error while updating your operating system.
- Update Manifest Files: The reason due to which the error is being shown are the manifest files that are associated with Windows updates. The error pops up when Windows is not able to access/read the manifest files for Windows updates. This happens when the update is canceled in the middle by either the Windows Update service or the user itself. That is why the error message is accompanied by the context ‘Operation was canceled’.
Now that you are aware of the cause of the issue, let us continue with the solutions for the said error message.
Solution 1: Running a Powershell Script
The easiest way of fixing the error message is to run a Powershell script that will clean up superseded updates on your system. The script is provided on Microsoft Technet, thus, you don’t have to worry about your system getting infected. Here’s how to run the script:
- Go to this page and download the script.
- Once you have downloaded the script, go to your downloads directory and right-click the file.
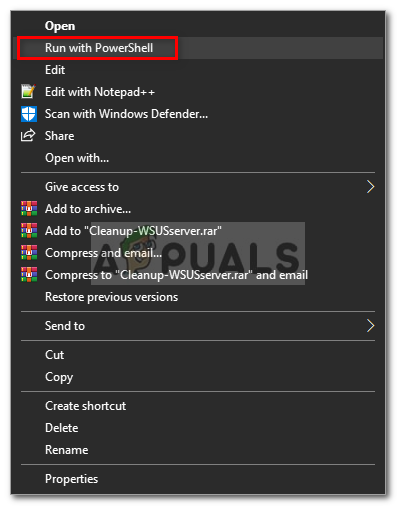
- Select Run with Powershell to execute the script and then wait for it to complete.

Running the Script with Powershell - Restart your system and then try updating again.
Solution 2: Using the Windows Update Troubleshooter
The next thing that you can do in order to resolve your issue is to use the Windows Update Troubleshooter. In case you didn’t cancel the update yourself, then the Windows Update Troubleshooter might be able to pinpoint the issue with your Windows update services and circumvent it. To run the Window Update Troubleshooter, follow the given steps:
- Press Windows Key + I to open up the Settings window.
- Go to Update & Security.
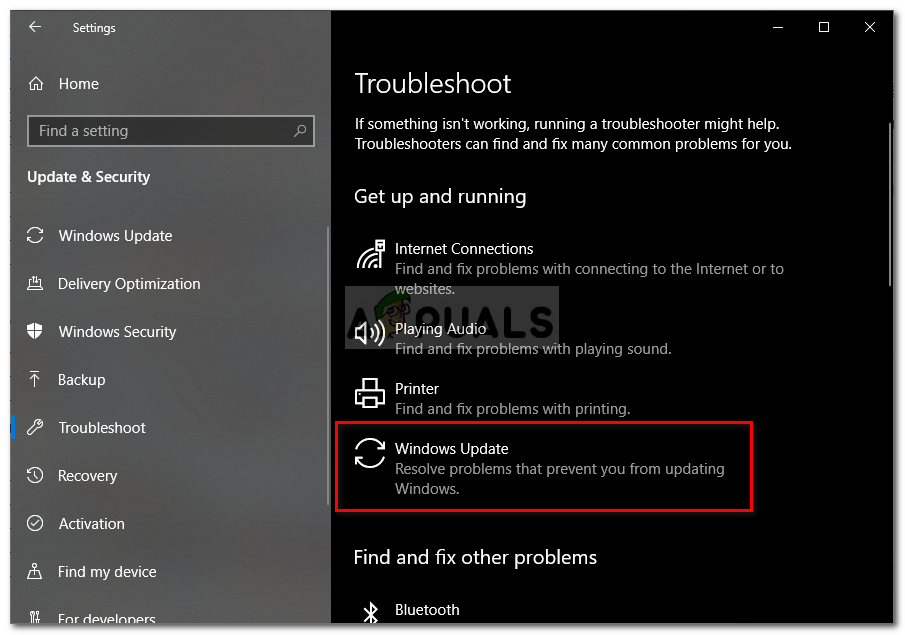
- Navigate to the Troubleshoot pane on the left-hand side.
- Select Windows Update to run the troubleshooter.

Running Windows Update Troubleshooter - Wait for it to complete troubleshooting and then run the update again to see if it the issue has been resolved.
Solution 3: Renaming the Spupdsvc.exe File
Lastly, the error can be solved by renaming a file named spupdsvc.exe. Spupdsvc basically stands for Microsoft Update RunOnce Service and the file is a process of this service. This is utilized while downloading Windows updates, however, at times it needs to be renamed to solve some issues. Here’s how to rename the file:
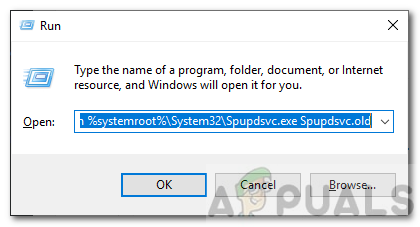
- Press Windows Key + R to open up the Run dialog box.
- Once it opens up, paste in the following command and then hit the Enter key:
cmd /c ren %systemroot%\System32\Spupdsvc.exe Spupdsvc.old

Renaming spupdsvc.exe - Finally, restart your computer and then try to run the update, hope it fixes your issue.


