Fix: Windows doesn’t have a network profile for this device
This error message appears when you are trying to connect a new device to your computer. Sometimes the error occurs when trying to connect a wireless device such as a printer or a speaker but the error can often be generalized. You will probably have to tweak your network profile in order to adjust for the error or you may need to install some drivers.
We have prepared some steps in order to solve the problem. The methods below were confirmed to work by online users and we hope you will be able to solve the method.
What Causes the “Windows doesn’t have a network profile for this device” Error?
There are several different causes for this problem. It’s quite possible that the network settings for your computer need to be setup differently. This can be done by tweaking the network profile on your wireless or Ethernet connection.
If it’s a problem with your wireless printer, you can try configuring some port settings. Each printer uses different ports to connect via your wireless connection. These settings can be located in Control Panel.
Finally, you can run the hardware and device troubleshooter to try and solve some basic problems. If that doesn’t work, you can try updating the printer’s driver software. You can try it automatically or by downloading them manually from the manufacturer’s website.
Solution 1: Allow Your PC to be Discoverable
This setting is located in the Settings tool on Windows 10 and you can easily turn it on. This will enable your PC to be discoverable by the device you are trying to connect to our computer. Performing this method will only take a couple of minutes and it will help you connect devices as suggested by plenty of users who have tried this method out.
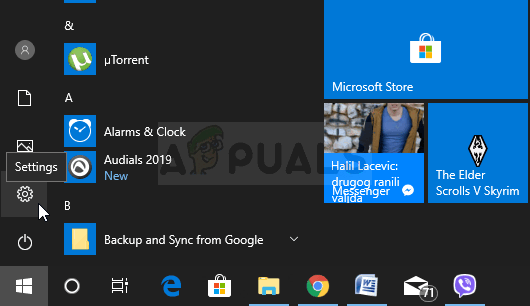
- Open the Settings tool on your Windows 10 computer by clicking the Start menu button and clicking the cog icon just above the Start menu button. You can also use the Windows Key + I key combination or simply type Settings in the Start menu.
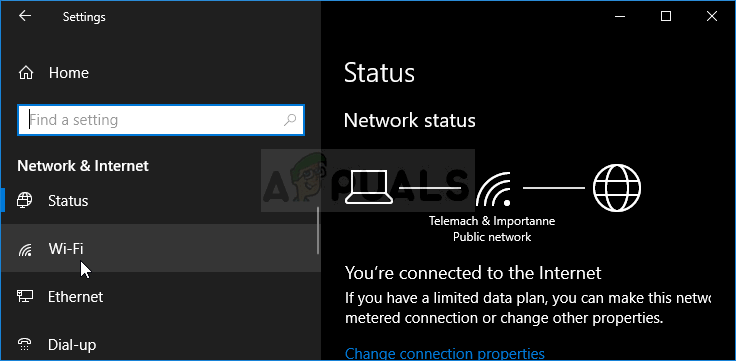
- Click the Network and Internet entry in the Settings window. Click Ethernet or Wi-Fi, depending on the type of network you’re currently using to connect to the Internet. Information about the network you’re connected to will appear promptly.
- If you’re connected to a wired Ethernet network, click the name of the network you’re using. If you’re connected to a wireless network, click Advanced Options under the list of available wireless networks. The list of settings available for your network connection is shown.
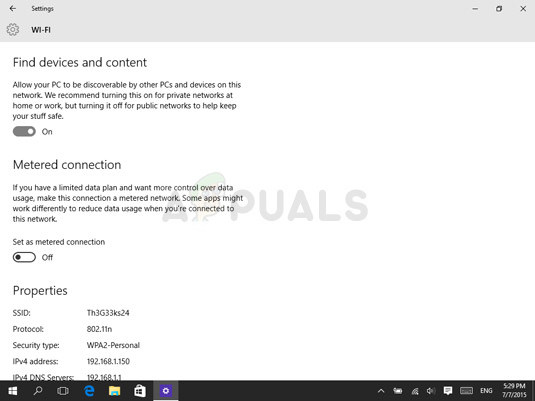
- Set the Find Devices and Content switch to On, and close Settings in order to apply the changes. You might want to reconnect to the network or restart your computer in order to apply the changes.
Solution 2: Troubleshooting for Printers
If you are struggling with a wireless printer and if you wish to fix the problem, you might consider solving the problem by following the steps below. This method is related to ports the printer uses to connect via your wireless connection.
In order for it to work properly, it needs to use these ports without restrictions which can be done with the steps below.
- Start up Control Panel by searching for the utility in the Start button or by clicking the Search button (Cortana) button at the left part of your taskbar (bottom left part of your screen.
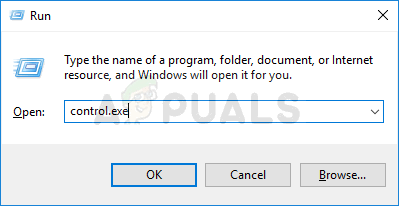
- You can also use the Windows Key + R key combo where you should type “control.exe” and click Run which will also open Control Panel directly.
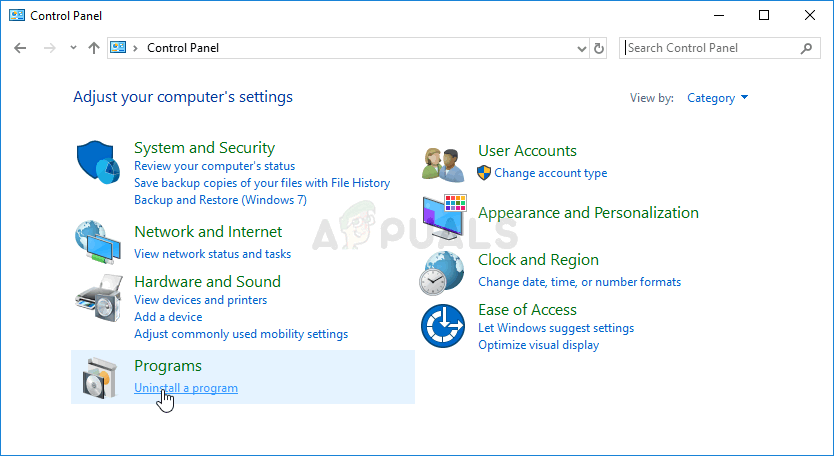
- After Control Panel opens, change the view to Category and click on View devices and printers under Hardware and Sound in order open this section. Note that you will have to solve the problem using Control Panel and not Settings on Windows 10.
- You should see a familiar screen with the complete list of your printers on it. The one you are having problems with should be there but grayed out “offline” even though it is probably not. If your printer is not there, you might want to skip this method and try something else from our article.
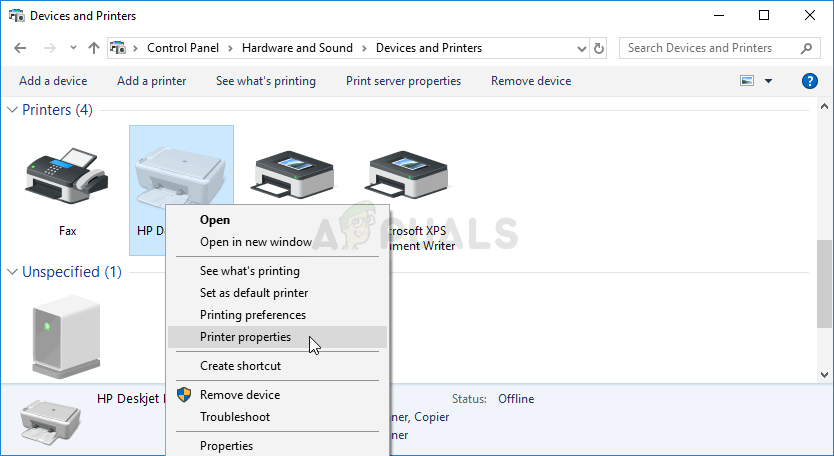
- Right click the problematic printer and you should notice that a menu will come up. Select “Printer Properties” from the new menu and click the tab which should be labeled as Ports.
- At the bottom of the Ports section, you should notice a button saying “Configure port”. Click this button in order to bring up a port configuration screen. Check the bottom of this screen for a check box with the text referring to SNMP protocol next to it.
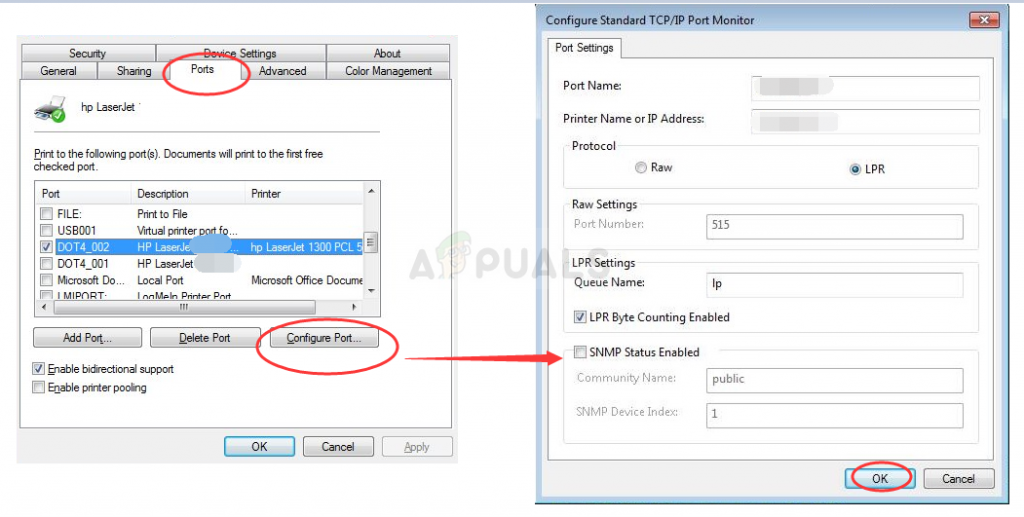
- Uncheck this box and save the changes. Your printer should come back online and you shouldn’t see the “Windows doesn’t have a network profile for this device” error anymore.
Solution 3: Run the Hardware and Devices Troubleshooter or Reinstall the Driver
If the problem is related to the driver your printer uses to connect to your PC, the error might be fixed with the troubleshooter built into Windows which deals with the devices connected to your PC. You also might want to actually reinstall the driver for the printer which may fix your problem if everything else fails.
- Start up Control Panel by searching for the utility in the Start button or by clicking the Search button (Cortana) button at the left part of your taskbar (bottom left part of your screen.
- You can also use the Windows Key + R key combo where you should type “control.exe” and click Run which will also open Control Panel directly.

- After Control Panel opens, change the view to Large or Small icons and navigate to the bottom in order to open the Troubleshooting option.
- Choose the View all option from the left side navigation pane and locate the Hardware and Devices entry in the window. Click on it and follow the instructions on screen in order to run the troubleshooter. Check to see if the Windows doesn’t have a network profile for this device error still appears.
If this method doesn’t work, you can try to reinstall the driver for the printer in Device Manager. You can choose to update it or to simply reinstall the current one. Try out both ways just to make sure.
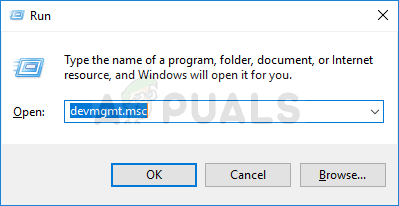
- Click the Start menu button at the lower left part of your screen, type in Device Manager, and click its entry from the list of results at the top. You can also use the Windows Key + R combination by clicking both of these keys simultaneously in order to bring up the Run dialog box. Type in “devmgmt.msc” in the box and click OK.
- Right click on your printer which can be found under Print queues and select Properties. After the Properties window has opened, navigate to the Driver tab and check for the Update Driver button
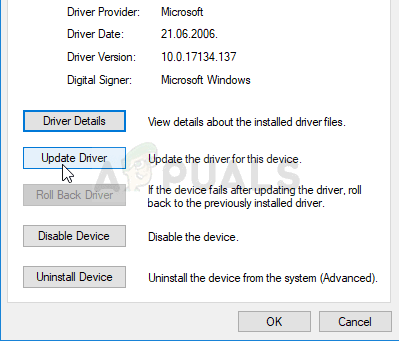
- You can also choose Uninstall Device and download the driver manually from your manufacturer’s website which is also easy to do. Either way, wait for the process to finish, restart your computer and check to see if the error still appears.


