Fix: Windows Couldn’t Remove your Computer from Homegroup
Windows Homegroups are extremely useful for connecting several computers into a network and this feature is commonly used among companies and individual users as well. This error message ‘Windows Couldn’t Remove your Computer from the Homegroup‘ appears when users try to exit a homegroup they are a part off and it can be quite difficult to resolve.
Luckily, there are some verified solutions for this problem and they have appeared over the years so we decided to list them out in an article along with detailed solutions. Follow the instructions we have prepared in order to get rid of this error.
What Causes the Windows Couldn’t Remove your Computer from the Homegroup Error?
The list of thing which cause this error is not very long and the problem can be often resolved by looking at the several causes from the list below:
- HomeGroup Provider and HomeGroup Listener service might be disabled or stopped from running on your computer and you should enable and start them in order to resolve your problem. This can be done easily.
- A folder called MachineKeys located in C:\ProgramData\Microsoft\Crypto\RSA may have gone corrupt on your computer and you should clear it of any files inside after taking ownership of it.
- A file called idstore.sst located deep inside the Windows folder in your Local Disk may have also gone corrupt and you should make sure to rename or delete it in order to have Windows replace it manually.
Solution 1: Enable HomeGroup Provider and HomeGroup Listener Services
As is the case with plenty of other Windows features, the HomeGroup feature depends on these two services and they need to be up and running in order for you to be able to opt out of a HomeGroup. Enabling these services is easy and the process is explained in the steps below.
- Open the Run utility by using the Windows Key + R key combination on your keyboard (press these keys at the same time. Type “services.msc” in the newly opened box without the quotation marks and click OK in order to open the Services tool.

- The alternative way is to open Control Panel by locating it in the Start menu. You can also search for it using the Start menu’s search button.
- After the Control Panel window opens, change the “View by” option at the top right part of the window to “Large Icons” and scroll down until you locate the Administrative Tools entry. Click on it and locate the Services shortcut at the bottom. Click on it to open it as well.
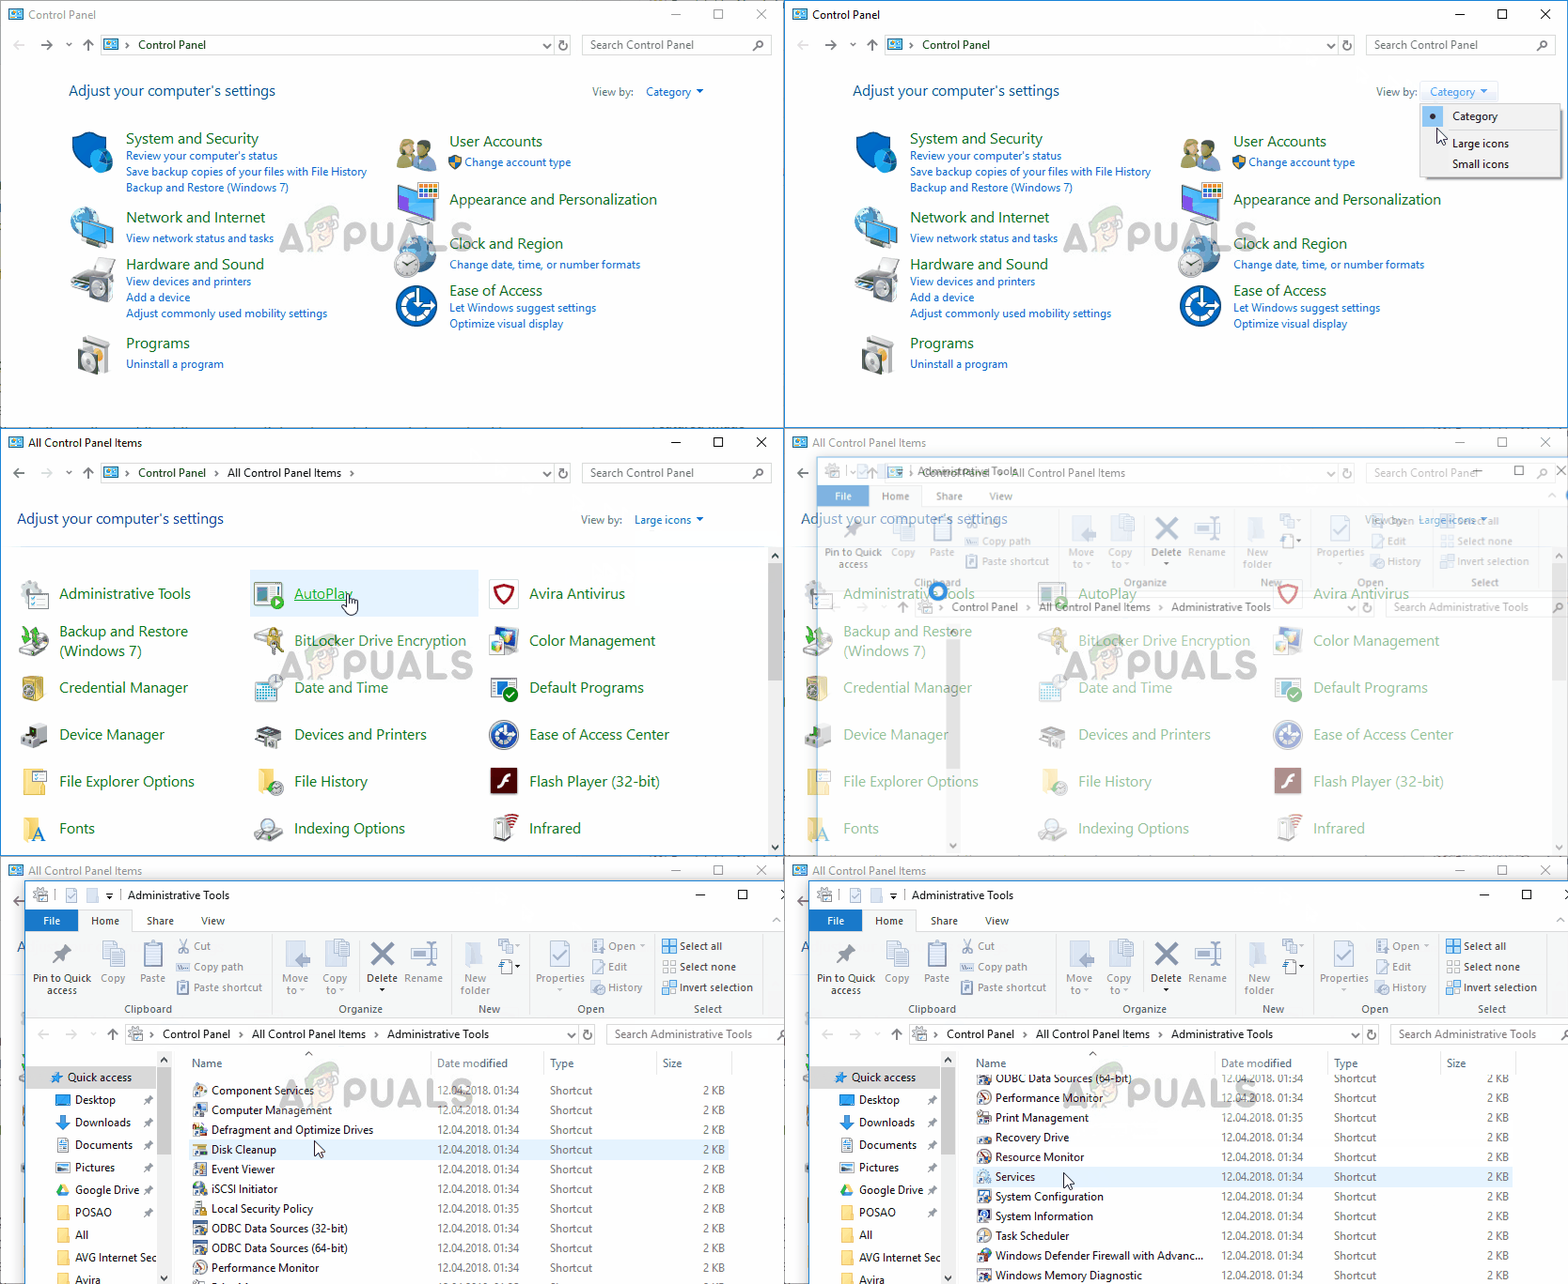
- Locate the HomeGroup Provider or the HomeGroup Listener service on the list, right-click on it and select Properties from the context menu which appears.
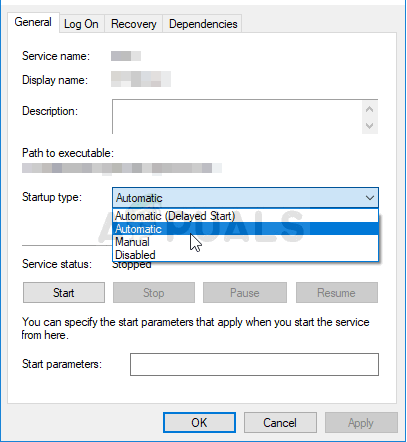
- If the service is started (you can check that just next to the Service status message), you should stop it for now by clicking the Stop button in the middle of the window. If it is stopped, leave it stopped until we proceed.
- Make sure that the option under the Startup type menu in the service’s properties window is set to Automatic before you proceed with other steps. Confirm any dialogue boxes which may appear when changing the startup type. Click on the Start button at the middle of the window before exiting. Make sure you repeat the same process for both of the services we mentioned.
You may receive the following error message when you click on Start:
“Windows could not start the service on Local Computer. Error 1079: The account specified for this service differs from the account specified for other services running in the same process.”
If this happens, follow the instructions below to fix it.
- Follow the steps 1-3 from the instructions above in order to open the service’s properties window. Navigate to the Log On tab and click on the Browse… button.
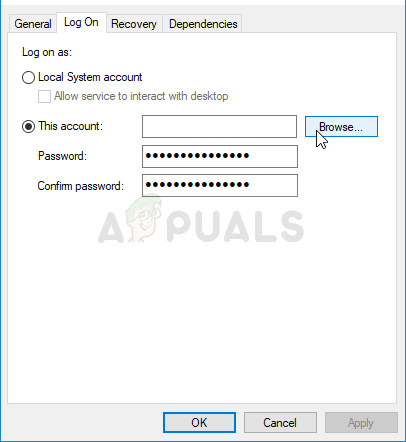
- Under the “Enter the object name to select” entry box, type in your account’s name, click on Check Names and wait for the name to become available.
- Click OK when you are finished and type in the password in the Password box when you are prompted with it, if you have setup a password. It should now start without issues!
Solution 2: Take Ownership of a Folder
Taking ownership of the MachineKeys folder located in C:\ProgramData\Microsoft\Crypto\RSA has fixed the problem for countless users who have struggled with the same problem. The ownership should be transferred to your own user account if you are a local administrator. Follow the steps below to achieve this!
- Open your Libraries entry on your PC or open any folder on your computer and click on This PC option from the left side menu.
- Navigate to the C:\ProgramData\Microsoft\Crypto\RSA folder.
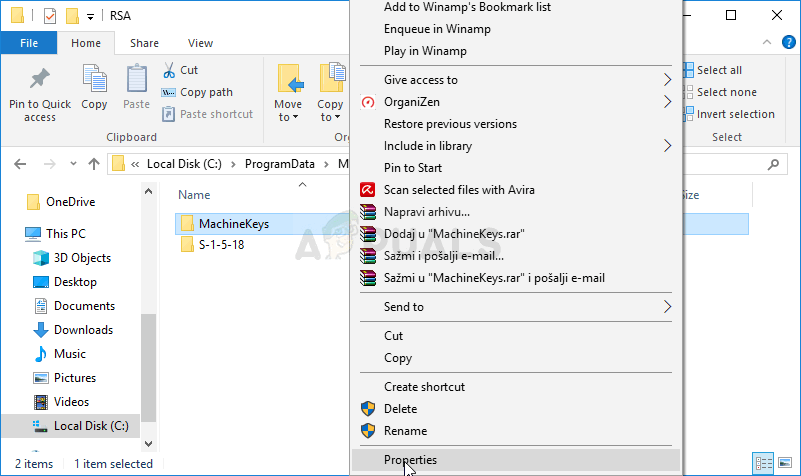
- You will need to take ownership of the MachineKeys folder located inside. Right-click the folder, click Properties, and then click the Security tab. Click the Advanced button. The “Advanced Security Settings” window will appear. Here you need to change the Owner of the key.
- Click the Change link next to the “Owner:” label The Select User or Group window will appear.
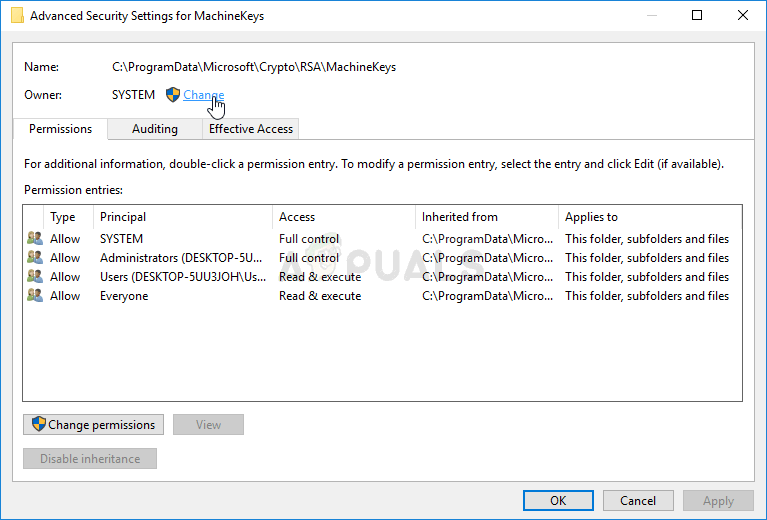
- Select the user account via the Advanced button or just type your user account in the area which says ‘Enter the object name to select’ and click OK. Add your user account.
- Optionally, to change the owner of all subfolders and files inside the folder, select the check box “Replace owner on subcontainers and objects” in the “Advanced Security Settings” window. Click OK to change the ownership.
- Now that you have complete control over the folder, open it, select everything you find inside and remove the files to another location. Restart your computer and the problem should be resolved.
Solution 3: Rename or Delete the Following File
There is a file located in C:\Windows\ServiceProfiles\LocalService\AppData\Roaming\PeerNetworking called idstore.sst which can sometimes become corrupted and directly affect your HomeGroup settings as they are directly related to Peer Networking. The deletion of this file will cause it to be recreated when you either restart your computer restart the PNRP service so make sure you give this a shot.
- Open your Libraries entry on your PC or open any folder on your computer and click on This PC option from the left side menu. Double-click to open your Local Disk C: and navigate to the Windows folder inside.
- Navigate to ServiceProfiles >> LocalService >> AppData >> Roaming >> PeerNetworking.
- If you are unable to see the ProgramData folder, you may need to turn on the option which enables you to view hidden files and folders. Click on the “View” tab on File Explorer’s menu and click on the “Hidden items” checkbox in the Show/hide section.
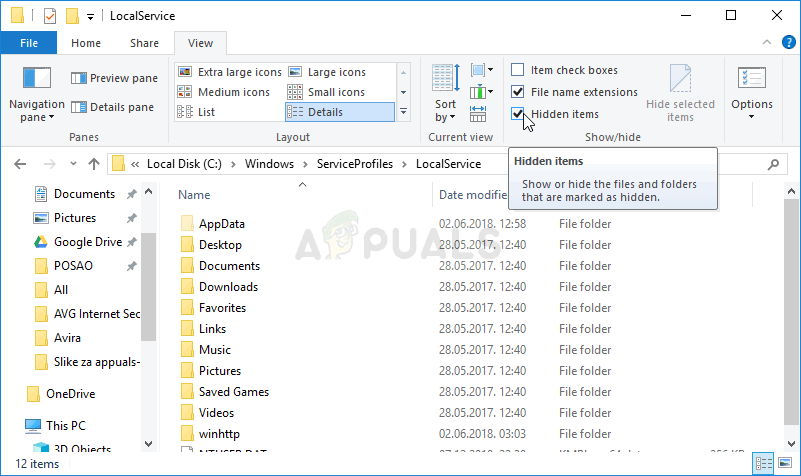
Enabling the View of Hidden Files and Folders - Locate the file named idstore.sst, right-click on it, and choose Rename from the context menu. Rename it to something like idstore.old and apply the changes. Restart your computer and check to see if the problem is resolved.


