Error Fixed: ‘Windows Could Not Prepare the Computer to Boot’
The error message “Windows could not prepare the computer to boot into the next phase of installation” often appears during the installation process, particularly after selecting the drive. This usually happens when Windows setup can’t properly configure the system to boot. This error generally means that the partition setup on the hard drive or SSD isn’t correctly matched with the chosen installation mode.
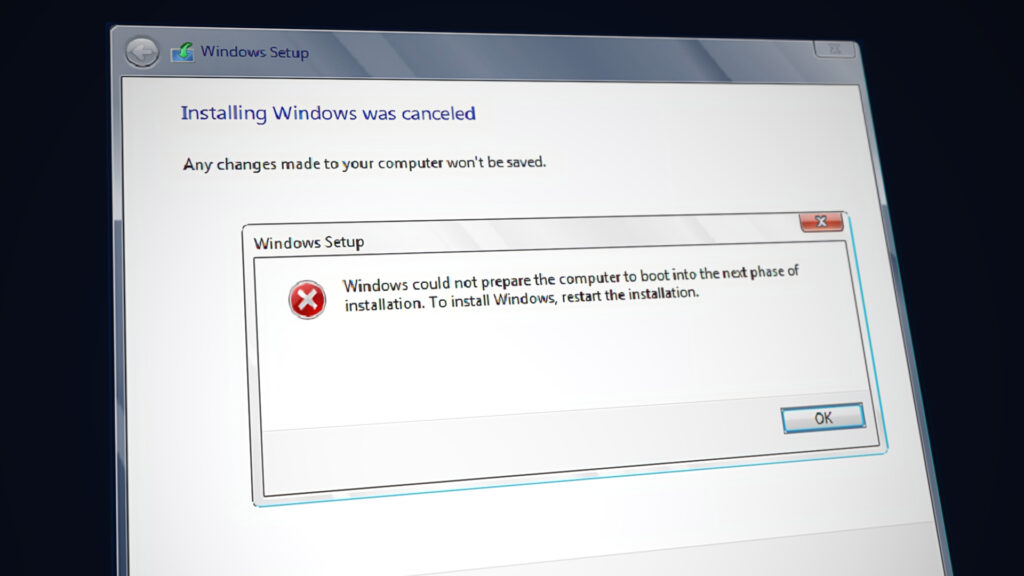
This can occur if the drive is not properly partitioned for UEFI or legacy BIOS settings. The most common cause is a mismatch between the partition style and the boot mode (UEFI needs GPT, while legacy BIOS needs MBR). Other causes include not fully wiping previous partitions or having corrupt installation media.
In this article, we will discuss different ways to solve this error.
1. Disable All Unnecessary Hardware
Before attempting complex software fixes, try simplifying the hardware setup. Disconnect unnecessary devices like external drives or extra internal hardware to reduce conflicting drivers or hardware issues. This helps the system focus on the essential components needed for installation, often resolving the boot preparation problem.
After your computer is running with the bare minimum hardware, restart it and try the installation again. You will likely complete the process without encountering the error.
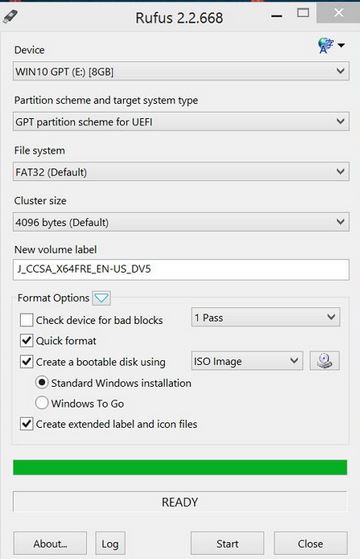
2. Prepare the Installation Media Properly
To prevent installation errors, it’s important to prepare the installation media correctly. If it’s not set up properly, the installer might not configure your system’s boot files. Use trusted tools like Rufus or the Windows Media Creation Tool to create a bootable USB with the correct settings for your system’s partition style (GPT for UEFI or MBR for Legacy BIOS). This helps avoid many issues caused by misconfigured boot media, allowing the installation to proceed without partition-related errors.
- Creating a Windows 7 Bootable DVD or USB
- Creating a Bootable USB Drive with Rufus or MediaCreation Tool
3. Verify Whether BIOS Supports the Windows Version
Make sure your BIOS supports the Windows version you’re installing because old or incompatible firmware can stop the installation. Newer Windows versions, like Windows 10 and 11, often need specific BIOS features like UEFI, Secure Boot, or TPM 2.0. If these features are missing or turned off, the installation might fail, causing a boot error. Checking BIOS compatibility and updating to the latest version helps ensure these features are on and meet the Windows requirements.
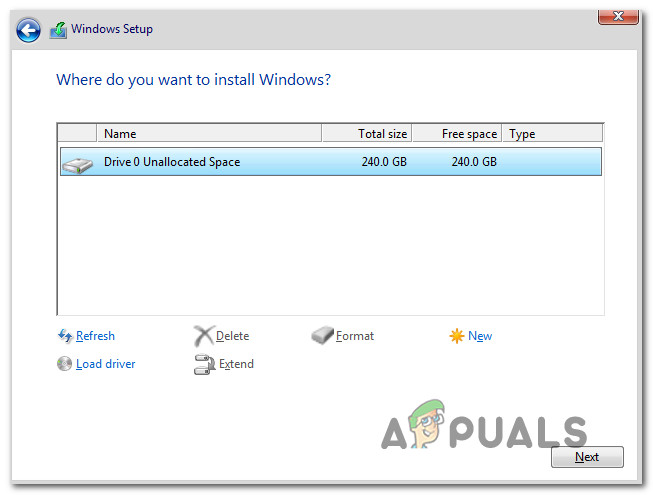
4. Delete All Partitions
Wiping all partitions resets your drive, removing old data and files that could interfere with a clean installation. This lets the system create the correct partition setup for a smooth process, avoiding conflicts between old and new partition systems.
While installing Windows, click on the drive and hit the Delete button.


You don’t need to delete all partitions. just delete system reserved and your C drive in which you have installed the window. and recreate the partition. It will automatically generate system reserved partition again. and then start installation.