Fix: Windows cannot run disk checking on this volume because it is write protected
Encountering an error while attempting to run a disk checking command (CHKDSK) on Windows often results in the command failing to execute properly. This issue typically occurs when the disk is flagged as “write-protected” or when Windows cannot access the disk, indicating that the system is unable to perform the check due to restrictions or corruption.
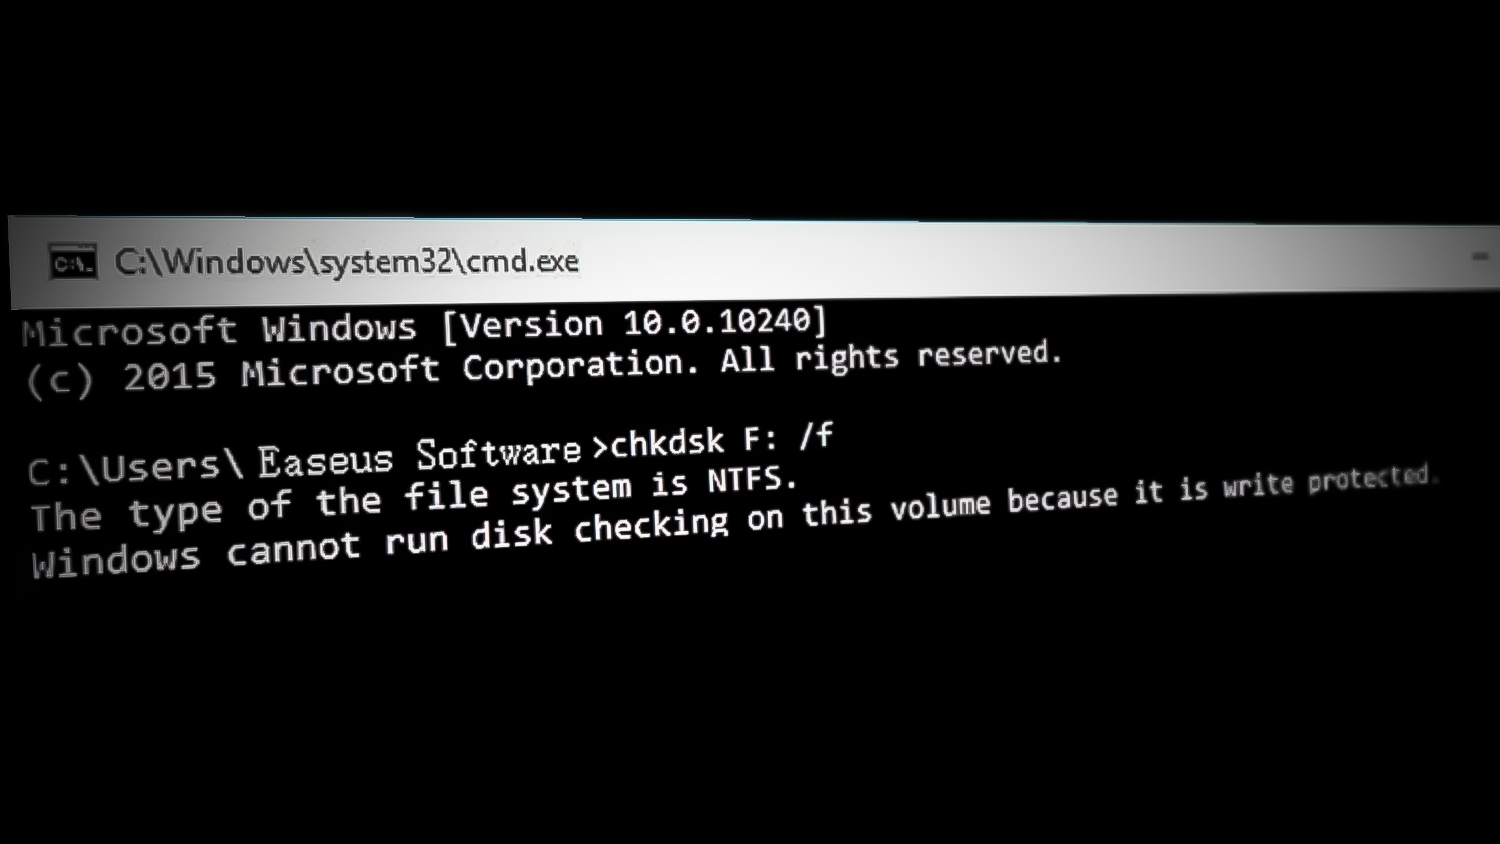
The most frequent cause is a write-protection attribute set on the drive, either through a physical switch, a corrupted file system, or registry settings.
Other common reasons include file system errors that necessitate a restart to fix, disk corruption, or the need for administrative privileges.
This error can also occur on memory cards. If that’s the case, you can easily remove the write protection using the lock on the memory card.
1. Clear Read Only Attributes
You can easily clear the Read-Only attribute by using the diskpart utility, which allows users to manage disks efficiently.
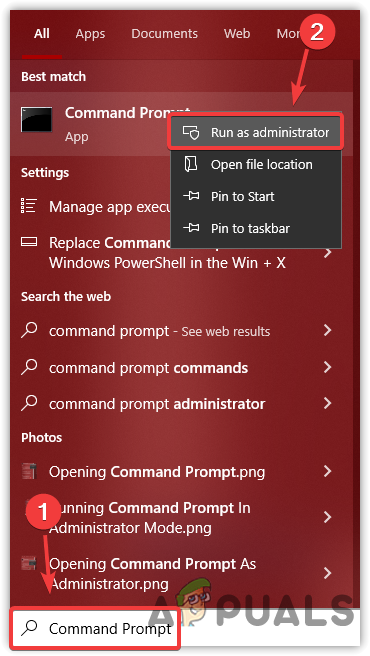
- Click Start Menu and type Command Prompt.
- Right-click on the command prompt and then select Run As Administrator.
Running Command Prompt As Administrator - Once the terminal is launched, type the following command to use the diskpart utility:
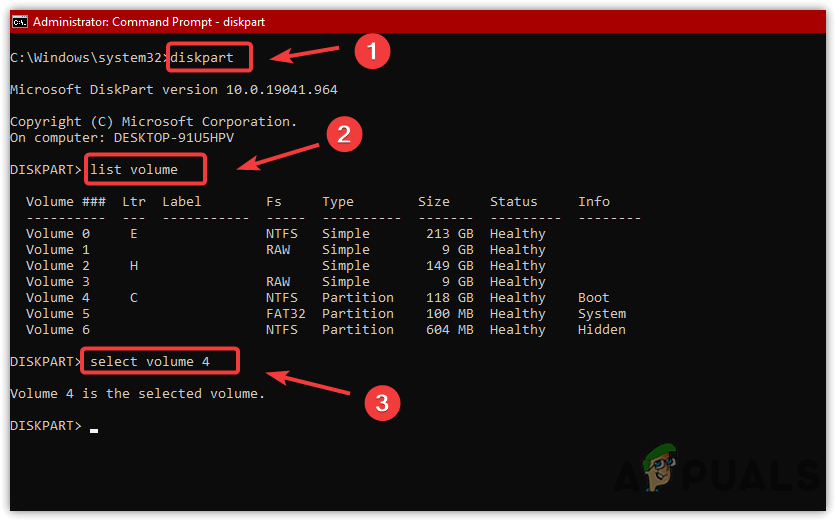
diskpart
- After entering diskpart, type the following command to list all your volumes:
list volume
- Select the volume causing the error by replacing # with the volume number:
select volume #
Using Diskpart Volume - Before making any changes, check the current attributes:
attributes volume
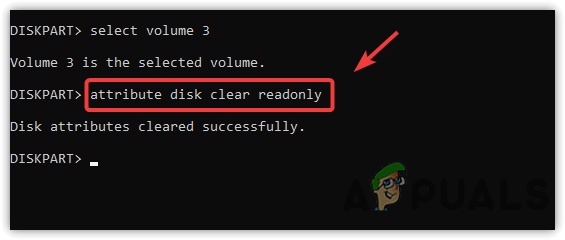
- If the volume is marked as Read-Only, clear the Read-Only mode:
attribute disk clear readonly
Leaving Read Only Mode - If you’re dealing with the entire disk, list all the disks and select the appropriate one:
list disk
select disk #
- Check the current disk attributes:
attribute disk
- If the disk is marked as Read-Only, clear the Read-Only mode:
attributes disk clear readonly
- After that, type the following command to check the current state of the disk. If the Read Only mode value is No, the disk is no longer write-protected:
attribute disk

Checking Disk Attributes - After that, run the disk-checking commands to see if the error is fixed.
2. Remove Write Protection Via Registry Editor
You may also try removing the write protection using the Registry Editor. The Registry Editor is a database for the operating system to store and manage all the tasks. This error might not appear after disabling the write protection using the Registry Editor.
Note: Please make a backup of your registry before making any changes to it, as improper changes can cause instability issues on your system. Follow our detailed guide on how to backup and restore Registry in Windows.
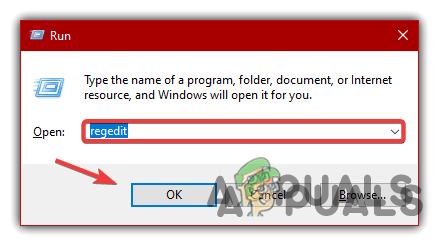
- Press Windows + R on the keyboard to open the Run program.
- Type Regedit and click OK.
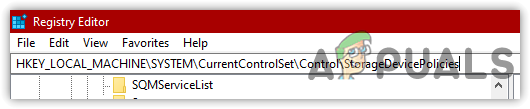
Opening Registry Editor - Once the Registry Editor is launched, navigate to the following path:
HKEY_LOCAL_MACHINE\SYSTEM\CurrentControlSet\Control\StorageDevicePolicies
Note: You can paste the following path in the address search bar for faster navigation.
Navigating to a Path in the Registry Editor - If the Storage Device Policies key is not there, create one under Control.
- Right-click Control, hover over New, and then click on Key.
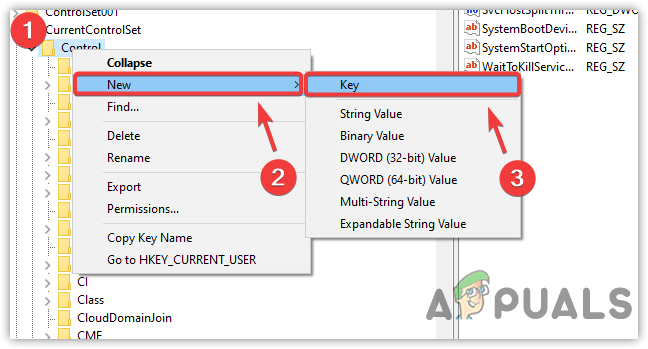
Making A Registry Key - Once the entry is created, name it StorageDevicePolicies.
- Right-click on the right pane, hover over New, and then click DWORD (32-bit) Value.
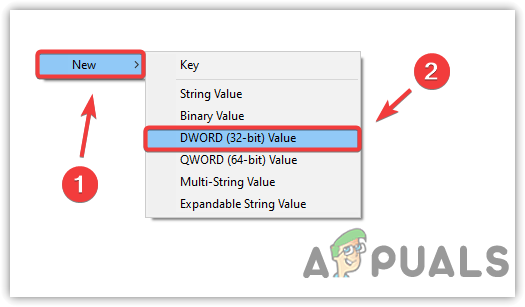
Creating A Subkey - Name it Writeprotect, then double-click on it and change its value data to 0.
- When done, click OK.
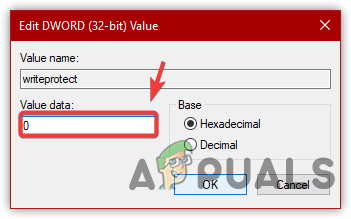
Changing Value Data to 0 - Restart your computer and run the disk-checking commands to see if the error persists.
3. Repair Disk Errors
If you have any disk errors in your target drive, it can lead to this issue. However, if you use some commands to ensure there is no disk error, then you can consider other potential solutions. Regardless of checking the drive for bad sectors, we have done everything that can fix this issue.
To check for disk errors, use chkdsk, a command-line utility that allows users to check for bad sectors and verify the integrity of system files in the target volume.
- Press the Windows key and type command prompt.
- Right-click on the terminal and choose Run As Administrator to launch with administrative privileges.
Opening Command Prompt As Administrator - Once it is launched, type the following command to check for disk errors and bad sectors:
chkdsk D: /f /r /x
Note: Make sure to replace D with the faulty drive.
/f: Fixes errors on the disk.
/r: Locates bad sectors and recovers readable information.
/x: Forces the volume to dismount first if necessary.
Important: The
/xparameter forces a dismount, which should not be used on the root partition (usually the C: drive) or other active system partitions because it can interrupt system operations and cause instability. Always ensure you have saved and closed any open work on the drive before using this parameter.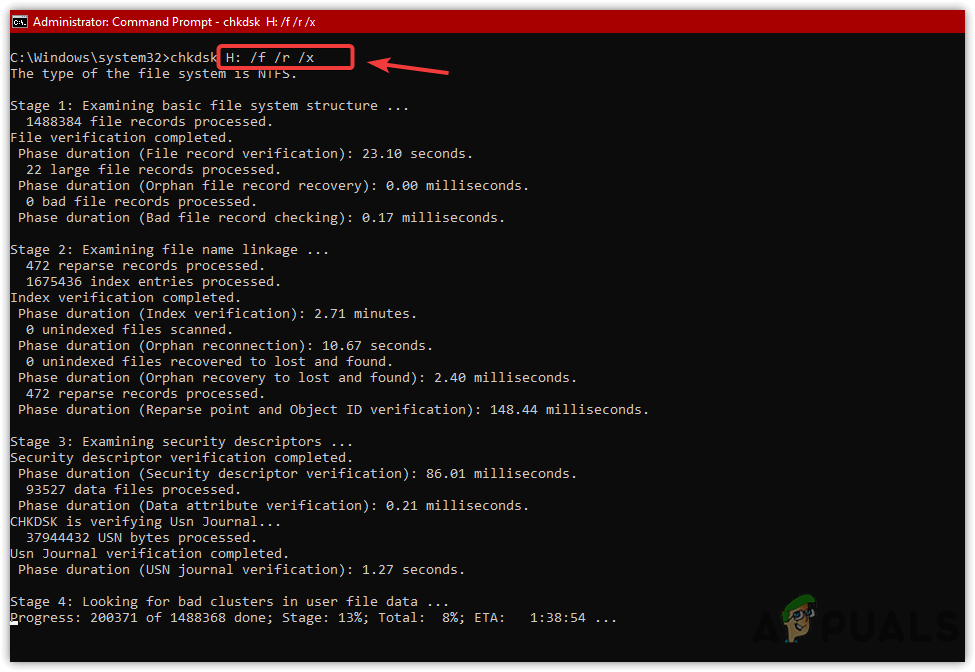
Running CHKDSK - If errors are found, the utility will automatically fix them, so don’t worry.
- Once done, check if the error is still occurring.
If none of the methods have successfully removed the write protection from your drive, there are three potential factors that could be causing this issue:
- Encryption: Your drive might be encrypted. If this is the case, you will need to unlock the drive using the appropriate decryption key.
- Third-Party Software: The write protection may have been applied by a third-party application. To remove the write protection, you will need to utilize the same software that imposed it.
- Corruption or Physical Damage: It is also possible that your drive is corrupted or physically damaged.
If one of these scenarios applies to your situation, follow the corresponding solution mentioned above. However, if none of these methods resolve the issue, it may be necessary to consult a local data recovery center to retrieve your data.


None of these work, still says write protected