How to Fix Windows Won’t Sleep Issue?
When Windows won’t automatically enter sleep mode, it usually indicates a problem with power settings, such as fast startup, power plans, or power management configurations. Incorrectly configured settings can prevent Windows from going to sleep. 
One of the frequent reasons for this issue is the power management settings of the Network Adapter. If your network adapter is set to wake the computer, it can conflict with the sleep function.
By adjusting the following settings, you can ensure that Windows enters and maintains sleep mode without interruptions. Here, we’ll go through solutions to resolve this issue step by step.
1. Disable Link State Power Management
Link State Power Management (LSPM) is a feature in Windows designed to reduce the power consumption of PCI Express devices, such as network adapters, when they are idle.
While intended to conserve energy, this feature can sometimes interfere with sleep mode, causing the computer to wake up unexpectedly.
This occurs because the network adapter might send a wake signal during power state transitions, disrupting the sleep process.
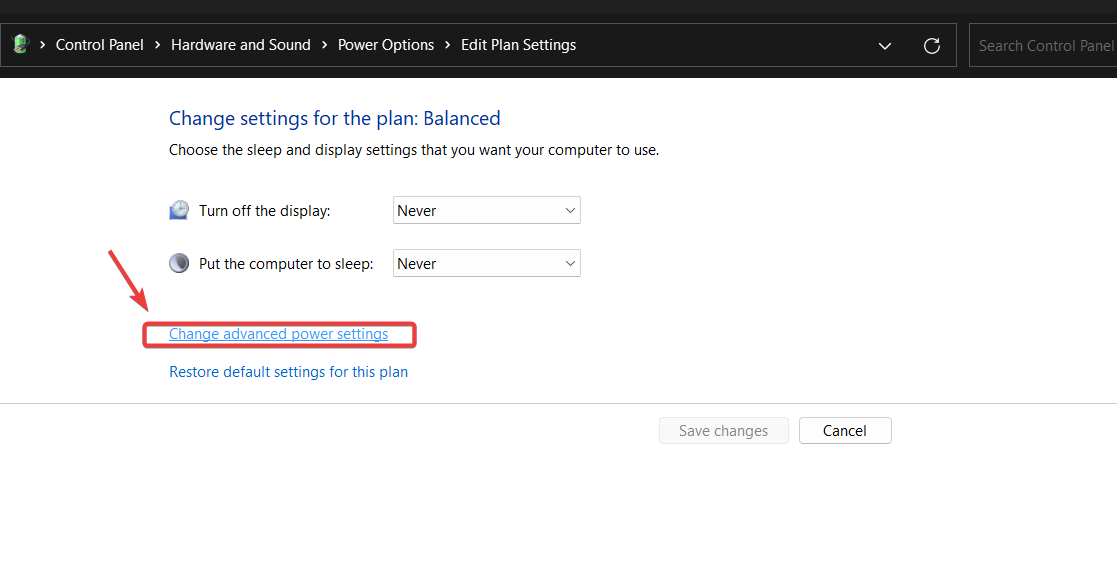
- Press the Windows key, type Edit Power Plan, and press Enter to open power settings.

- Click on Change advanced power settings to access detailed power options.
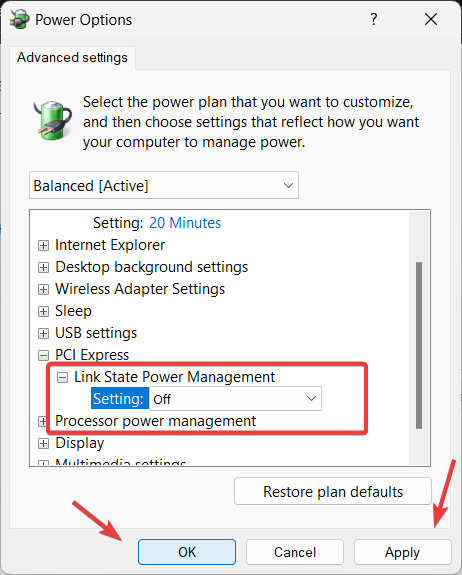
- Expand the PCI Express section, then expand Link State Power Management.
- Set the option to Off to disable Link State Power Management.
- Click Apply and then OK to save the changes.
- After making these changes, test sleep mode to see if the issue is resolved.
2. Configure the Power Management for the Network Adapter
If your network adapter is set to wake the computer, Windows might either not enter sleep mode or wake up unexpectedly. To prevent such issues, adjust the network adapter’s settings so that it won’t wake the computer during sleep mode.
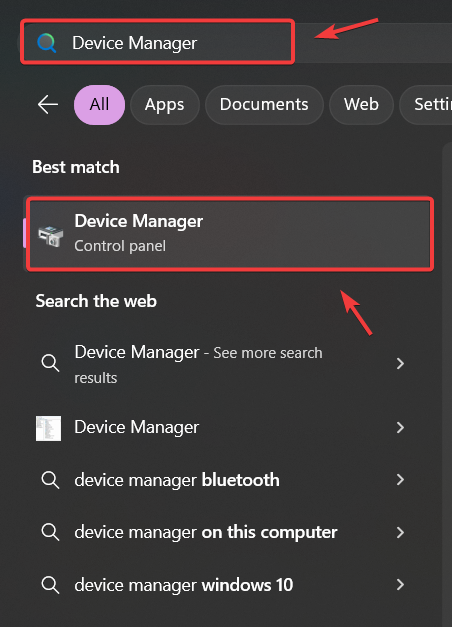
- Press the Windows key to open the Search Bar.
- Type Device Manager and press Enter to open it.
- Expand the Network Adapters section, right-click your network adapter, and select Properties.
- Go to the Power Management tab and uncheck the box next to Allow this device to wake the computer.
- Click Apply, then OK to save the changes.
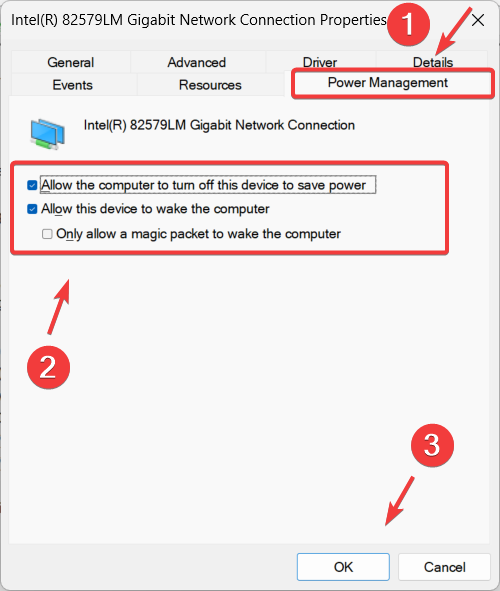
- Test to see if the issue is resolved by putting your computer into sleep mode.
3. Disable the Hibernate Feature
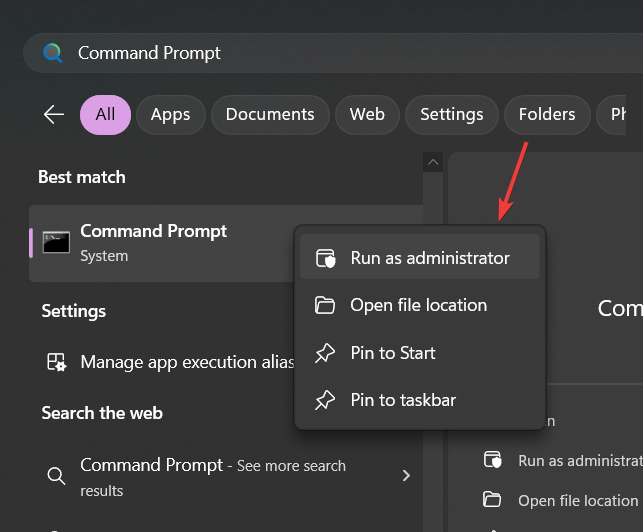
- Press the Windows key to open the Start Menu.
- Type Command Prompt in the Windows Search bar, then right-click on it and select Run as Administrator.
- In the Command Prompt window, type the following command to disable the hibernate feature and press Enter:
powercfg -h off
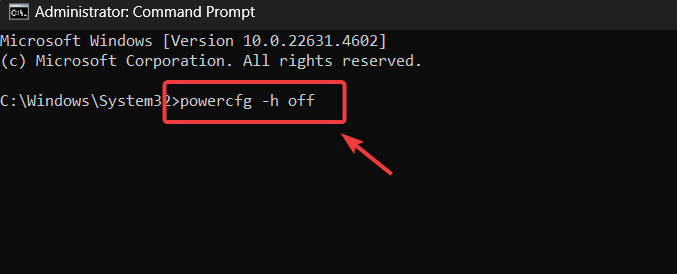
- After executing the command, close the Command Prompt and check if the issue is resolved.
4. Disable Fast Startup
The Fast Startup feature works in combination with hibernate to reduce boot times. With Fast Startup enabled, Windows doesn’t perform a full shutdown.
Instead, it saves the current system state to a hibernate file, allowing the computer to quickly resume from this state during the next startup, significantly reducing boot time.
However, Fast Startup can sometimes cause problems with sleep mode, leading to issues where the system fails to enter or maintain sleep mode correctly. Disabling it can help resolve these conflicts.
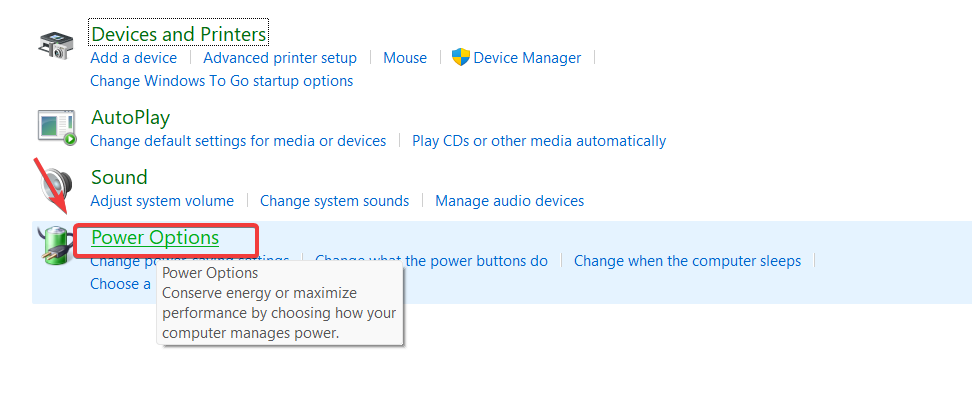
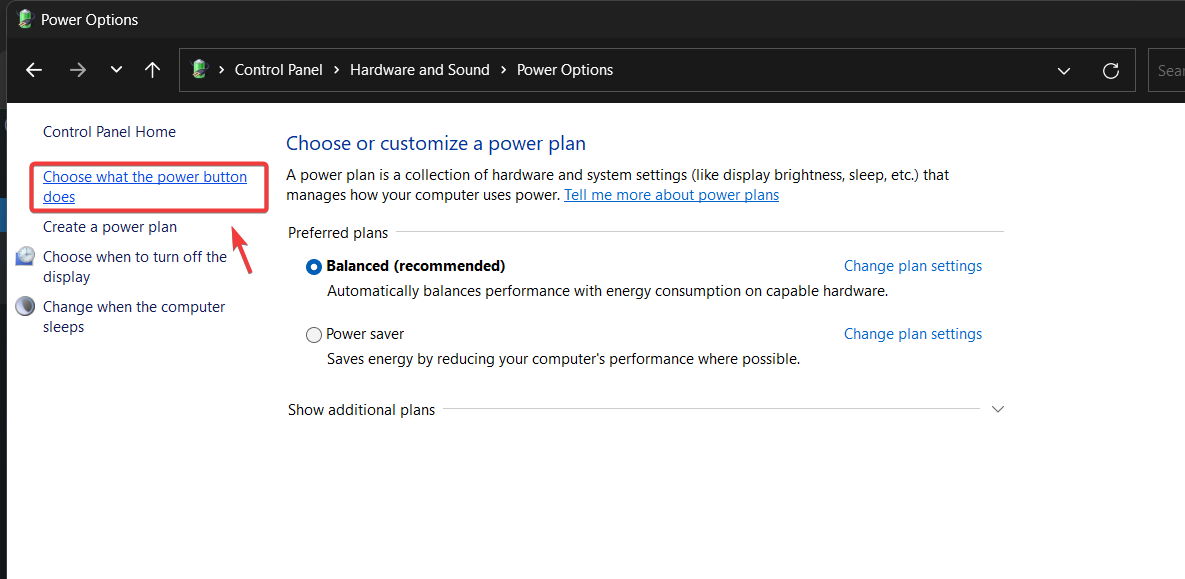
- Open the Control Panel by searching for it in the Start Menu.
- Go to Hardware and Sound > Power Options.
- From the left-hand menu, click Choose what the power buttons do.
- Click Change settings that are currently unavailable to unlock the options.
- Uncheck the box next to Turn on fast startup (recommended).
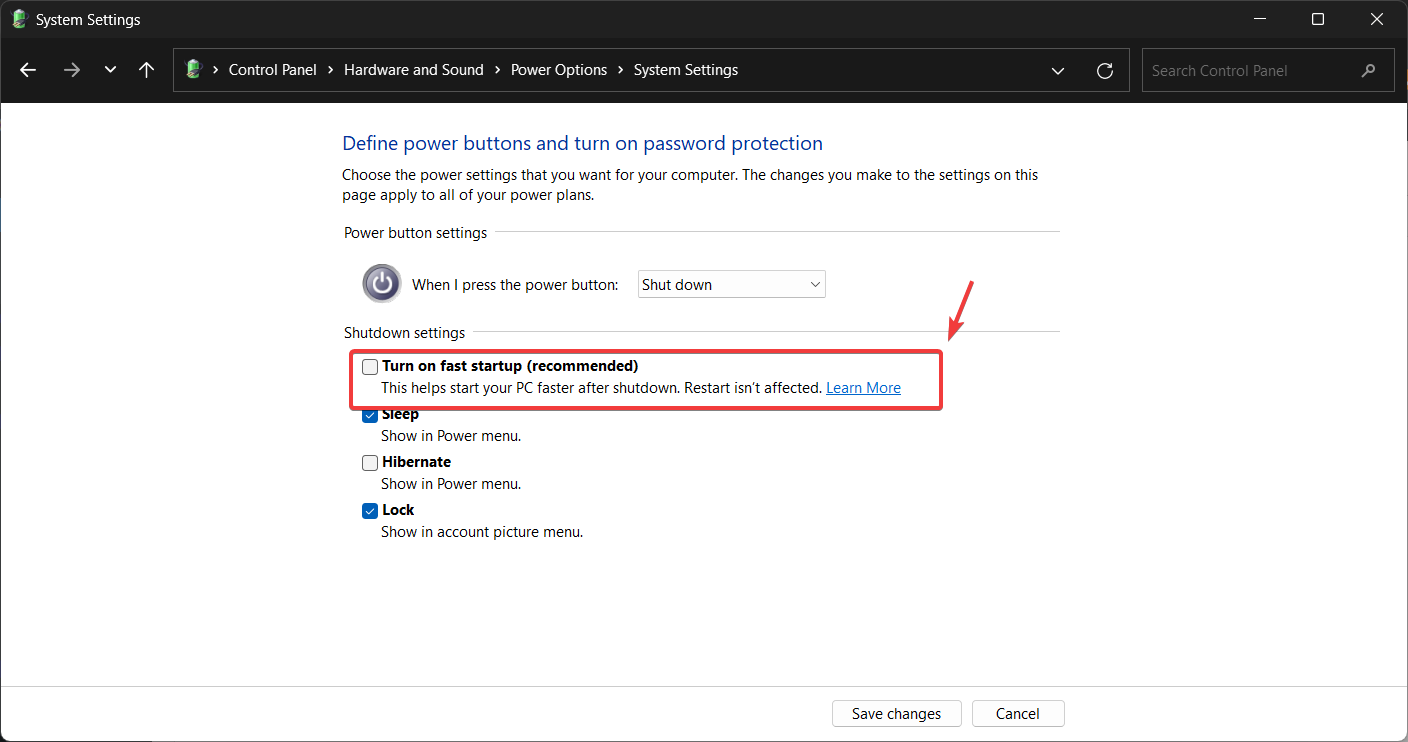
- Click Save Changes, then restart your computer and check if the issue is resolved.
5. Perform a Clean Boot
If the issue persists, a third-party application or background service might be interfering with sleep mode. To identify the cause, you can perform a clean boot. This process disables all non-essential third-party services and startup programs, allowing you to identify which application or service is preventing Windows from entering sleep mode.
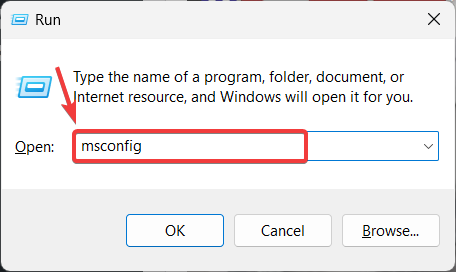
- To perform a clean boot, press the Windows + R keys together to open the Run dialog box. Type msconfig and click OK to open the System Configuration window.
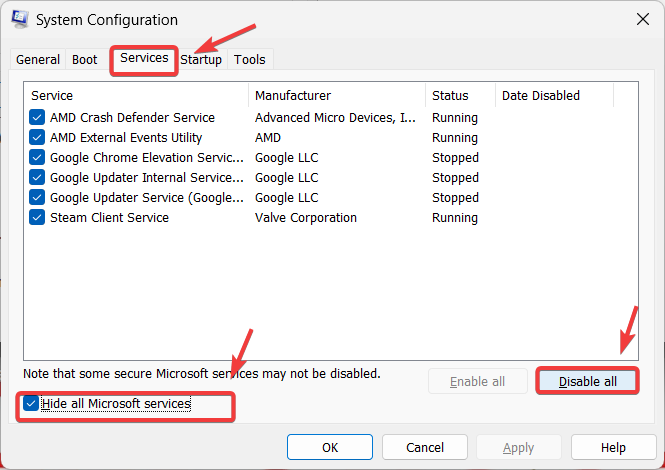
- In the System Configuration window, select Selective Startup and go to the Services tab.
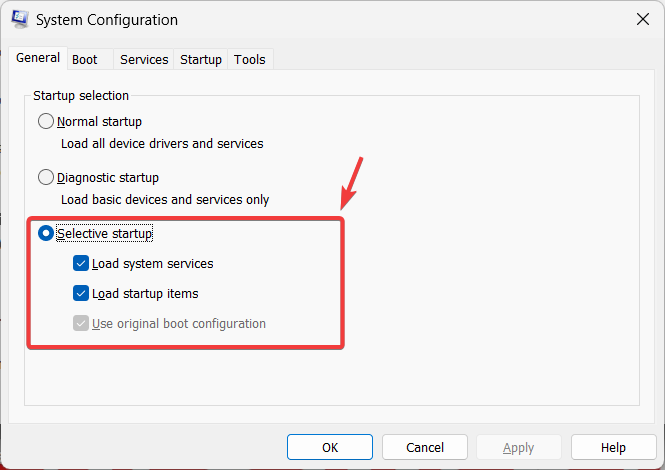
- Check the box for Hide all Microsoft services, then click Disable All to turn off non-Microsoft services.
- Then, go to the Startup tab and click Open Task Manager. In Task Manager, right-click each startup app and select Disable to prevent them from running at startup.

- Once done, restart your computer and check if Windows can now enter sleep mode correctly.
Hey, thanks for the handy page! My PC hadn’t been sleeping automatically, and this page was helpful. Specifically, it led me to find that Steam was running in the background, keeping my computer awake all night. There may still be other issues, but Appuals helped me find that one!