Fix: Windows Update Error 0x8024a112
Some users have been reporting that certain pending Windows 10 updates fail with the 0x8024a112 error code. Most of the time, users report losing the ability to restart their system. Apparently, every restart attempt ends up failing with the following error text:
We’re having trouble restarting to finish the install. Try again in a little while. If you keep seeing this, try searching the web or contacting support for help. This error code might help: (0x8024a112)
Typically, the error occurs on users that are signed into the Windows 10 Insider build programme. The 0x8024a112 error code is indicative of the OS failing to schedule a sequence of tasks. Most of the time this happens because another update is waiting in line or because Task Scheduler is malfunctioning.
If you’re currently struggling with this particular issue, the following methods will most likely help. Below you have a collection of methods that other users have used in order to resolve the 0x8024a112 error code. Please follow each potential fix in order until you discover a fix that manages to resolve the issue in your particular situation.
Method 1: Using the Restart and Update button
The most common reason why a pending update will fail with the 0x8024a112 error code is because the system is in the middle of applying another update. This is known to happen if Windows 10 recently downloaded and installed a Windows update, but requires a restart in order to complete the process. As you probably noticed, Windows will complete the updates during the startup process.
If a new update becomes available and the user tries to install it, it might fail with the 0x8024a112 error code until you allow your operating system to complete the pending update. To do this, access the Start menu (bottom-left corner) and click the Update and restart button. Your computer will restart promptly and complete the pending update.
Then, once your computer boots back up, you can return to Windows Update and apply the newest update. The process should complete without the 0x8024a112 error code.
If you’re still encountering the 0x8024a112 error code when applying the update, move over to Method 2.
Method 2: Using the Windows Update Troubleshooter
If a Restart didn’t work, let’s try running the Windows Update troubleshooter. Some have reported that they were able to avoid the 0x8024a112 error code and install the pending update after running the Windows Update Troubleshooter.
Windows Update Troubleshooter is a built-in Windows 10 utility that is configured to automatically detect and fix incorrect WU (Windows Update) settings and glitches that might result in update failures. Here’s a quick guide on how to run the Windows Update Troubleshooter:
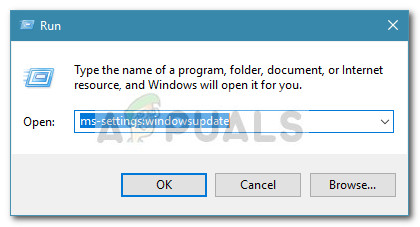
- Press Windows key + R to open up a Run box. Then, type “ms-settings:troubleshoot” and hit Enter to open Windows Troubleshooter.
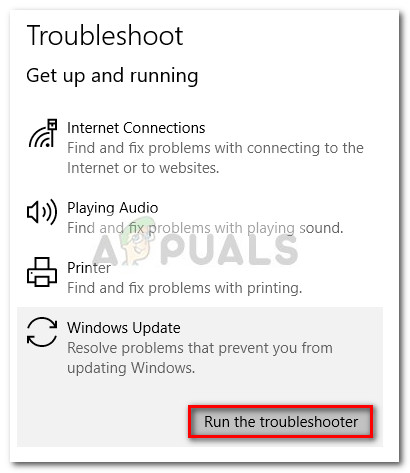
- In the Troubleshoot menu, scroll down through the list of repair strategies and click on Windows Update. Then, click on Run the troubleshooter to open the Windows Update Troubleshooter.
- Wait until the Windows Update Troubleshooter detects potential problems with your update component.
- Once the analysis is complete, click on Apply this fix and wait until the process is complete.

When the repair process is complete, restart your computer and see whether you are able to install the Windows Update at the next startup without the 0x8024a112 error code. If you’re still seeing the same error, go over to Method 3.
Method 3: Modifying the Startup type of Task Scheduler
As some users have reported, the issue might also be caused by a broken Task Scheduler. There are scenarios where Task Scheduler can become corrupted or even disabled by 3rd party interference.
Some users have managed to resolve the issue by using Registry Editor to re-enable Task Scheduler. This will enable Windows Update to to complete the updating process. Here’s a quick guide on using Registry Editor to re-enable Task Scheduler:
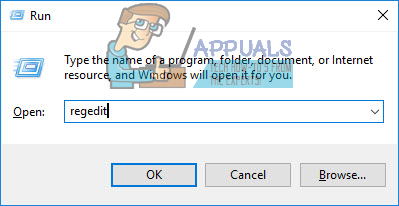
- Open a Run box by pressing Windows key + R. Then, type “regedit” and hit Ctrl + Shift + Enter to open Registry Editor with administrative privileges.
- In Registry Editor, use the left-hand pane to navigate to HKEY_LOCAL_MACHINE \ SYSTEM \ CurrentControlSet \ Services \ Schedule.
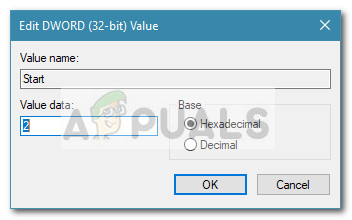
- Then, move over to the right-hand pane and double-click on Start. Then in Start DWORD, change the Base to Hexadecimal and the Value data to 2. Hit Ok to save.
- Restart your device and see if you are able to update without the 0x8024a112 error code at the next startup.
If you’re still encountering the 0x8024a112 error, move over to Method 4.
Method 4: Upgrading via the Media Creation tool
If all the methods above have failed you, you can probably force the update to install by using the Media Creation Tool. Some users have managed to complete the updating process without the 0x8024a112 error by using the Upgrade option. Here’s a quick guide on how to do this:
- Visit this link (here) and click on Download tool now to download the Media Creation tool.
- Open the MediaCreationTool executable and wait until the tool is initialized. Once Media Creation Tool is ready, agree with the License terms by clicking the Agree button.
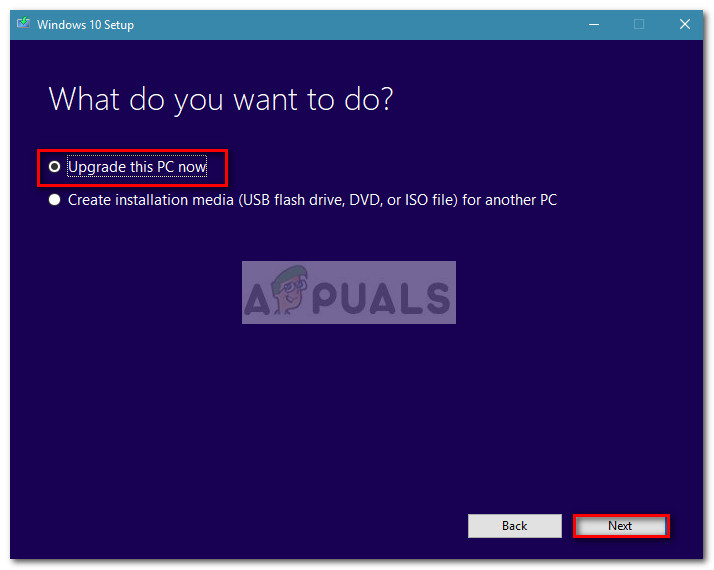
- At the next screen, select the toggle associated with Upgrade this PC now and click the Next button.
- Next, wait until the Windows 10 iso is downloaded on your PC, then hit the Next button again to apply kickstart the Upgrade process. At the end of it, you should be prompted to restart. In case you aren’t, perform a manual restart yourself.


