Fix: Windows 10 Update Error 0x80070070
The error 0X80070070 is signaling that there isn’t enough space on the drive (ERROR_DISK_FULL). While the issue can indeed be related to low disk space, it’s usually caused by not enough contiguous free space in the hidden system partition (recovery partition).

Most of the time, you’ll encounter the error code 0X80070070 in one of the following scenarios:
- When accessing the Windows update page – “Windows Update has encountered a problem and cannot display the requested page. 0X80070070”
- After a Windows update fails – “Download Failed. Result code: 0X80070070”
- When installing Windows from DVD or USB – “Installation Failed” 0X80070070
- After upgrade to Windows 10 fails – “The installation failed in the Safe_OS phase with an error. 0X80070070”
When prompted with this error code, it’s recommended that you begin your troubleshooting guide by making sure that your drive has enough disk space. If clearing space on the drive doesn’t fix the issue, the problem is almost certainly related to the system reserved partition.
Below you have a collection of fixes that have successfully helped users to eliminate the 0X80070070 error. Please follow them in order until you encounter a solution that works in your scenario.
Note: Depending on the scenario in which you encounter the 0X80070070 error, you might or might not have access to some of the solutions featured in the methods below. Only follow those fixes that are applicable to your situation.
Method 1: Clearing disk space
Before you try anything else, it’s important to make sure you have enough disk space for the windows upgrade or installation to install. This can either mean uninstalling apps that you don’t use, deleting big files, or adding additional storage space.
If that’s not enough, let’s try cleaning up the system files using Disk Cleanup. Here’s what you need to do:
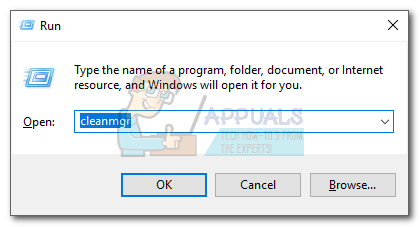
- Press Windows Key + R to open a Run window and type “cleanmgr“. Hit Enter to open a Disk Cleanup dialog box.
- Click the Cleanup system files button. You might be asked to provide the admin password at this point.
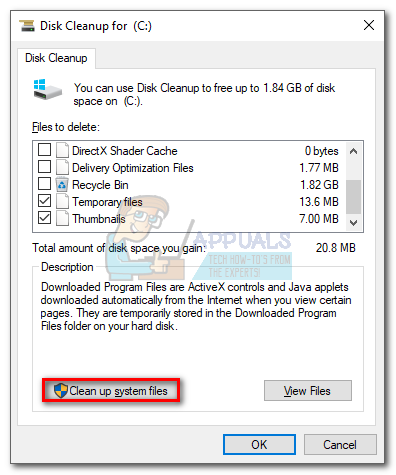
- You can run the cleanup tool for the file types already selected by clicking Ok. If you need even more free space, you can also check the box next to Windows Update Cleanup, Temporary Files and Windows Update log files.

- Confirm and kickstart the tool by clicking on Delete Files.
- Reboot your system and attempt to upgrade or download the update again. If you’re presented with the same error message, move to Method 2.
Method 2: Moving the Temp Folder
Some users have managed to fix the error 0X80070070 by moving the temp folder to a different partition/disk. This method is effective if you didn’t manage to clear enough disk space using Method 1.
When the system needs to manipulate large files, the temp folder is used to store those files temporarily. If it doesn’t have enough space to store them, the user will be prompted with the 0X80070070 error. However, you can avoid this issue by moving the Temp folder to a different partition that has more space to work with. Here’s a quick guide on how to do it:
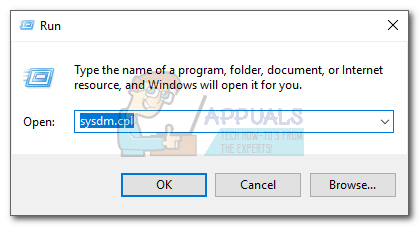
- Press Windows key + R to open a Run window. Type “sysdm.cpl” and hit Enter to open System Properties.
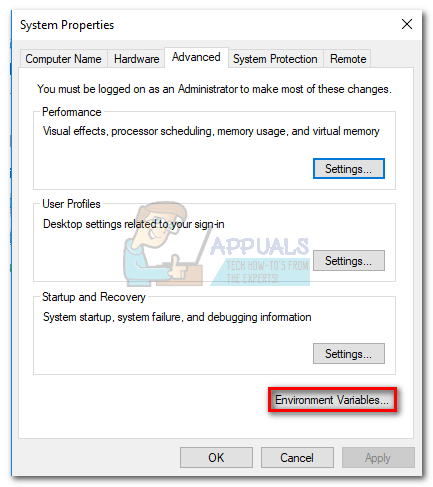
- Under System Properties, Go to the Advanced tab and click on Environment variables.
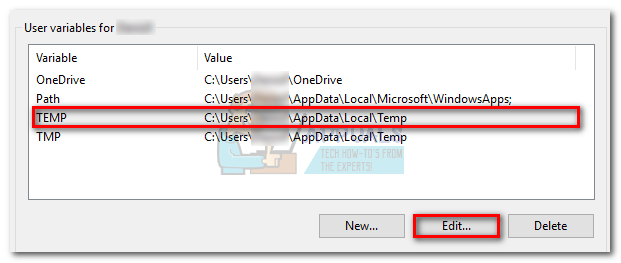
- Select the Temp folder and click the Edit button.
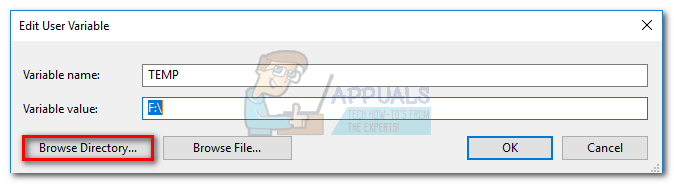
- Then, use the Browse Directory button to move the Temp folder to another partition where you have more space. Hit Ok to confirm.
- Reboot your system and attempt to perform the update/upgrade again. If you’re still seeing the 0X80070070 error, move to Method 3.
Method 3: Disabling Disk Quotas
A disk quota is a limit imposed by the system administrator with the purpose of tracking and controlling disk usage on a per-user or per-volume basis. Using disk quotas is beneficial in allocating limited disk space in a reasonable way. However, a 0X80070070 error can be triggered if you have Disk Quotas enabled on your drive and you’re over the limit.
Here’s a quick guide on disabling disk quotas on your system:
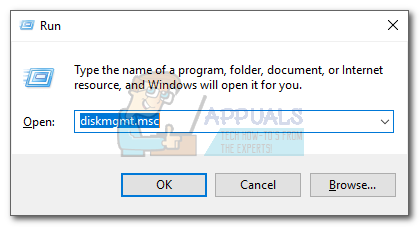
- Press Windows key + R to open a Run command and type “diskmgmt.msc“. Hit Enter to open the Disk Management dialog box.
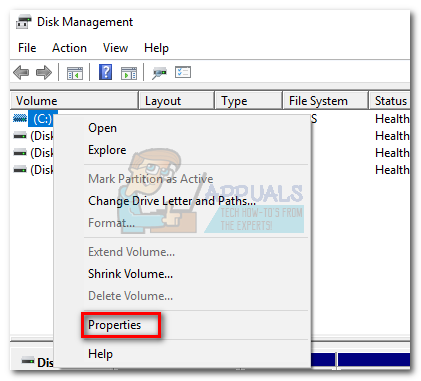
- Right-click on your Windows partition and select Properties.
- Access the Quota tab and uncheck the box next to Enable quota management. Hit Apply to confirm.
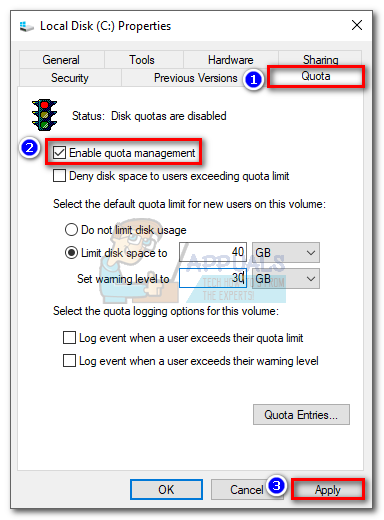 Note: If you need to keep using disk quotas, try adjusting the limit disk space instead of disabling quota management.
 - Restart your system and attempt to re-apply the upgrade/update. If it’s still failing with the 0X80070070 error, proceed to the next method.
Method 4: Repartitioning the Hard drive from Disk Management
Some users have reported seeing the 0X80070070 error when trying to apply the Windows 10 upgrade. If you have enough storage space on your OS drive, this typically happens because the upgrade wizard is trying to copy files on the recovery drive. If that’s the case, one solution would be to enlarge the recovery drive so that it has enough space to store the new files.
To repartition the hard drive so that it has sufficient space for the installation, follow the steps below:
- Press Windows key + R to open a Run Window. Type “diskmgmt.msc” and hit Enter to open Disk Management.

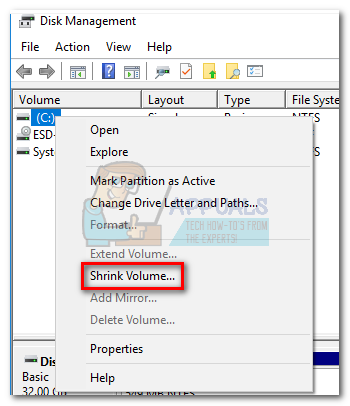
- Right-click on C (or whatever your Windows drive is lettered) and click on Shrink Volume. It might take a while for the query to complete.
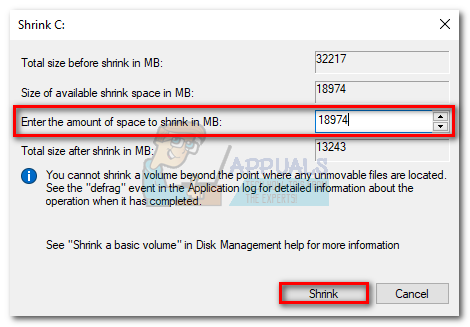
- Next, use the box next to Enter the amount of space to shrink in MB to extract the space required for the upgrade wizard. Just to be sure, free over 15 Gb (15000 MB). Next, hit Shrink and wait for the process to complete.
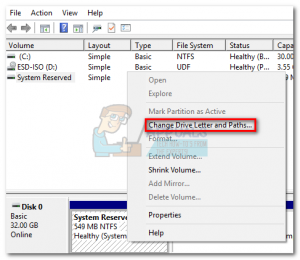
- Once you extracted space from the Windows drive, let’s rename the recovery drive to something else. To do this, right-click on the recovery drive and click on Change Drive Letter and Paths.
- If the drive doesn’t have any letter assigned (usually it’s labeled as D), click on Add and assign the letter G. If the letter D is already assigned, use the Change button to modify it.
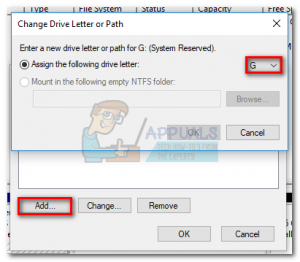 Note: You can assign any letter besides G. The point is to rename the recovery drive to something other than D. This step is necessary since the upgrade setup is keen on writing on the D drive.
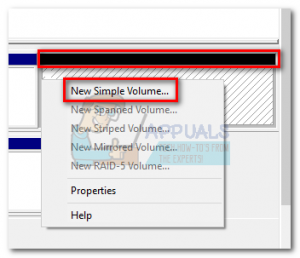
 - Finally, right-click on the unallocated space that you’ve previously freed from the C drive and select New Simple Volume.
- Follow along with the volume wizard and make sure you use all the unallocated space left. When you reach the Assign Drive Letter or Path stage, choose to Assign the following drive letter and select the letter D from the drop-down menu.
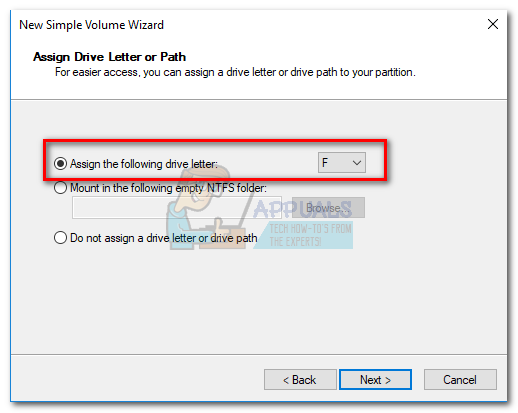
- Click Next at the two following prompts, then click Finish to complete the process.
- Reboot your device and run the upgrade wizard again. If it fails with the same error, move to the next method.
Method 5: Using the Media Creation Tool to upgrade Windows
If you were unable to remove the 0X80070070 error with the methods above, let’s try using the Media Creation tool. This Microsoft-developed tool is usually capable of completing the installation even if the Upgrade Assistant previously failed. If you’re seeing the 0X80070070 error when the Windows 10 upgrade fails, this method should allow you to complete the upgrade.
Besides downloading the files required for a clean installation, the Media Creation Tool is also capable of upgrading the version of your Windows. Here’s a quick guide to using Media Creation Tool to upgrade Windows:
- Download Media Creation Tool from this official link (here).
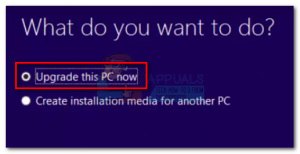
- Open the tool and choose Upgrade this PC now at the first prompt.
- The software will download the required files and check if the system requirements are being met. If your specs are enough, the setup will begin installing the upgrade on your PC. Your system will restart several times during this process.
If the Media Creation Tool returns the same 0X80070070 error, move down to Method 6.
Method 6: Deleting the reserved partition (Clean Install)
Most of the time, the error 0X80070070 is shown when Windows does not have enough space to install the required files on the recovery drive. Windows 7, Windows 8 and Windows 10 all have in common a special System Reserved partition that is created when you install the OS on a clean drive. However, Windows will not automatically assign a drive letter to this partition (unless you force it). Because of this, you’ll not see this drive unless you’re in Disk Management (or other similar utility), or when booting from the Windows Installation media.
Under normal conditions, deleting the System Reserved partition is not a good idea since it contains boot manager and boot configuration data. However, if you’re trying to perform a clean installation of Windows or when upgrading to another Windows version, the partition recovery will be recreated anyways.
If you encounter the 0X80070070 error when trying to do a clean installation of Windows, follow the guide below to delete the reserved partition before attempting a clean installation:
Warning: Do not attempt the steps below unless you’re already planning on doing a clean Windows installation. Deleting the system reserved partition will remove important boot files and might make your system incapable of booting up.
- Boot from the Windows installation media. If you don’t have the appropriate installation media for your Windows version, follow this guide for Windows 7 (here) or this guide for Windows 10 (here).
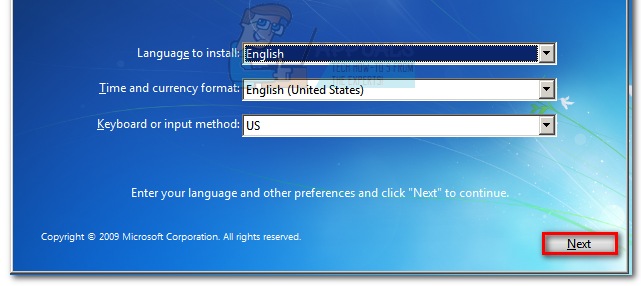
- Click Next at the first installation window and then select Install Windows.
Note: If you’re installing Windows 10, you will also be asked to insert the product key.
- Check the box next to I accept the license terms and hit Next.
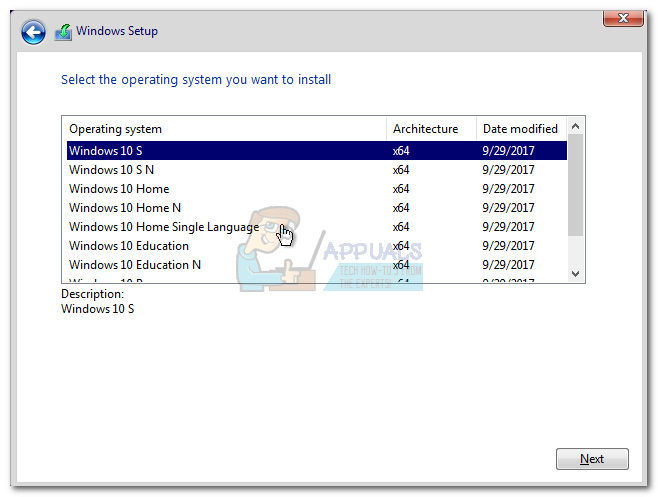
Note: When installing Windows 10, you might need to select the operating system that you want to install before agreeing to the license.
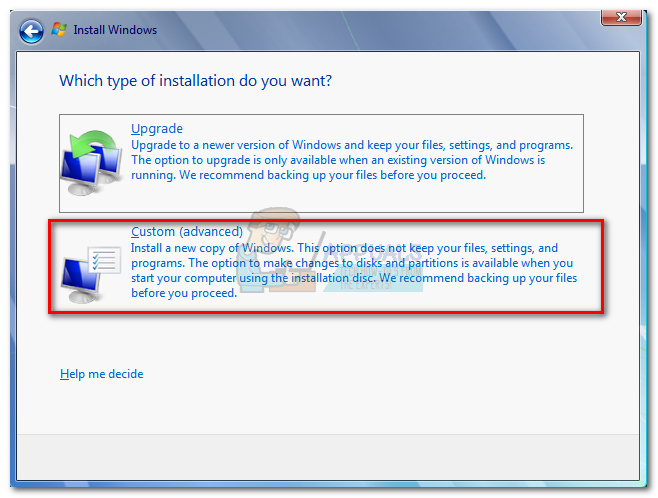
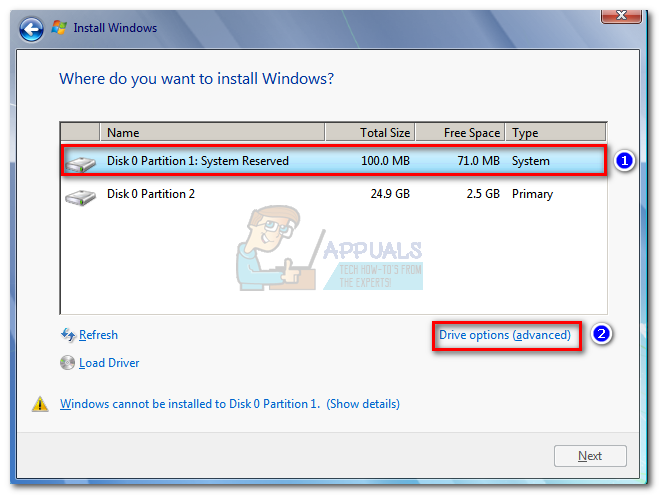
- When asked which type of installation do you want, choose Custom (advanced).
- Select the System Reserved Partition ( Disk 0 Partition 1) and click on Drive options (advanced).
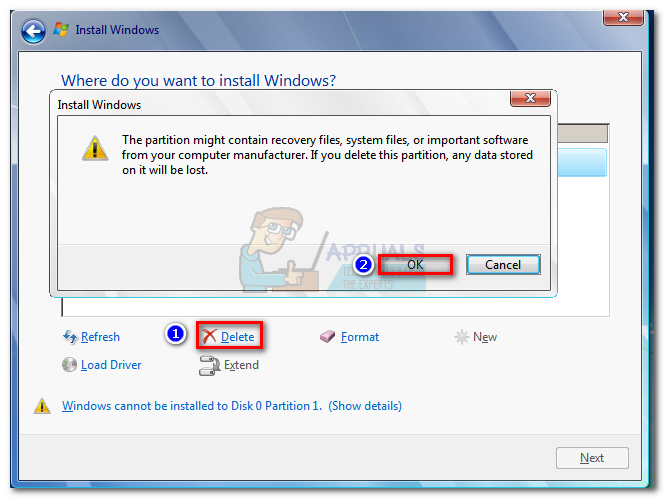
- Click the Delete button and then OK to confirm.
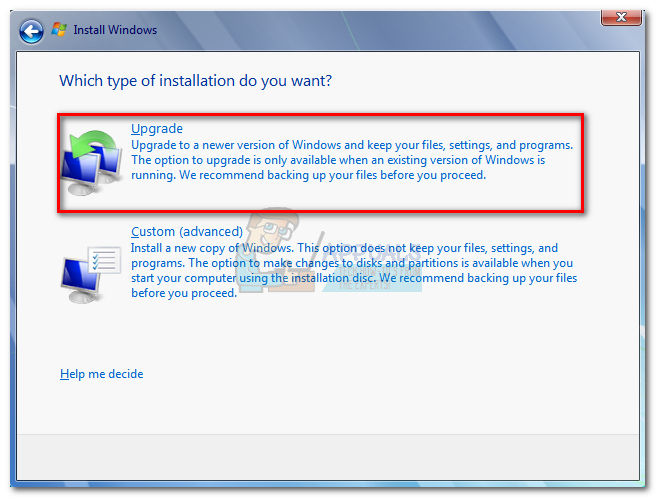
Note: If you want to upgrade to another Windows version, close the wizard after deleting the recovery partition and start again with Step 1. Then, at Step 4 select Upgrade instead of Custom(advanced).
That’s it. Once the recovery partition is removed you can proceed forward with the installation. It should complete without the 0X80070070 error.