Fix: Windows Stuck in Tablet Mode
A lot of Windows 10 users are reported that their PC is stuck in Tablet Mode. Trying to turn the feature off conventionally doesn’t do anything for most affected users. In most case, the issue is reported to occur if the user installed a Windows update while Tablet mode is enabled. Based on user reports, the issue seems to be exclusive on Windows 10.
What is causing the ‘Stuck in Tablet Mode’ issue on Windows 10?
We investigated this particular issue by looking into various user reports and the repair strategies that are commonly being used to fix this particular issue. Based on what we gathered, there are several potential culprits that might trigger this particular issue on Windows 10:
- Notification button is glitched – In most cases, the user is unable to exit Tablet Mode because the button present inside the Notification bar is glitched. If this particular scenario is applicable, you will be able to resolve the issue by disabling the Tablet Mode via the System tab.
- Start Full Screen is enabled – This particular issue can also be caused by a Start setting called Start full menu. Upon disabling this setting from the Settings menu several affected users have reported that their computer booted directly into desktop mode.
- A glitch caused by Windows update – If your device was using tablet mode while a pending Windows update was installed, the tablet mode might have glitched. Since the tablet mode button won’t do anything, you will be able to resolve the issue by performing a full shutdown.
- Surface PRO glitch – Surface pro devices are known to enter a glitch-loop that will essentially restrict users from accessing the desktop mode. If this scenario is applicable, you can resolve the issue by performing a two-button restart procedure.
- Tablet Mode is being forced by a Registry key – As it turns out, this particular issue can also occur if a Registry Key is forcing your device to remain inside tablet mode. In this case, you will be able to resolve the issue by using Registry Editor to disable tablet mode.
- System file corruption – System file corruption can also be the main culprit why your computer remains stuck into tablet mode. System file corruption can be resolved by using restoring to a healthy restore point, performing a repair install or doing a clean install.
Method 1: Disabling the Tablet mode via System tab
In the majority of case, the issue is occurring because the Tablet mode icon present inside the Notification window becomes glitched and no longer makes the switch to the desktop mode. This is typically reported to occur right after a Windows update is installed.
If this particular scenario is applicable, chances are you will be able to resolve the issue by disabling Tablet Mode via the Settings app. Here’s a quick guide on how to do this:
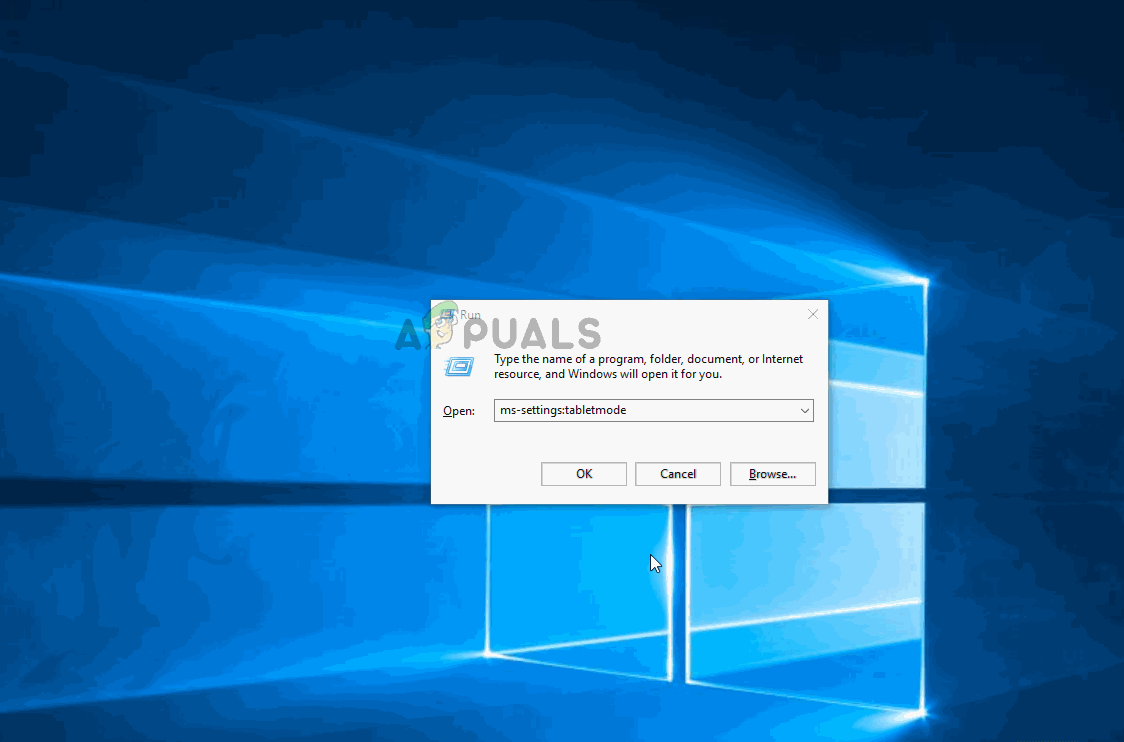
- Press Windows key + R to open up a Run dialog box. Then, type “ms-settings:tabletmode” and press Enter to open up the Tablet Mode tab of the System Category (inside the Settings app).
- Inside the tablet mode, change the When I sign in the drop-down menu to Use Desktop mode.
- Once the change has been made, restart your computer and see if your computer boots up directly into the desktop mode at the next startup.
If you’re still encountering the same issue and your PC still boots inside the Tablet mode, move down to the next method below.
Method 2: Disabling Use Start full screen
Several affected users have reported that the issue was resolved and they were able to exit table mode after accessing the Start Settings menu and disabling the use of the Start full-screen option. After marking this chance and setting the default mode to Desktop mode, users reported that the issue was resolved at the next startup.
Here’s a quick guide on disabling the use of Start Full screen:
- Press Windows key + R to open up a Run dialog box. Then, type “ms-settings:personalization-start” and press Enter to open the Personalization page directly at the Start tab (via the Settings app).
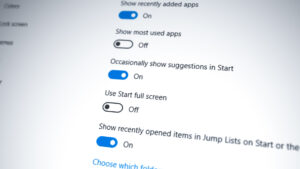
- Inside the Start tab, scroll down through the list of settings and locate Use Start full screen. When you see it, disable the toggle so the option is inactive.
- Press Windows key + R to open up a Run dialog box. Then, type “ms-settings:tabletmode” and press Enter to open up the Tablet Mode tab of the System Category (inside the Settings app).
- Inside the Tablet mode menu, change the drop-down menu associated with When I sign in to Use desktop mode.
- Restart your computer and see if the issue is resolved at the next startup.
If you’re your PC is still stuck inside the tablet mode at the next system startup, move down to the next method below.
Method 3: Performing a Full Shutdown
Some users that were encountering this exact issue have reported that the problem was finally resolved after they followed the steps to do a full system shutdown. This will disengage any glitch that is currently holding your system captive in Tablet Mode.
A full shutdown will close all apps, sign out all users and completely turn off the PC – bypassing fast startup, hibernation or other similar features.
Here’s a quick guide on performing a full shutdown via command prompt:
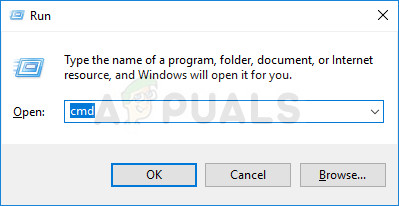
- Press Windows key + R to open up a Run dialog box. Then, type “cmd” and press Ctrl + Shift + Enter to open up an elevated Command Prompt. When prompted by the UAC (User Account Control), click Yes to grant administrative privileges.
Running CMD using Run box - Inside the elevated Command Prompt, type the following command and press Enter to execute a full shutdown sequence:
shutdown /s /f /t 0
- Your system will immediately shut down. Once all lights go off, wait a couple of minutes before attempting to start your machine again.
If your computer is still starting directly inside the Tablet Mode, move down to the next method below.
Method 4: Doing a Two-button restart (Surface Pro only)
If you’re encountering the issue on a Surface Pro, chances are you will be able to resolve the issue by doing a two-button restart. Several users finding themselves in a similar glitch-loop reported that their device was finally back into desktop mode after following the necessary steps for the two-button restart.
Note: This procedure is not confirmed to work for any other device than Surface Pro 4.
Here’s a quick guide with what you need to do:
- On your Surface Pro device, press and hold the power button for 30 seconds. Once the time period has passed, release the power button.
- Next, press and hold the volume up button and the power button at the same time. Keep both buttons pressed for at least 20 seconds before releasing both at the same time.
Note: During the period where you’re holding both the buttons pressed, the screen might flash several times. If it does, do not freak and continue holding down the button for the full 20 seconds. - After both buttons are released, wait at least 10 seconds.
- Press and release the power button immediately to turn on your Surface device back on.
- Once the startup sequence is complete, your device should boot directly into the desktop mode.
If this method wasn’t applicable to your device or the procedure wasn’t successful, please move down to the next method below.
Method 5: Disabling tablet mode via Registry Editor
If you’ve come this far without a result, chances are you’ll be finally able to get your PC out of tablet mode by doing a quick registry fix. Several affected users have reported that the issue was finally resolved after they used Registry Editor to disable Tablet mode – setting the value of TabletMode to 0 and the value of SignInMode to 1.
Keep in mind that even if you haven’t applied any registry fixes before, this procedure will not harm your machine in any way as long as you follow the instructions carefully and avoid doing any other modifications that are not specified in the steps below.
Here’s a quick guide on disabling the Tablet Mode via Registry Editor:
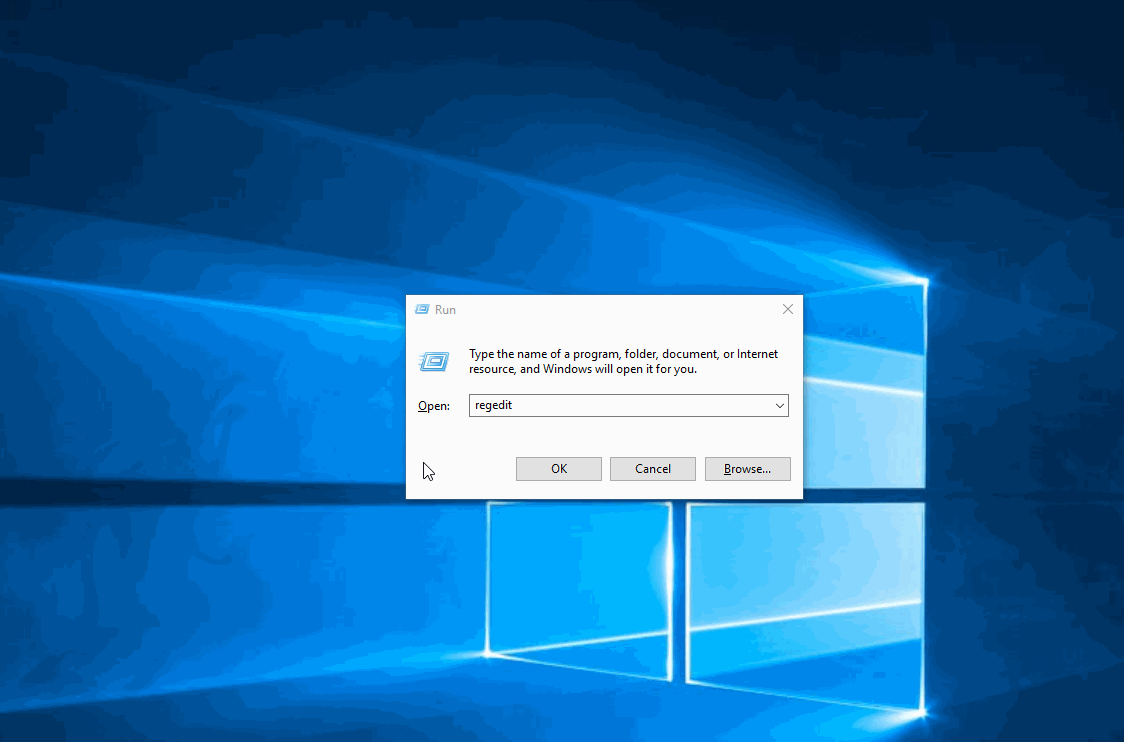
- Press Windows key + R to open up a Run dialog box. Then, type “regedit” and press Enter to open up the Registry Editor. When prompted by the UAC (User Account Control), click Yes to grant administrative privileges to Registry Editor.
- Inside the Registry Editor, use the left-hand side menu to navigate to the following location:
Computer\HKEY_CURRENT_USER\Software\Microsoft\Windows\CurrentVersion\ImmersiveShell
Note: You can also paste the registry address directly in the navigation bar and press Enter to get there instantly.
- Once you get to the correct location, move over to the right-hand side and double-click on SignInMode.
- Then, set the Base of SignInMode to Hexadecimal and the value data to 1. Make sure to click Ok in order to save the changes.
- Next, double-click on TabletMode. From the Edit DWORD (32-bit) value menu, set the Base to Hexadecimal and the Value data to 0. Then, click Ok to save the changes.
- Restart your computer and see if the issue is resolved at the next system startup.
If your computer is still starting directly into Table Mode, move down to the next method below.
Method 6: Doing a system restore
A couple of affected users have reported that they finally managed to get out of Tablet Mode after using an older System Restore point to bring their machine to a healthy state in which the issue wasn’t occurring.
In case you didn’t know, System Restore is a utility that will fix certain glitches and crashes by essentially restoring your entire Windows installation back to a state where everything was functioning normally. The latest Windows versions are configured to periodically take snapshots of the Windows system files, registry settings, program files, hardware drivers, etc.
But keep in mind that system restore points can also be created manually, but by default Windows 10 installation will create a new restore point once every week.
Here’s a quick guide on performing a System Restore:
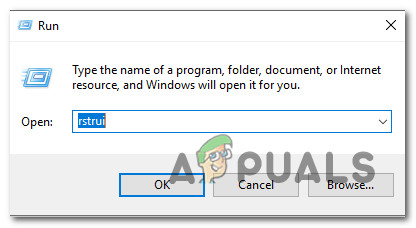
- Press Windows key + R to open up a Run dialog box. Then, type “rstrui” and press Enter to open up a System Restore wizard.
Opening the System Restore wizard via Run box - Once the initial screen of System Restore is opened, click Next to advance to the next screen.
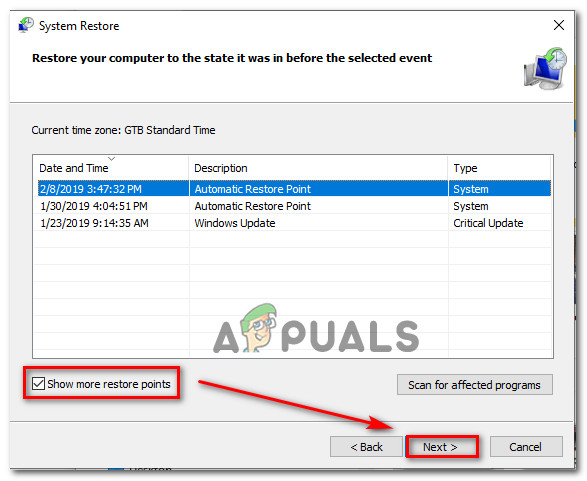
- At the next screen, start by checking the box associated with Show more restore points. Then, pick a restore point that has an older date than the period of time in which you suspect the issue first started occurring. Once the appropriate system restore point is selected, click on Next once again.
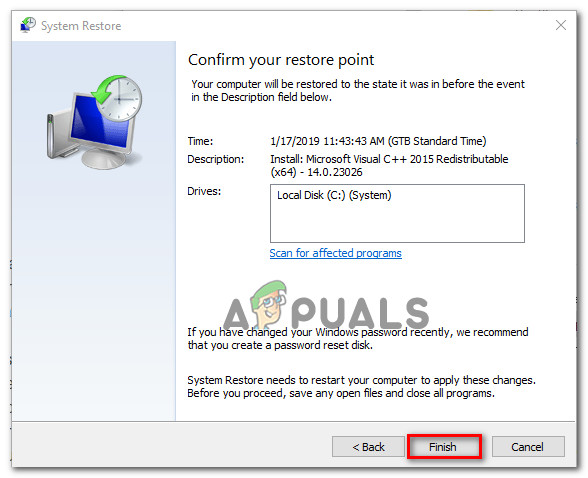
Restoring your system to a previous point in time - When you get this far, the utility is ready to be launched. Upon hitting Finish, your computer will restart and the older state will be mounted once the next startup is complete. Make sure to save everything before clicking the button because the process cannot be interrupted.
Starting the System Restore process If your PC still boots directly into Tablet Mode, move down to the next method below.
Method 7: Performing a Repair/Clean Install
If you’ve followed all the potential fixes presented above but you’re still having the same issue, one surefire way to resolve the issue is to reset all your Windows components. If this particular scenario is applicable, you have two ways forward – a destructive method and a non-destructive method:
- Clean Install – This procedure will reset all Windows components, but it will also delete any additional data such as applications, personal user preferences, personal files, media files, etc.
- Repair Install – This procedure is a damage-controlling approach that will also reset all your WIndows controller, but it does this without touching your personal files or applications. All your apps, games, music, photos or videos will not be affected.
Follow whichever method is more convenable to your situation and your PC should finally start outside Tablet Mode.


