Fix: Windows Adaptive Brightness won’t Turn Off
Some Windows 10 users are reporting that there’s no longer an apparent way to turn off adaptive brightness. Even with the Adaptive Brightness settings intentionally set to off, a lot of affected users are reporting that their screen is still getting brighter or darker constantly.
What is causing the adaptive brightness feature to remain ON?
We’ve investigated this particular issue by looking at various user reports and the repair strategies that are commonly being used to fix this particular issue and finally stop the screen brightness from changing dynamically.
As it turns out, there are several different potential culprits that might end up triggering this particular issue:
- Adaptive Brightness is enabled for the current power plan – Even if you previously disabled adaptive brightness, you might currently be on a different power plan in which the setting is still enabled. In this case, you will be able to resolve the issue by disabling adaptive brightness for all available power plans.
- Intel’s Display Power Saving Technology is enabled – As it turns out, Intel has a proprietary technology that is perfectly capable of overriding your operating system settings regarding adaptive brightness. Several affected users have reported that the issue was only resolved after they disabled Display Power Saving Technology from Intel Graphics and Media.
- Contrast Enhancement and Film Mode is enabled – There are two Intel Graphics Control panel settings that are known to cause this particular issue – Contrast Enhancement and Film Mode Selection. Some users have managed to resolve the issue after disabling the two options from Intel HD Graphics Control panel menu.
- Vari-bright is enabled – If you’re using an AMD Radeon GPU, chances are the issue is being caused by a proprietary AMD technology called Vari-Bright. If this scenario is applicable, you can resolve the issue by disabling the feature from AMD Radeon Settings.
- Adaptive Brightness is enforced by Registry key – It’s also possible that adaptive brightness insists on remaining active even after you disable the option from Power options because a registry key is keeping it active. In this case, you can disable adaptive brightness indefinitely by disabling the option via Registry Editor.
- Sensor Monitoring Service is active – There’s one particular service (Sensor Monitoring) that is known to enforce adaptive brightness even if the option was previously disabled. If this scenario is applicable, you can resolve the issue by disabling the sensor monitoring service via the Services screen.
- Integrated GPU is glitched – In some cases, the error is reported to occur on dual GPU machine. If the integrated GPU gets stuck in a limbo state, adaptative brightness will kick off. If this scenario is applicable, you can resolve the issue by disabling and re-enabling the integrated GPU.
If you’re struggling to resolve this particular issue, this article will provide you with several different troubleshooting steps. Down below, you’ll discover several different methods that other affected users have successfully used in order to fix this particular problem.
Since the potential fixes are ordered by efficiency and difficulty, we advise you to follow them in the order that they are presented to improve your chances of success. Let’s begin!
Method 1: Ensuring that the Adaptive Brightness feature is turned Off
First things first, it’s important to start this troubleshooting quest by making sure that adaptive brightness is actually turned off from inside the Power options menu. Even if you previously turned it off, you might have since switched to a different power plan that enabled the feature once again.
Here’s a quick guide on ensuring that adaptive brightness is turned off from the Power Options menu:
- Press Windows key + R to open up a Run dialog box. Then, type “ms-settings:powersleep” and press Enter to open up the Power & Sleep tab of the Settings app.
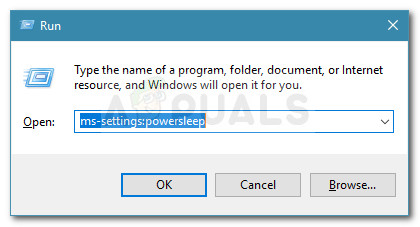
Run dialog: ms-settings:powersleep - Inside the Power & sleep tab, scroll down Related settings tab and click on Additional power options.
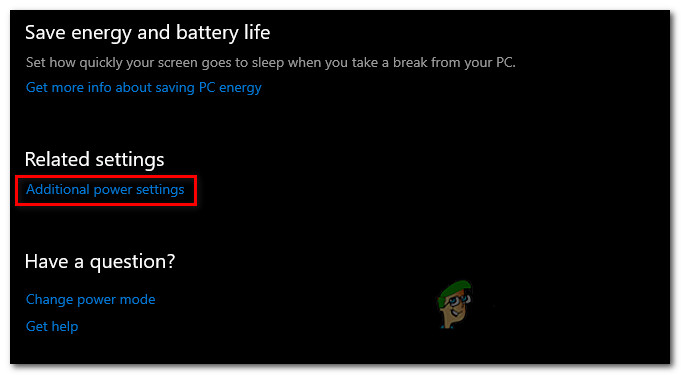
Accessing the Additional Power Settings menu - Inside the Power Options menu, see which power plan is currently active and click on Change plan settings.
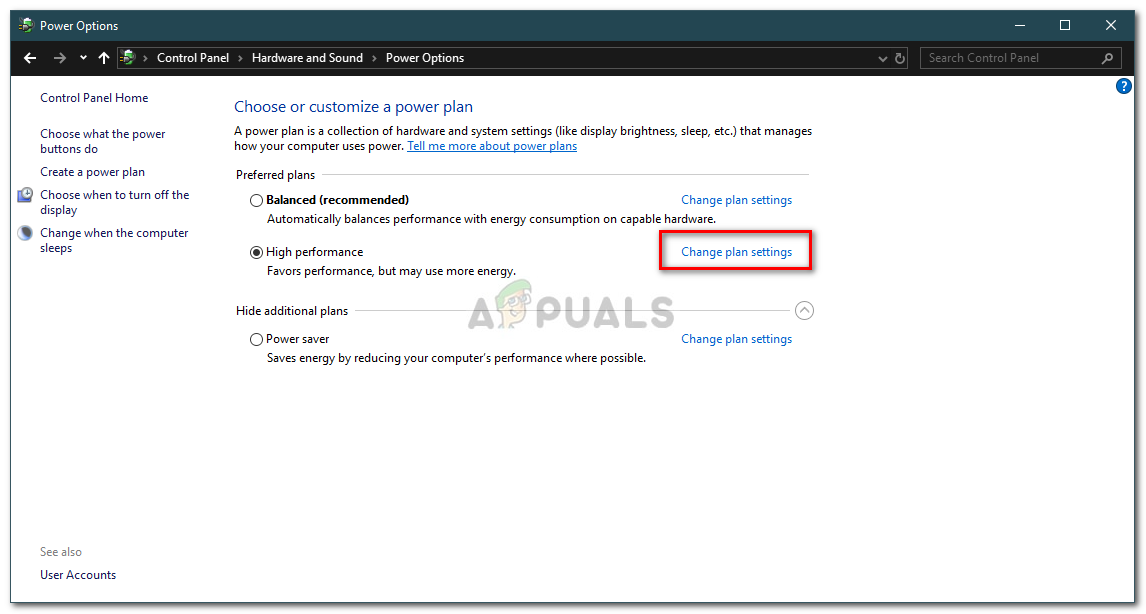
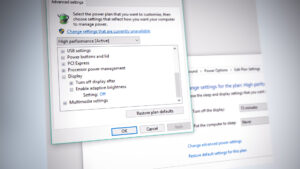
Power Plan Settings - Next, from the Edit Plan Settings, click on Change advanced power settings.
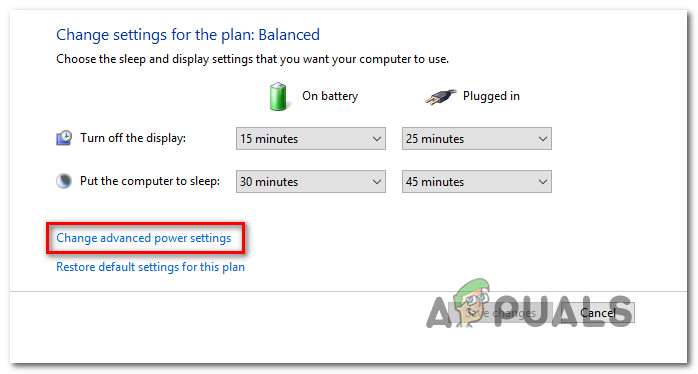
Changing the advanced power settings - Inside the Advanced settings menu, make sure that the active power plan is selected and expand the drop-down menu associated with Display. Then, double-click on Enable adaptive brightness and set the Setting to Off.
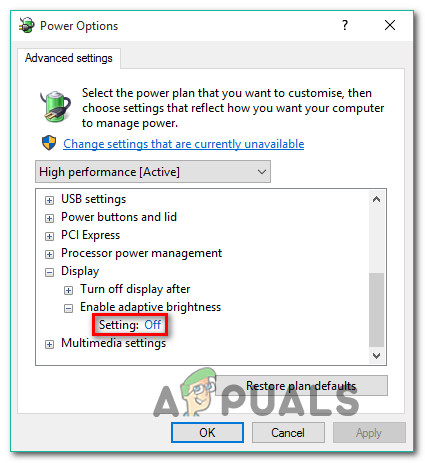
Changing adaptive brightness to off - Restart your computer and see if the issue has been resolved.
If the same issue is still occurring and you still find that the screen brightness is adjusting automatically, move down to the next method below.
Method 2: Disabling “Display Power Saving Technology” (Intel GPUs only)
If you’re using an integrated GPU from Intel, chances are the graphics card driver is overriding your Windows setting. So instead of listening to your setting that you established and keeping the adaptive screen brightness feature to off, Intel’s GPU uses it’s own utility (Intel Graphics and Media) to adjust the screen brightness automatically using a feature called Display Power Saving Technology.
If this scenario is applicable to your current situation, here’s a quick guide on disabling Intel’s power saving technology:
- Press Windows key + R to open up a Run dialog box. Then, type “control.exe” and press Enter to open up the classic Control Panel interface.

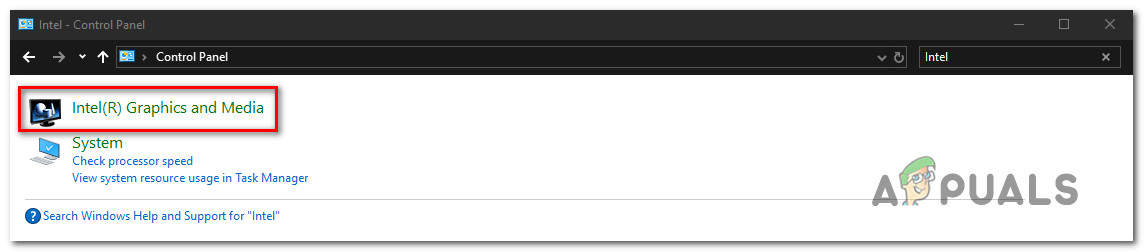
Running Control Panel - Inside the classic Control Panel interface, use the search function in the top-right section of the screen to search for “Intel Graphics“. Then, from the list of results, click on Intel (R) Graphics and Media.
Intel Graphics and Media - From the list of application modes, select Basic Mode and click on Ok to continue and launch the application.
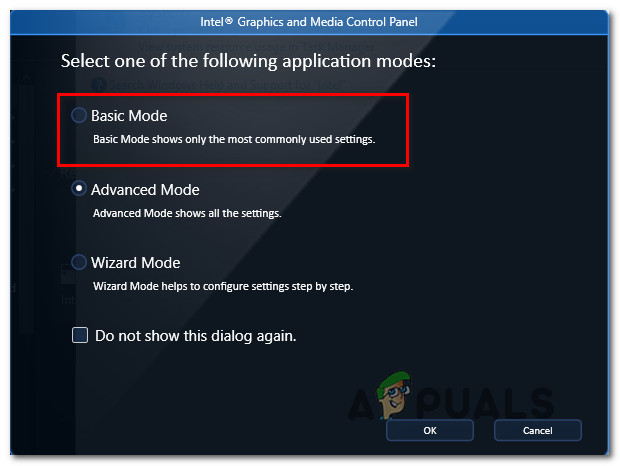
Accessing the basic Mode of Intel Graphics - next, from the Intel(R) Graphics and Media Control Panel menu, select Power from the right-hand pane. Next, move over to the right-hand section of the screen and ensure that the box associated with Display Power Saving Technology (under Power Conservation Features) is turned off.
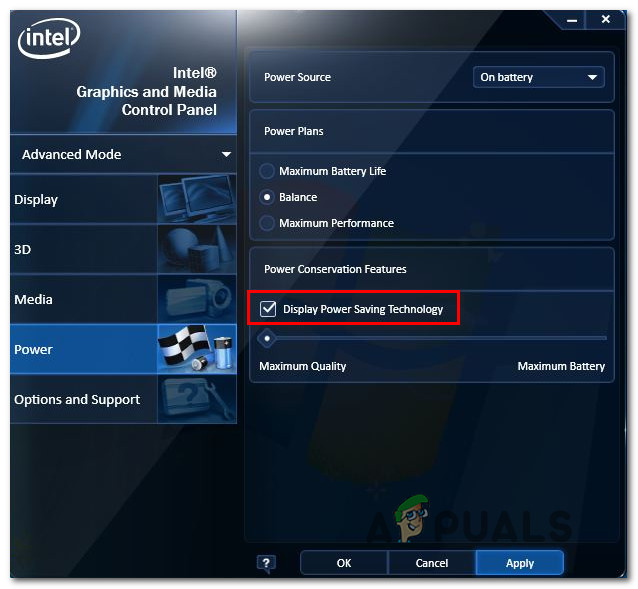
Disabling Intel’s power saving technology - Restart your computer and see if the issue has been resolved at the next system startup.
If you’re still encountering the same issue and you see the screen continuing to adjust automatically, move down to the next method below.
Method 3: Disabling Contrast Enhancement and Film Mode Selection
Several affected users have reported that the issue was resolved after they’ve accessed the Intel’s Graphics control panel and disabled two image enhancement features – Contrast Enhancement and Film Mode Selection.
After doing this and restarting their computer, the majority of affected users have reported that their screen brightness was no longer adjusting automatically. If this scenario is applicable to your current situation, here’s a quick guide on disabling the two image enhancement features:
- Right-click on a free space on your desktop and click on Intel Graphics Settings.
- Inside the Intel HD Graphics Control Panel menu, select Image Enhancement from the left-hand pane and set both the Contrast Enhancement and Film Mode Detection to Disabled.
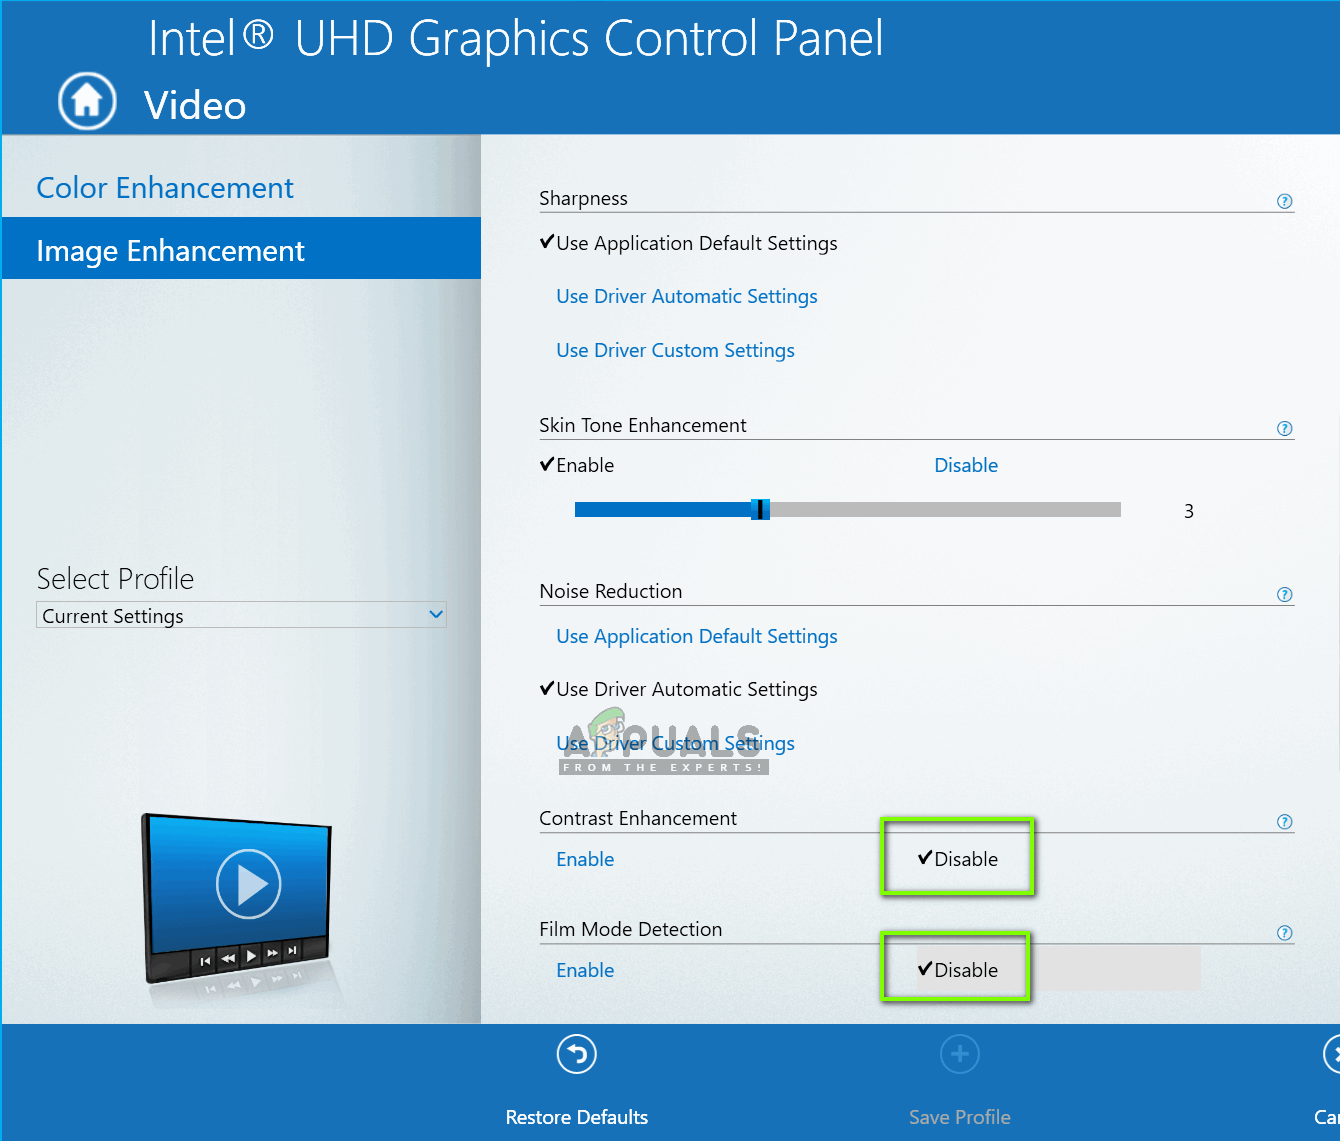
Disabling Contrast Enhancement and Film Mode Detection from Image Enhancement - Once the two settings have been enabled, restart your computer and see if the issue has been resolved.
If you’re still noticing that your screen brightness is automatically adjusting, move down to the next method below.
Method 4: Disabling Vari-Bright (Radeon GPUs only)
If you’re using an AMD Radeon GPU with and you’ve ensured that adaptive brightness is disabled from your Power Plan settings, chances are the issue is caused by a proprietary AMD featured called Vari-Bright.
As some users have reported, this feature has the potential of overriding the Windows preference and adjust the screen brightness automatically even if you’ve made sure that the Windows-equivalent feature is disabled. If this scenario is applicable and you’re using a Radeon GPU, here’s a quick guide on disabling Vari-Bright:
- Right-click on a free area on your desktop and choose AMD Radeon Settings from the context menu.
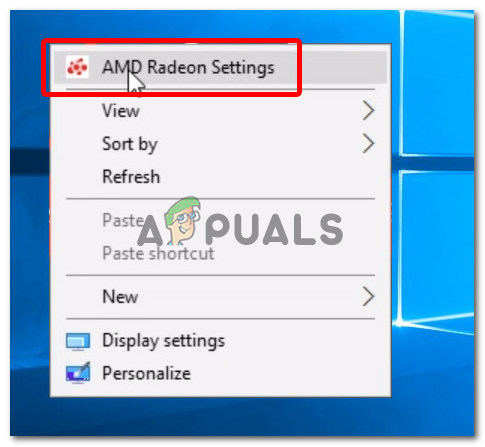
Opening AMD Radeon Settings - From the main Radeon Settings menu, click on Preferences on the bottom-left side on the screen (or top-right), depending on which version you have.
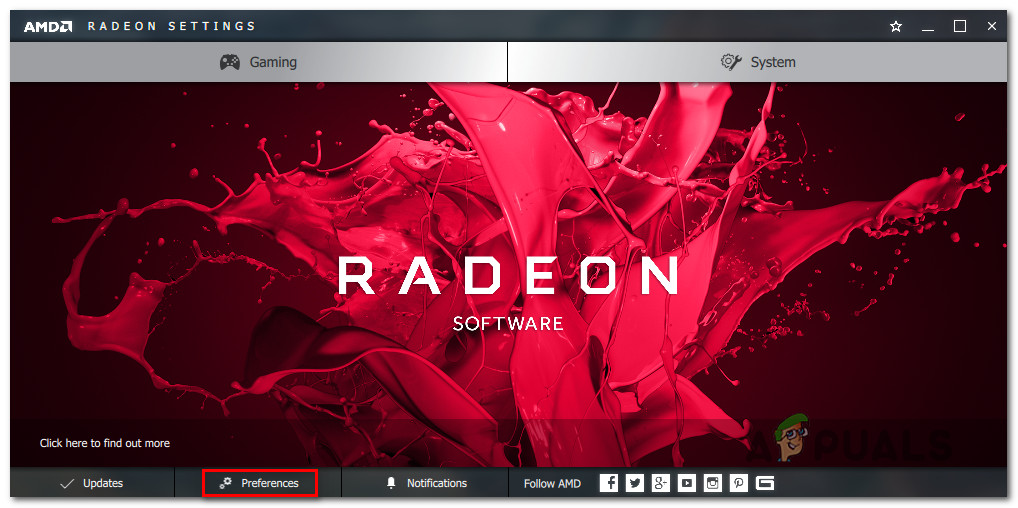
Accessing the Preferences tab of Radeon Settings - Then, from the next menu, select Radeon Additional Settings. Then, go over to the vertical menu on the left and choose Power > PowerPlay. Next, move over to the right pane and make sure that the box associated with Vari-Bright is disabled.
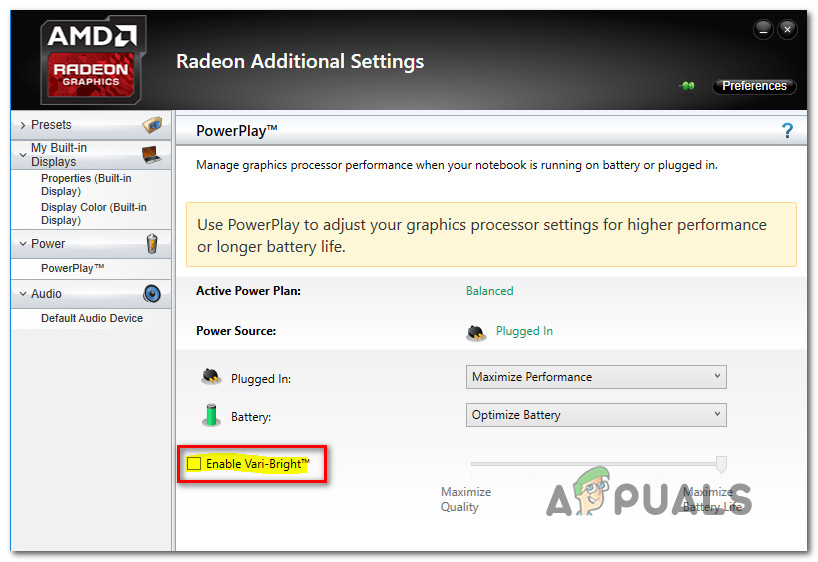
Ensuring that Vari-Bright is disabled - Click Apply to save the changes, then restart your computer and see if the issue is resolved once the next startup sequence is complete.
Method 5: Disabling Adaptive brightness via Registry Editor
If you’ve come this far without a result, chances are your computer has a registry key that keeps overriding whatever change you’re trying to enforce regarding adaptive brightness. If you’re not afraid to edit the registry, there is one way that will ensure that adaptive brightness settings are disabled via a registry key:
As long as you follow the instructions below to the letter and don’t modify anything else, the procedure below doesn’t have any kind of risk. Here’s a quick guide on disabling adaptive brightness via Registry Editor:
- Press Windows key + R to open up a Run dialog box. Then, type “regedit” and press Enter to open up the Registry Editor. When prompted by the UAC (User Account Control), click on Yes to grant administrative privileges.
- Inside the Registry Editor, use the left-hand pane to navigate to the following location:
Computer\HKEY_LOCAL_MACHINE\SOFTWARE\Intel\Display\igfxcui\profiles\Media\Brighten Movie
Note: You can also paste the address directly into the navigation bar at the top and hit Enter to get there instantly.
- Once you get to the correct location, move over to the right-hand pane and double-click on ProcAmpBrightness. Next, in the Edit String window, set the value data to 0 and click Ok.
- Next, use the left-hand pane again to navigate to the following location:
Computer\HKEY_LOCAL_MACHINE\SOFTWARE\Intel\Display\igfxcui\profiles\Media\Darken Movie
Note: Same as before, you can paste the location directly into the navigation bar and press Enter to get there instantly.
- Move over the right-hand pane and double-click on ProcAmpBrightness. Next, set the Value data to 0.
- Close Registry Editor and restart your computer to see if the issue is resolved at the next startup.

If you’re still encountering the same problem, move down to the next method below.
Method 6: Disabling the Sensor Monitoring Service (if applicable)
Some affected users have reportedly managed to resolve the issue by using the Services screen to permanently disable the Sensor Monitoring Service. As of now, the issue has only been confirmed to be effective on Surface 4 devices.
If this scenario is applicable to your current situation, here’s a quick guide on how to disable the Sensor Monitoring Service:
- Press Windows key + R to open up a Run dialog box. Then, type “services.msc” and press Enter to open up the Services screen. If prompted by the UAC (User Account Control), click Yes to grant administrative privileges.
- Inside the Services screen, move over to the right-hand pane and locate Sensor Monitoring service from the list of services. Once you see the right listing, right-click on it and choose Properties.
- From the properties screen of the Sensor Monitoring Service, select the General tab and set the Startup type to Disabled.
- Click Apply to save the changes, then restart your computer to see if the fix has been successful.

If the issue is still occurring, move down to the next method below.
Method 7: Re-enabling the Integrated card
Some affected users have reported that the issue was only fixed after they accessed the Device Manager and re-enabled the integrated GPU card. This method is typically reported to be effective in those situations where the computer is equipped with Intel HD 4000 and Intel HD 3000 integrated GPUs.
Here’s a quick guide on how to re-enable the integrated Graphics card via Device Manager:
- Press Windows key + R to open up a Run dialog box. Then, type “devmgmt.msc” and press Enter to open up Device Manager.

Running Device Manager - Inside Device Manager, expand the Display adapter drop-down menu and you should see a list of two GPUs – the integrated one and the dedicated card.
- Right-click on the integrated card and choose Disable Device. Once you’ve done this, wait a couple of seconds before right-clicking on the same listing again and choosing Enable Device.

Disabling the integrated GPU - Once the integrated graphics card is restarted, see if the issue has been resolved.


Nothing works. I’m on a newly built desktop system with NVidia GTX1050TI graphics and Ryzen 5 2600 CPU. All drivers are up to date, all settings are set to best performance. I checked them all, followed dozens and dozens of online guides which involves disabling services to changing the registry and t he display still dims and brightens on it’s own. Windows 10, the latest update has adaptive brightness enabled by default and has no control available to disable it. While searching the registry for clues to the problem I found an entry which was an indicator as to whether it was enabled or not, I believe it was a key named “isAdaptiveBrightnessEnabled” and it was set to a value of 1. I do not believe it was a switch to toggle it on or off but just an indicator. I couldn’t edit it anyhow, it wouldn’t let me. There’s no switch for it in the power display settings or anywhere else. I can handle a lot of problems with Windows and don’t mind waiting for a fix (in a reasonable amount of time), but this is very annoying as it effects ALL my software. The constant dimming and brightening is infuriating and I don’t know how much longer I can continue using this.