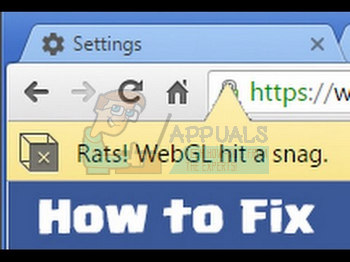
Fix: WebGL Hit a Snag
This particular error often affects Google Chrome users and the error itself is sometimes hard to get your hands on because users are often not sure what WebGL actually is. WebGL (Web Graphics Library) is a JavaScript API use for rendering interactive 2D and 3D graphics within any Google Chrome without the use of plug-ins. WebGL is integrated into all the web standards of the browser allowing GPU accelerated usage of physics and image processing an as part of the web page canvas.
However, the error code above prevents you from accessing certain websites with the error above appearing each time. The webpage probably won’t work even after you reload the site since something is preventing WebGL from accessing your graphics card. Follow the instructions presented below in order to get rid of this problem efficiently.
Solution 1: Disable WebGL in Chrome Settings
You can, luckily, disable WebGL from your Google Chrome browser and the error code will be gone for good. Some of the sites which use WebGL might load slower that they used to because WebGL was using your graphics processing power to load them faster but the overall experience is going to feel much better.
- Open your Google Chrome browser and click on the address bar in order to start typing. Type in: “chrome://flags” without the quotation marks and press Enter in order to open this area of Chrome.
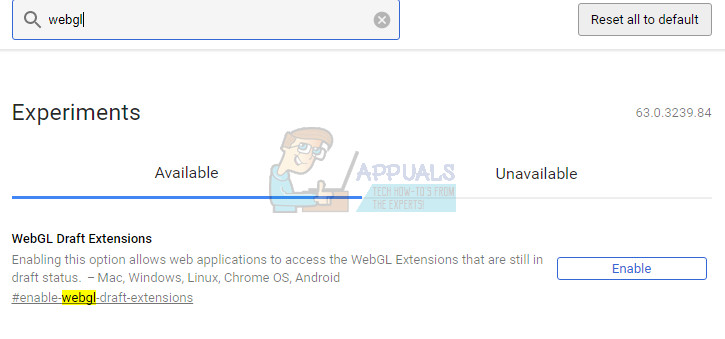
- In the search bar located at the top of the flags page in Chrome, type in “webgl”. There should be one result in the windows so make sure you disable it. If the option says “Disable “, click on it but don’t do anything otherwise.
Solution 2: Turn Off Hardware Acceleration
Turning off hardware acceleration in your browser is definitely the top recommended solution for this particular problem and it’s definitely no coincidence. Plenty of users were able to fix this issue after they disabled hardware acceleration so make sure you try this one out.
- Open Google Chrome browser from your PC.
- Open the browser and click on the three horizontal dots at the top right part of the browser. It says Customize and control Google Chrome when you hover above it. This will open the dropdown menu.

- Click on the Settings option near the bottom of the dropdown menu.
- Scroll to the bottom of this page and click the Show advanced settings option.
- Scroll to the bottom of the new page again, then uncheck the box to the left of Use hardware acceleration when available to remove the check and disable this option from Google Chrome. If the option was turned off, you can try enabling it to see whether this will help.

Solution 3: Clear Cache and Cookies from Google Chrome
Clearing cache and cookies from Google Chrome has been reported to solve this issue immediately so we recommend you do the same as soon as possible. Follow the steps below in order to do this.
- Clear your browsing data in Chrome by visiting Settings and clicking on the three vertical dots in the top right corner. After that, click on the “More tools” option and then “Clear browsing data”. In order to clear everything choose the “the beginning of time” option as the time setting and select what types of data you wish to delete.
We recommend clearing the cache and cookies.

- Make sure you restart your computer afterwards and unplug your DSL Internet cable or turn your Wi-FI adapter on and off before proceeding.
- In order to get rid of all cookies, again click on the three dots and select Settings. Scroll down to the bottom and expand the Advanced settings. Open Content settings and scroll down to the list of all cookies that remained after you have already deleted them in the Step 1. Delete either all cookies or just the ones related to the websites that aren’t working.
- Restart your computer again and check if the problem is solved.
Solution 4: Update Your GPU Driver
Since WebGL is using your GPU processing power in order to speed up the performance of certain web pages and in order to render certain images and videos, its performance greatly depends on your graphics video driver. This being said, updating your driver is crucial if you want to see this error gone from your PC forever.
Follow the set of steps presented below.
- Click Start and type Run. Select Run. A Run dialog box will appear.
- Type “devmgmt.msc” in the run dialog box and click the OK button. This is to open Device Manager Window.

- Locate your graphics card driver by checking under the Display adapters section. Click on the arrow left to this section in order to view the list of Display adapter drivers.
- Right-click on the adapter of your graphics card and select the Update driver option from the context menu. If you are using an integrated graphics card, there will probably only be one item on the list. If you are using an external graphics card, you can only update this one.

- Click Search automatically for updated driver software. Then Windows will search and install the new driver for you.
- Restart your PC for the change to take effect.
Note: You can also visit the site of the manufacturer which made your graphics card and download the latest driver from their site. They usually provide assistance when it comes to choosing the correct driver for your system.